SimpleSolutionsDiva.com

Kids Activities

Easy Halloween Treats & Decor

halloween-ssd


Halloween is almost here! Whether you are going to a Halloween party this year or you are hosting one this weekend, the Simple Solutions Diva has some simple Halloween snacks and décor you can make yourself!

Witches Broom Snacks

brooms

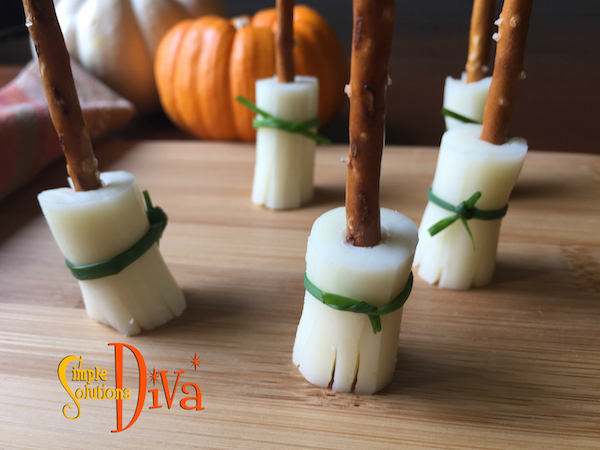
These are as simple as 3 ingredients – and they aren’t full of sugar! String cheese, pretzel sticks and fresh chives make up this adorable and tasty Halloween treat!

Instructions – Cut the string cheese into thirds. Slice the pieces of cheese 2/3 of the way to the top, creating the bristles of the broom. Stick a pretzel stick into the top (uncut) side of the broom. Tie the chive just above the cuts of the “broom” bristles. Keep refrigerated until ready to serve.

Spider Ice Cubes

spiders

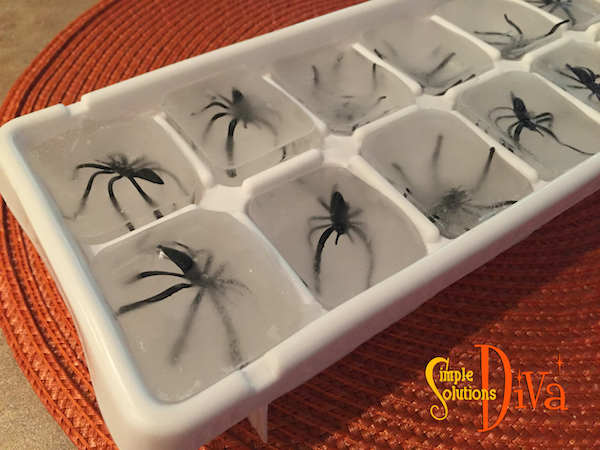
Create a surprise in your party cocktails with these creepy ice cubes! 

Instructions – Take (new) plastic spiders and wash them in soapy water, rinse and let dry. Place a spider into each space in an ice cube tray and fill with water. Freeze overnight, pop them out and use in your Halloween drinks or cocktails. (Note: If you want crystal clear ice cubes, boil the water before filling the ice cube tray.)

Carrot Finger Food – “Don’t Stick Your Fingers in The Dip” doesn’t apply here!

fingers1

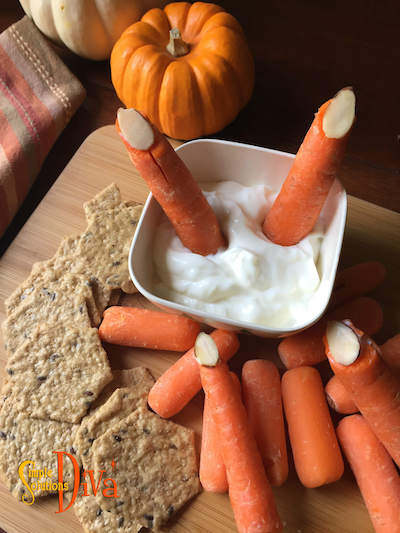
Carrots carved into fingers, complete with slivered almond nails, make the perfect “Finger Food”! You only have to create a few to make the impact. Stick a few in your favorite dip and place them in and around the other veggies you supply with the dip!

Instructions – Peel and wash the carrots. Cut the carrots into finger-sized pieces. Using a knife or a vegetable peeler, carve out a “nail bed”. Secure the almond “nail” with a dot of sour cream.

Foam Pipe Insulation “Chains” 

chains

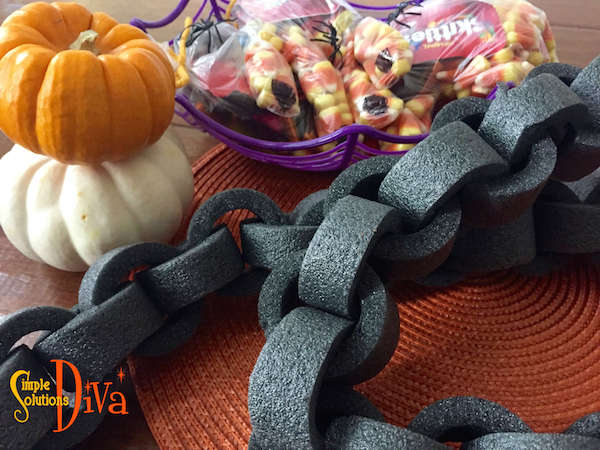
These make for some great table decor or to make your home look creepy. Simply purchase foam pipe insulation (it is dark grey). Slice the insulation into small rounds – these are the chain “links”. Attach the links together to make a chain. Hang on your stair railing, decorate your Halloween party table, or use as part of a costume! If you do decide to use them as part of a costume, you will want to secure the links closed using a hot glue gun (low temperature).

Glove Hand Treat Bag

hand

You can find plastic gloves at dollar stores or in the grocery stores. Simply fill them with favorite Halloween Candy and close and secure the bottom with string, yarn or twisty-ties.

Yarn Pumpkin

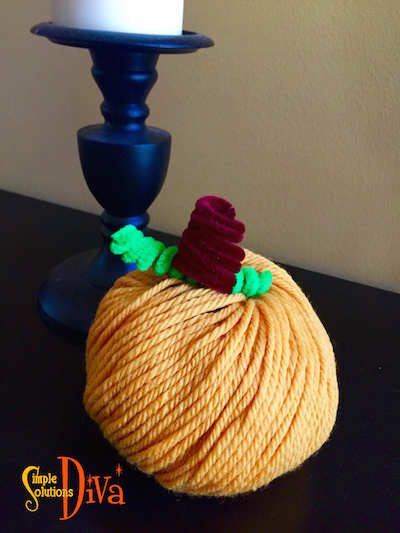
yarnpumpkin

My Confession: Sometimes, my projects don’t go as planned! Originally, I was going to create a paper mache pumpkin using yarn instead of paper. But honestly, it just didn’t work! The yarn stuck to the balloon – I couldn’t deflate the balloon without ruining the “pumpkin”. As I tried to figure out what else I could do, I realized the ball of orange yarn looked exactly like a pumpkin! So I added a pipe cleaner stem and leaf and, Voila! A cute yarn pumpkin! Couldn’t have been easier!


Thank you to WTLV-TV/NBC 12 First Coast Living for inviting me on to share these ideas!

Recipes For Kids To Make This Summer


kids recipes


With kids out of school during summer break, the two most dreaded phrases parents will hear are, “I’m Bored!” and “I’m Hungry”! Why not kill two birds with one stone and use the lazy days of summer to teach your kids to cook? Here are some recipes, of varying levels of difficulty, you can teach your kids to make. Who knows? Maybe they will make dinner for YOU sometime!

Note: As a parent, you need to determine how much supervision your child needs when using the oven, stovetop, knives, etc. Every child is different!

Ants on a Log – The childhood classic — celery sticks filled with peanut butter and topped with raisins is always a favorite, requires no oven and no sharp knives. Pre wash & cut the celery and keep it in the fridge for quick access for the kids! For a fun variation, use Craisins instead of raisins or use a flavored cream cheese spread in place of the peanut butter.
Corn Dog Muffins – I’ve taken the County Fair Favorite (a corn dog on a stick) and made it super easy! Your child can make a batch of these for snacks! Serve with ketchup or mustard to as a dip! (Requires the oven.)
Ingredients:

  • 2 packages cornbread mix
  • 2 Tablespoons brown sugar
  • 2 Eggs
  • 1.5 Cups milk
  • 1 Cup Cheddar Cheese (optional)
  • 9 All Beef Hot Dogs, sliced in half

Directions:

Preheat Oven To 400 degrees. Lightly grease muffin tin (makes 18 muffins).

In a large bowl, stir together the cornbread mix and brown sugar. In a separate bowl, beat the eggs and milk. Gently fold the egg mixture (and the optional cheese) into the cornbread mixture – mix until moistened.

Spoon the mixture into muffin tins until they are about 2/3 full. Add a ½ hot dog to each muffin cup.

Bake for 14-18 minutes, until golden brown.

Tuna Cheese Melts – English muffins, homemade tuna salad and cheese make for a yummy, simple lunch! (Requires toaster oven or regular oven for melting cheese.)

Ingredients:

  • 2 cans white albacore tuna fish in water, drained
  • 3 Tablespoons mayonnaise, more or less to taste
  • 1 teaspoon celery salt
  • 1 teaspoon onion powder
  • 1 teaspoon garlic powder
  • ¼ Cup each chopped celery & onion, chopped
  • 2-3 Tablespoons yellow or red bell pepper, chopped
  • 3 English muffins, split
  • 6 slices American cheese (or other favorite cheese)
  • 6 slices fresh tomato (optional)

Directions:

Toast the English muffin halves and set aside on a baking sheet. (Optional: You can butter the English muffins when you toast them.)

Preheat toaster oven (or oven) to 200 degrees.

In a medium bowl, flake the tuna and then combine the remaining ingredients, mixing thoroughly.

Spoon mixture onto each muffin half and top with a slice of cheese.

Pop in oven and bake until the cheese melts (approximately 8 minutes). Remove from oven, top with a tomato slice and serve.

Coconut Chicken Nuggets – A Tropical Twist on a kid’s favorite! Serve with pineapple mango salsa, or orange marmalade for dipping!

  • 1 Cup Flaked coconut
  • ½ Cup Flour
  • ½ teaspoon salt
  • ¼ teaspoon black pepper
  • ¼ teaspoon garlic powder
  • 1-1/2 pounds boneless, skinless chicken breasts, cut into 1 inch cubes (or strips if you prefer chicken strips!)
  • 1 egg, beaten
  • 1/3 Cup Butter, melted

Directions:

Preheat oven to 400 degrees.

On a plate, mix coconut, flour, salt, pepper, and garlic. In small bowl, beat the egg.

Dip the chicken in the egg mixture, then roll the pieces in the coconut mixture to coat.

Place on a non-stick baking sheet and drizzle with the butter. Bake 25 minutes, or until chicken is browned and cooked through, turning pieces halfway through.

Serve with dipping sauce and enjoy!

Note: You can mix a cup of orange marmalade with 2 tablespoons dijon mustard to make a zesty dip! (I added a couple of splashes of sweet chili sauce to it for my dip!)

For more recipes to make with the kids, check out the Diva’s video series Cooking With The Kids!

Thank you to WTLV-TV’s First Coast Living for inviting me on to share these recipes!

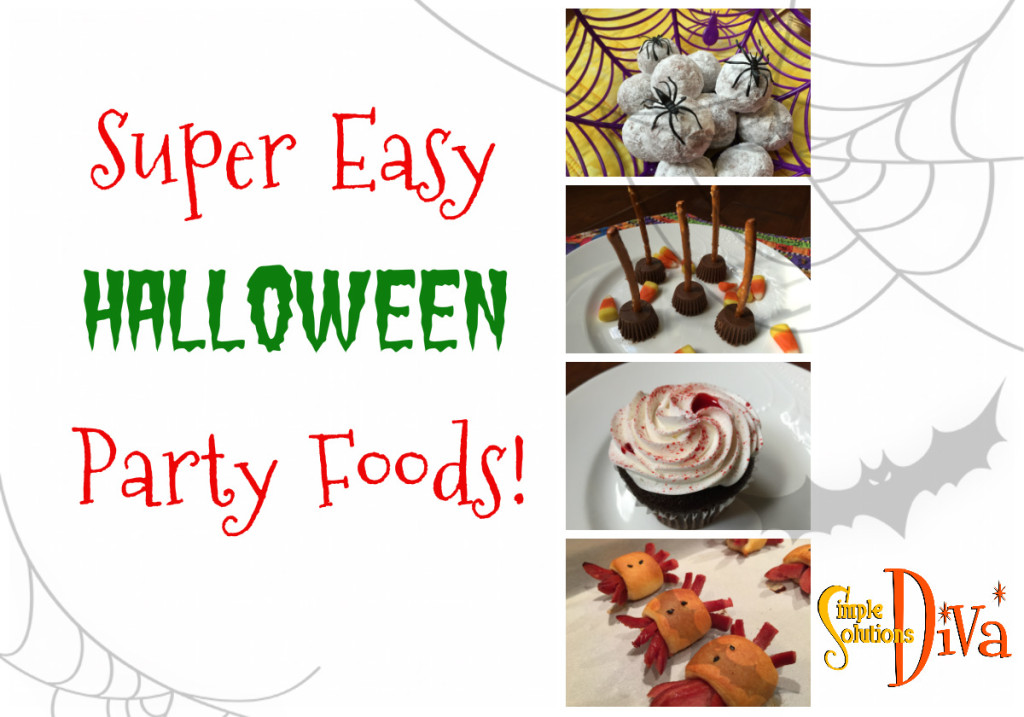
Super Easy Halloween Party Foods

It is the day before Halloween, and you get invited at the last minute for a Halloween Party. You need to bring something to share, but you want to do something easy! Try one of these simply ghoulish treats – they are tasty, easy to make, and are kind of creepy! They are so easy, the kids can even make them!

SSD Halloween Party Foods


Spider Eggs

These are the EASIEST food to bring by far! It is as simple as getting powdered donut holes, stacking them on a plate or bowl, and placing plastic spiders around and on the donut holes. (If there are little kids at the party, they need to be supervised so they don’t eat the spiders!)

SSD Spider eggs


Witch’s Broom

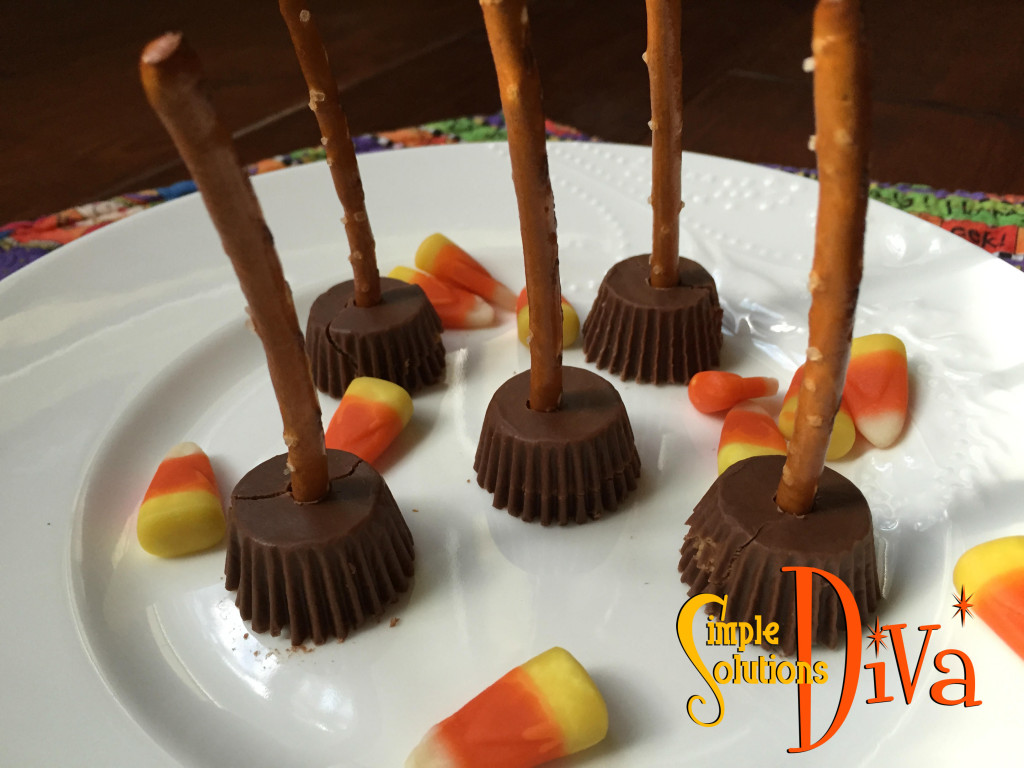
Another super simple, little party treat! Reese’s minis, unwrapped and placed upside down on a serving plate. Insert into what is now the top of the Reese’s (actually the bottom), insert a small pretzel stick. Easy Peasy! (Note: You may want to use a toothpick to make a small hole first – the size of the pretzel stick may crack the Reese’s – as seen below!)

SSD Witch Broom


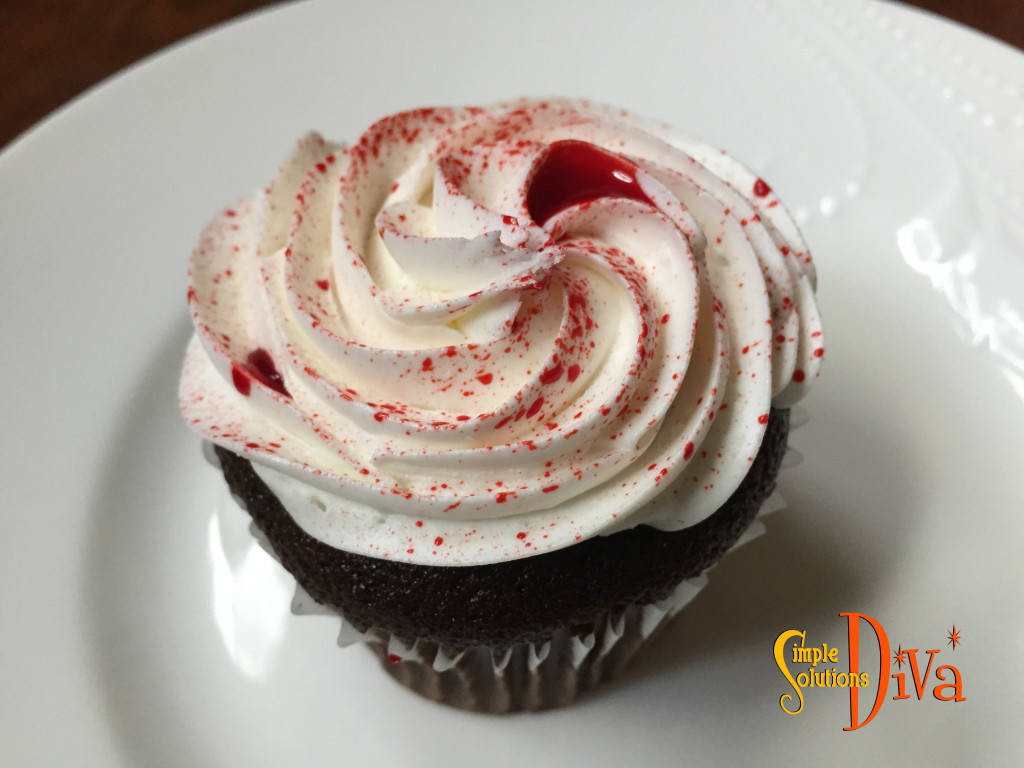
“Blood-Splattered” Cupcakes

You can make your own, or use store-bought, white frosted cupcakes for this treat! Using red GEL food coloring (it adds a little thickness to the “blood”), squeeze into a small bowl and add a little water. Take a BRAND NEW toothbrush (use an old one? YUCK!), dip it into the red mixture, then splatter the cupcakes with it. Looks gruesome! (Be sure to not wear a white or other light colored shirt – protect your shirt while doing this!)

SSD Blood cupcake


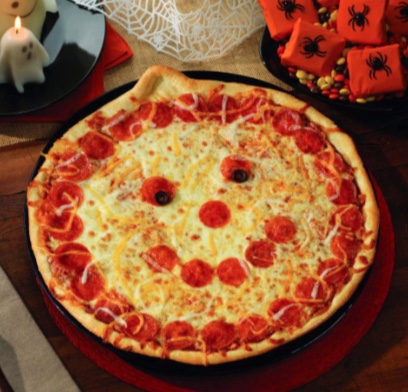
Pumpkin Pizza

No, not pumpkin flavored pizza, just pizza decorated to look like a Jack-0-Lantern! Take any frozen, round cheese pizza and add toppings (choose your favorites) to decorate! Here is a great example from the Papa Murphy’s Restaurant website:

Pumpkin Pizza: Photo Courtesy of Papa Murphy's Restaurant.
Pumpkin Pizza: Photo Courtesy of Papa Murphy’s Restaurant.


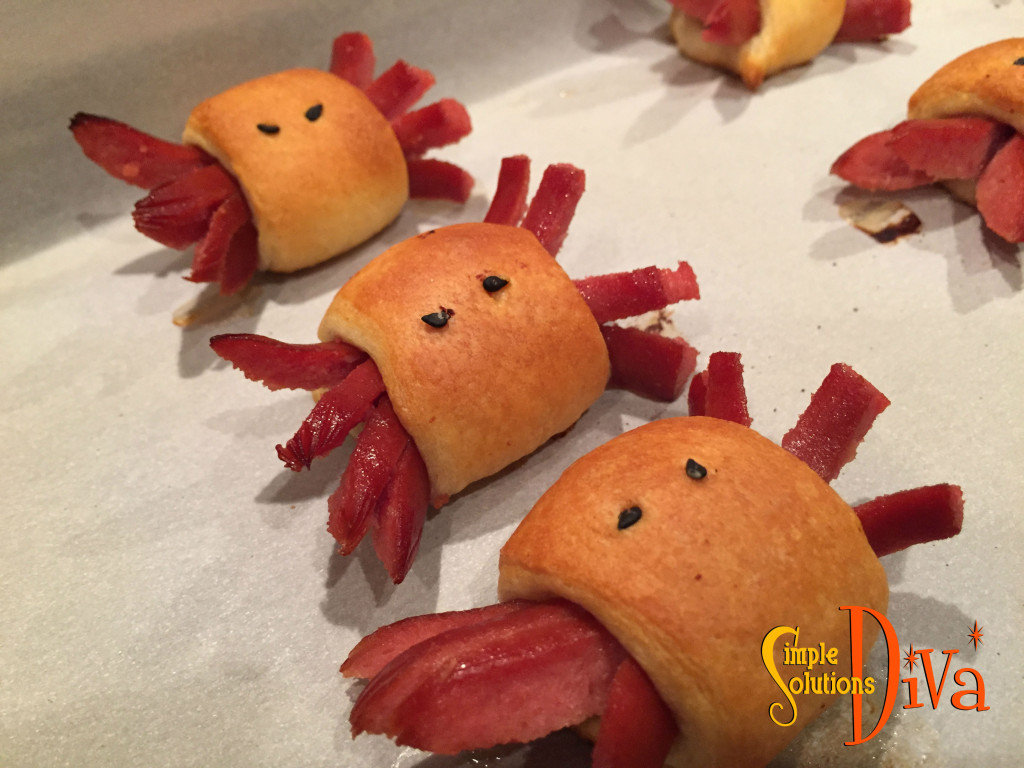
Spider Dogs

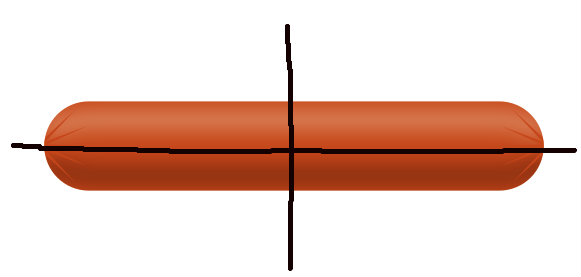
These cute little guys are probably the most time consuming of the bunch here(it took me 10 minutes to whip up and assemble them), but they are just so cute! Preheat your oven to 400 degrees. Cover a cookie sheet with parchment paper. Start with one hot dog (one hotdog will make 4 spider dogs), slice it length-wise. Cut each length in half. See illustration below:

hot dog

Lay each quarter dog flat. Slice 3 slits on each end of the quarters (leaving about 1/2 inch or so solid in the middle. These will make the eight legs for the spiders!

Using crescent roll dough, take slices of the dough and wrap around the middle of each spider and place on the parchment paper covered cook sheet. Black sesame seeds make the eyes. Place in the oven for 8-12 minutes, until the spiders are light brown (ovens will vary so be sure to watch them!).

SSD spider dogs


Thank you to WTLV-TV’s First Coast Living for inviting me on to share these simple Halloween recipes!

Five Minute Cake In A Mug!


When you are in a hurry for a decadent dessert, who doesn’t like chocolate? Here’s a recipe that is perfect to make and eat with the kids! Warning – this serving was so big, one mug (an oversized mug!) would have been plenty for two people!

Ingredients:

  • 4 Tablespoons flour
  • 4 Tablespoons sugar
  • 2 Tablespoons cocoa
  • 1 egg
  • 3 Tablespoons milk
  • 3 Tablespoons vegetable oil
  • 3 Tablespoons chocolate chips, optional (really, if you are making cake, GO FOR IT!) 😉
  • 1/2 teaspoon vanilla extract

Directions:

Add the dry ingredients to a large, microwave-safe coffee mug, and mix well. Add the egg and mix thoroughly, being sure to scrape the sides and the bottom well to incorporate the mixture. Add the chocolate chips and vanilla and mix.

Place mug in microwave and cook for 3 minutes. The cake will rise and will peek out over the top of the mug, so don’t worry and think that it will explode!

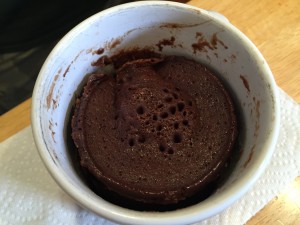
Cake right out of the microwave - looks a little spongy and it is oh, so good!
Cake right out of the microwave – looks a little spongy and it is oh, so good!

Allow to cool, add some vanilla ice cream (why not!?!) and enjoy! So good you don’t need frosting!

Thank you so much to my assistants in today’s video, Dylan and Kingston! They were a big help AND they did a great job!

SSD Cake in mug

Fourth Of July Crafts For Kids!


SSD July collageIndependence Day is a favorite holiday in my house! It happens to be the day AFTER my birthday, so I always looked at it as a celebration of MY birthday as well as our country’s! My neighbor and I both love it so much, we started our neighborhood’s Fourth Of July Bike Parade 15 years ago and it is STILL going strong!

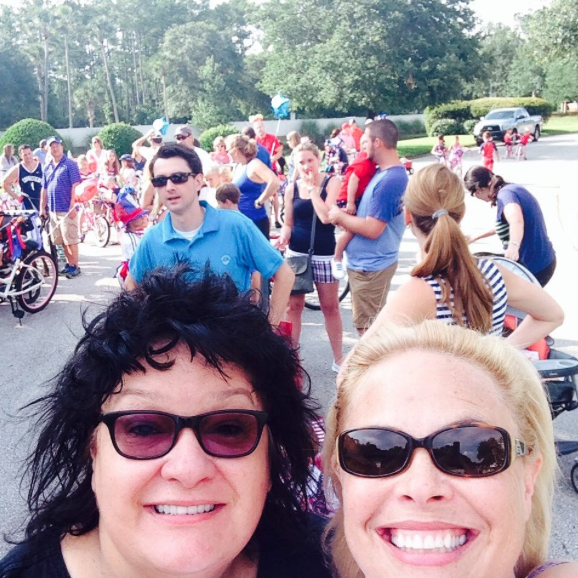
My partner in crime, Pegine and I, celebrating at last year's Neighborhood Independence Day Bike Parade we established 15 years ago!
My partner in crime, Pegine and I, celebrating at last year’s Neighborhood Independence Day Bike Parade we established 15 years ago!

Here are a few simple crafts you can do with the kids this year, plus a few decorating & celebrating ideas I found that were just too good not to include!

Liberty Paper Plate Hat

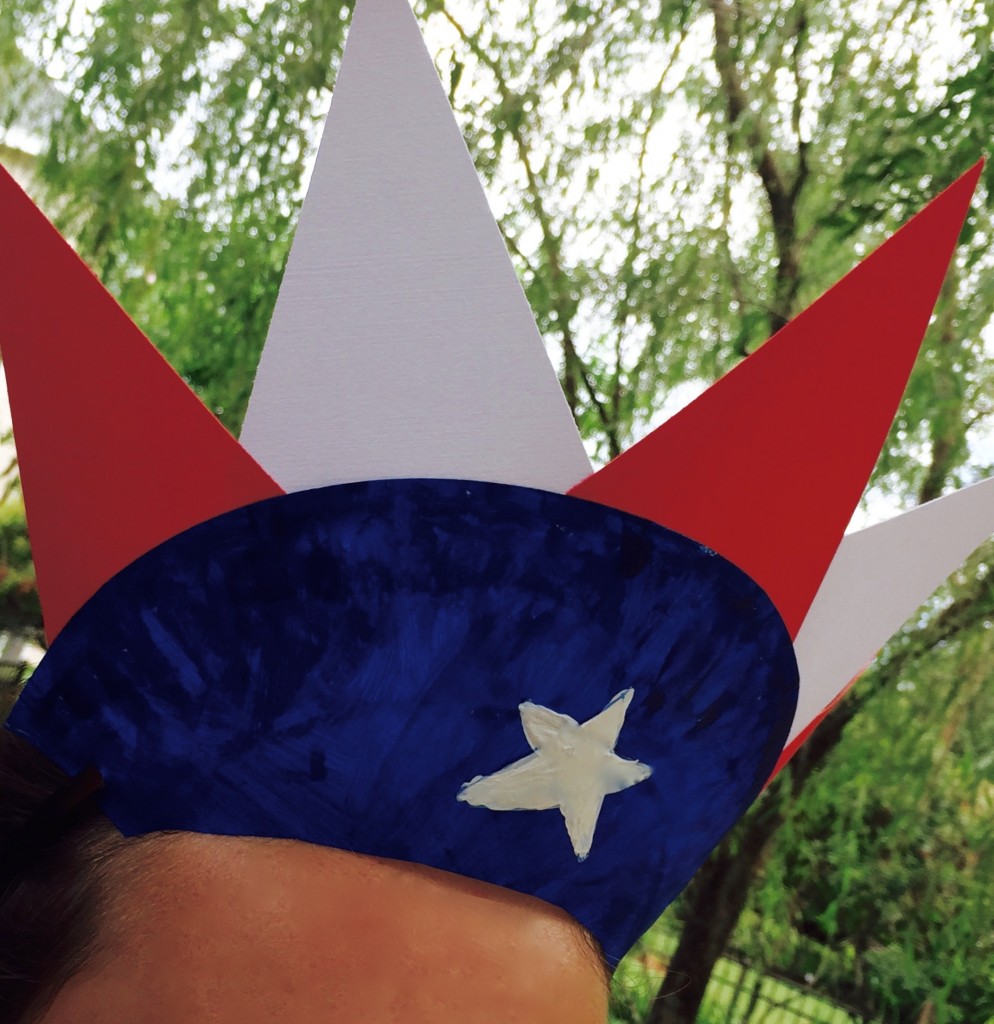
mandy

This is a simple project that requires just a few items!

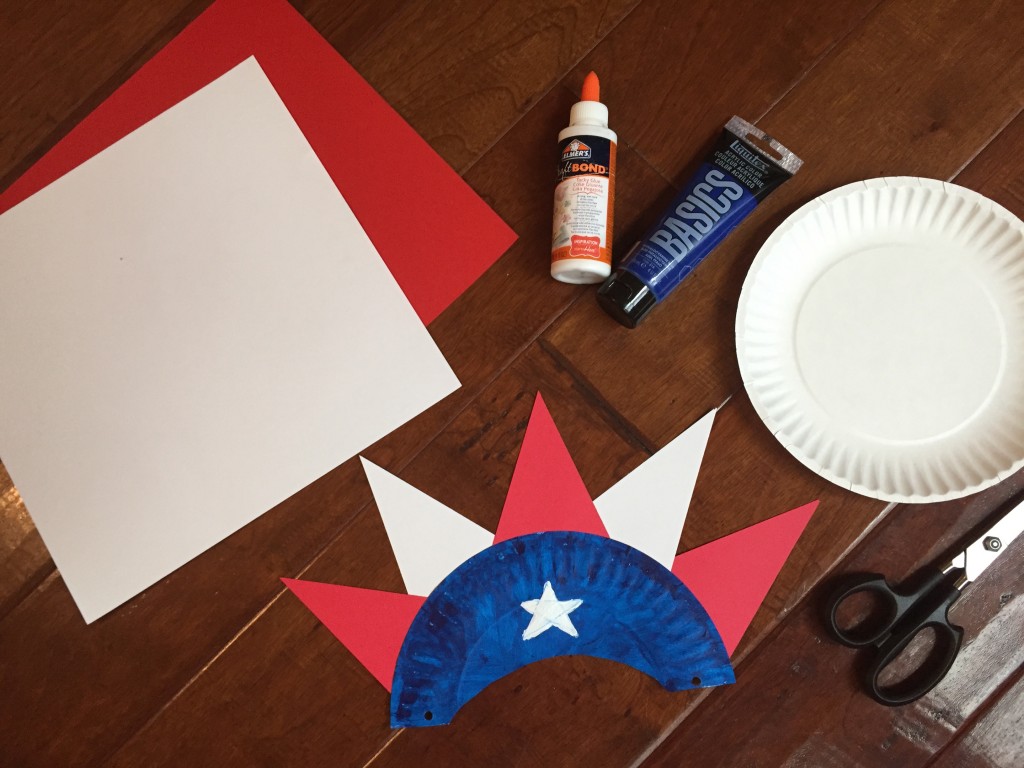
What You Need:

  • White paper plates
  • Blue acrylic paint & paint brushes
  • White and red construction paper
  • Hole punch
  • Glue or glue dots to eliminate dry time
  • Elastic

IMG_7409 copy

Directions:

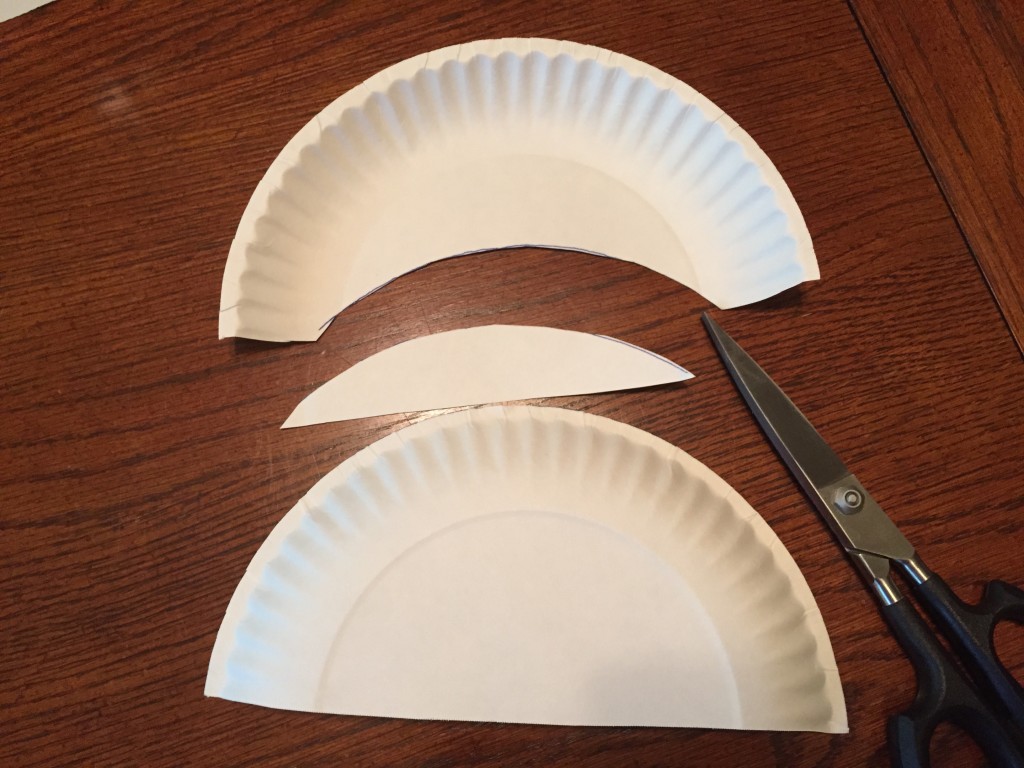
Cut the paper plate in half, then on the cut side, cut a half moon out of the bottom using the other half of the paper plate as a guide (sounds complicated, but see photo below!). Paint one side of the plate blue. Set aside to dry.

IMG_7397 copy

Cut elongated triangles out of the red and white paper.

Flip the dried plate over and glue the paper triangles to the back of the paper plate (along the top-curved part), alternating red and white-points pointed up. Allow to dry.

Using hole punch, punch a hole on either side of the bottom of the plate. Thread elastic through each hole and tie off (estimate amount of elastic needed based on the child’s head size). You can also use a hard headband and put the headband ends through the holes on either end!

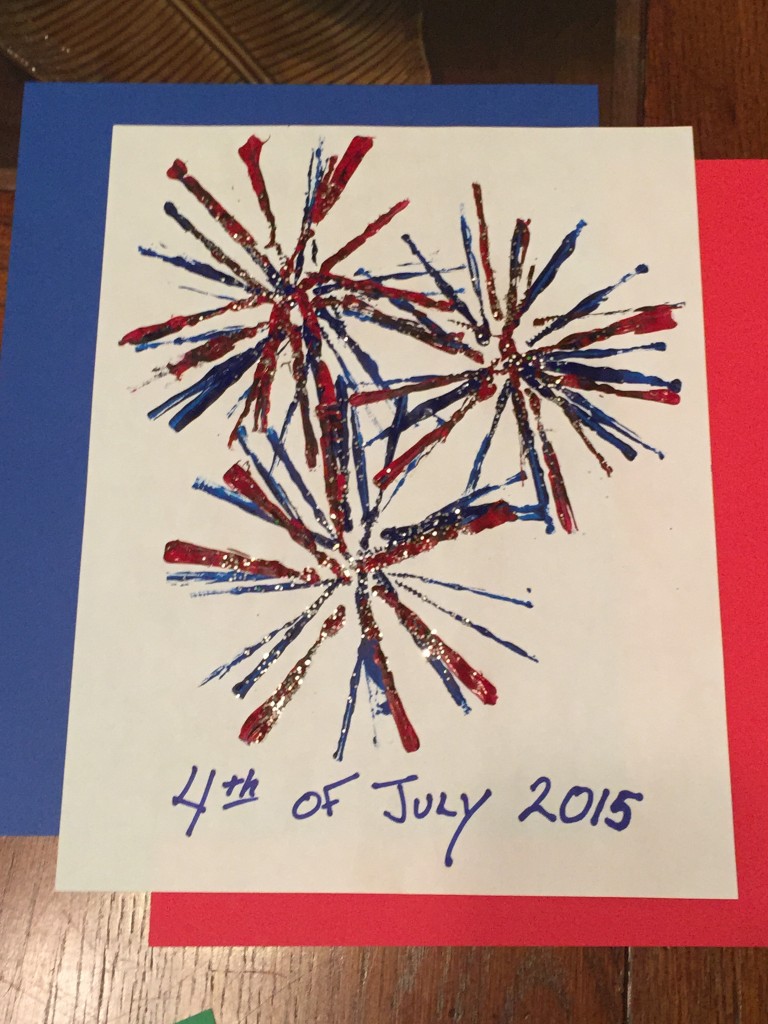
Fireworks Art

IMG_7395

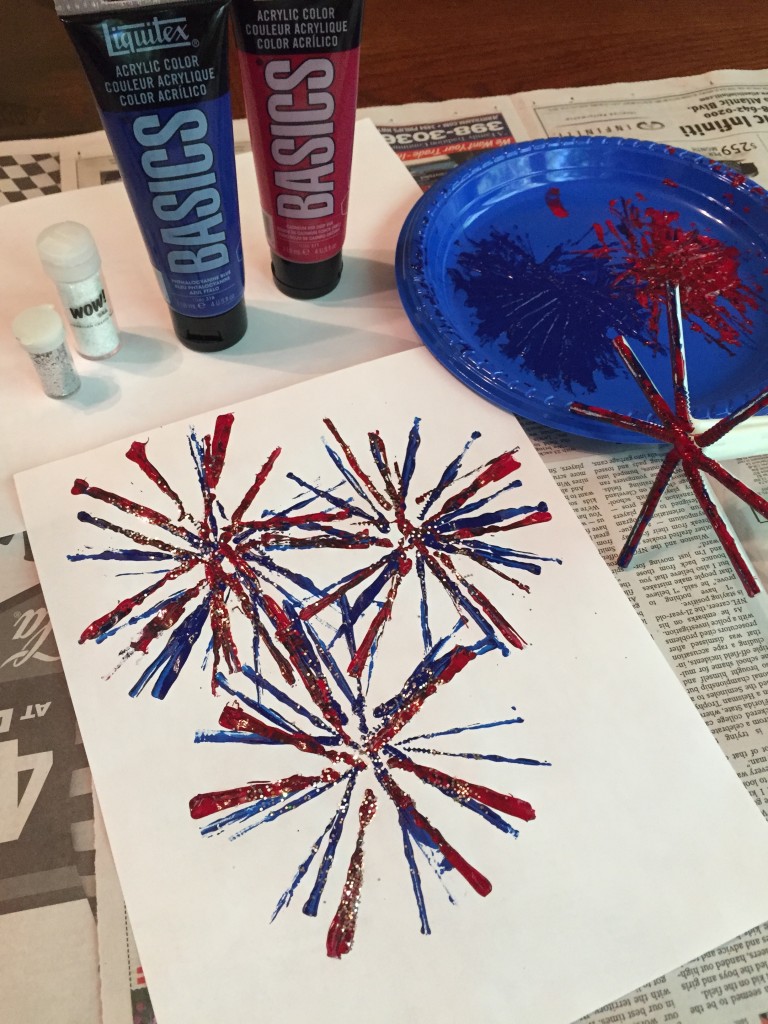
Bendy straws make this simple craft fun AND pretty!

What You Need:

  • 7 bendy straws per person
  • Tape
  • Blue and Red acrylic paint
  • Paper plate
  • White paper
  • Red, white or blue glitter (optional)

Directions:

IMG_7391

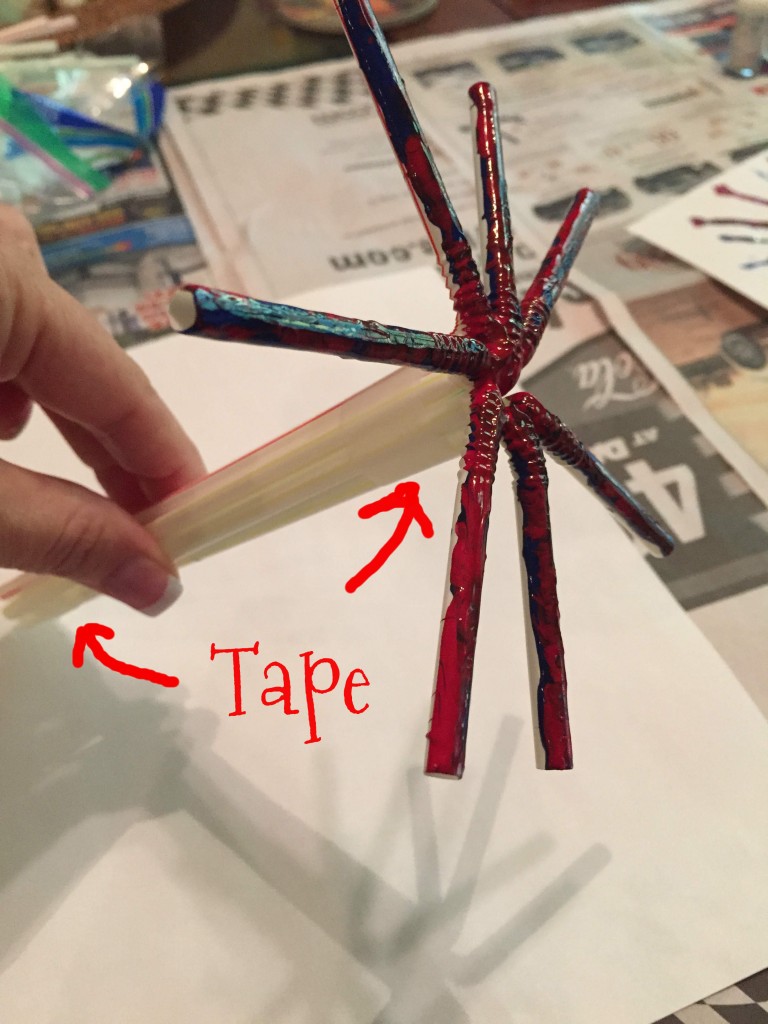
Pull each of the bendy straws so they are fully extended. Holding the 7 straws in a bundle in your hand (making sure the ends are aligned), wrap tape around the bottom and then right under where the straws bend. Once secured, bend and spread out the bendy end of the straws to create a pinwheel shape. (See photo below!)

straw tape

Pour blue paint onto a paper plate and have the kids dip the pinwheeled end of the straws in the paint. Have them stamp the pinwheel all over the white paper; repeat with red paint. (You may need to press the straws to the paper so they make full contact with the paper.) If desired, while paint is wet, sprinkle sparkles on the artwork.

Flag Handiwork!

IMG_7408

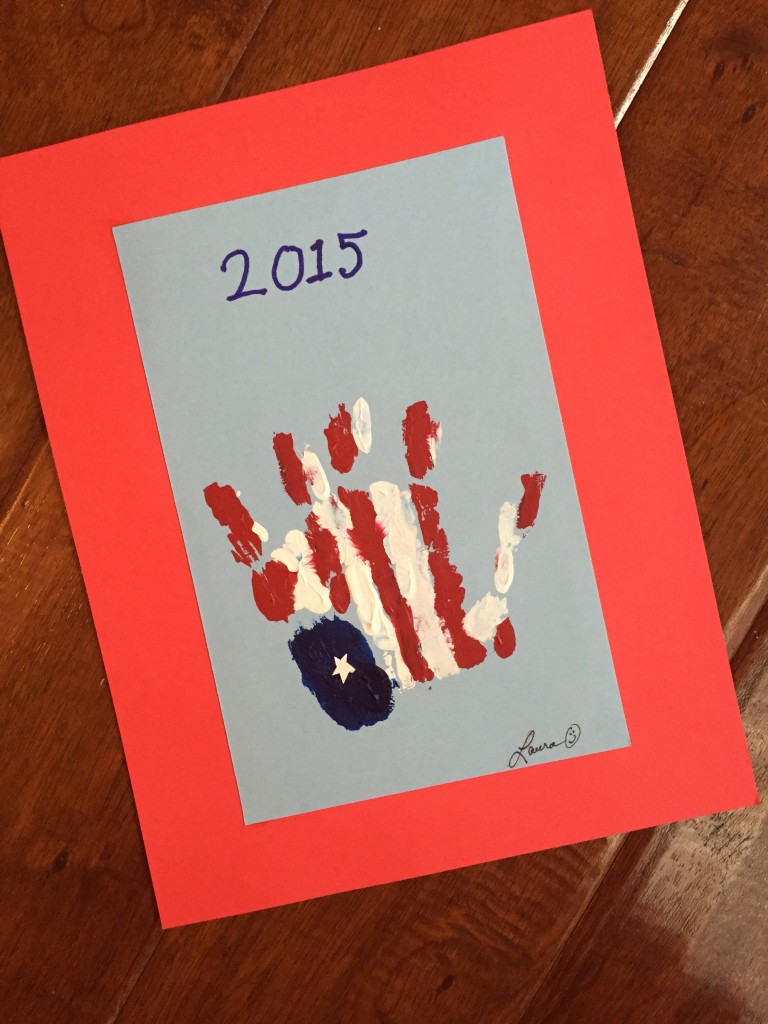
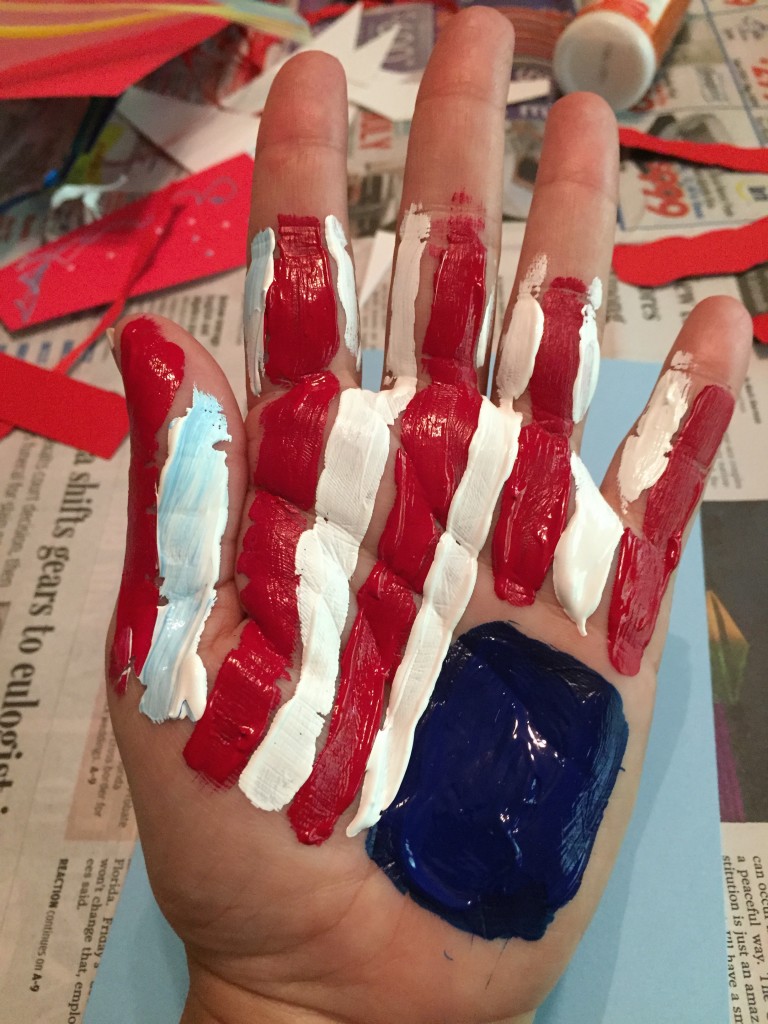
Give the flag a hand! Use your child’s hand to re-create the flag!  (Don’t laugh, but since I have teens, not toddlers, at home I used my own hand for demo purposes!)

What You Need:

  • Red, White and Blue Acrylic Paint
  • Paintbrushes
  • Light Blue Paper for the print
  • Red Paper for Mounting
  • White Paint or Paint Marker

Directions:

Assemble your paints, brushes, and light blue paper. Have your child hold out their hand (I used left hand) and gently paint a blue square on their palm, followed by alternating red and white stripes leading out onto their fingers. (See photo) NOTE: Plan to work quickly so the paint doesn’t dry on their hand!!

IMG_7399

Press the painted hand onto the light blue paper. Once dried, paint a white star on the blue square. Mount the artwork onto slightly larger red paper.

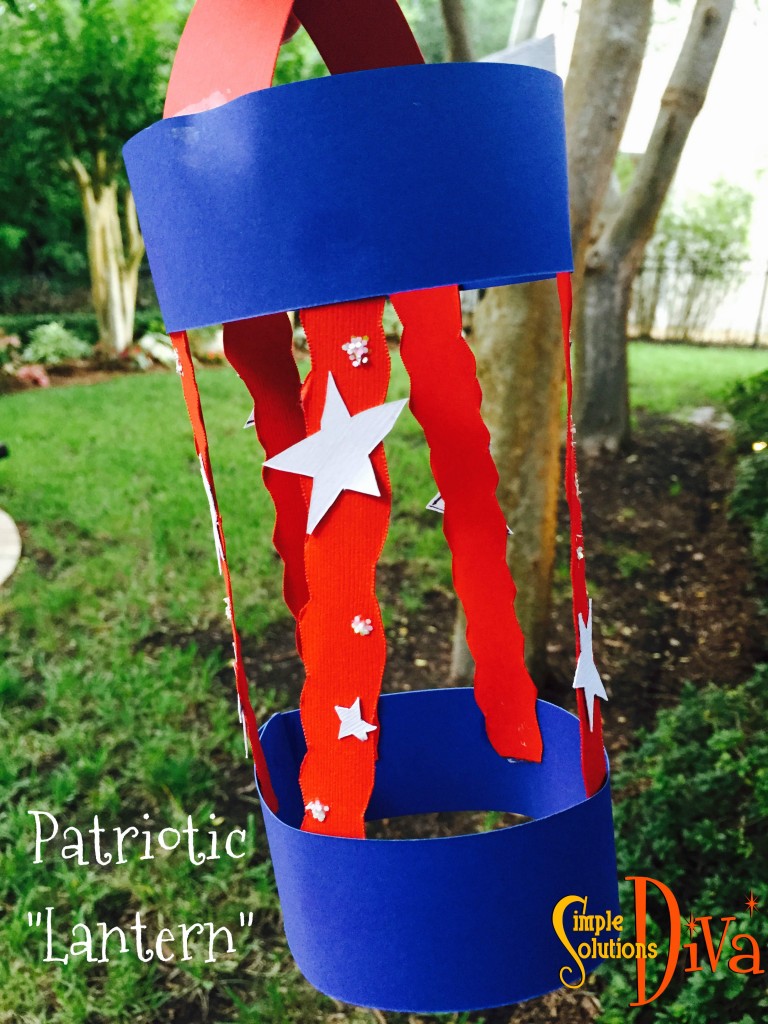
Patriotic “Lantern”

SSD lantern

This is always fun for kids to make and they are perfect to display on the porch, in the bedroom or even attached to a stick to carry in the neighborhood bike parade!

What You Need:

  • Blue & Red Construction Paper, cut into long, inch wide strips (I used heavier paper that I had on hand)
  • White Paper, cut into free-formed stars, various sizes
  • Craft Glue
  • Glitter (optional)

Directions:

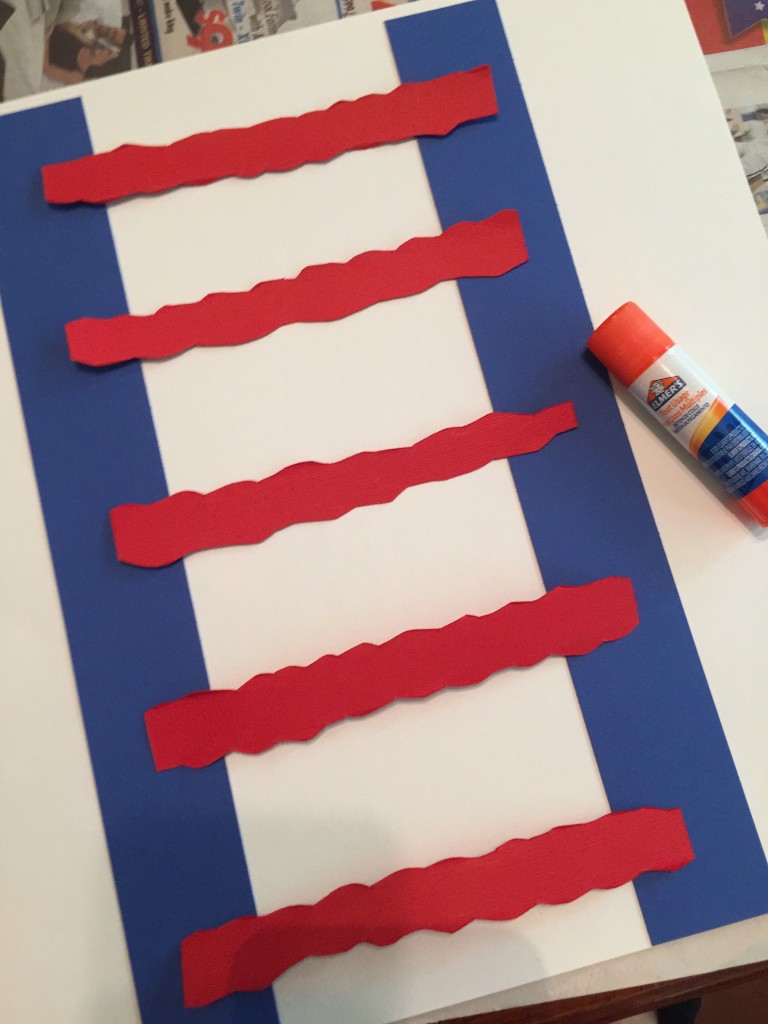
Lay two blue strips vertically with a few inches between them. Lay your red strips between the blue strips horizontally and glue (see photo below).

IMG_7400Once dry, join the each end of the two blue strips together and glue.

Add the white stars as desired, and put a few dots of glue here and there, then sprinkle with glitter if you want to add a little more pizzazz! (You could add streamers off the bottom if you want to turn this into a windsock!)

Glue a red strip to the top as a handle and you are ready for the parade!

Sparkler Guard

SSD Sparkler

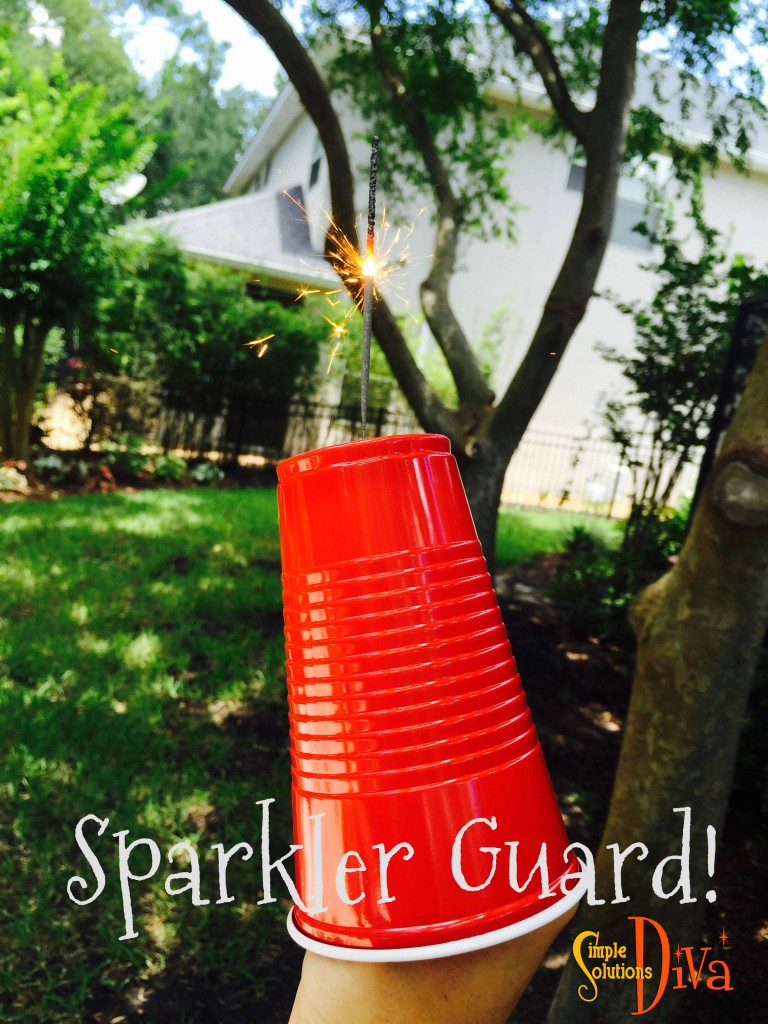
You might see a red cup, I see a Sparkler Guard! I saw this on Pinterest and thought it was brilliant! I love sparklers, but when I was little I was always afraid that I would get burned. This solves that problem!

Just cut a small hole in the bottom of the cup and stick the sparkler handle into the cup. That’s it! But now, a few notes and disclaimers on this one:

  • Never leave a child alone with matches, sparklers, fire or anything else flammable!
  • Always supervise your children during this activity – This is not meant to be a “Light It & Leave” activity!
  • Always have a container of water on hand to place the used sparklers in to douse any heat or flame.
  • Make sure the entire “business end” of the sparkler is sticking out, so the only part on the inside of the cup is the handle and your hand. You don’t want it to burn down INTO the cup!

Other Great Ideas From Around The Web:

There are so many fun 4th Of July activities & crafts out there, I couldn’t cover them all! I’ve selected a few of my favorites below. Be sure to click on each link to visit the sites for directions!

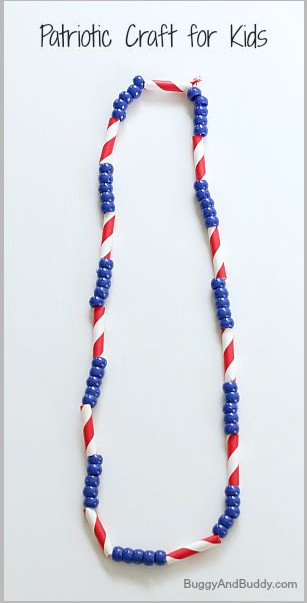
Screen Shot 2015-06-28 at 8.11.51 PMPatriotic NecklaceClick Here


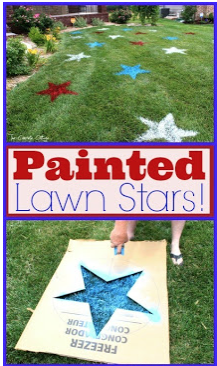
Screen Shot 2015-06-28 at 8.01.30 PMPainted Lawn StarsClick Here (I LOVE this idea and may have to do it next year!)


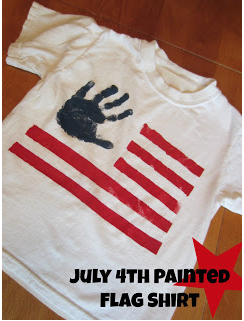
Screen Shot 2015-06-28 at 8.05.18 PMDIY Independence Day Flag T-ShirtsClick Here


Screen Shot 2015-06-28 at 8.06.09 PMPatriotic Ice Cream Sandwich Pops (So Easy!) – Click Here


How Easy Is It To Make Your Own Artwork?

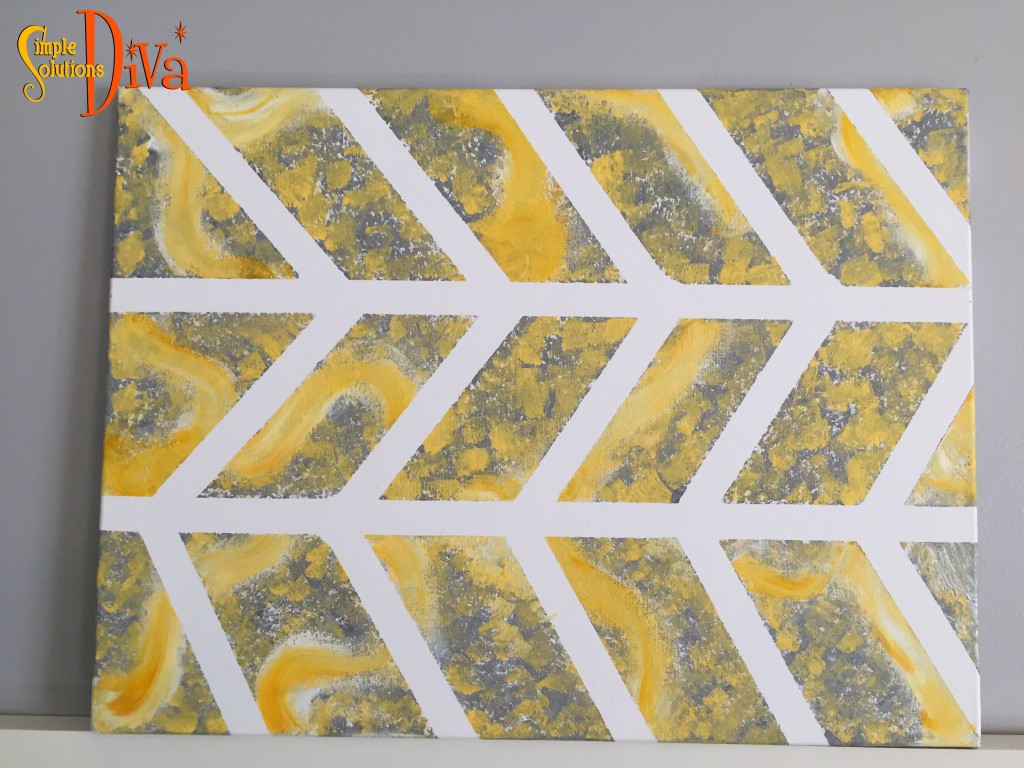
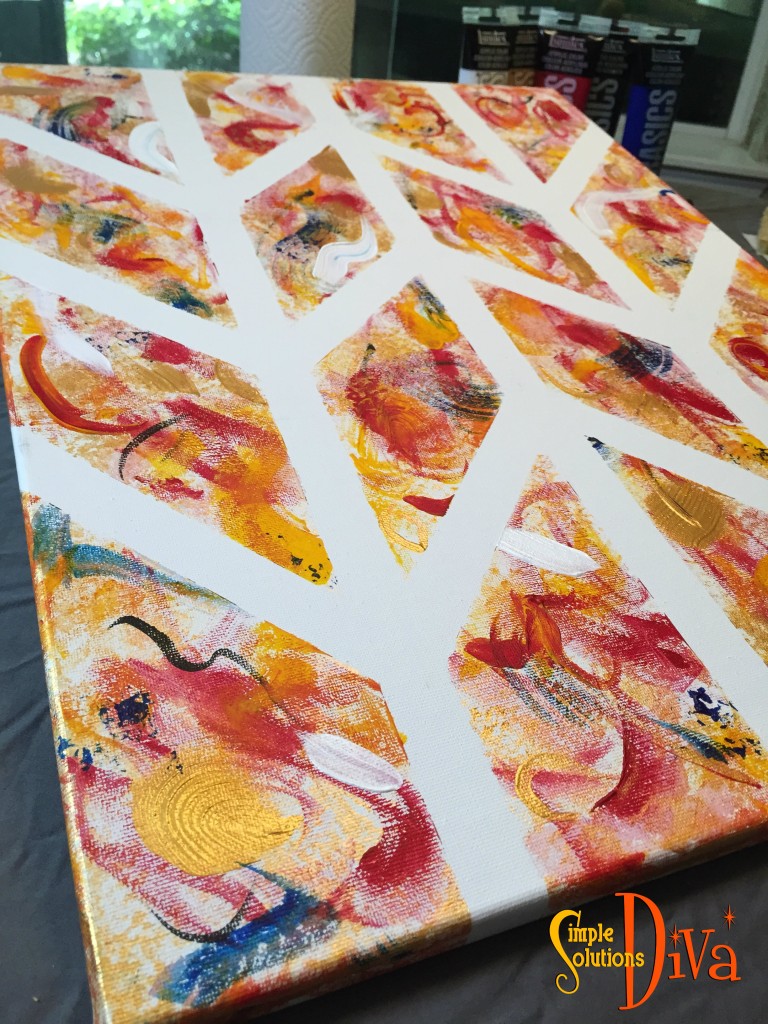
Today’s video is part of the “Putting Pinterest To The Test” Video Series! The Diva tests a pin that says it is easy to make your own, beautiful wall art – as easy as having some acrylic paints, a canvas and some masking tape. How easy is it? Do you need an art degree, or at least a little creativity?

Additionally, the Diva was a little wary that the masking tape might not create a good seal on the canvas, so she tested masking tape versus Frogtape Multi-surface painting tape.


SSD DIY Art


To make your own wall art, you need will the following:

Check the video for directions and helpful tips!

What do you think of our artwork?

Artwork created by the Diva's daughter!
Artwork created by the Diva’s daughter!
Artwork created by the Diva!


Simple Halloween Games For Kids

Everyone loves a good game or activity to do with their kids – even better when it is a Halloween party! Here are a few favorites from our family! One of our children has an October birthday, so we often had a Halloween-themed party when she was little. Thanks to WTLV-TV’s First Coast Living for inviting me on to share these activities!

Toilet Paper Mummy Race

TP Mummy Race
TP Mummy Race

Break into teams of three (or four) people. One person in each group is the mummy. Using toilet paper rolls, wrap up the person head to toe to look like a mummy. The first team done wins!

Eye Of Newt Relay Race

Screenshot 2014-10-29 17.28.59
Who’s Looking At You? Eye Of Newt Relay Race!

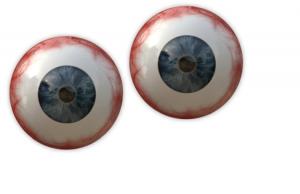
Purchase chocolate eyeballs (or use white grapes!), enough plastic spoons for each participant. Divide the participants into teams of three people or more. Each team splits in half and separate with about 10 feet between the two groups. They face each other. Put two “eyeballs” into the starter’s plastic spoon and begin the relay race – first person runs the 10 feet to their partner, passes the eyeballs from their spoon to their partner’s (without using their hands), and then that partner runs back across the 10 feet to do the same with the next team member. If they drop an eyeball, they need to pick it up with the spoon, not their hands. First team to pass their eyeballs through all their team members wins!

Pass The Pumpkin

Pumpkin Relay Race
Pumpkin Relay Race

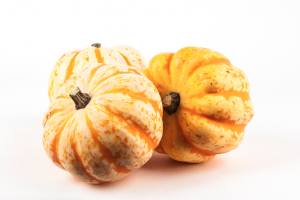
Divide kids into equal teams. Each team lines up so you have each team member behind the next. Give the person in front of the line a pumpkin (you want it somewhat big, but not too big for the age group!). At the count of three, first person in line passes pumpkin backwards over their head to next in line. That person then passes it through their legs to the next person – they alternate like this until the end! First line to finish wins!

Simple Rainy Day Activities For Kids

Rainy Day FunRain putting a damper on your kids’ summertime fun?  Simple Solutions Diva has some fun and active ways to keep kids entertained! Try one of these themes to keep them busy!


Anyone who says sunshine brings happiness has never danced in the rain. ~Author Unknown

Game Day Fun:

Indoor Scavenger Hunt – A little preparation ahead of time will make this something easy to pull together when you need it! This is a great way for the kids to have fun and maybe even work together to solve some clues!  Think of “Eye Spy” in your own home. Being as creative as you can (maybe even do a poem), describe an item in the house the kids have to find. Once they find the item, the next clue will be there. Make them run up and down stairs, climb under beds, etc. Each clue answer brings them to the next clue. The kids can work together as a team or as individuals to solve the clues. Make the prizes at the end enjoyable for both you and the kids – homemade cookies, trips to the bowling alley, or other appealing activities!

Can of Sardines – This game of hide and seek has you finding the person who is “It”, but instead of announcing you found them, you cram into the same space with them and wait. The last person to find them is the next “sardine”!

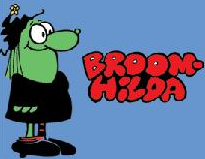
Broom-Hilda, Created by Russell Myers.

Broomhilda The Witch – Broomhilda The Witch is a game I used to play with friends MANY years ago (I will not divulge exactly how many!). The play area should be a circle of some sort, maybe around a table or big space cleared in a family room.  The person who is “It” (the Broomhilda) is blindfolded and given a broom to hold upside down. The others quietly hide in spaces within the circle/play area. The lights are dimmed and “Broomhilda” begins her slow and careful march, banging the broom handle on the ground with each step, letting the others know she is coming. “Broomhilda” can say anything to make the others giggle, giving up their hiding place. If she finds you, you are out. If you are the first one to be found, you are the next “Broomhilda”.

Mini Marshmallow Popping Contest – Plastic cups, mini marshmallows, scissors and balloons are the simple items you need for this project/game. Cut off the bottom of the plastic cup with the scissors. Take a balloon and tie off the balloon. Using scissors, cut off the top of the balloon and attach the part of the balloon with the knot onto the open bottom of the cup. Make sure it fits tightly onto the cup, bringing the knot almost flush with the bottom of cup. Repeat the process for as many players as you have.

Take a mini marshmallow and place in the bottom of the cup, fitting it into the knotted part of balloon. Pull the balloon down and “pop” the marshmallow out of the cup. The person who can shoot the marshmallow the farthest is the winner.

The way I see it, if you want the rainbow, you gotta put up with the rain. — Dolly Parton

Camp Out in The Family Room:

This theme is always my go to favorite!

Make Microwave S’mores – So simple and easy! Assemble your s’mores fixings (graham cracker, chocolate piece, marshmallow, and another graham cracker on top!) on a microwave-safe plate and microwave until the marshmallow gets big. Keep a close watch on them — 15-30 seconds, depending on your microwave.

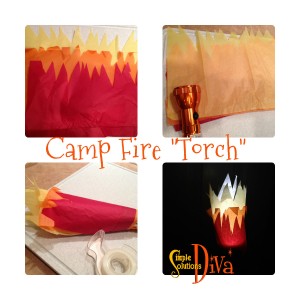
Make An indoor “Camp Fire” -Use yellow, orange and red tissue paper to create a “torch” using a flashlight. Perfect to use in those tents you make with blankets and chairs! 

Campfire Torch

Communications Fun – Make 2 tents and have the kids make a communications system  using the old idea of two cans (or cups) with a string between them!

Tea Party:

The Table – Set a beautiful Tea Party Table on a table or maybe even on a blanket. Consider using the china – great time to teach the kids to be gentle with things!

The Guests – Have kids create a character they will be. This is a great way for kids house their imagination. Have them create that character’s silly back ground. Have the kids:

  • Speak in funny accents.
  • Dress up in mom and dad clothes.

The Food – Serve tea sandwiches (any sandwich that has the crust cut off and is cut into four small, triangular pieces can be a tea sandwich) and tea (or favorite beverage).  

Baking Day:

My personal feeling: Anytime you can make real, homemade baked goods (from scratch) with the kids helping will be a special time. With so many boxed dessert products out there, it is nice to show your kids what real homemade cookies taste like!

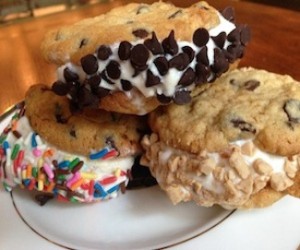
Bake Homemade Chocolate Chip Cookies or brownies

– Use some of the cookies (or brownies) to make Ice Cream Sandwiches, then roll the edges in different toppings. 

photo 1-4
Ice Cream Sandwiches from SimpleSolutionsDiva.com.

Want A Few More Ideas?

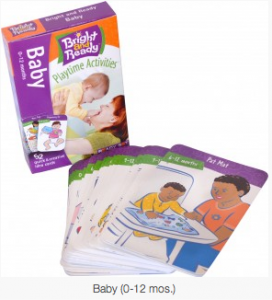
Screenshot 2014-07-17 08.03.25Bright And Ready: If you need some simple ideas on what to do with the kids (without having to spend a lot of money), check out the Activity and Learning Decks from Bright and Ready. They have terrific and creative ideas to encourage your child to learn and grow!  They have a variety of activity decks for babies, on up to 9 years old.


Thank you to WTLV-TV’s First Coast Living for inviting me on to speak about these fun activities!


Simple Summer Treat: Frosty Popsicles

Popsicles are a perfect treat for summertime! Try making these yummy and healthy treats (at least most are healthy!) for your family – they may never want to visit the ice cream truck again!

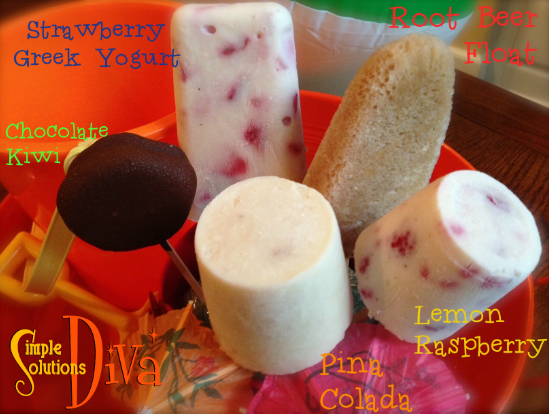
A variety of homemade & healthy popsicles from SimpleSolutionsDiva.com!

Frozen Chocolate Covered Kiwi Pops

A perfect blend of chocolate and kiwi. These are so simple to make, you will want to make them for yourself and your kids all the time! And you don’t have to feel guilty eating them.

Ingredients:

  • Kiwi slices, peeled and sliced at least ¼ inch thick.
  • Baker’s Dipping Chocolate (Any flavor will do, but I used milk chocolate flavor)
  • Popsicle sticks (You can get these from any crafts store and at some dollar stores)

Preparation:

Insert one popsicle stick into each kiwi slice. Take parchment paper and cover a baking sheet. Place kiwi slices with stick onto parchment paper and freeze. (Approximately 2-4 hours)

Just before you take the kiwi out of freezer, heat the Baker’s Dipping Chocolate according to the package. Take kiwi out of freezer and dip each into the chocolate and place back onto parchment paper. When finished dipping all the kiwi slices, place back into freezer for an hour or feel free to eat it right away!


Strawberry Greek Yogurt Popsicles

Greek yogurt is packed full of protein and low in fat. These treats have awesome flavor AND are filling!

Ingredients:

  • One 16 oz. container of vanilla greek yogurt. (I used Chobani)
  • ½ cup milk
  • 1/3 cup chopped strawberries
  • ½ teaspoon vanilla
  • popsicle sticks and molds

Preparation:

In a bowl, combine all the ingredients together, gently stirring in the strawberries. Pour into popsicle molds, insert popsicle sticks and freeze for approximately 4 hours. When removing pops from the mold, either leave out for 5 minutes prior to trying to remove OR run bottom of the molds under hot water for up to one minute.

Makes approximately 5 popsicles.

Pinã Colada Popsicles

These are like the frosty cocktail on a stick, but hold the rum! A creamy treat – and so simple to do!

Ingredients:

  • 1 can light coconut milk
  • 1 small can crushed pineapple, with juice
  • 1 ripe banana
  • 1 teaspoon vanilla
  • ¼ cup shredded, sweetened coconut (optional)
  • popsicle sticks and molds

Preparation:

Combine all ingredients in a blender and blend until smooth! Pour into pop molds and insert popsicle sticks. Freeze for approximately 4 hours. Makes approximately 6 popsicles.

Lemon Yogurt & Raspberry Popsicles

Another simple recipe – I love the combo of lemon and raspberries! I use greek yogurt, but feel free to use regular yogurt in this recipe for a sweeter flavor.

Ingredients:

  • 2 small (5 oz. each) containers of lemon-flavored greek yogurt (or use regular lemon-flavored yogurt)
  • ½ cup vanilla-flavored almond milk (or use regular milk)
  • 1 Tablespoon honey (optional)
  • ½ cup ripe raspberries
  • popsicle sticks and molds

Preparation:

In a bowl combine all ingredients – feel free to lightly crush some of the raspberries! It just adds to the beauty and flavor of the popsicle! Pour into pop molds and insert popsicle sticks. Freeze for approximately 4 hours. Makes approximately 4 popsicles.

Root Beer Float Popsicles

The old-fashioned, summertime tradition, but frozen on a stick!

Ingredients:

  • One bottle of A&W Root Beer (or other favorite root beer!)
  • Small container of vanilla bean ice cream
  • popsicle sticks and molds

Preparation:

You want to open the root beer and allow it time to turn somewhat flat. (Approximately 20-30 minutes in the fridge.) If you don’t the molds will overflow when in the freezer!

Place popsicle mold onto a flat baking sheet. Pour the slightly flat root beer into the molds, until molds are ½ full. Place a small scoop of ice cream into the mold. Gently pour more root beer on top of the ice cream. It will foam up – scrape away excess foam as best you can. Insert popsicle sticks and freeze for approximately 4 hours. FYI – They may over flow due to bubbles! Makes approximately 4 popsicles.

Thank you to WTLV-TV’s First Coast Living for having me on!

NOTE: If you don’t have popsicle molds, you can use paper cups as molds. You will still need popsicle sticks.

1 2

© 2015 SIMPLESOLUTIONSDIVA.COM Designed by The Web Design Chic | ADMIN LOGIN