SimpleSolutionsDiva.com

Kids Activities

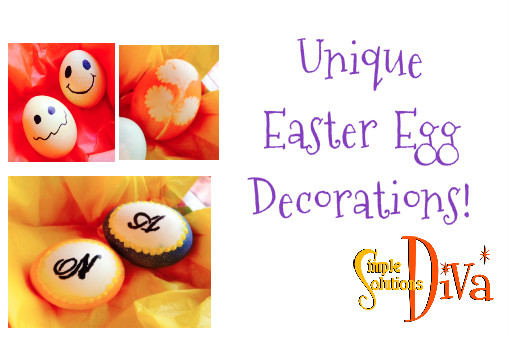
Unique Easter Egg Decorations!

SSD Easter Egg Decor
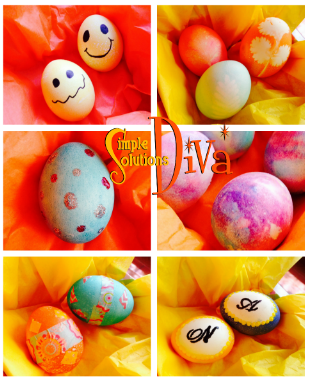
I was so excited when First Coast Living gave me a challenge – find some unique ways to decorate Easter Eggs! Well, after searching high and low, I found some favorites and tested them just for you!


Volcano Eggs
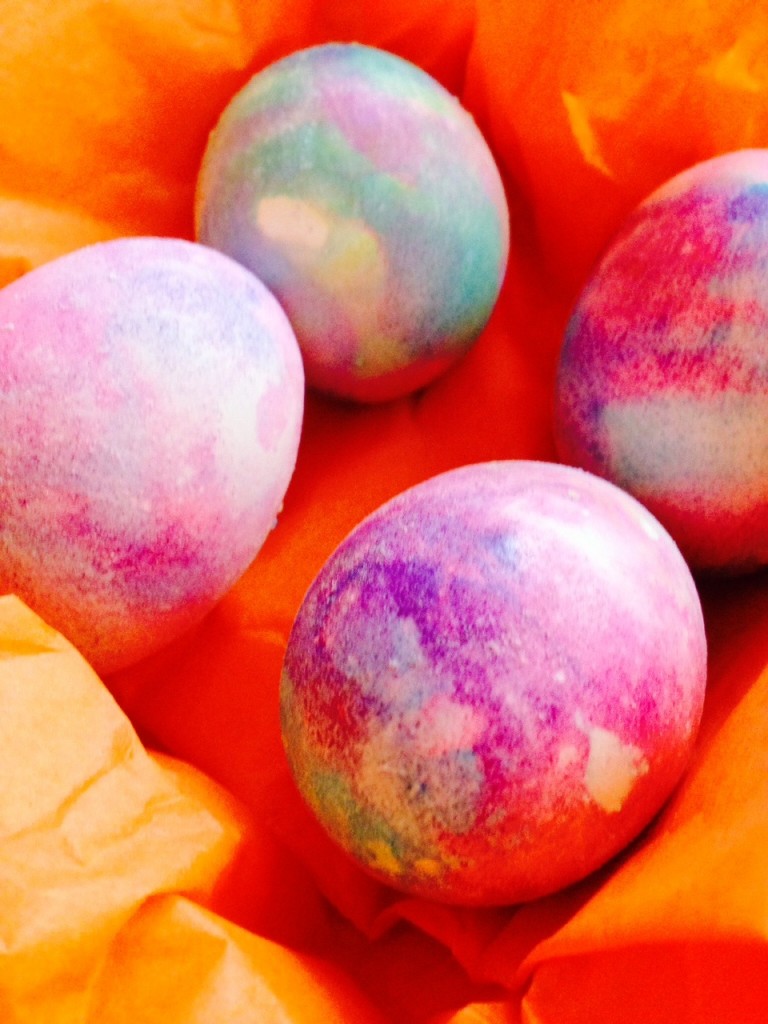
Volcano Eggs
Volcano Eggs

This is a cool technique and great fun to do with the kids! And it yields a beautiful egg coloring.  The best part about this technique?  It looks like a volcano bubbling a rainbow! I found this technique on the website ToddlerApproved.com. Check out the website for great ideas!

What You Need:

  • Hard boiled eggs
  • Food coloring
  • Baking soda
  • Vinegar
  • Wide-lipped plate or bowl
  • Paint Brushes
  • Color-safe cups for mixing “paint”

Technique:

Make the “Paint” – Combine in a color- safe cup, one tablespoon baking soda, a teaspoon or two of water and food coloring of choice. Mix until it is a consistency of mustard – kind of grainy but with some heft to it.

Repeat that process with the other colors you choose to use.

Take a paintbrush and start to paint your eggs with the different “paint” colors – there is no perfect way to do this, just have fun and be creative. Make sure to leave a “blob” or two of the paint on the egg.
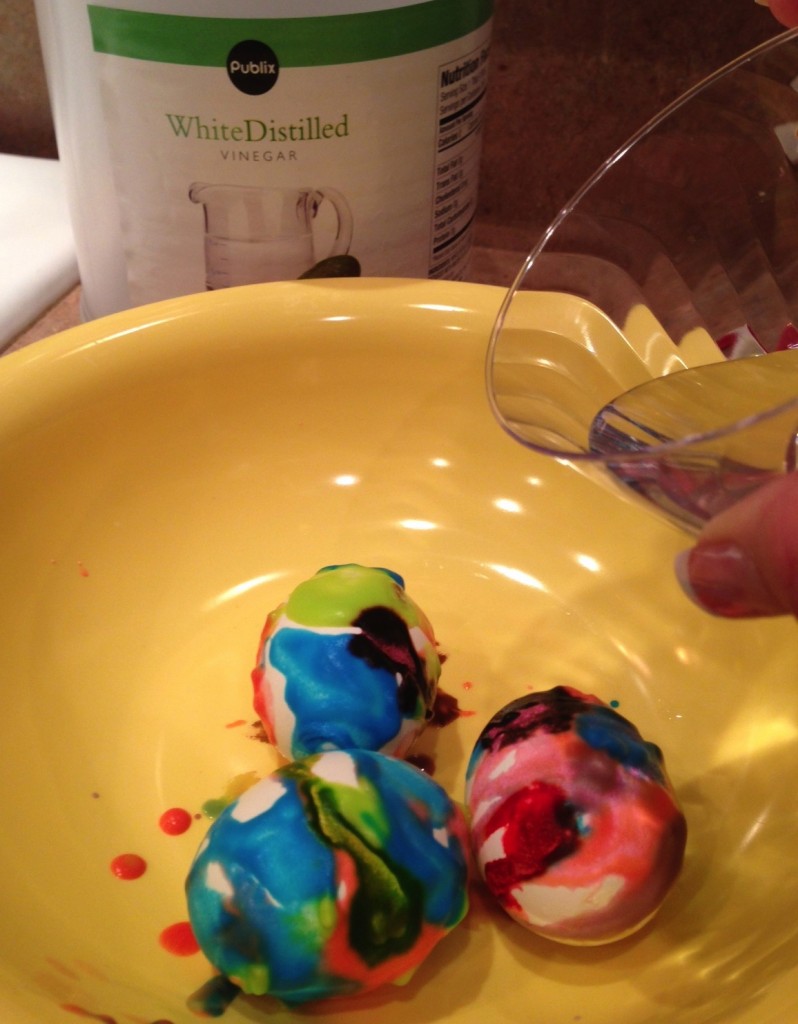
Pouring Vinegar on Volcano Eggs.

Place the painted eggs into the wide-lipped plate or bowl.  Take your food coloring and drip a drop or two on your eggs.

Now comes the volcano part: Drizzle vinegar over your eggs and watch the colors start to bubble! Let the mixture sit on the eggs for awhile, then wipe off with paper towel!


Leaf Print Eggs

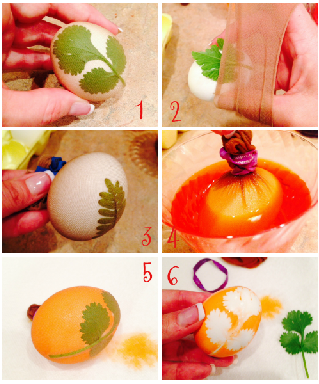
Leaf Print Easter Eggs

I love incorporating natural elements into projects if I can.  I found this beautiful idea, Leaf Print Eggs, on Spoonful.com and thought I’d give it a try! Since I AM the Simple Solutions Diva, I wanted to simplify the process, so I just used the PAAS Egg Decorating Kit to dye the eggs, rather than mix up my own dyes as listed on Spoonful (click on the link above to see their full instructions!).

What You Need:

  • Hard Boiled Eggs
  • PAAS Egg Decorating Kit
  • Various leaves with interesting shapes – I used Cilantro, a fern and a small squash leaf. (Don’t recommend “woody” types like rosemary)
  • Cups to mix up the dyes
  • Rubber bands
  • Sheer knee high hosiery (nylons), cut into 3 inch strips
  • Color-safe place to dry the eggs

Instructions:

Mix up your dyes according to the PAAS package, using the instructions for more vivid colors (using vinegar).

1.) Take the egg and position your leaf on your egg. 2.) Using the piece of knee high, wrap your egg so the leaf is secure and tight against the egg. 3.) Pull the excess nylon tight on the opposite side of the egg, securing with a rubber band.

4.) Place the egg in the dye and allow to sit until the egg has reached the color intensity you want.

5.) Remove the egg from the dye and place on color safe surface. 6.) Remove rubber band and nylon and gently remove the leaf from the egg. Allow to dry.

 Screenshot 2014-04-13 18.32.32

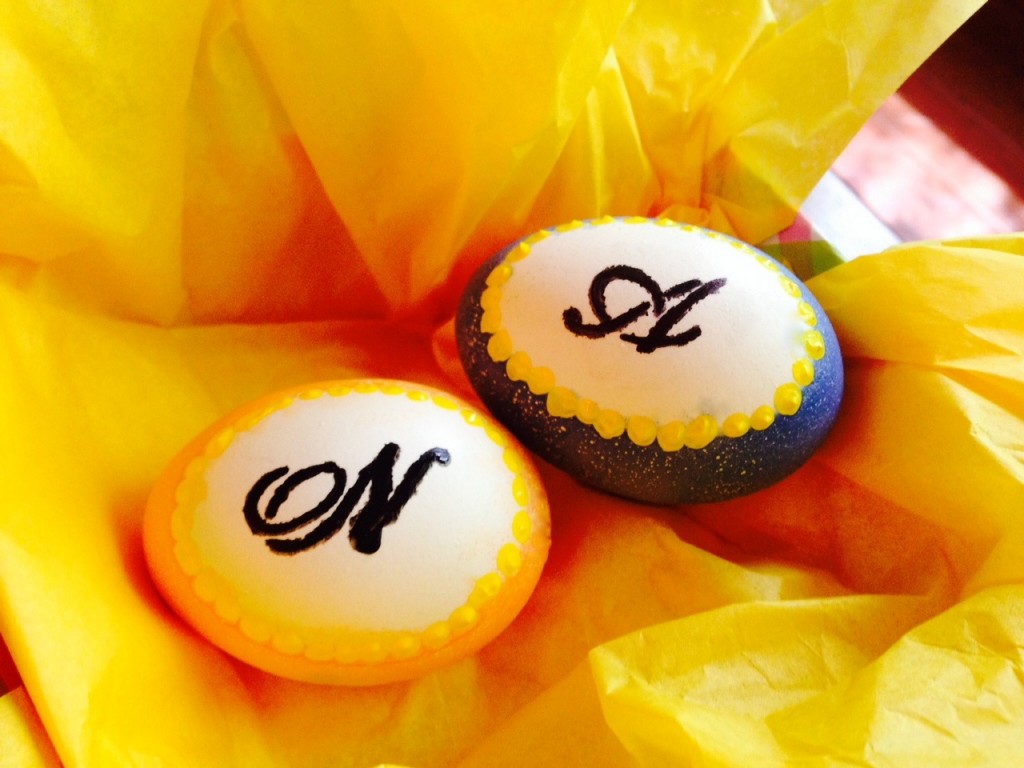
Initial Eggs

Initial Easter Eggs
Initial Easter Eggs

These make for cute placeholders for the Easter table, or for limiting how many each child gets during the Easter Egg Hunt (They look for their name or initial!).  This cute idea is from Reader’s Digest!

What You Need:

  • Hard Boiled Eggs
  • PAAS Egg Decorating Kit with dyes
  • Cups for mixing dyes
  • Acrylic Paint
  • Small Paintbrush
  • Black Sharpie

Instructions:

Mix up your egg dyes according to package, using the vivid instructions (includes using vinegar).

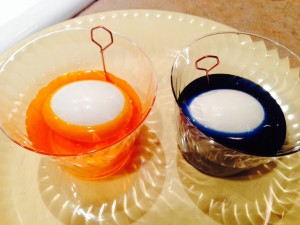
Place an egg sideways in a cup and gently pour the dye of choice until you have an oval of white showing (don’t cover the entire egg with dye-See photo below). Let egg sit, without disturbing, in dye until it reaches the desired color.  Remove egg from dye and allow to dry.

Image 8

Once dry, take acrylic paint and, using paintbrush, draw dots around the edge of the oval. Allow to dry.

Once dry, draw an initial or a name in center of oval, using the black sharpie. Allow to completely dry.


Washi Tape Eggs
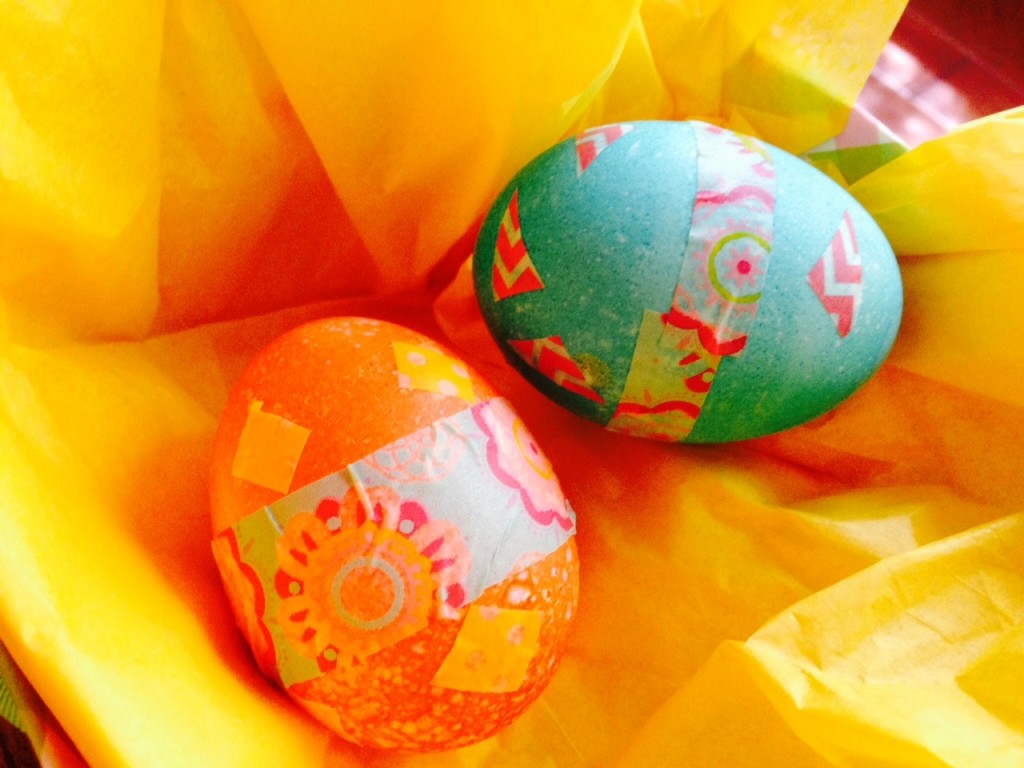
Washi Tape Eggs
Washi Tape Eggs

Washi tape is like a very pretty, decorative masking tape. And projects using it are all over Pinterest! It comes in a variety of colors and sizes. It works perfectly on dyed, hard boiled eggs or just plain, white hard boiled eggs! This is a simple way to get little kids involved with the egg decorating.

What You Need:

  • Hard Boiled Eggs (they can be dyed or not)
  • Washi Tape (available at any craft stores), choose a variety of patterns and sizes.

Instructions:

Just “go to town” and start decorating!

For small children – Cut small pieces of washi tape and put them out for little hands to decorate with!


“Bling” Eggs
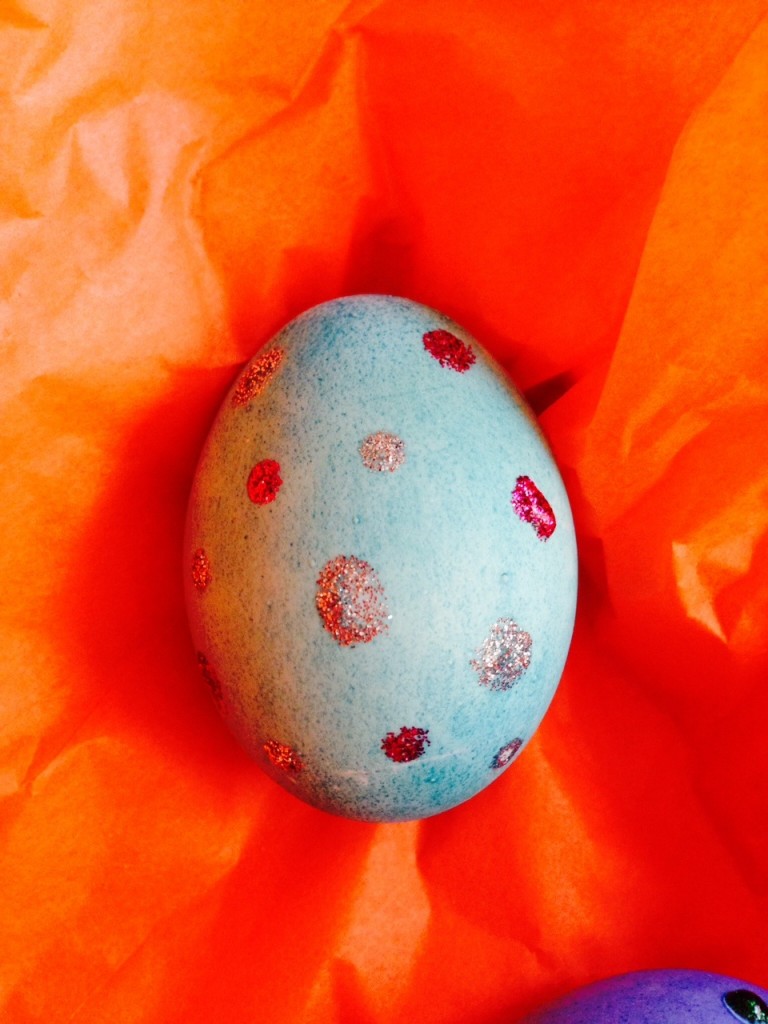
Image 22
Bling Eggs

Another simple way to decorate the eggs with little kids!

What You Need:

  • Hard Boiled Eggs (colored or plain white)
  • Crayola Washable Glitter Pens, variety of colors

 Instructions: 

Using the glitter pens, make dots of glitter all over the eggs. I did one side first, allowed to dry, then did the other side!


Happy Face Eggs
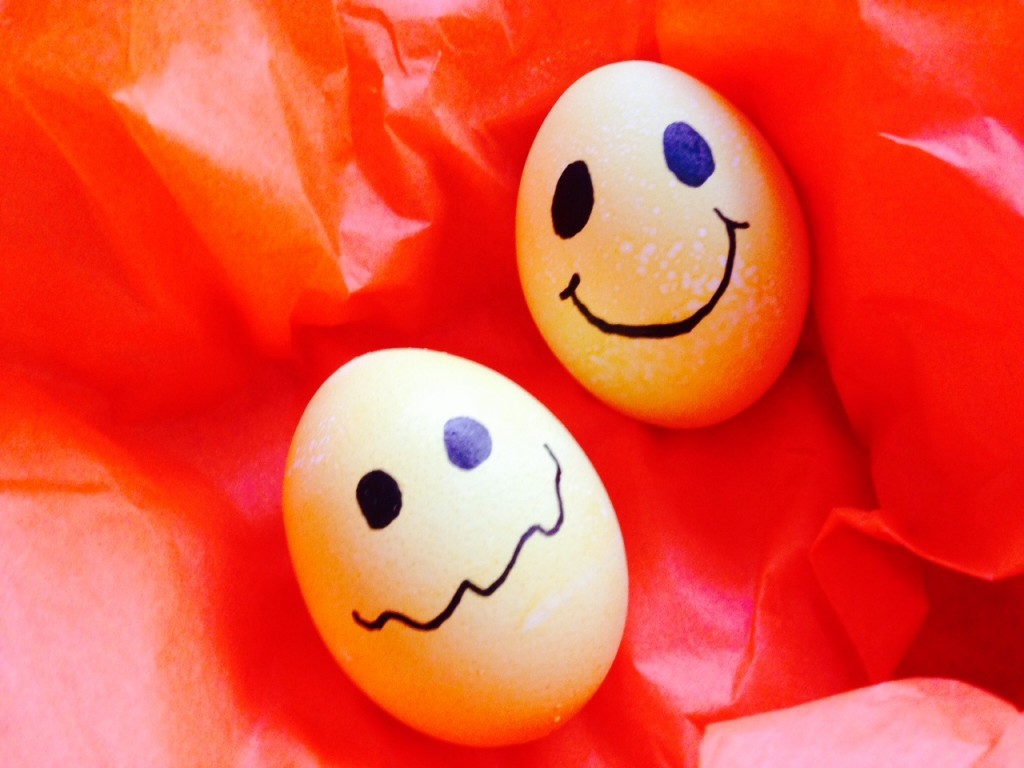
Image 20
Happy Face Eggs

This is my personal favorite because my mom and I love smiley faces, PLUS it is super simple to do!

What You Need:

  • Hard Boiled Eggs dyed yellow
  • Black Sharpie

Instructions:

Use the black sharpie to create whatever type of face YOU want! Tip –When drawing the eyes, make sure the eyes are on the narrow end of the egg, mouth near the lower half of egg.

Thanks WTLV-TV’s First Coast Living for this fun challenge!
Six Unique Easter Egg Decorations!


Spring Crafts Fun!

Spring Craft Ideas From SimpleSolutionsDiva.com.

With Easter and Passover fast approaching, we will have lots of family time – what can you do that’s fun with the kids and adults to keep everyone busy? Try some springtime crafts!

“Beach Glass” Vases

"Beach Glass" Vases from SimpleSolutionsDiva.com.
“Beach Glass” Vases from SimpleSolutionsDiva.com.

I love the look of beach glass. Muted hues of blues, greens and whites. You can make any glass item look like a piece of beach glass by just using special glass paint. I used Martha Stewart Crafts Frost Translucent Glass Paint — The effect is translucent, frost-like with a slight pebbly texture that resembles sea glass.  Beautiful and easy!

What You Need:

  • Martha Stewart Crafts Frost Translucent Glass Paint (Available at most craft stores) I used colors of beach glass green, sea lavender and white. (Click Here To See Product And Color Selection Available)
  • Sponge applicators – I like to use sponge applicators because they leave a nice, pebbly texture behind in the paint.
  • Glass vase or other glass items – Check out the selection at dollar stores (love these stores!). You can find some great pieces that can be painted!
  • Rubbing Alcohol/cotton balls
  • Small paper plates or other item to squeeze paint on to

Directions:

Find a clean, flat work surface and cover with old newspapers. Wipe down the glass vase surface to be painted with rubbing alcohol and allow it to dry.

Squeeze out a dab of glass paint onto paper plate. Using the sponge applicator, dip the applicator in the glass paint and dab the paint onto the glass surface. Cover the entire surface. Allow to dry for one hour.

The paint is permanent after it has dried for 21 days.  You can speed the process along by curing the paint by baking it. Here are the instructions from Martha Stewart Crafts: Let project air dry 1 hour, place in cool oven. Set temperature to 350 degrees. Once oven reaches 350 degrees, bake for 30 minutes (glass must heat gradually). After 30 minutes, turn oven off. Let glass cool completely in oven. Wait 72 hours before using. **

**NOTE: If you use the white frosted paint, baking the project might slightly darken the paint. Mine turned from a pretty white to a creamy, slightly toasted color.


Spring “Impressionist” Glass Painted Votives

Spring "Impressionist" Votives from SimpleSolutionsDiva.com.
Spring “Impressionist” Votives from SimpleSolutionsDiva.com.

Spring brings beautiful colors and softness to our landscape.  I always think of Monet paintings when I think of Spring.   I love the slightly unfocused visual and blended soft colors. THis little project makes me think of Impressionist paintings.   And best of all, with this project, you don’t have to be perfect! Just keep it simple!

What You Need:

  • Glass votives – Again, the dollar stores are a great source for these types of items!
  • Glass Paint – I used Folk Art Brand Multi Surface Acrylic Paints, because I can use the paints for many other projects in the future. I would use no more than 3 complimentary colors. (I chose 2 colors, plus white.) Click Here to see product and color selection.
  • Paper plate to squeeze paint on
  • Cup of Water
  • Paintbrush
  • Rubbing Alcohol/cotton balls

Directions:

Clean the inside of glass votive with rubbing alcohol and cotton balls. Alow them to dry.

There is no one method for this – just listen your inner artist!! The first one I did I was not thrilled with, but once I limited my colors to 2 colors plus white, I found the ideal combination for me!

My technique for 3 colors: Take your paintbrush and dip in the cup of water. Swirl brush into your 1st paint of choice and apply dabs to inside of the votive.  Clean the brush and repeat the “swirl and dab” process above with second color. Using the same process, finish with the white, using it to blend and swirl the other colors inside the votive. You will be really surprised when you are done how nice it looks! Just don’t use too many colors or it will start to get “muddied”.

Allow to dry 21 days or cure the glass using the same instructions under the Beach Glass Vases above.

Edible Robin’s Egg Nest

Edible Bird Nests from SimpleSolutionsDiva.com.

I love making food related crafts with the kids! They love getting messy and they enjoy “cleaning” (read licking) their fingers when done. These little bird nests are adorable and pretty yummy.  They are a twist on an old favorite I remember eating as a kid.

Ingredients:

  • 1 bag semi-sweet chocolate chips (12 oz.)
  • 1 bag butterscotch chips (11 oz)
  • 10 oz.  Crunchy Chow Mein Noodles
  • 1 bag of bird egg shaped candies of your choice (I used Whoppers malted milk balls in the shape of bird eggs, but M&M’s or jelly beans would work, too.)
  • Parchment paper or wax paper

Directions:

Combine and melt both bags of chips in a microwave safe bowl, on 50% power for 60 seconds. Stir. Repeat the process until all chips are melted. Gently stir in the chow mein noodles until well coated.

On a flat work surface, spread out parchment paper/wax paper. Using clean hands, take a small handful of the chocolate/chow mein mixture and put it in a shape of a small nest on the parchment paper. Repeat the process until you have used all the mixture.  Take 3 “eggs” (egg-shaped candies) and arrange on each nest. Let harden or place in fridge to speed up the hardening process.

Ladybug Garden Décor

Lady Bug Garden Decor from SimpleSolutionsDiva.com.

This is a cute little project kids of all ages will enjoy and it is very simple & inexpensive to do!!

What You Need:

  • Flat rocks of various sizes (I used river rocks I bought at the dollar store)
  • Assortment of acrylic paints, including black paint. I used Folk Art Multi Surface Acrylic paints.
  • “Wiggly” eyes for the ladybugs.
  • Glue
  • Clear Acrylic Sealing paint to seal the rocks once painted.
  • Paintbrush – I used a large one for the overall colors and a fine tipped one for the ladybug dots and wing line.

Directions:

Wash and dry the rocks to be used.

On a flat, protected work surface, lay your rocks out and paint them the overall colors you want. Allow to dry for about ½ hour.

Now for the details!  Taking the black color paint, paint the head of the ladybug. Draw a lie down the back of the lady bug using the black paint and the thin, small tipped brush. Add dots to the ladybug’s back. Allow to dry.  Apply Clear Acrylic Sealing paint to the ladybugs and allow to dry.

Add 2 small dots of glue to the ladybug head. Place a wiggly eye on each dot and allow to dry.

Place in the garden, indoor planters, display on desk or table. They also make adorable paperweights!

Easter Centerpiece

Image 2
Easter Centerpiece from SimpleSolutionsDiva.com.

This is a fun way to bring Easter to the table and let the kids get involved! I have seen it all over Pinterest and thought I needed to try making it – SUPER simple!

What You Need:

  • Two vases, one smaller that can fit into the larger vase, allowing for at least a ½ inch space between the two.
  • 1 bag of jellybeans
  • 1-2 packages of Peeps bunnies
  • Flowers of choice

Instructions:

Place smaller vase inside larger vase, making sure it is centered. Pour jelly beans into space between the two vases, making sure you make it as level as possible around the vase. Take Peep bunnies out of package and slide a row of them into the space between the two vases, letting them rest on the jellybeans.  Repeat the process until the bunnies go all the way around the vase.

Trim your flowers to fit the inside vase. Pour water into the inside vase and arrange flowers. Voila! You have a beautiful centerpiece the kids helped with!


Thank you to WTLV-TV’s First Coast Living for inviting me on to talk about these fun craft projects!

Simple Thanksgiving Craft Ideas

Thanksgiving is a time for family and friends to gather and be thankful for all they have. Simple Solutions Diva has a few simple ideas to add to the Thanksgiving festivities, keeping family and friends connected, and keeping the conversations going! Thanks to WTLV-TV/Channel 12’s First Coast Living for inviting me to share these ideas on air!

May you all have a wonderful Thanksgiving!

Father, we thank Thee for this food, for health and strength and all things good. May others all these blessings share, and hearts be grateful everywhere. — Traditional American Blessing, circa 1800’s

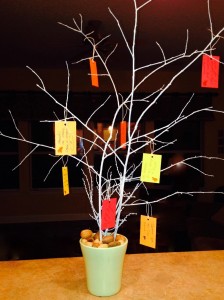
Thankful Tree

The Thankful Tree
The Thankful Tree

This project is very simple to make. You need the following items:

  • Heavy vase or clean, outdoor pot
  • Branches from trees in your own back yard, stripped of foliage and cut to the appropriate size for pot. You can paint the branches white or black, or you can leave them natural. I used white spray paint.
  • Styrofoam block or floral dry foam block.
  • Filler (I used nuts, but you could use fabric, autumn leaves, etc.)
  • Blank tags with ties. I made my own with construction paper, and hole punch and natural cord/string.
  • Pens

Place your pot on a flat surface. Place styrofoam or floral dry foam block inside pot; secure with tape if needed.

Insert branches into the foam block. Add filler material around the base of the branches to cover the foam block.

Place the Thankful Tree, tags and pens in a prominent place in your home and ask guests to write what they are thankful for and to tie it to the tree.

I found this thoughtful idea from Yesterfood.com – to see their beautiful post, click HERE.


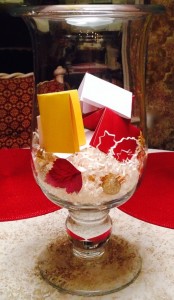
Thanksgiving Conversation Starter Centerpiece

Thanksgiving Conversation Centerpiece
Thanksgiving Conversation Starter Centerpiece

Keep the fun conversation going at the Thanksgiving table! For this project you can use many items from around your home. You will need:

  • Large glass vase or decorative glass bowl
  • Thanksgiving themed filler – you can use nuts, ornaments, ribbon, leaves, felt pumpkins. Basically whatever calls to you!
  • Small blank cards or squares of construction paper
  • Pens
  • Stickers or other decorative elements – optional

Assemble your filler of choice in the vase or bowl. Write conversation prompts on the small cards and fold them (or roll & tie them). Place the cards into the bowl. Place bowl on or near the Thanksgiving table. Reach for the the bowl whenever the mood or need arises! Make sure you have at least one prompt per person.

Stumped for prompt ideas? Try some of these:

What life advice would you give a younger person?

What is your favorite holiday memory?

What is your favorite Thanksgiving food?

What is your favorite part of Thanksgiving?

How is Thanksgiving different today from when you were a child?

When you were a child, what were the popular toys everyone wanted for Christmas?

I found this great idea on CraftyChica.com. Here is the original post!


Turkey Day Table Runner

Let your guests get creative during the Thanksgiving meal!  Let them discover their inner artist! And most importantly, keep them at the table by giving them something to do between courses!

You will need:

Brown or white plain wrapping paper or white butcher paper. I used postal wrapping paper because it is a little heavier than wrapping paper and there is no gloss to it. It is also significantly cheaper – $4.99 for 75 sq. ft of paper, versus $4.99 for 45 sq. ft. of wrapping paper.

Pens, crayons, markers (no bleed).

Thanksgiving themed stickers or other decorations

Run the wrapping paper down the center of your table. Add your major table elements, like your candles, centerpiece, salt & pepper – whatever you plan to place on the table for dinner.

Add a few decorative elements to your table runner, to let people know they can write on it. Add stickers or other decorations. Or even use it to write out place cards for your guests!

Place markers and or crayons in small cups along the table within easy reach of guests. Be sure to let them know they are free to doodle!


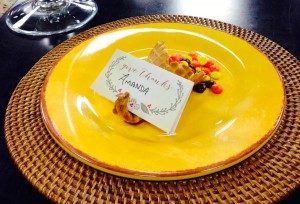
Cornucopia Place Card Holders

Cornucopia Place Card Holders

This is a perfect project to get your kids involved in, but be sure to have plenty of the candy filler around!

You will need:

  • Waffle cones
  • A bowl of water
  • A fat pen
  • Candy filler – you can use the Harvest mix candies (they are like candy corn, but veggie shapes), or you could use Reese’s Pieces (they are perfect harvest colors!), or even use a nut based trail mix.
  • Place cards (you can find a free place card printable at EleganceAndEnchantment.com.)

Take your waffle cone and soak the pointy end in the bowl of water for about 30 seconds (not too soaked – you don’t want it to get too mushy). Place cone in microwave for approximately 30 seconds, until the ends is just softened and pliable.

Remove cone from microwave and using the fat pen, flatten and curl the cone’s end up around the pen to create a cornucopia effect.

Fill cornucopia with candy or nut filler and lay at the place setting. Filler can spill out for effect, or you can wrap the open end in plastic wrap and secure with ribbon.

Lay the place card on the back end of the cornucopia.

This creative idea came from Squiddo.com.


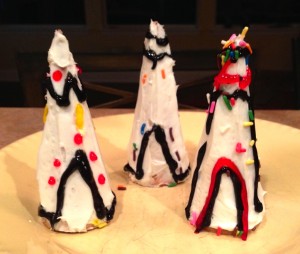
Sugar Cone Teepees

Sugar Cone Teepees
Sugar Cone Teepees

A simple little craft to entertain the kids while waiting for dinner!

You will need:

  • Sugar cones
  • White frosting
  • Black gel icing tube
  • Harvest color edible decorations – Reese’s Pieces, sprinkles, etc., placed in dishes
  • A flat, clean work surface safe for kids.

Smear white icing to cover the cones. Let the kids go to town decorating their teepees!


Boredom Busters: Kid-Friendly Summer Activity Ideas

I’M BORED! Those dreaded words that make any strong mother or father drop to their knees and scream, “What on earth can I do to keep them entertained?!” If this kind of describes you and your summer with the kids, then this topic is for you! I have pulled together some great summer entertainment ideas that will help keep your kids entertained (at least for a little while!).

I have included credit and links to websites where I found some of these ideas. I encourage you to visit the sites – they are wonderful and worth the visit!


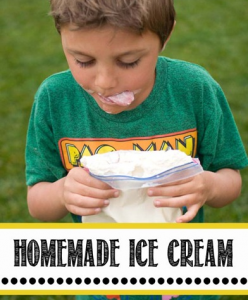
Photo Credit: OverTheBigMoon.com
Photo Credit:
OverTheBigMoon.com

Homemade Ice Cream in a Baggie! My girls did this yummy project in elementary school, and it is a surefire winner in entertaining the kids! This project is great for older and younger children alike (even us moms and dads!). Recipe credit goes to OverTheBigMoon.com– Adorable website with great craft ideas and more!

Ingredients:

  • Half and Half
  • Sugar
  • Vanilla
  • gallon Ziploc baggies
  • quart Ziploc baggies
  • Ice
  • Rock salt

For each serving you need 1 cup of  half and half, 2 Tbsp. sugar, and 1/2 tsp. vanilla. Pour ingredients into a quart bag and seal. (Blogger did about 3/4 cup half and half and 1/4  cup whipping cream. She said, “the whipping cream made it really smooth and creamy. Do not use all whipping cream though because it kind of whips up and doesn’t freeze as well.”)

Fill a gallon Ziploc bag a little less than half way up with ice and then add 1/2 cup rock salt and the quart baggie with the ice cream ingredients. Then shake it! It takes about 5 minutes to get it a really thick consistency. (Best of all, the kids will be exhausted by the time it reaches the right consistancy!) Once is it done, you can add chopped fresh fruit to make it a little extra special.

When everyone has enjoyed their treats, ask the kids how they think it became frozen. Challenge them to research the answer online. A teachable moment!


Screen Shot 2013-06-11 at 8.20.26 AM
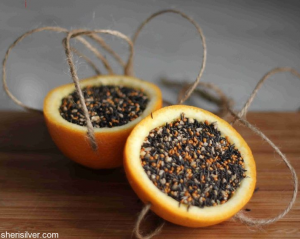
Photo Credit:SheriSilver.com

Crafty Orange Bird Feeders. Most kids are naturally drawn to any project that helps animals.  And the reward of creating a bird feeder that attracts beautiful, colorful birds into your yard is a real treat, plus it demonstrates the immediate benefit of the project. This idea comes from SheriSilver.com, a website full of crafty ideas!

Materials:
orange
(4) pieces of twine, yarn or string, cut into 24? lengths
bird seed

With a sharp knife, cut the orange in half – scoop out the flesh. Pierce 4 small holes on opposite sides, about 1/2? from the top edge of each half . Thread one piece of twine through a hole, and out the opposite end. Repeat with the second piece of twine in the remaining holes (you’ll have an “X”). Gather the ends together and tie in a knot. Repeat with the other half. Fill with bird seed and hang from sturdy branches outside.

Photo Credit: wallcoo.com

Family and Friend Dog Show! Gather together the sociable dogs of family and friends, a few props (you can use chairs, skateboard ramps or the slide in the backyard), and lots of treats, and you have the makings of a great dog show!

Let the kids take the dogs into the backyard and have them “train” the dogs to run an obstacle course, perform tricks, or just sit and look cute. The kids get to be creative with their pups, and the dogs get some much loved attention!


Vine Movie MakerThe Mini Movie Challenge! Encourage those budding movie directors with the Mini-Movie Challenge Using Vine. Vine is an application for your iPhone, iTouch, or iPad, that allows you to create short (6 seconds), looping videos.  I watched my teenager and her friend spend over an hour creating their perfect movie – it had drama, humor, and a murder mystery all in 6 seconds.  Best of all, you can share the movies with family and friends!

For the younger “directors”, you might want to give them a theme to start from.  For the older kids, let them do it freestyle, and just step back and let the creativity flow!

For a Challenge – Try a challenge like the international, 48 Hour Film Project: Break them up into teams. All teams must incorporate the same prop and the same phrase into their movie.  You’ll be surprised how different each film will be!


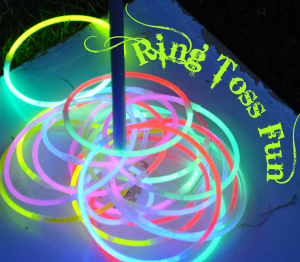
Photo Credit: MommaDidIt.blogspot.com

NightTime Ring Toss: This simple and inexpensive idea is sure to keep the kids entertained in the evening hours.  Two glow-in-the-dark bracelets, attached together with the connectors (included in packages) and reinforced with tape, make perfect rings for ring toss! Place two wooden poles approximately 10 feet apart, and you have a simple ring toss pit! To make things a little easier, paint the wooden poles with glow-in-the-dark paint.

You can find packages of glow-in-the-dark bracelets CHEAP at places like Hobby Lobby, The Dollar Store, Target, Oriental Trading Company. (15 bracelets/$1.00)

Check out MommaDidIt.Blogspot.com to see this idea, plus many more great, nighttime activities!!

For more great summertime activities, I recommend checking out a few Pinterest Boards:

Summer Ideas For Kids: Terrific ideas to keep the kids entertained throughout the summer! Compiled by Lisa from OverTheBigMoon.com.

Summer Board: Cool summer ideas for decorating, food, games, and more, compiled by Megan Mathis.

Summer Lovin’ Board – A Round up of activities, recipes, style, and decorating ideas compiled by SimpleSolutionsDiva.com.

1 2

© 2015 SIMPLESOLUTIONSDIVA.COM Designed by The Web Design Chic | ADMIN LOGIN