Admit it – you’ve probably had a “senior moment” and done this before! Forgotten to use a restaurant coupon, when you went to the restaurant specifically to use the coupon! Check out this simple tip to remember next time!
And don’t worry about that “senior moment” – you can blame it on the fantastic company and conversation at dinner!
What I loved about this project is I used items I had hanging around the house, so there was no expense involved in the project!
There’s just something about the romance of “bleeding” candles really screams Halloween!
Ghoulish Halloween Candles from SimpleSolutionsDiva.com
What You Need:
White candle of choice – I used used pillar candles that I was about to get rid of, but you can use brand new candles as well.
Red candle – Make sure the candle you use is NOT a dripless candle! I used red tea lights I had hanging around (I had a bunch left over from Christmas).
Directions:
Place white candle in or on candle holder of choice. Light the red candle, and very gently drip the hot wax down the sides of the white candle until it looks ghoulish enough to your liking! That is it!
So simple, yet so creepy!
Bleeding, Ghoulish Halloween Candles from SImpleSolutionsDiva.com.
Note/Disclaimer:
As with any project that involves a flame, keep lit candles in a safe place, away from potential fire hazards.
Do not leave home with candles lit – you don’t want to come back from trick or treating and find your house in flames!
Supervise children if they are doing this project. Hot wax and flames can be harmful to children, their clothes, their hair and eyebrows! (Take it from someone who lost an eyebrow as a kid!)
Domestic Violence. It is in the news this week and it is making me sick to my stomach. The violent actions of an athlete are only exacerbated by the inactions (or under actions) of the National Football League. This is not just a football problem – it is a disturbing pattern in our society to blame the victim, rather than punish the perpetrator.
From what I understand, so many victims feel there is no way out of their situation. They do not know where to turn, whom to trust, and do not see a way to safely exit the relationship.
I could go on a huge rant right now, but I want to be positive. So rather than just pontificate about the unfairness of this situation, I am putting forth a challenge to all my friends in the Blogosphere:
Bloggers: I Challenge You To Share The National Domestic Violence Hotline Contact Information- 800.799.7233 http://www.thehotline.org
All you ladies and gentlemen who have blogs that are focused on women, are for women, or just are read mostly by women, step up and help domestic violence victims by letting them know they are not alone! Share a post on your website with the contact information for the National Domestic Violence Hotline. Let your readership know you support people to get help if they are victims of domestic violence. Share any and all of these photos that I’ve created below. Then challenge YOUR blogger friends to do the same!
You may help save a life.
Seek Help For Domestic Violence: The National Domestic Violence Hotline: 800.799.7233 http://www.thehotline.org.
I love fresh cherries! This little video shows you the simple way to pit a cherry without having to buy a cherry pitter! Enjoy! And go make a fresh cherry pie!
I love guacamole, and my favorite is from the restaurant, Cantina Laredo. They make it table side for you and adjust the seasonings to fit your taste. Here is a pretty close version of their recipe – Many people don’t care for the taste of cilantro, so feel free to adjust this recipe based on your likes!
Fresh Guacamole
Ingredients:
2 Haas avocado (review my tips in video above to find the perfectly ripe avocado)
1 plum tomato, chopped
1/4 cup of a small purple onion, chopped very fine
1/2 fresh jalapeno pepper (I use 1/4 or even less). If you don’t want to deal with chopping a jalepeno pepper, use canned, pre-chopped version – about 1/2 to one whole teaspoon.
2 T. fresh Lime juice (I recommend fresh lime juice over packaged lime juice. Some things are worth the work!)
1/4 teaspoon salt (I tend to not use salt, but I do when working with avocados and eggs!)
1/4 teaspoon pepper
2 T. fresh cilantro chopped (Omit if you don’t like the flavor!)
1/4 teaspoon garlic powder
Preparation:
Combine fresh lime juice, salt, pepper, garlic powder in a bowl and mix. In a separate, small bowl, scoop out avocado flesh and mash with a fork.
Add avocado, jalapeno, tomato, onion, and cilantro to lime juice mixture. Serve immediately with tortilla chips, or save using the method in my video above.
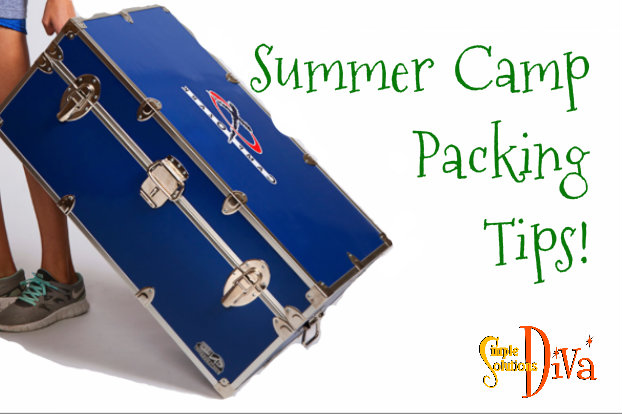
Rain putting a damper on your kids’ summertime fun? Simple Solutions Diva has some fun and active ways to keep kids entertained! Try one of these themes to keep them busy!
Anyone who says sunshine brings happiness has never danced in the rain. ~Author Unknown
Game Day Fun:
Indoor Scavenger Hunt – A little preparation ahead of time will make this something easy to pull together when you need it! This is a great way for the kids to have fun and maybe even work together to solve some clues! Think of “Eye Spy” in your own home. Being as creative as you can (maybe even do a poem), describe an item in the house the kids have to find. Once they find the item, the next clue will be there. Make them run up and down stairs, climb under beds, etc. Each clue answer brings them to the next clue. The kids can work together as a team or as individuals to solve the clues. Make the prizes at the end enjoyable for both you and the kids – homemade cookies, trips to the bowling alley, or other appealing activities!
Can of Sardines – This game of hide and seek has you finding the person who is “It”, but instead of announcing you found them, you cram into the same space with them and wait. The last person to find them is the next “sardine”!
Broom-Hilda, Created by Russell Myers.
Broomhilda The Witch – Broomhilda The Witch is a game I used to play with friends MANY years ago (I will not divulge exactly how many!). The play area should be a circle of some sort, maybe around a table or big space cleared in a family room. The person who is “It” (the Broomhilda) is blindfolded and given a broom to hold upside down. The others quietly hide in spaces within the circle/play area. The lights are dimmed and “Broomhilda” begins her slow and careful march, banging the broom handle on the ground with each step, letting the others know she is coming. “Broomhilda” can say anything to make the others giggle, giving up their hiding place. If she finds you, you are out. If you are the first one to be found, you are the next “Broomhilda”.
Mini Marshmallow Popping Contest – Plastic cups, mini marshmallows, scissors and balloons are the simple items you need for this project/game. Cut off the bottom of the plastic cup with the scissors. Take a balloon and tie off the balloon. Using scissors, cut off the top of the balloon and attach the part of the balloon with the knot onto the open bottom of the cup. Make sure it fits tightly onto the cup, bringing the knot almost flush with the bottom of cup. Repeat the process for as many players as you have.
Take a mini marshmallow and place in the bottom of the cup, fitting it into the knotted part of balloon. Pull the balloon down and “pop” the marshmallow out of the cup. The person who can shoot the marshmallow the farthest is the winner.
The way I see it, if you want the rainbow, you gotta put up with the rain. — Dolly Parton
Camp Out in The Family Room:
This theme is always my go to favorite!
Make Microwave S’mores – So simple and easy! Assemble your s’mores fixings (graham cracker, chocolate piece, marshmallow, and another graham cracker on top!) on a microwave-safe plate and microwave until the marshmallow gets big. Keep a close watch on them — 15-30 seconds, depending on your microwave.
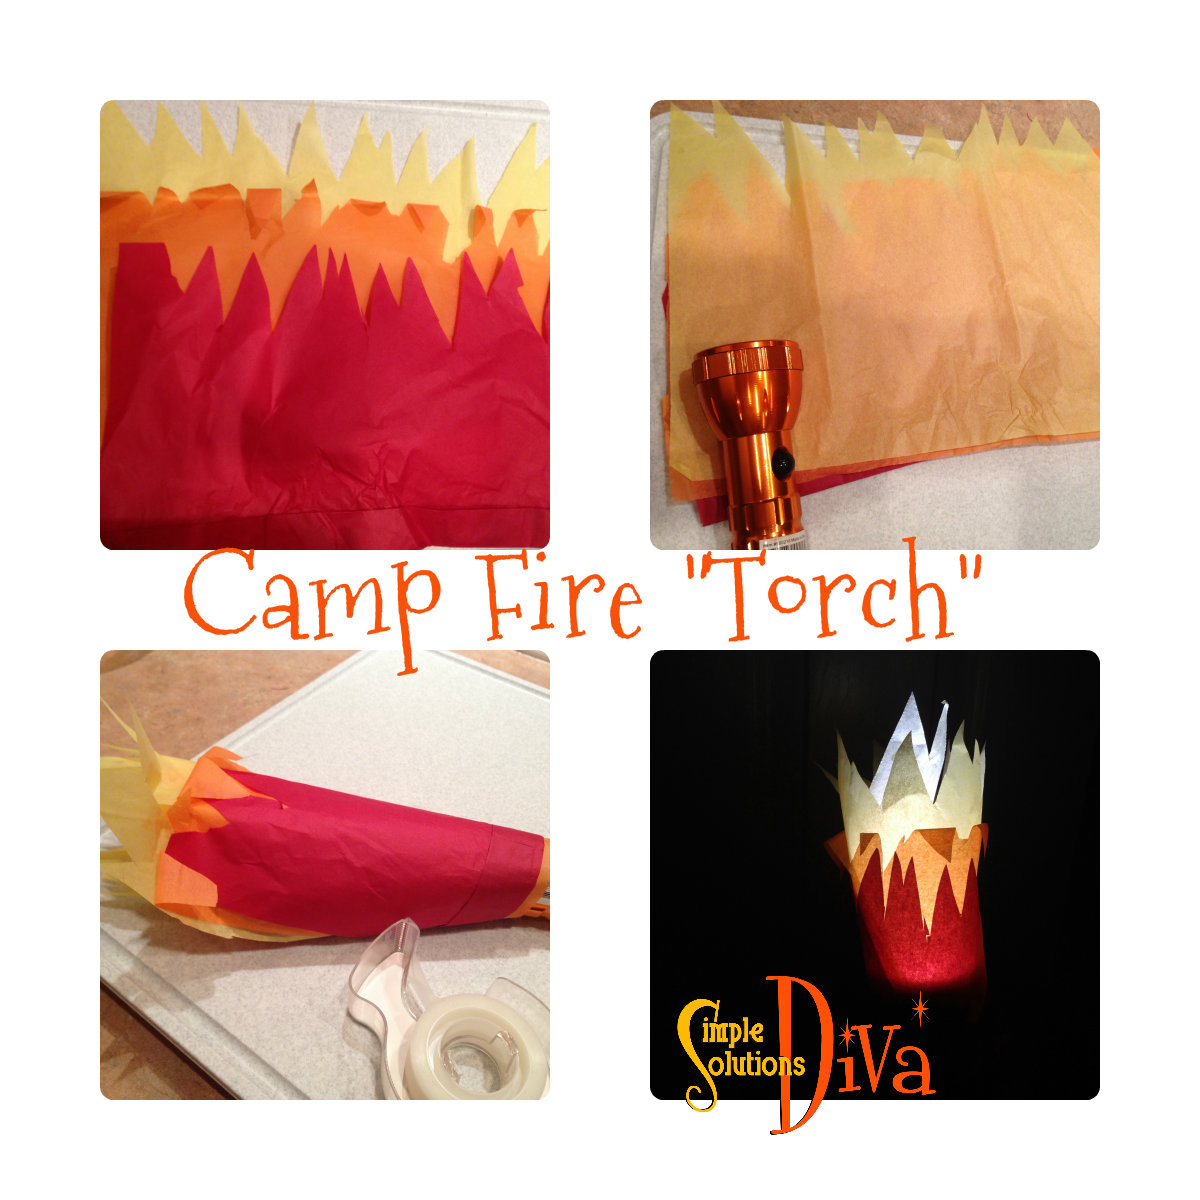
Make An indoor “Camp Fire” -Use yellow, orange and red tissue paper to create a “torch” using a flashlight. Perfect to use in those tents you make with blankets and chairs!
Communications Fun – Make 2 tents and have the kids make a communications system using the old idea of two cans (or cups) with a string between them!
Tea Party:
The Table – Set a beautiful Tea Party Table on a table or maybe even on a blanket. Consider using the china – great time to teach the kids to be gentle with things!
The Guests – Have kids create a character they will be. This is a great way for kids house their imagination. Have them create that character’s silly back ground. Have the kids:
Speak in funny accents.
Dress up in mom and dad clothes.
The Food – Serve tea sandwiches (any sandwich that has the crust cut off and is cut into four small, triangular pieces can be a tea sandwich) and tea (or favorite beverage).
Baking Day:
My personal feeling:Anytime you can make real, homemade baked goods (from scratch) with the kids helping will be a special time. With so many boxed dessert products out there, it is nice to show your kids what real homemade cookies taste like!
– Bake Homemade Chocolate Chip Cookies or brownies
– Use some of the cookies (or brownies) to make Ice Cream Sandwiches, then roll the edges in different toppings.
Ice Cream Sandwiches from SimpleSolutionsDiva.com.
Want A Few More Ideas?
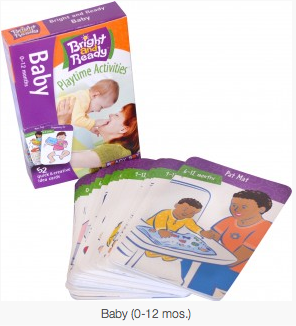
Bright And Ready: If you need some simple ideas on what to do with the kids (without having to spend a lot of money), check out the Activity and Learning Decks from Bright and Ready. They have terrific and creative ideas to encourage your child to learn and grow! They have a variety of activity decks for babies, on up to 9 years old.
Thank you to WTLV-TV’s First Coast Living for inviting me on to speak about these fun activities!
I am always looking for simple ways to do things in the kitchen, hopefully saving time and energy! These simple kitchen hacks are just a few of my favorites for the summer:
Don’t Lose Hot Dogs In The Grill: For perfectly grilled hot dogs that don’t curl, use 2 wooden skewers, soaked in water so they don’t burn, and thread hot dogs between two skewers. Grill the hot dogs, then turn them over by using the skewers.
Banish The Fruit Flies: Summer time equals fresh fruit – which also means fruit flies in the house! Ugh! This is my favorite way to get rid of the flies easily! Click here to see my video, Get Rid Of Pesky Fruit Flies!
The Perfect Sliced Onion: Perfect slices of onion for hamburgers or other recipes are easier if you use a vegetable peeler to get perfectly thin slices of onion!
Grilled Cut Veggies: For perfect sliced veggies for the grill, like zucchini, squash, or potatoes, use an apple slicer to slice them!
Got A Recipe That Calls For Lots Of Tomatoes (or grapes)? Slice cherry tomatoes or grapes in large quantities by using this tip – place the tomatoes between two dishes; using a sharp serrated knife, slice through the tomatoes. Voila! And, I just happen to have a link to one of my favorite summertime appetizers using grape tomatoes – Caroline’s Tomato Feta Dip
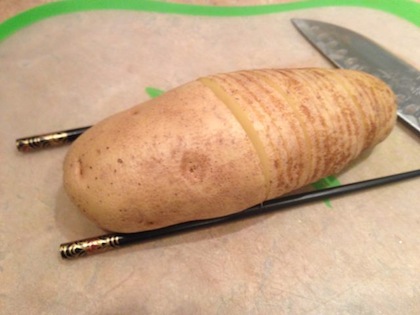
Easy Way to Slice Zucchini or Potatoes Hasselback Style –
Hasselback Potatoes
Hasselback potatoes (or zucchini) are a great way to serve stuffed potatoes, but sometimes it is hard to keep from slicing all the way through the potato! If you place chopsticks on either side of the potato and then slice, the chopsticks prevent you from completely cutting through the potato! Like this:
Easy Way To Cut Hasselback Potatoes
Keep Your Iced Coffee Strong, Not Watery – Extra coffee in the coffee pot? Pour leftover coffee into ice cube trays and freeze. Perfect way to make the iced coffee without watering it down!
Keep Wine Chilled In Your Glass – Add frozen grapes to your wine glass to keep your wine chilled, without watering it down!
Thank you to WTLV-TV’s First Coast Living for inviting me on the show to share these simple summertime kitchen hacks!
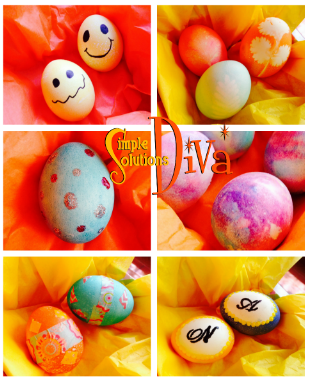
I was so excited when First Coast Living gave me a challenge – find some unique ways to decorate Easter Eggs! Well, after searching high and low, I found some favorites and tested them just for you!
Volcano Eggs
Volcano Eggs
This is a cool technique and great fun to do with the kids! And it yields a beautiful egg coloring. The best part about this technique? It looks like a volcano bubbling a rainbow! I found this technique on the website ToddlerApproved.com. Check out the website for great ideas!
What You Need:
Hard boiled eggs
Food coloring
Baking soda
Vinegar
Wide-lipped plate or bowl
Paint Brushes
Color-safe cups for mixing “paint”
Technique:
Make the “Paint” – Combine in a color- safe cup, one tablespoon baking soda, a teaspoon or two of water and food coloring of choice. Mix until it is a consistency of mustard – kind of grainy but with some heft to it.
Repeat that process with the other colors you choose to use.
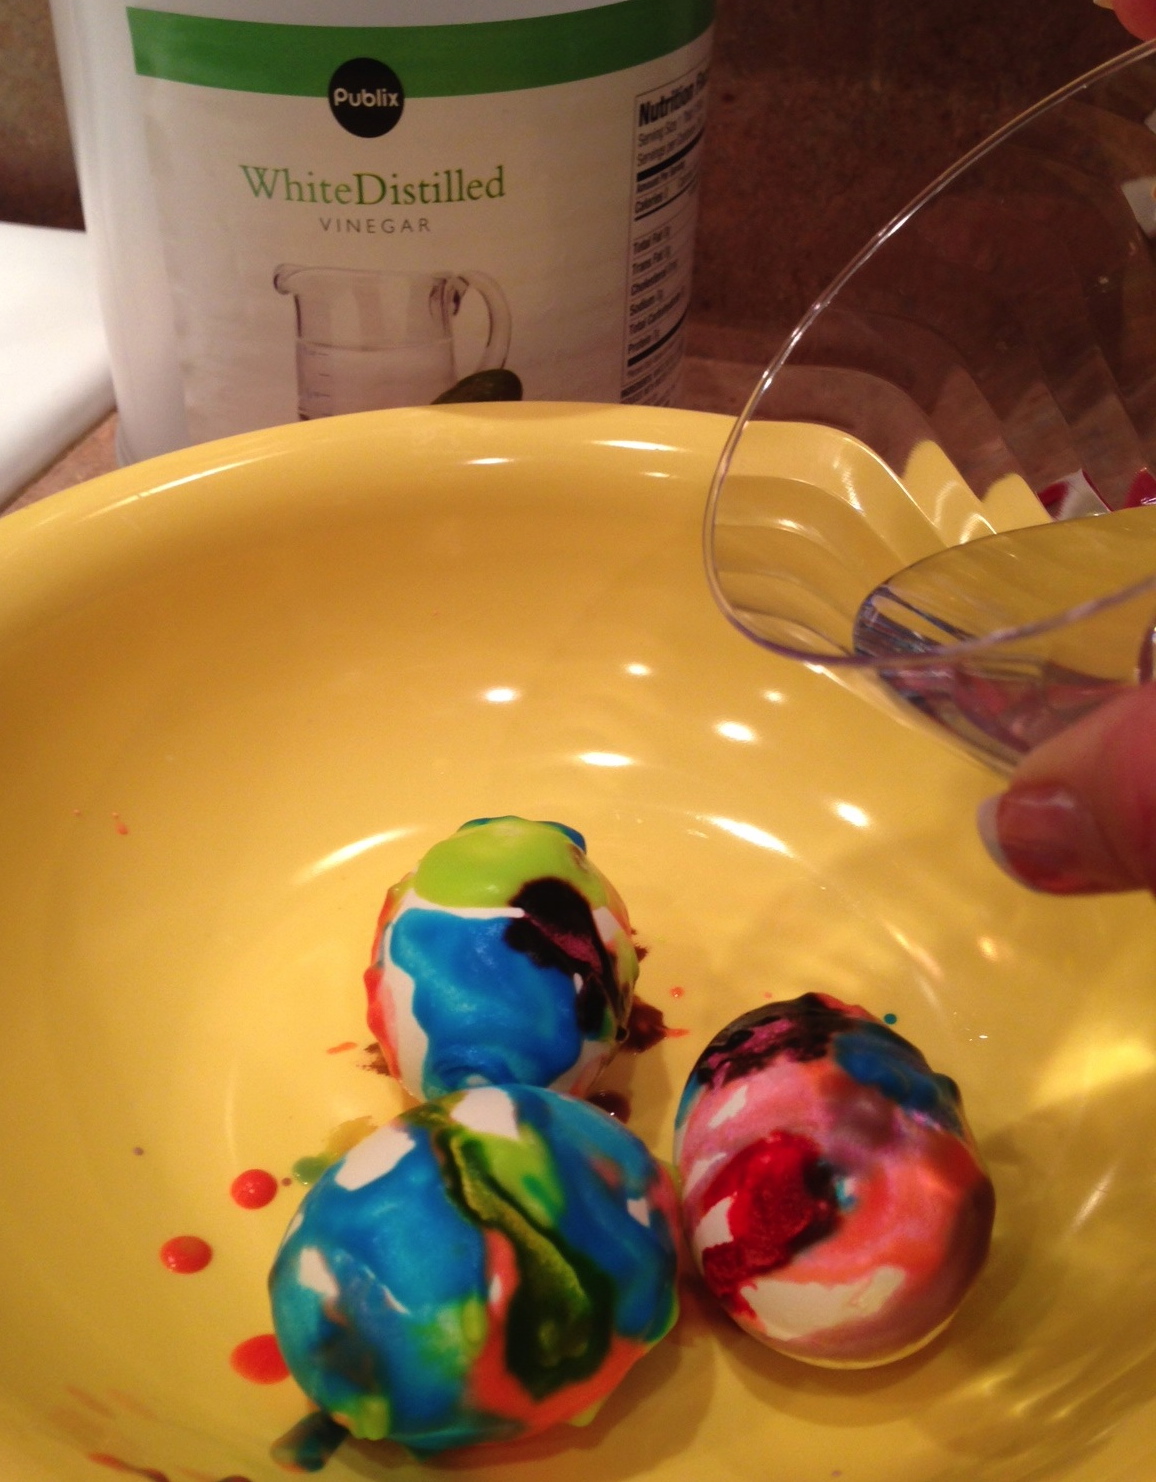
Take a paintbrush and start to paint your eggs with the different “paint” colors – there is no perfect way to do this, just have fun and be creative. Make sure to leave a “blob” or two of the paint on the egg.
Pouring Vinegar on Volcano Eggs.
Place the painted eggs into the wide-lipped plate or bowl. Take your food coloring and drip a drop or two on your eggs.
Now comes the volcano part: Drizzle vinegar over your eggs and watch the colors start to bubble! Let the mixture sit on the eggs for awhile, then wipe off with paper towel!
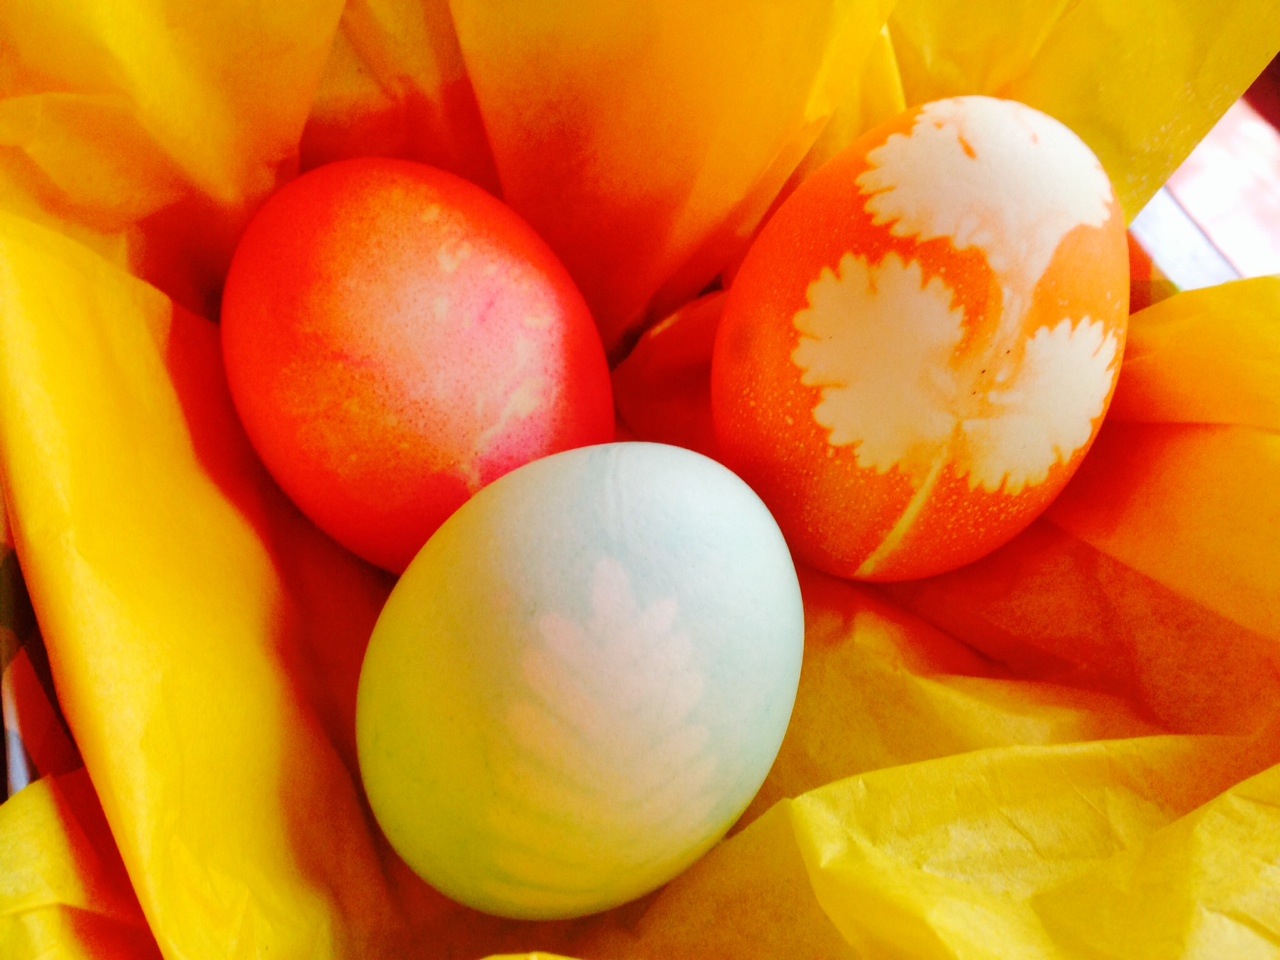
Leaf Print Eggs
Leaf Print Easter Eggs
I love incorporating natural elements into projects if I can. I found this beautiful idea, Leaf Print Eggs, on Spoonful.com and thought I’d give it a try! Since I AM the Simple Solutions Diva, I wanted to simplify the process, so I just used the PAAS Egg Decorating Kit to dye the eggs, rather than mix up my own dyes as listed on Spoonful (click on the link above to see their full instructions!).
What You Need:
Hard Boiled Eggs
PAAS Egg Decorating Kit
Various leaves with interesting shapes – I used Cilantro, a fern and a small squash leaf. (Don’t recommend “woody” types like rosemary)
Cups to mix up the dyes
Rubber bands
Sheer knee high hosiery (nylons), cut into 3 inch strips
Color-safe place to dry the eggs
Instructions:
Mix up your dyes according to the PAAS package, using the instructions for more vivid colors (using vinegar).
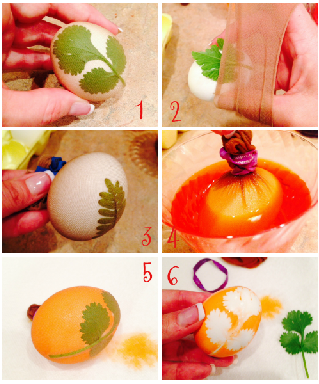
1.) Take the egg and position your leaf on your egg. 2.) Using the piece of knee high, wrap your egg so the leaf is secure and tight against the egg. 3.) Pull the excess nylon tight on the opposite side of the egg, securing with a rubber band.
4.) Place the egg in the dye and allow to sit until the egg has reached the color intensity you want.
5.) Remove the egg from the dye and place on color safe surface. 6.) Remove rubber band and nylon and gently remove the leaf from the egg. Allow to dry.
Initial Eggs
Initial Easter Eggs
These make for cute placeholders for the Easter table, or for limiting how many each child gets during the Easter Egg Hunt (They look for their name or initial!). This cute idea is from Reader’s Digest!
What You Need:
Hard Boiled Eggs
PAAS Egg Decorating Kit with dyes
Cups for mixing dyes
Acrylic Paint
Small Paintbrush
Black Sharpie
Instructions:
Mix up your egg dyes according to package, using the vivid instructions (includes using vinegar).
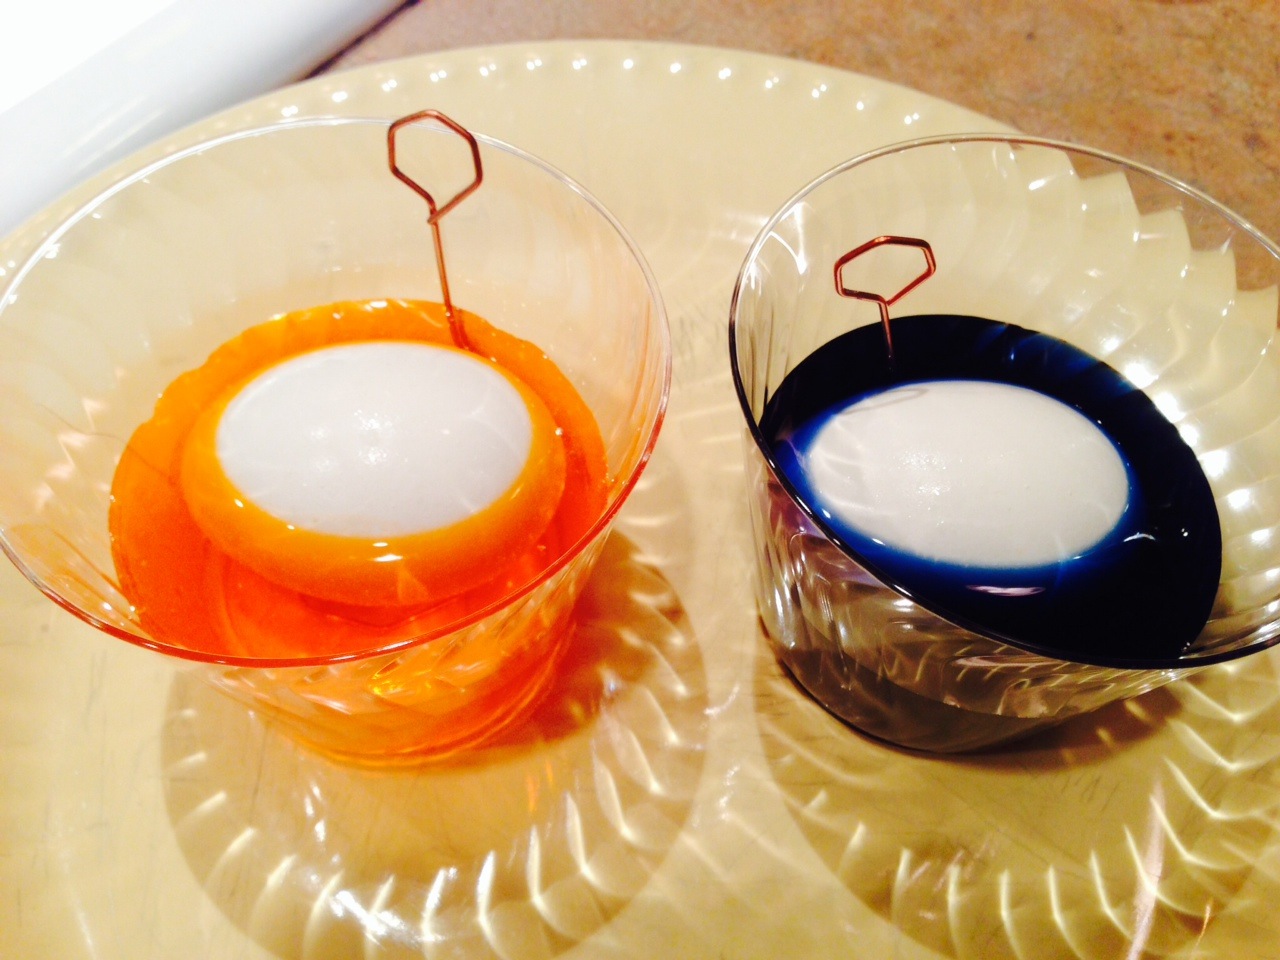
Place an egg sideways in a cup and gently pour the dye of choice until you have an oval of white showing (don’t cover the entire egg with dye-See photo below). Let egg sit, without disturbing, in dye until it reaches the desired color. Remove egg from dye and allow to dry.
Once dry, take acrylic paint and, using paintbrush, draw dots around the edge of the oval. Allow to dry.
Once dry, draw an initial or a name in center of oval, using the black sharpie. Allow to completely dry.
Washi Tape Eggs
Washi Tape Eggs
Washi tape is like a very pretty, decorative masking tape. And projects using it are all over Pinterest! It comes in a variety of colors and sizes. It works perfectly on dyed, hard boiled eggs or just plain, white hard boiled eggs! This is a simple way to get little kids involved with the egg decorating.
What You Need:
Hard Boiled Eggs (they can be dyed or not)
Washi Tape (available at any craft stores), choose a variety of patterns and sizes.
Instructions:
Just “go to town” and start decorating!
For small children – Cut small pieces of washi tape and put them out for little hands to decorate with!
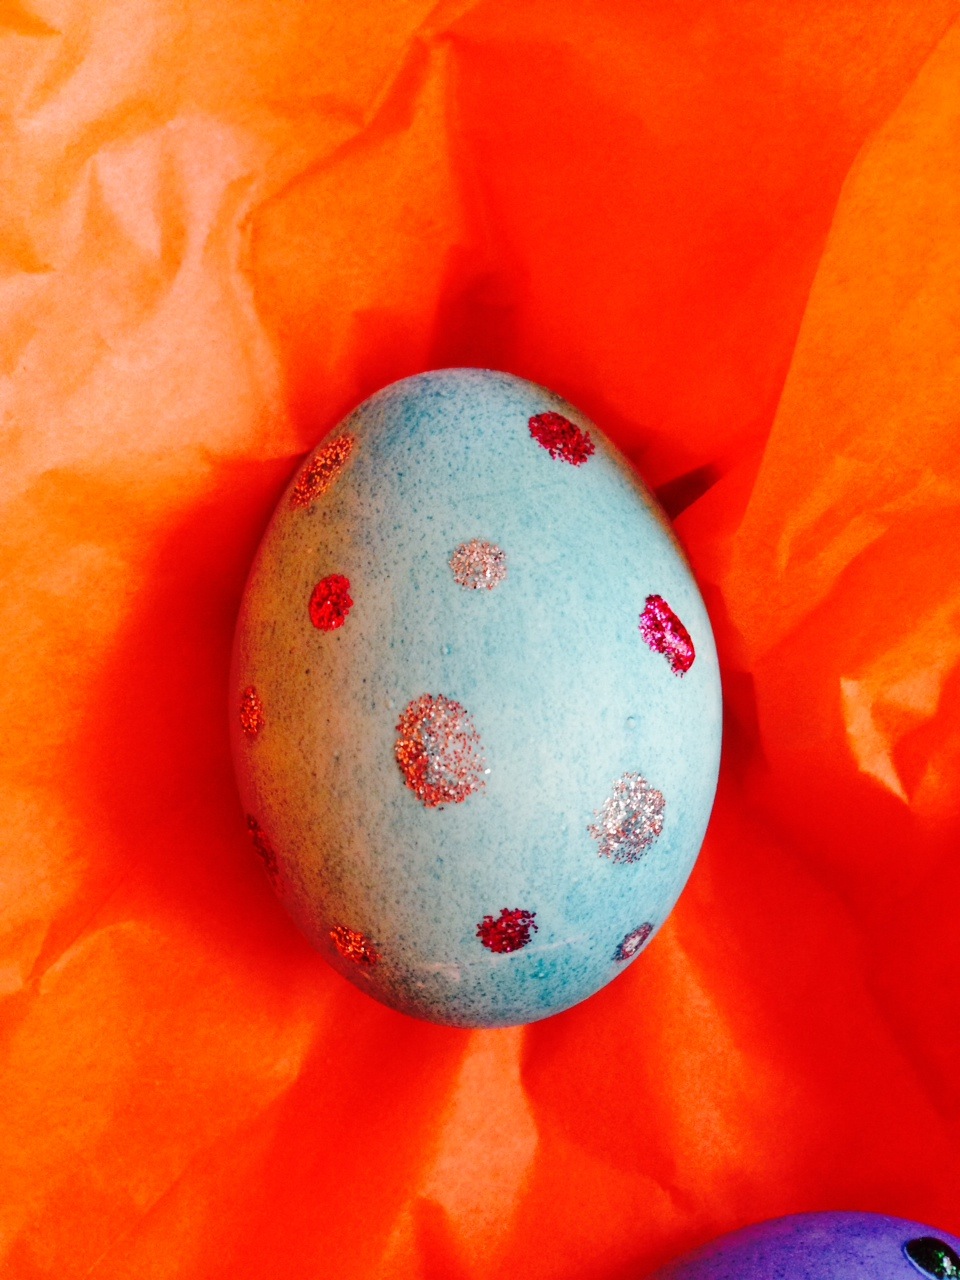
“Bling” Eggs
Bling Eggs
Another simple way to decorate the eggs with little kids!
What You Need:
Hard Boiled Eggs (colored or plain white)
Crayola Washable Glitter Pens, variety of colors
Instructions:
Using the glitter pens, make dots of glitter all over the eggs. I did one side first, allowed to dry, then did the other side!
Happy Face Eggs
Happy Face Eggs
This is my personal favorite because my mom and I love smiley faces, PLUS it is super simple to do!
What You Need:
Hard Boiled Eggs dyed yellow
Black Sharpie
Instructions:
Use the black sharpie to create whatever type of face YOU want! Tip –When drawing the eyes, make sure the eyes are on the narrow end of the egg, mouth near the lower half of egg.
Thanks WTLV-TV’s First Coast Living for this fun challenge!