SimpleSolutionsDiva.com

Recipes

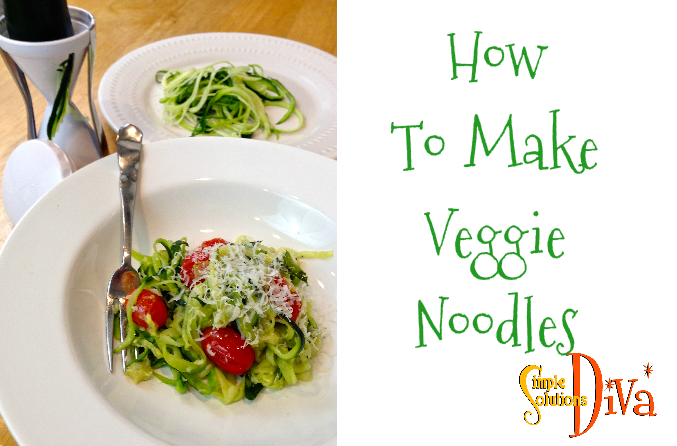
How To Make Veggie Noodles


Veggie NoodlesVegetable Noodles are all the rage right now! Search “Vegetable Noodle Recipes” on Pinterest and you will find hundreds of recipes! (And click here to see them all!)  But is there a simple way to MAKE them? YES!

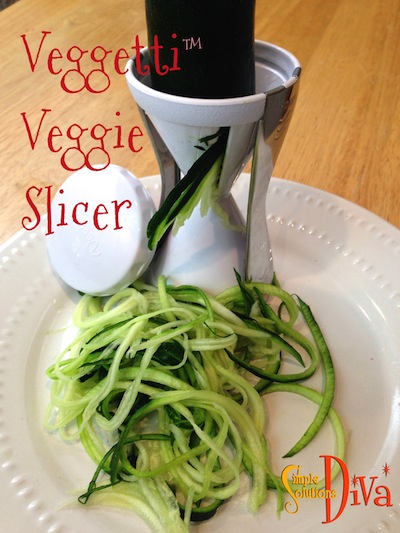
By using a specific product made to create those lovely noodles! There are many out there, some expensive, some inexpensive. I am using the Veggetti™ (I got mine at Bed, Bath & Beyond). You can find it here if you are having trouble finding one –Veggetti Spiral Vegetable Slicer, Makes Veggie Pasta

Veggetti Slicer

Now that you have these noodles, what do you do with them? Make all kinds of wonderful dishes! I found one recipe I loved on WhatsGabyCooking.com. Be sure to check out her website!

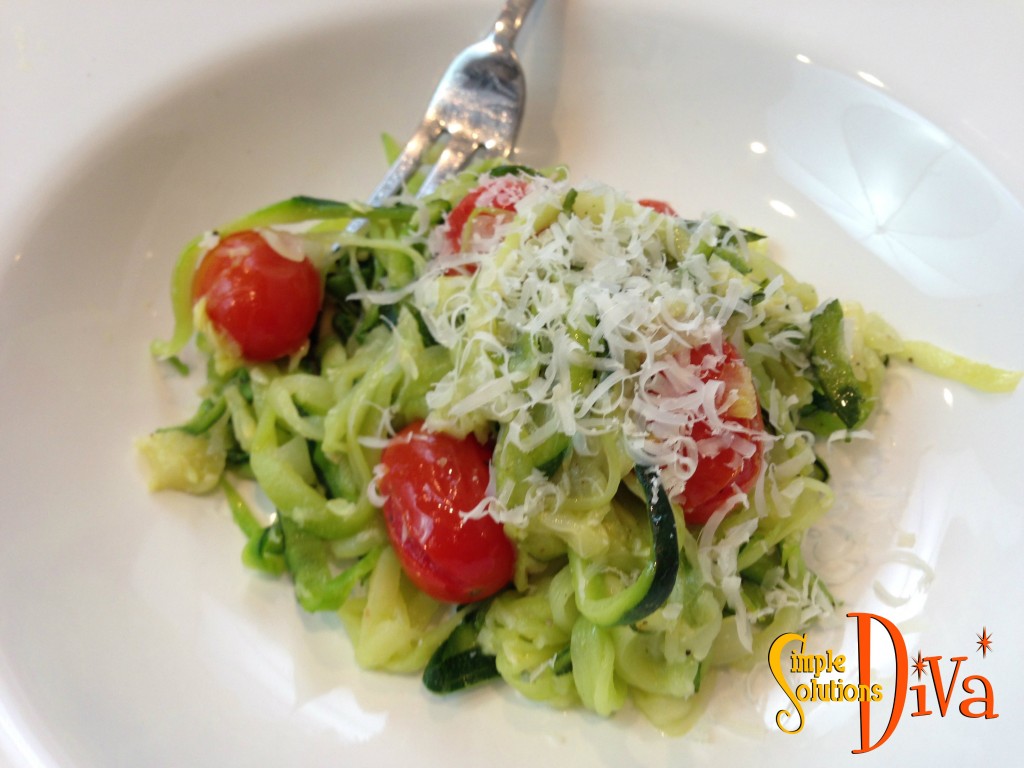
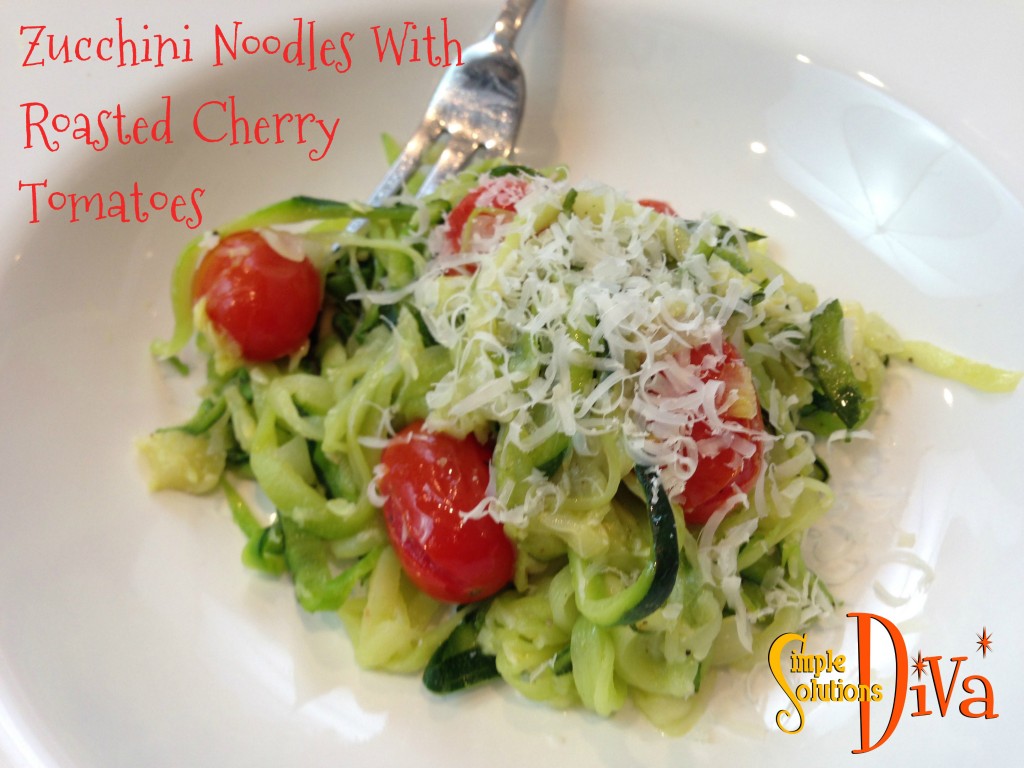
Zucchini Noodles With Roasted Tomatoes

Zuch Noodles 2

Ingredients:

  • 1 cup cherry tomatoes
  • 4 tablespoons olive oil, divided
  • 4 large zucchini
  • 1 yellow onion, thinly sliced
  • 4 cloves garlic, roughly chopped
  • kosher salt and freshly cracked black pepper to taste
  • grated pecorino cheese to serve (I used fresh parmesan!)

Directions:

Preheat the oven to 400 degrees F.

Distribute the cherry tomatoes evenly on a baking sheet. Drizzle with 2 tablespoons of olive oil and season with salt and pepper. Transfer the baking sheet into the oven and roast for 10-15 minutes until the cherry tomatoes just start to burst. Remove the baking sheet and set aside. (PS – I could eat these like they are candy!)

Using a mandolin or spiralizer (I used the Veggetti™), cut the zucchini into thin strips.

Heat a large nonstick skillet over medium heat. When hot add 2 tablespoons of the olive oil, onions and garlic and cook until fragrant, about 1 to 2 minutes.

Add the zucchini noodles to the onion and garlic mixture and sauté for 1-2 minutes. Add the cherry tomatoes to the zucchini noodles and season with salt and pepper. Toss to combine.

Dust the top of the noodles with pecorino cheese and serve.

Zuch Noodles 1

Simple Recipe: Creamy Mashed Cauliflower

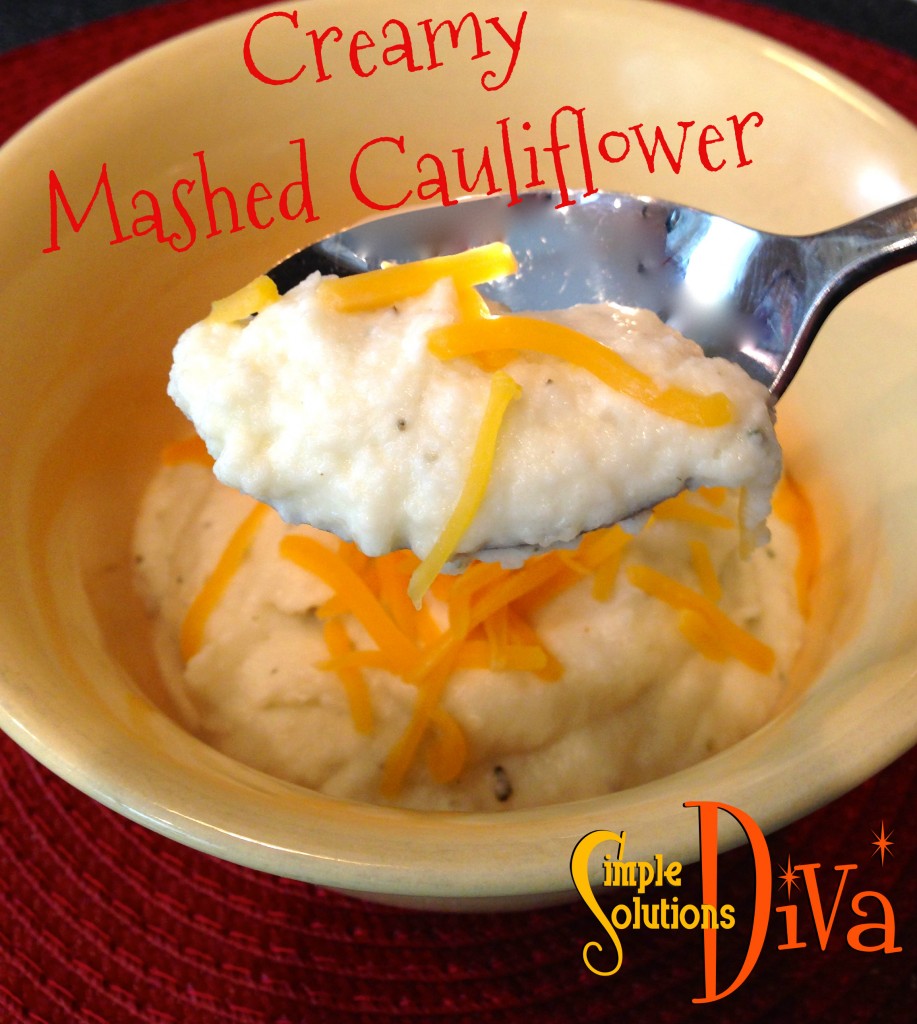
This was my first time to make mashed cauliflower, and from what I gather, I was pretty lucky to find one that had the consistency of real mashed potatoes! This recipe makes wonderfully thick and creamy mashed cauliflower – so similar to mashed potatoes because they are the perfect consistency!

Creamy Mashed Cauliflower, from SimpleSolutionsDiva.com

Ingredients:

  • 1 Medium Cauliflower, chopped into small florets
  • 4 oz. Cream Cheese
  • 3 Tablespoons Butter
  • 1 teaspoon Garlic Powder plus 1 teaspoon Salt
  • 1 teaspoon Italian Seasoning

Preparation:

Bring a pot of water to a boil – once boiling, add the cauliflower florets and cook for 10 minutes (until you can poke a fork into the cauliflower easily).

Drain the cauliflower.

Place the cooked cauliflower into a blender or food processor. Add the remaining ingredients. Cover and blend/process until all ingredients are thoroughly mixed and there are no lumps.

Turn out into serving dish and top with shredded cheddar cheese, if you like!

I slightly adapted this recipe from one I found on TheTaylor-House.com – be sure to check them out! Great recipes, craft ideas, travel ideas and more!


Back-To-School Lunch Ideas!

School gets going and sometimes it is hard to come up with fun lunches the kids will like. Check out some of these ideas from Simple Solutions Diva:

BTS Lunch ideas

Chicken Soft Tacos – Let the kids assemble their own soft chicken taco for lunch! Place all their favorite ingredients in small, separate, plastic containers. Things like guacamole or avocado slices, shredded cheese, salsa, and leftover shredded chicken work great — they can wrap it up in a whole wheat soft tortillas and feel like they are the chef!

Sandwich Sushi – Sometimes it is not about the sandwich, but the presentation! The night before, take your favorite filling – PBJ, chicken salad, turkey and cheese – and layer it in whole wheat soft tortilla. Tightly roll the tortilla up and seal in plastic wrap. In the morning, unwrap the plastic and slice the sandwich into pinwheels. Place in a plastic container like sushi rolls and include wooden chopsticks.

Shake It Up Layered Salad – Layer/assemble a salad in a mason jar or tall plastic container. Be sure to place the dressing at the bottom of the container first, to avoid wilting the salad greens. Also, you want to leave a little room at the top so when there is room to shake things up (and disperse the ingredients!  This is also great for adults!

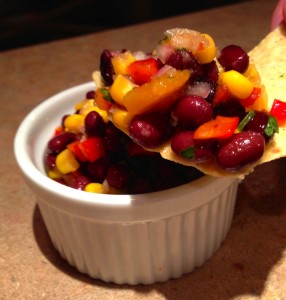
Lunch Dip Day – Assemble a simple tapas-style lunch – a little bit of everything! For protein, use things like single serve hummus, sliced chicken, black bean, corn and red pepper salsa, avocado or guacamole, yogurt dip. Assemble dippers/scoopers like whole wheat or bean tortilla chips, baby carrots, red pepper slices in a separate container. They can much away at a little bit of everything!

If you want a GREAT Black Bean, Corn and Red Pepper Salsa, check out my recipe here!

Black Bean, Corn & Red Pepper Salsa, From SimpleSolutionsDiva.com.


Now we have these great ideas for lunch, but how do your kids lay everything out to assemble? On a dirty school lunch table? Nope! I like creating a disposable placemat out of parchment paper or wax paper. A small sheet will do!

Now, my kids are older, and they really don’t like taking a lunch box to school – they go old school with a paper bag lunch. But I get worried about things getting too warm. So, I started freezing their small water bottle (or you could freeze a juice box) to use as a freezer pack that is melted by the time they sit down to eat. 

Another great lunch idea, if your kids like soup or chili, is to send them to school with a small thermos that will keep their soup or chili hot.

How to Take Lunch To School (or work!)

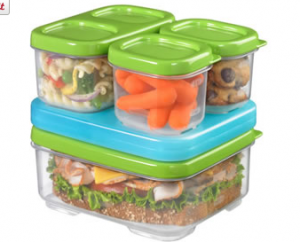
Rubbermaid Lunch Blox Sandwich Kit

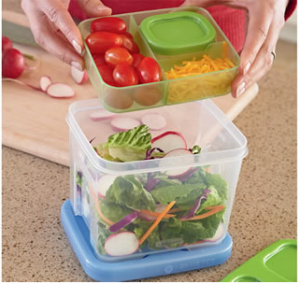
Lunch Blox by Rubbermaid – These are a cool way to carry salads & sandwiches to school or work. They come in a variety of sizes, but I really thought the Sandwich Kit and the Salad Kit were unique – they come with a freezer pack that fits between the components to keep everything cold!

You can find Lunch Blox on the Rubbermaid site (Click Here), or you can also look at Target, Pulbix or other grocery stores.


Rubbermaid Lunch Blox Salad Kit


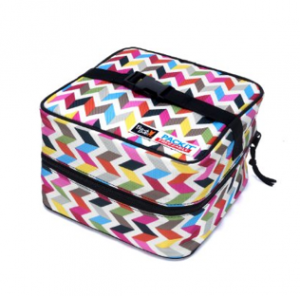
French Bull Packit Salad Cooler – I thought this was so neat! The entire bag freezes to keep salad cool up to 6 hours! They have a variety of sizes (sandwich, entree, and more!), but I snagged the salad bag! (And it can hold the Rubbermaid Lunch Blox salad kit!)

Screenshot 2014-08-19 17.39.56
French Bull Packit Freezable Lunch Bag

You can find it on Amazon.com – Click Here: PackIt Freezable Salad Cooler Bag with Zip Closure, Ziggy

Thank you to First Coast Living (WTLV-TV/NBC 12) for inviting me on to speak about Back-To-School!


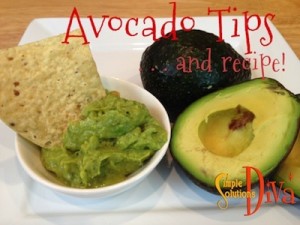
Simple Tip & Recipe: Avocado Tips and Guacamole Recipe

I love guacamole, and my favorite is from the restaurant, Cantina Laredo. They make it table side for you and adjust the seasonings to fit your taste. Here is a pretty close version of their recipe – Many people don’t care for the taste of cilantro, so feel free to adjust this recipe based on your likes!

Fresh Guacamole

Ingredients:
  • 2 Haas avocado (review my tips in video above to find the perfectly ripe avocado)
  • 1 plum tomato, chopped
  • 1/4 cup of a small purple onion, chopped very fine
  • 1/2 fresh jalapeno pepper (I use 1/4 or even less). If you don’t want to deal with chopping a jalepeno pepper, use canned, pre-chopped version – about 1/2 to one whole teaspoon.
  • 2 T. fresh Lime juice (I recommend fresh lime juice over packaged lime juice. Some things are worth the work!)
  • 1/4 teaspoon salt (I tend to not use salt, but I do when working with avocados and eggs!)
  • 1/4 teaspoon pepper
  • 2 T. fresh cilantro chopped (Omit if you don’t like the flavor!)
  • 1/4 teaspoon garlic powder
Preparation:
Combine fresh lime juice, salt, pepper, garlic powder in a bowl and mix.  In a separate, small bowl, scoop out avocado flesh and mash with a fork.  
 
Add avocado, jalapeno, tomato, onion, and cilantro to lime juice mixture.  Serve immediately with tortilla chips, or save using the method in my video above.

SSD Avocado


Simple Recipe: Hasselback Potatoes Two Ways

Hasselback Potatoes Two Ways

Ingredients:

  • 2 potatoes, washed and scrubbed clean of dirt
  • 2-3 Tablespoons olive oil
  • 1 stick of butter, sliced into small squares/pads
  • Cheese of Choice – Version 1: Sharp cheddar cheese, Version 2: Boursin Garlic and Herb Cheese
  • Salt and Pepper to taste

Preparation:

Preheat the oven to 400 degrees.

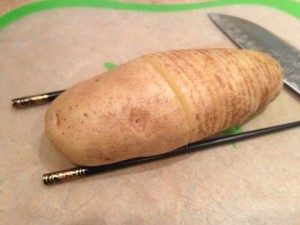
Placing potato on a clean work surface, make slices in the potato without cutting all the way through (like an accordion). To make it easier, place a chopstick on either side of the potato while cutting to keep the knife from cutting all the way through, like this:

Easy Way To Cut Hasselback Potatoes

Slice the entire potato.  Alternating between the slices, place a small pad of butter into the slice, then in the next slice, alternate with your cheese of choice. Do this until the potato is completely stuffed with cheese and butter (no one said this was low calorie!). The potato will be somewhat arched.

Drizzle the potato with a little olive oil and sprinkle on salt and pepper to taste.

Repeat the process with the other potato. When completed, place the potatoes on a baking sheet (cover the sheet with tin foil to protect it), doing your best to make them stand up (like a delicious tasting little rainbow!).

Place in the oven and bake for 45 minutes, or until the cheese is melted and the inside of the potato is cooked (it will be somewhat firm but not hard). Be sure to check on the Boursin cheese potato a little sooner than the cheddar cheese – mine burned a little (but still tasted AWESOME!).

One large potato can easily satisfy two people (as a side dish).

Hasselback Potatoes
Hasselback Potatoes from SimpleSolutionsDiva.com

A Simple Summer Treat For Your Dog


During the summer, we all want a nice, frosty treat to cool us off — including our dogs! So here is a simple recipe for homemade Frosty Paws for your pup! They will love it!

Homemade Frosty “Faux” Paws Treats For Dogs

Ingredients:

  • 16 oz. container of plain greek yogurt
  • 1 banana, peeled
  • 1 Tablespoon peanut butter
  • 1-2 tablespoons of honey

Preparation:

Place all ingredients into a blend and blend until creamy and mixed thoroughly. Using cooking spray, spray the inside of a cupcake tin. FYI – I used mini-cupcake tins because my dog is small; feel free to use the larger cupcake tins if your dog is on the bigger size!

Pour the mixture into the cupcake tin and freeze until hardened (approximately 4 hours). Pop the “Frosty Faux Paws” out of the tin and place in a freezer bag; return to freezer until ready to use!


"Can I have a treat NOW, Mom?!"
“Can I have a treat NOW, Mom?!”

Simple Summer Treat: Frosty Popsicles

Popsicles are a perfect treat for summertime! Try making these yummy and healthy treats (at least most are healthy!) for your family – they may never want to visit the ice cream truck again!

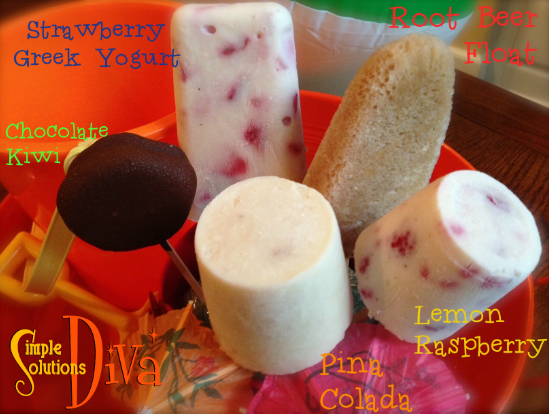
A variety of homemade & healthy popsicles from SimpleSolutionsDiva.com!

Frozen Chocolate Covered Kiwi Pops

A perfect blend of chocolate and kiwi. These are so simple to make, you will want to make them for yourself and your kids all the time! And you don’t have to feel guilty eating them.

Ingredients:

  • Kiwi slices, peeled and sliced at least ¼ inch thick.
  • Baker’s Dipping Chocolate (Any flavor will do, but I used milk chocolate flavor)
  • Popsicle sticks (You can get these from any crafts store and at some dollar stores)

Preparation:

Insert one popsicle stick into each kiwi slice. Take parchment paper and cover a baking sheet. Place kiwi slices with stick onto parchment paper and freeze. (Approximately 2-4 hours)

Just before you take the kiwi out of freezer, heat the Baker’s Dipping Chocolate according to the package. Take kiwi out of freezer and dip each into the chocolate and place back onto parchment paper. When finished dipping all the kiwi slices, place back into freezer for an hour or feel free to eat it right away!


Strawberry Greek Yogurt Popsicles

Greek yogurt is packed full of protein and low in fat. These treats have awesome flavor AND are filling!

Ingredients:

  • One 16 oz. container of vanilla greek yogurt. (I used Chobani)
  • ½ cup milk
  • 1/3 cup chopped strawberries
  • ½ teaspoon vanilla
  • popsicle sticks and molds

Preparation:

In a bowl, combine all the ingredients together, gently stirring in the strawberries. Pour into popsicle molds, insert popsicle sticks and freeze for approximately 4 hours. When removing pops from the mold, either leave out for 5 minutes prior to trying to remove OR run bottom of the molds under hot water for up to one minute.

Makes approximately 5 popsicles.

Pinã Colada Popsicles

These are like the frosty cocktail on a stick, but hold the rum! A creamy treat – and so simple to do!

Ingredients:

  • 1 can light coconut milk
  • 1 small can crushed pineapple, with juice
  • 1 ripe banana
  • 1 teaspoon vanilla
  • ¼ cup shredded, sweetened coconut (optional)
  • popsicle sticks and molds

Preparation:

Combine all ingredients in a blender and blend until smooth! Pour into pop molds and insert popsicle sticks. Freeze for approximately 4 hours. Makes approximately 6 popsicles.

Lemon Yogurt & Raspberry Popsicles

Another simple recipe – I love the combo of lemon and raspberries! I use greek yogurt, but feel free to use regular yogurt in this recipe for a sweeter flavor.

Ingredients:

  • 2 small (5 oz. each) containers of lemon-flavored greek yogurt (or use regular lemon-flavored yogurt)
  • ½ cup vanilla-flavored almond milk (or use regular milk)
  • 1 Tablespoon honey (optional)
  • ½ cup ripe raspberries
  • popsicle sticks and molds

Preparation:

In a bowl combine all ingredients – feel free to lightly crush some of the raspberries! It just adds to the beauty and flavor of the popsicle! Pour into pop molds and insert popsicle sticks. Freeze for approximately 4 hours. Makes approximately 4 popsicles.

Root Beer Float Popsicles

The old-fashioned, summertime tradition, but frozen on a stick!

Ingredients:

  • One bottle of A&W Root Beer (or other favorite root beer!)
  • Small container of vanilla bean ice cream
  • popsicle sticks and molds

Preparation:

You want to open the root beer and allow it time to turn somewhat flat. (Approximately 20-30 minutes in the fridge.) If you don’t the molds will overflow when in the freezer!

Place popsicle mold onto a flat baking sheet. Pour the slightly flat root beer into the molds, until molds are ½ full. Place a small scoop of ice cream into the mold. Gently pour more root beer on top of the ice cream. It will foam up – scrape away excess foam as best you can. Insert popsicle sticks and freeze for approximately 4 hours. FYI – They may over flow due to bubbles! Makes approximately 4 popsicles.

Thank you to WTLV-TV’s First Coast Living for having me on!

NOTE: If you don’t have popsicle molds, you can use paper cups as molds. You will still need popsicle sticks.

Simple & Scrumptious Strawberry Scones

I love scones, especially ones filled with flavor and fruit! But all the recipes I have found are filled with tons of butter (yummy, but fattening!) and are a lot of work! I found this great recipe from JoyTheBaker.com  (actually, thank you to my friend Lisa who sent it to me with high recommendation!) and fell in love with this easy recipe! You can easily adapt this recipe by substituting raspberries or blueberries, or even chopped, dried cranberries and finish with an orange glaze! YUM!


Scrumptious Strawberry Cream Scones

Simple & Scrumptious Strawberry Scones

Ingredients:

  • 3 cups all-purpose flour
  • 1 tablespoon baking powder
  • 1 teaspoon salt
  • 1/3 cup granulated sugar
  • 1 teaspoon pure vanilla extract
  • 1 1/3 to 1 1/2 cups heavy cream plus more for brushing the top
  • 3/4 cup coarsely chopped fresh strawberries
  • 1/3 cup chopped white chocolate (optional- I did not use these in mine)
  • turbinado sugar for topping

Preparation:

Preheat oven to 425 degrees. Line a baking sheet with parchment paper.

In a medium sized bowl, whisk together the flour, baking powder, salt and sugar.

In a liquid measuring cup, combine the 1 1/3 cup cream and vanilla. Drizzle the cream mixture over the flour mixture, mixing as you go. Add strawberries (and chips if desired) and toss mixture to combine. Add up to 2 tablespoons of cream to the mixture to create a moist, but not sticky, dough.

Turn out the dough onto a clean, floured work surface and roll out to approximately 3/4″ thickness.

Using a small round cookie cutter or biscuit cutter (I improvised by using a small metal ramekin!), flour the cutter and cut small disks of dough. Place on the parchment-lined baking sheet. Brush the tops with cream and sprinkle with turbinado sugar.

Bake for 12-14 minutes, until golden brown and cooked through. Serve warm!

Be sure to check out JoyTheBaker.com – her photos are beautiful and her recipes are great!

Five Flavorful Homemade Spice Blends

I love using spices when I cook, and I especially love the convenience of pre-packaged spice blends!  But when I began looking at the salt content and additives in the packets, I thought there has got to be a better way! So here are five, very flavorful spice blends that will save you on salt and additives. Simple, flavorful and awesome!

Note: All spice blends will stay fresh in air-tight containers for up to 6 months.

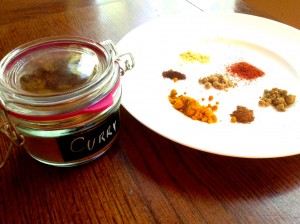
Homemade Curry Powder Recipe:

Homemade Curry Blend from SimpleSolutionsDiva.com.

Ingredients:

  • 1/2 cup Paprika
  • 1/4 cup Cumin
  • 1 tablespoon Fennel Powder
  • 2 tablespoons Ground Mustard Powder
  • 1 tablespoon ground Red Pepper Flakes – more or less to taste adds spiciness
  • 3 tablespoons ground Coriander
  • 1/4 cup ground Turmeric root
  • 1 teaspoon Cinnamon Powder
  • 1/2 teaspoon Cloves Powder – Adds complex flavor

Preparation:

Combine all ingredients into an air-tight jar and shake!


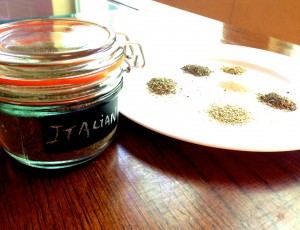
Homemade Italian Seasoning

Homemade Italian Seasoning, from SimpleSolutionsDiva.com.

Ingredients:

  • 1/2 cup Basil leaf
  • 1/2 cup Marjoram Leaf
  • 1/2 cup Oregano leaf
  • 1/4 cup cut and sifted Rosemary Leaf
  • 1/4 cup Thyme Leaf
  • 2 tablespoons Garlic Powder

Preparation:

Combine all ingredients into an air-tight jar and shake!


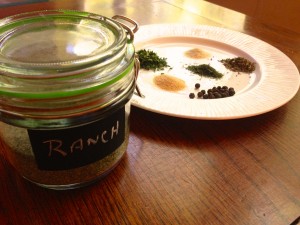
Homemade Ranch Mix

Homemade Ranch Seasoning Mix, from SimpleSolutionsDiva.com.

Mix one tablespoon of this mix with 1/3 cup mayonnaise and 1/4 cup milk or buttermilk. This is also great sprinkled by itself onto fish or chicken before cooking.

Ingredients:

  • 1/4 cup dried Parsley leaf
  • 1 Tablespoon Dill leaf
  • 1 tablespoon Garlic Powder
  • 1 tablespoon Onion Powder
  • 1/2 teaspoon Basil leaf
  • 1/2 teaspoon ground black pepper

Preparation:

Mix all ingredients together in jar or food processor (I used my single serve sized blender!).


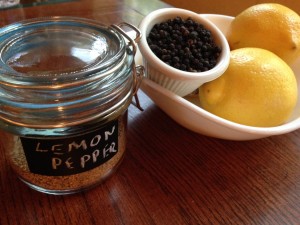
Lemon Pepper Seasoning

Homemade Lemon Pepper Seasoning, from SimpleSolutionsDiva.com.

Ingredients:

  • 1 cup fresh lemon zest (zest approximately 10-12 lemons to get 1 cup)
  • 1/3 cup peppercorns (black or mixed colors)

Preparation:

Place peppercorns in a food processor {or clean coffee grinder} and pulse just a few times until coarsely ground. Combine together in a bowl the fresh lemon zest and ground peppercorns and combine thoroughly. Pour out onto a parchment lined baking sheet and place in oven on lowest setting (mine was lowest at 170 degrees). Bake for about 1 hour or until zest is dried. Place mixture back into food processor and pulse until finely ground.

For ideas on what to do with all those lemons you used to get the zest, check out another Simple Solutions Diva post! (Click Here) 

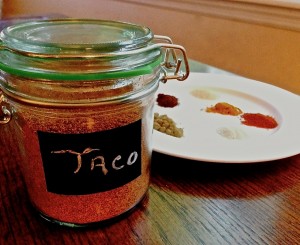
Homemade Taco Seasoning

Image 3

Click Here to see my zesty, homemade Taco Seasoning recipe!

1 2 3 4 5 9

© 2015 SIMPLESOLUTIONSDIVA.COM Designed by The Web Design Chic | ADMIN LOGIN