I did not make up the title of this recipe, but I have to be in full agreement with the title! I discovered this recipe online on the site JaimeCooksItUp.com, a great site with lots of family friendly recipes. My first reaction was, “Yuck, turkey in a crockpot?”, but then I thought about how simple it sounded. And how great this would be for, perhaps, someone with very little room in their kitchen or oven (like apartment dwellers). A perfect way to save space in the mad dash to cook up a Thanksgiving Day meal!
I made the recipe a week ago, with the intention of taking photos of the final product. Well, the final product was so good, there was nothing left to take pictures of! (Photos are taken directly from JaimeCooksItUp.com!)
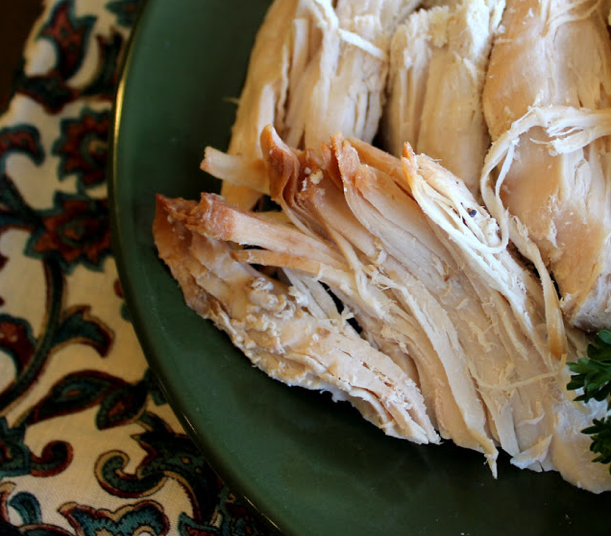
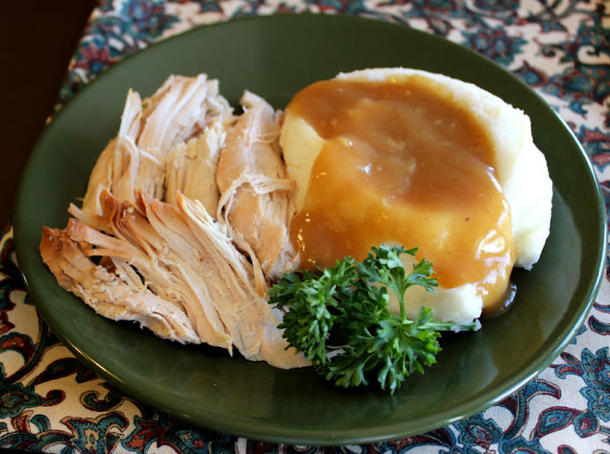
Though the skin was not golden brown like when you roast the turkey, this dish was seriously good, easy to make, and the turkey was very moist and fell off the bone! And the drippings left in the crockpot make a TASTY gravy!
Ingredients:
One 5-6 pound turkey breast (bone in)
1/2 Cup Orange Juice (or chicken broth)
One packet Lipton Onion Soup Mix
One can whole cranberry sauce (14 oz.)
Salt & Pepper to taste (I did not use salt, because soup mix had enough for me!)
Place turkey breast in crockpot (be sure crockpot is large enough- you need to make sure the lid will fit over the turkey!).
In a bowl or measuring cup, mix together the OJ, onion soup mix and cranberry sauce. Pour mixture over the turkey breast, cover with lid, and let cook on low for 8-9 hours.
That is it!! Enjoy!! For my 30SecondMom.com video version of this recipe, Click Here!
Be sure to check out the original post from JaimeCooksItUp.com! I think she’s a cooking genius!
Turkey Breast of Wonder (and photo credit) from JaimeCooksItUp.com.
Did you know spices have a shelf life? Humidity, heat, sunlight, and exposure to air can pull the flavor and aroma right out of spices and dried herbs. With the holidays here, now is the perfect time to replace those holiday spices you bought last year! Colleen Messner of The Spice & Tea Exchange in St. Augustine, Florida, has a list of the top spices you should have in your cabinet for the holidays. (And most of them can be used year round!)
Top Spices For The Holidays
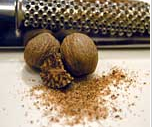
Nutmeg Photo from Food.com.
Nutmeg – This brown seed, when grated, provides a warm, spicy/sweet flavor to dishes. A whole seed can be stored indefinitely in an airtight container. Best when freshly grated.
Allspice – This spice tastes/smells like a combination of cinnamon, cloves, and nutmeg. I love it on pork tenderloin!
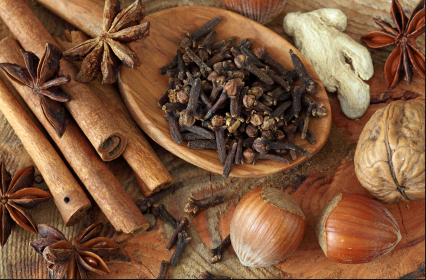
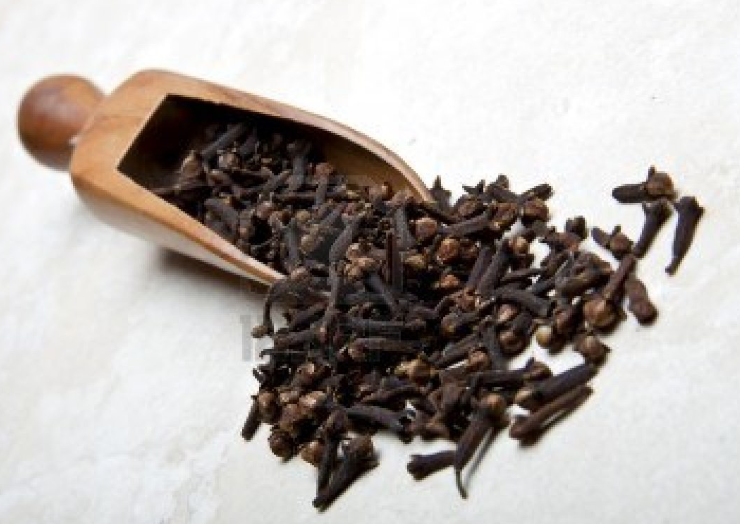
Cloves Photo from Food.com.
Cloves – This fragrant, nail-head shaped spice is perfect for decorating a ham or whole orange. Imparts a warm and sweet flavor.
Green Pod Cardamom Photo from Food.com
Green Pod Cardamom – Cardamom has a strong, unique spicy-sweet taste. Best when purchased in pods, which are removed and discarded before grinding the seeds. Adds great flavor to danish and other pastries.
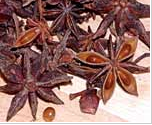
Star Anise Photo from Food.com
Star Anise – Sweet/warm spice with a licorice flavor. Great to use in pastries, stews or even asian cooking (It is one element in Chinese 5 Spice Blend).
Candied Ginger Photo from Food.com
Candied Ginger – Perfect to use in gingerbread or even chopped as decorative (and tasty!) topping for cupcakes!
Cinnamon – The favorite in the Simple Solutions Diva household! Warm and sweet, cinnamon works well in so many recipes during the holidays!
Storage Tips
Keep all spices in a dark, cool and dry place, away from heat. (So I guess that means I need to move my spice shelves away from the stove!)
Leafy items, such as oregano, basil, bay leaves do best when stored in the fridge.
Order Fresh Spices and Dried Herbs
If you would like to order any or all of these spices FRESH from the Spice & Tea Exchange, follow this link HERE to be taken directly to the products page of their website!
This recipe is the best of both worlds – pumpkin bread AND cheesecake! Feel free to use your own favorite pumpkin bread recipe, then use the directions below to create the cheesecake layer and to assemble the layers!
Ingredients:
Pumpkin Bread Layer
2 Cups canned pumpkin (one can of canned pumpkin)
4 Eggs
1 1/2 Cups flour (You can make this 1/2 white flour and 1/2 wheat flour, for a healthier and more dense bread)
3/4 Cup light brown sugar, packed
1 teaspoon baking soda
1 1/2 teaspoons ground cinnamon
1/4 teaspoons nutmeg
1/4 teaspoon ground cloves
1/4 teaspoon ginger
Cheesecake Layer
8 oz. cream cheese, softened
4 Tablespoons sugar
2 teaspoons flour
1 egg
Directions:
Preheat oven to 350 degrees. Grease and flour a bread loaf pan.
For the pumpkin layer– In a large bowl, combine the pumpkin and eggs until mixture is smooth. In a separate, medium bowl, combine the flours, sugar, baking soda, and spices, making sure they are well mixed.
Slowly add in the dry ingredients into the wet ingredients. Mix well and set aside.
For the cheesecake layer – In a small bowl, combine cream cheese, sugar, flour, and egg until smooth.
To assemble the layers – Spoon or pour the pumpkin mixture into the bread loaf pan, filling 1/2 way. Spoon or pour the entire cheesecake mixture over the pumpkin mixture, covering well. Add remaining pumpkin mixture to fill bread loaf pan 3/4 of the way.
Place in 350 degree oven for approximately 50-60 minutes. Test with a knife or toothpick in center for doneness – toothpick should come out clean. If not, place it back in oven and test again in five minutes!
This wonderful recipe was adapted from the website, BroughtToYouByMom.com. If you would like to check out the original recipe, click Here.
cinnamon sticks and small orange slices as garnish
Dark rum or spiced rum (optional)
Directions:
Pour the apple cider into a large pot (or crockpot).
Wash, dry, then slice the orange into thin slices, leaving a 1/4 of the orange ready for juicing. Place slices into the apple cider, and squeeze the juice from the 1/4 of orange into the pot.
Wash, dry, then slice the apple into thick slices. Push the whole cloves into the skin of the apple slices, and place into the pot (or just toss both apple slices and cloves separately into the pot for convenience!).
Add the cinnamon sticks, allspice, brown sugar, and nutmeg into the pot and stir well. Heat on low for 10-15 minutes (or place on warm in crockpot for hours!). Serve warm in cups garnished with a fresh cinnamon stick and a small slice of orange.
For an adult version, serve with a shot of dark rum or spiced rum – YUM!
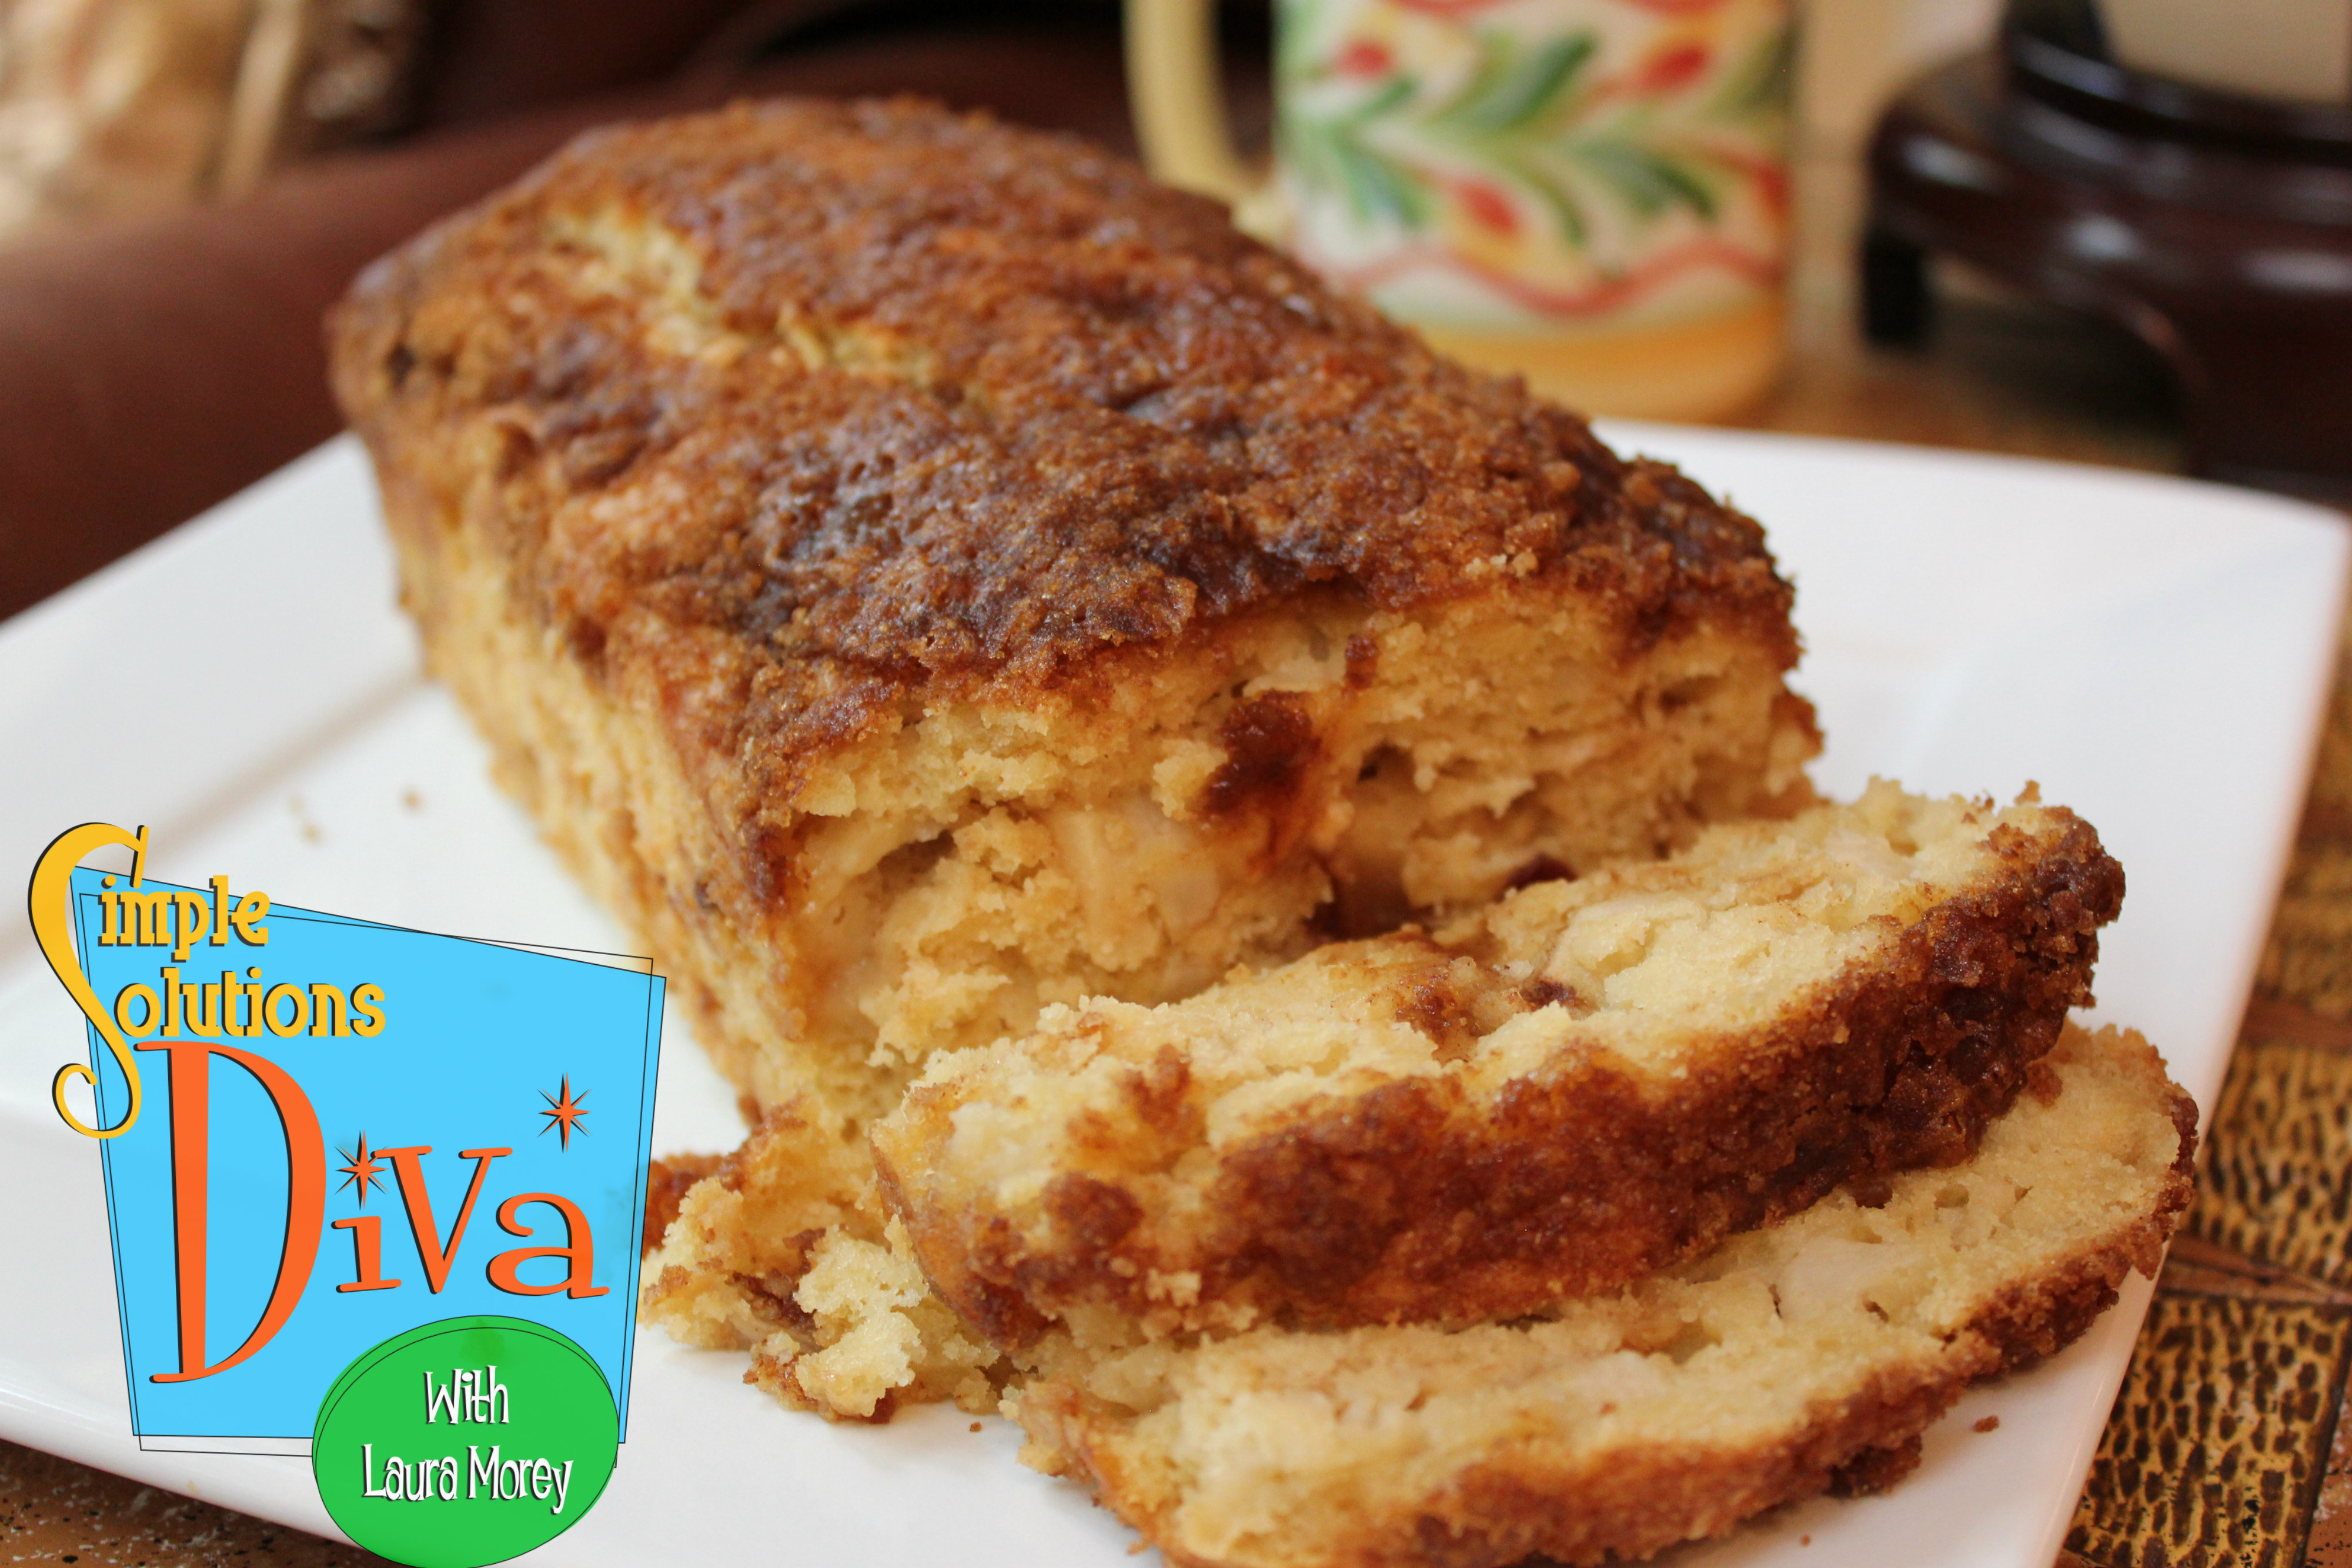
I’m celebrating Fall, and featuring today a fantastic recipe for apples! Apple Pie Cinnamon Bread comes out warm and moist, and holds up beautifully the next day (that is, if it lasts till the next day!). Just make sure to test for doneness by inserting a toothpick into the center of bread — if it doesn’t come out clean, keep the bread in the oven until it yields a truly clean toothpick! My first attempt, I undercooked it!
Apple Pie Bread, recipe from SpendWithPennies.com; Photo Credit: Simple Solutions Diva.
The recipe for Apple Pie Cinnamon Bread came from Spend With Pennies, a great site for all sorts of recipes, craft ideas, deals, and more! For the recipe for Apple Pie Bread With Cinnamon, click Here to be brought directly to the recipe! You will not regret it!
The key to all these simple meals is having the sauces in your pantry ahead of time, and the fresh ingredients on hand — boneless, skinless chicken breasts (cubed or sliced thin) and chopped onions and peppers to quickly sauté up in a large pan. Add one of the sauces, let simmer, and VOILA! You have a tasty meal in under 30 minutes! Add rice, noodles, or mashed potatoes as a side, along with a healthy salad, and you have a quick meal you can feel good about serving to your family.
Thank you to Amy West of LikeLoveWantNeed.com for giving me the challenge to write for her blog about “Finding Luxury in Unlikely Places” – it was the inspiration for this video post! Be sure to check out her wonderful site that features videos, travel reviews, luxury items/destinations, giveaways and more!
I am reposting this video because it is perfect to see again just before the Labor Day Weekend! You don’t have to spend a lot of money to grill out this long weekend, just ask your local butcher! I had the opportunity to visit with Mike, the meat manager of my local Publix, about how to save a little money without sacrificing flavor when it comes to steaks.
Mike was so excited to share what he knows about steaks and grilling! He highly encourages anyone to visit their local butcher or meat manager to find out what they recommend for steaks or any other types of meats or fish. They can “steer” you in the right direction! (Pun intended!)
Here are Mike’s top recommended cuts of beef as alternatives to more expensive cuts for grilling:
Flat Iron Steak (Also known as Hanger Steak) – This was the top choice of our Meat Expert. He noted that this cut of beef is starting to trend across the country. Great to marinate and grill.
Shoulder Tender Medallions – This was the runner-up to the Flat Iron as a favorite of our Meat Expert. Marinate overnight and grill.
Chuck Eye Steak – According to our Meat Expert, this cut of beef doesn’t even need to be marinated. It is a cut that is right next to the Ribeye, so flavor is all there.
Shoulder Steak – Great to marinate and grill.
Shoulder London Broil – The original London Broil cut. Marinate and Grill
Bottom Sirloin Steak Rolls– Marinate and grill.
Chuck Steak (Boneless) – Marinate and grill.
For great marinade recipes (including Mike’s Simple Marinade) for beef, fish and poultry,Click Here.
I found this simple recipe on Pinterest, and it originated on MyRecipes.com. I used sea salt in the video recipe; the original recipe (which appears here) calls for kosher salt.
Ingredients:
10 1/2 ounces trimmed curly kale, torn into 2-inch pieces (about 14 cups)
1 tablespoon olive oil
1/4 teaspoon kosher salt
Preparation:
Preheat oven to 350 degrees.
Rinse kale; drain well, and pat dry with paper towels. Place in a large bowl. Drizzle with olive oil, and sprinkle with salt. Toss well. Place kale in a single layer on 3 (16 x 13?inch) baking sheets.
Bake at 350° for 15 minutes. (Watch closely to prevent leaves from burning.) Cool completely. Store in an airtight container.
Flavor Options: Friends have suggested sprinkling with parmesan cheese, sweet paprika, or garlic powder for flavor variety.
The kids are heading off to school early in the morning, and coming home STARVING! How do we give them treats that are filling, are good for them, and will not ruin their dinner? Simple Solutions Diva has gathered a few recipes from friends and her social media circles that are sure to be easy, fun, and great snacks!
Peanut Butter Banana Chocolate Chip Cookies!
Warm muffins fresh out of the oven just melt my heart every time! Make them in mini muffin tins (or in heart shaped muffin tins, as illustrated in the photo!) for a perfect child-sized treat.
Ingredients:
3-4 ripe bananas, mushed
1/2 cup peanut butter
1/2 cup sugar
1/2 cup milk
2 cup all-purpose flour
2 teaspoons baking powder
1 teaspoons baking soda
1 cup mini chocolate chips
Preparation:
Preheat oven to 350°. Mix together bananas, peanut butter, sugar, and milk. Add in flour, powder, and soda. Stir in chips. Prepare pans with cooking spray or oil. Pour into prepared pan(s).
Bake mini muffins or heart-shaped muffins for approximately 15 minutes. Bake loaf for 45-50 minutes and regular muffins for 15-18 minutes.
This yummy recipe (and photo) is courtesy of Annette at ThisSimpleHome.com. She always has wonderful recipes, homemaking tips, craft ideas, and so much more on her website. If you have a chance, please visit her!
Simple, Small-Sized Pizza
What kid does not like pizza? And decorating your own mini pizza to bake can be a healthy treat for the kids, because YOU control the ingredients!
Provide the kids with sauce, your favorite mozzarella or other cheese, fresh cut veggies, turkey pepperoni (Hormel has a mini-sized turkey pepperoni that is terrific-70% less fat than regular pepperoni!), and they have their own pizza pie shop!
Now, because I’m the SIMPLE Solutions Diva, I love to use pre-baked breads for the base of my small pizza – you can use 1/2 an english muffin (PERFECT small size!), small pitas, or one of my favorites, StoneFire Naan Flatbreads (See photo above).
Once assembled, these little pizzas cook up quickly in the oven or toaster oven – Cook at 400 degrees, for 5-10 minutes. Not much of a recipe, but you get the idea! And in my book, the simpler, the better!
Trail Mix Sprinkle Cracker Snack
Trail Mix Sprinkle Cracker Snack from LunchBoxBunch.com.
Another great recipe where the kids can take a break from studying to make a tasty snack. And it is Vegan, so you can feel good about giving it to your kids!
Ingredients:
8 extra large ‘entertaining’ size crackers, multi or whole grain
4 Tbsp vegan cream cheese or nut butter (you can use regular cream cheese instead of vegan if you prefer)
1 Tbsp maple syrup
1 1/2 cups of “trail mix” sprinkle – Basically a mixture of your favorite combo of dried fruits/nuts/seeds. A few ideas: dried apricots, dried blueberries, salted sunflower seeds, almonds, cashews, poppy seeds, pumpkin seeds, dried cherries, dried figs, sesame seeds, goji berries, shredded coconut, dried cranberries, walnuts, pecans, Brazil nuts, pistachios and hazelnuts. For large items like dried apricots and large nuts-be sure to chop them into pea sized bits.
Preparation:
1. Assemble your trail mix sprinkle of choice in a bowl, making sure you chop extra large pieces into smaller pieces.
2. “Whip” your maple syrup into your cream cheese or nut butter into a smooth “frosting”.
3. Line a cookie sheet or other flat surface with wax paper (this will catch any wayward sprinkles so they can be used again!.)
4. Assemble the crackers (pack them tightly together) on the covered flat surface. Spread one teaspoon of “frosting” onto each cracker.
5. Sprinkle the trail mix mixture over the crackers and frosting. Press mixture lightly and then remove crackers to individual plates and enjoy!!
This recipe (and the photo!) is from LunchBoxBunch.com; it is a site full of tasty and terrific Vegan recipes.
Choco-Banana-Almond Chiller
Choco-Banana-Almond Chiller from SimpleSolutionsDiva.com.
My nephew loves chocolate (What can I say? He takes after his favorite Auntie!), and since he discovered Chocolate Almond Milk, he’s hooked! I haven’t introduced this smoothie recipe to him yet, but I know he will LOVE it!
Ingredients:
8 oz. Silk Pure Almond Milk, Dark Chocolate Flavor
1 small, frozen banana
1 heaping teaspoon almond butter (I love the crunchy kind)
A handful of ice
(Optional: For an extra kick of calcium, you can get creative and add flavored yogurt, like coconut flavored for an “Almond Joy” type of flavor, or just plain vanilla yogurt.)
Preparation:
Blend all ingredients in a blend until the drink is smooth. Serve icy cold!
For more great ideas for snacks and Back-To-School snack ideas, visit Simple Solutions Diva’s Simple Snacks For Back To School Pinterest Board, where I’ve collected way too many ideas to feature here in this post! May your kids enjoy their new school year (and may YOU enjoy a little quiet time!).
Simple Solutions Diva is gearing up for Back-To-School! All kids need a healthy treat when they get home from school, so Simple Solutions Diva have gathered some great, simple recipes and ideas for snacks! Click here to check out the board!