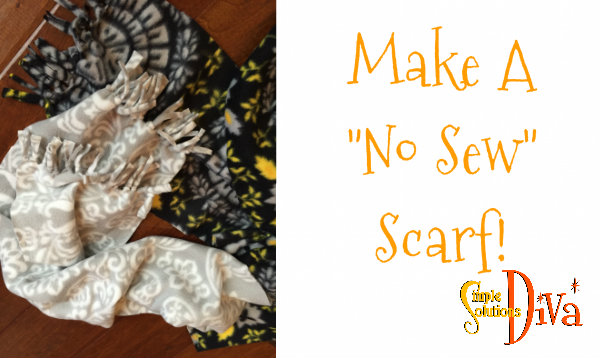
As a kid, I used to make costumes for my cats, making them get married or go to a ball. I’d spend hours on costumes, and quite a bit of time trying to get them on the cats! Once done, I’d sit back and admire my work, as I applied Bandaids to my face and neck.
But I never really LEARNED to sew. Yes, I could sew on a button (Thanks Grandma!), but I never really learned on a sewing machine. I envied people who could! So over the years, as I tried to create Halloween costumes for myself and eventually my kids, I found I became very adept at using a hot glue gun to seal seams!
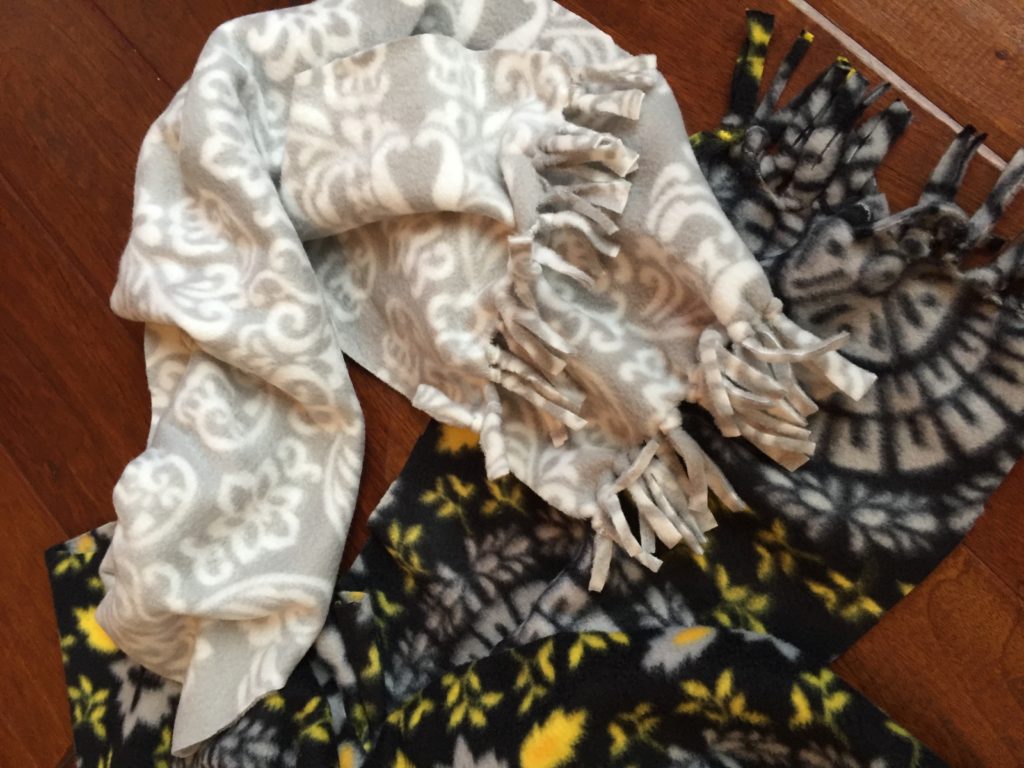
Well, with THIS project, you don’t need ANY hot glue, sewing machines, or even needle and thread! Just a yard of fleece fabric, some masking tape and sharp fabric scissors! (MY kind of sewing project!) And look how nice they are:
This makes a great, last minute gift idea, or even better, it could become a community service project for middle school or high school students! Make a few scarves in one day and donate them to a homeless shelter!
A Few Tips:
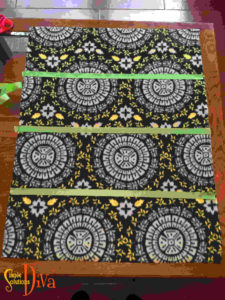
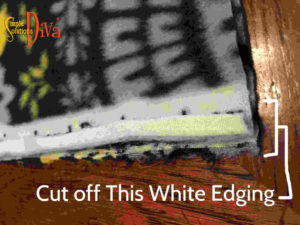
Fold the yard of fleece in half, line the edges up and cut off the white edging where the print stops.
Use masking tape to mark off the four scarves and to provide a straight line to cut along. Scarves should be 8-10 inches wide – on this project I marked off 9.5 inches.
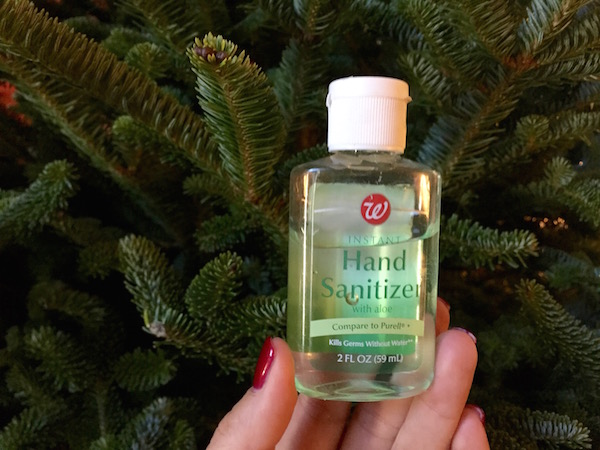
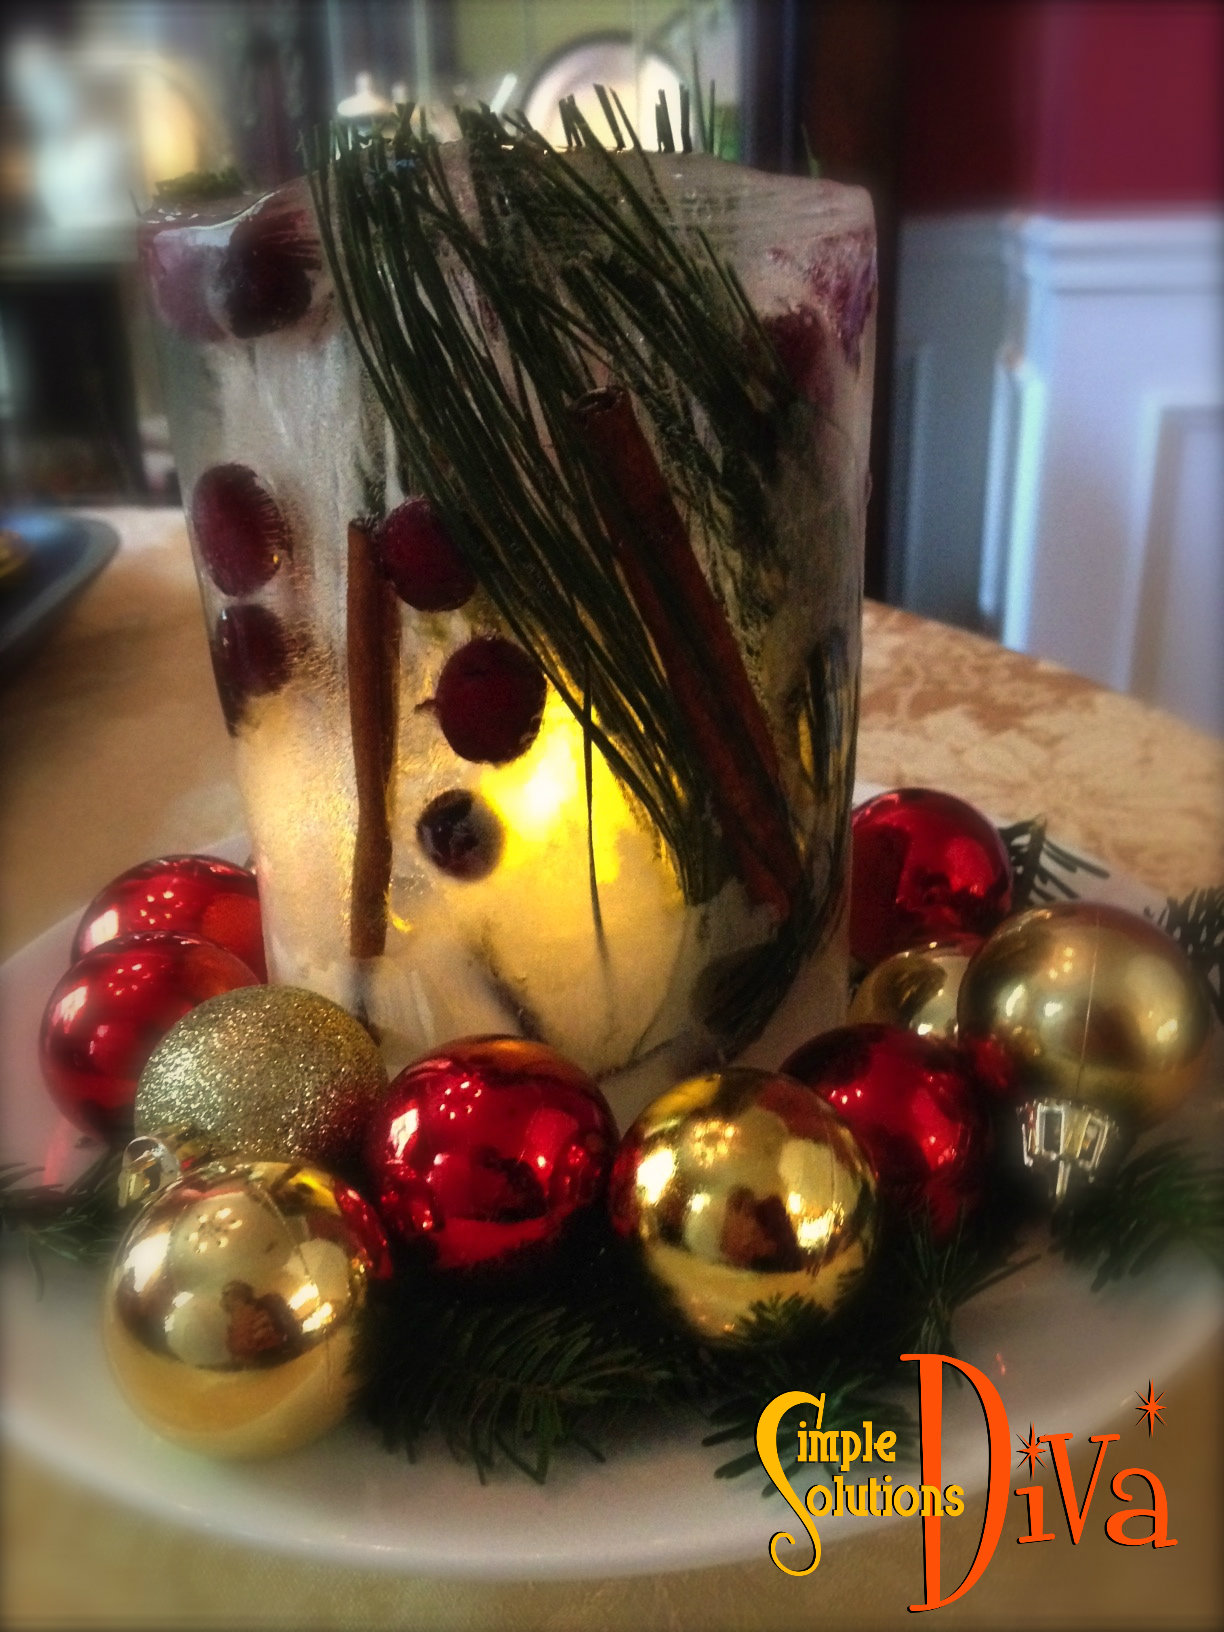
I love the timeless, holiday tradition of bringing home the fresh Christmas tree! But want to guess what the most annoying, holiday tradition is? Trying to get the tree sap off your hands!
I have to thank James, the guy at the tree lot where we bought our Christmas trees for this fantastic tip — and it really does work in seconds!
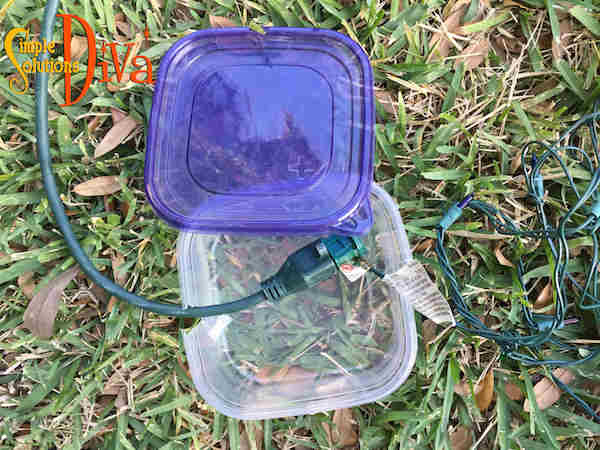
During the holidays, have you ever come home one rainy night to see your holiday lights are out? When water gets into those electrical connections (like where extension cords connect to holiday lights), it can create a short which trips the circuit breaker – causing all your outdoor lights associated with that breaker to go out!
This Simple Holiday Survival tip is sure to help prevent that from happening!
SimpleSolutionsDiva.com’s tip to keep outdoor lights from blowing out!
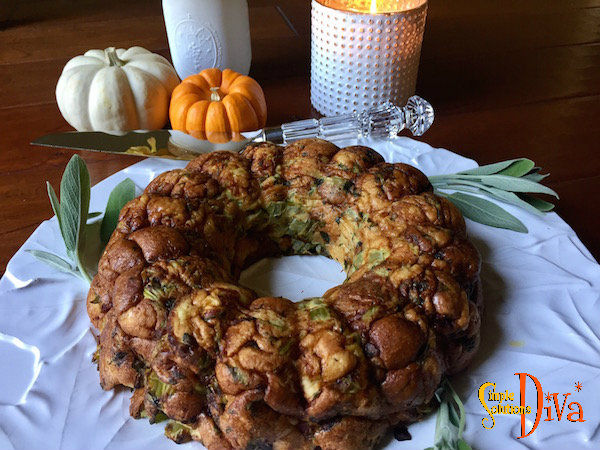
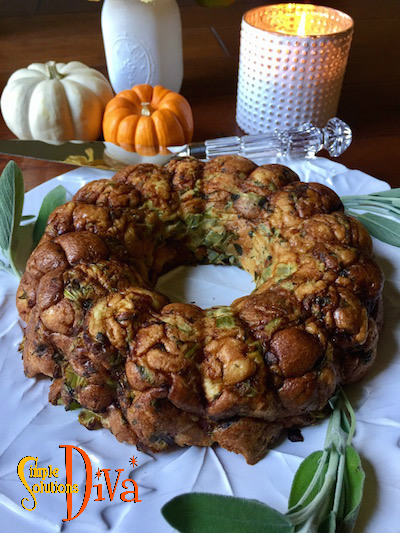
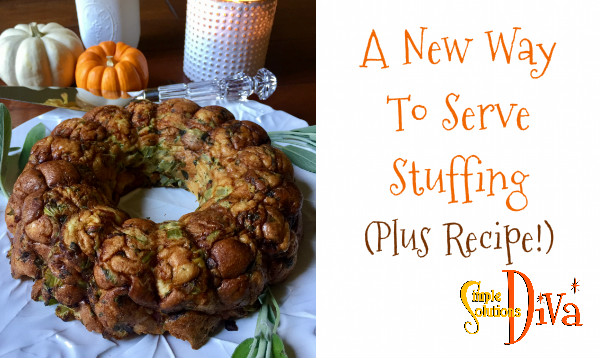
Tired of serving stuffing out of a bird’s behind? Try presenting your stuffing in a creative way (plus, you don’t have to worry about undercooking and getting salmonella!).
Make your stuffing in a bundt pan! It is not only healthy, but it presents the stuffing in a unique form! The key is to add eggs to your favorite recipe so it will hold together when you take it out of the bundt pan. Look how pretty it looks!
You can use your own, favorite recipe, just be sure to add 3-4 eggs to your mixture (mix it in with the chicken broth you use in your recipe). Bake at 400 degrees for 30-40 minutes, until it is lightly browned.
Cook this recipe separately from your turkey and be sure to cook it in a bundt pan for a nice presentation!
Author: SimpleSolutionsDiva.com
Recipe type: Side Dish
Cuisine: American
Serves: 10 servings
Ingredients
4 slices thick cut bacon (or ½ cup ground pork sausage), cooked, drained and copped into small pieces (keep the fat in the pan)
1 Tablespoon chopped, fresh sage
½ cup fresh chopped parsley
½ teaspoon (or more) minced garlic
Salt & Pepper to taste
1 loaf of french bread, cubed and dried in a 200 degree oven until lightly toasted - about 20 minutes.
2-3 cups chicken broth
3-4 eggs, beaten
Instructions
Heat the oven to 400 degrees.
Using the pan with the bacon (or pork sausage) grease, sauté the sage, garlic, parsley together for 30-40 seconds. Add the chopped bacon (or sausage) and stir.
In a small bowl, mix the beaten eggs into the chicken broth.
In a large bowl, place the bread cubes, the herb mixture, and mix together.
Slowly add the chicken broth mixture, tossing the bread cubes to coat.
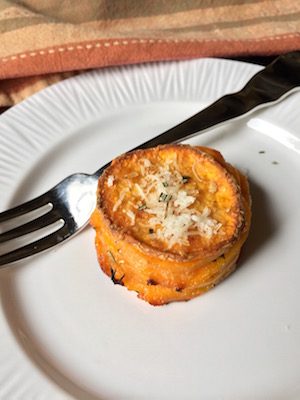
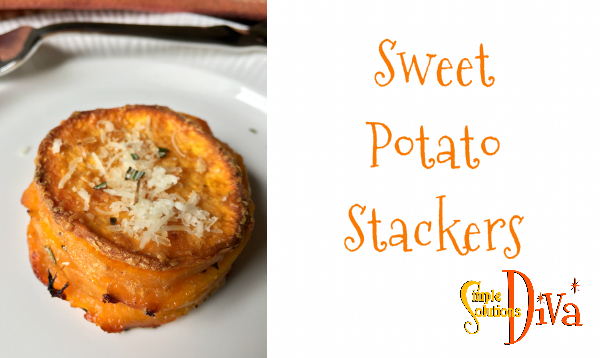
My family LOVES sweet potatoes! I served these and they were a BIG hit, so I believe I will serve them for Thanksgiving this year. Buttery layers of sweet potatoes with rosemary and garlic and fresh parmesan cheese – my mouth is watering just thinking about them!
These are a different way to serve those delectable, spuds of the South! And best part? No mini marshmallows!
Buttery layers of sweet potatoes, paired with rosemary, garlic and fresh parmesan - these Sweet Potato Stackers are sure to be a hit at the next family gathering!
Author: SimpleSolutionsDiva.com
Recipe type: Side Dish
Cuisine: American
Serves: 12
Ingredients
4-5 sweet potatoes, washed, peeled and sliced into thin slices.
2 Tablespoons melted butter
2 Tablespoons olive oil
1 teaspoon freshly chopped rosemary (plus another teaspoon for topping at end)
½ teaspoon garlic powder
¼ teaspoon onion powder
2-4 Tablespoons fresh grated parmesan cheese (plus 2 TBS for topping at end)
salt & pepper to taste
Instructions
Preheat the oven to 375 degrees.
Combine in a large bowl the melted butter, olive oil, rosemary, garlic powder, onion powder, salt and pepper and whisk until they ingredients are blended.
Add freshly grated parmesan cheese and lightly wish.
Add sliced sweet potatoes to the bowl and mix until all slices are coated in the oil mixture.
In a light greased muffing tin, layer the sweet potatoes until each tin is filled to the top. These will shrink down while they cook.
Cook for 45-55 minutes, or until the potatoes are lightly browned and are tender.
Place on a plate and top with more parmesan cheese and fresh chopped rosemary. Serve immediately.
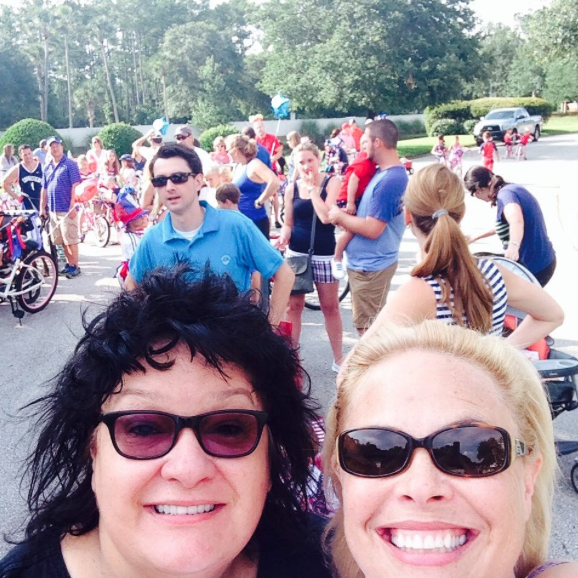
Independence Day is a favorite holiday in my house! It happens to be the day AFTER my birthday, so I always looked at it as a celebration of MY birthday as well as our country’s! My neighbor and I both love it so much, we started our neighborhood’s Fourth Of July Bike Parade 15 years ago and it is STILL going strong!
My partner in crime, Pegine and I, celebrating at last year’s Neighborhood Independence Day Bike Parade we established 15 years ago!
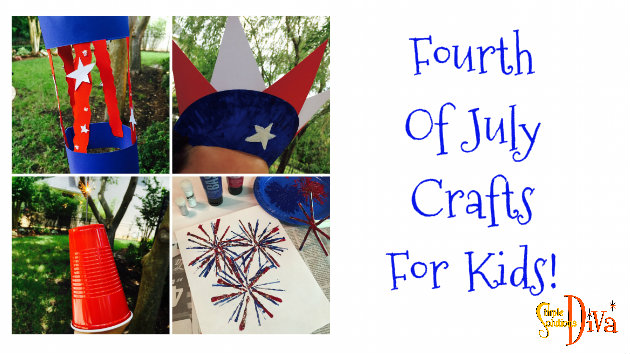
Here are a few simple crafts you can do with the kids this year, plus a few decorating & celebrating ideas I found that were just too good not to include!
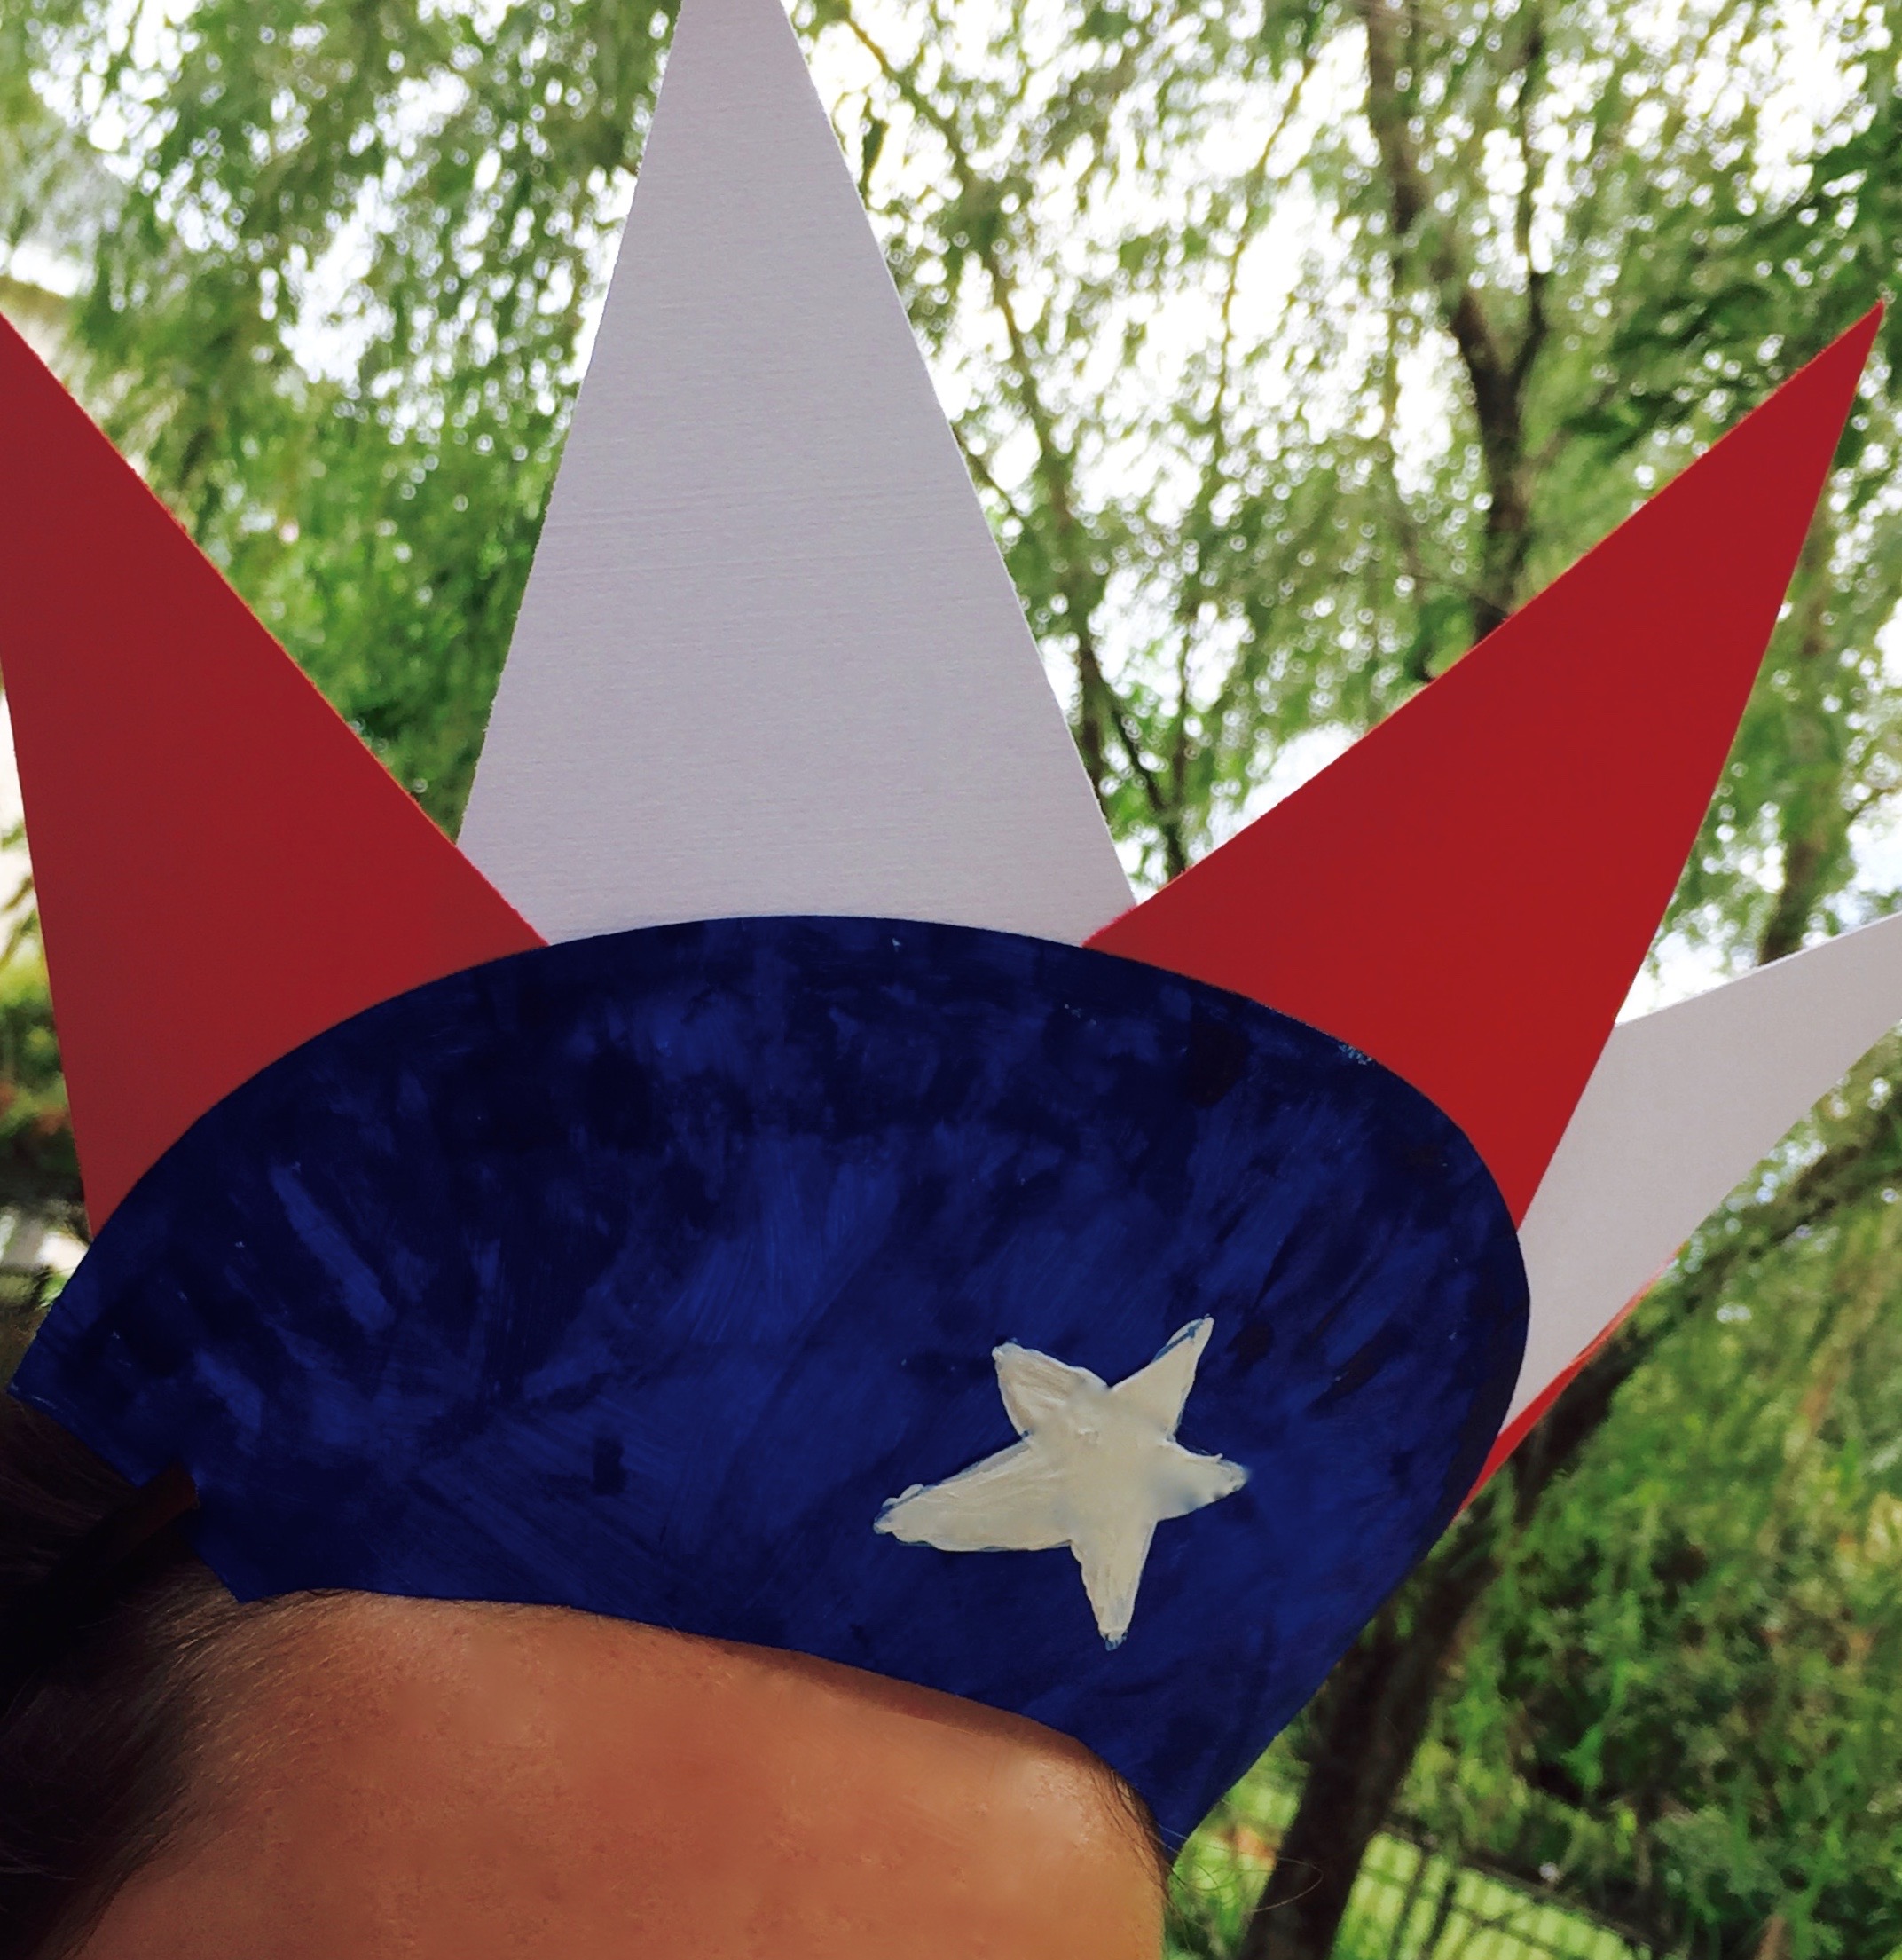
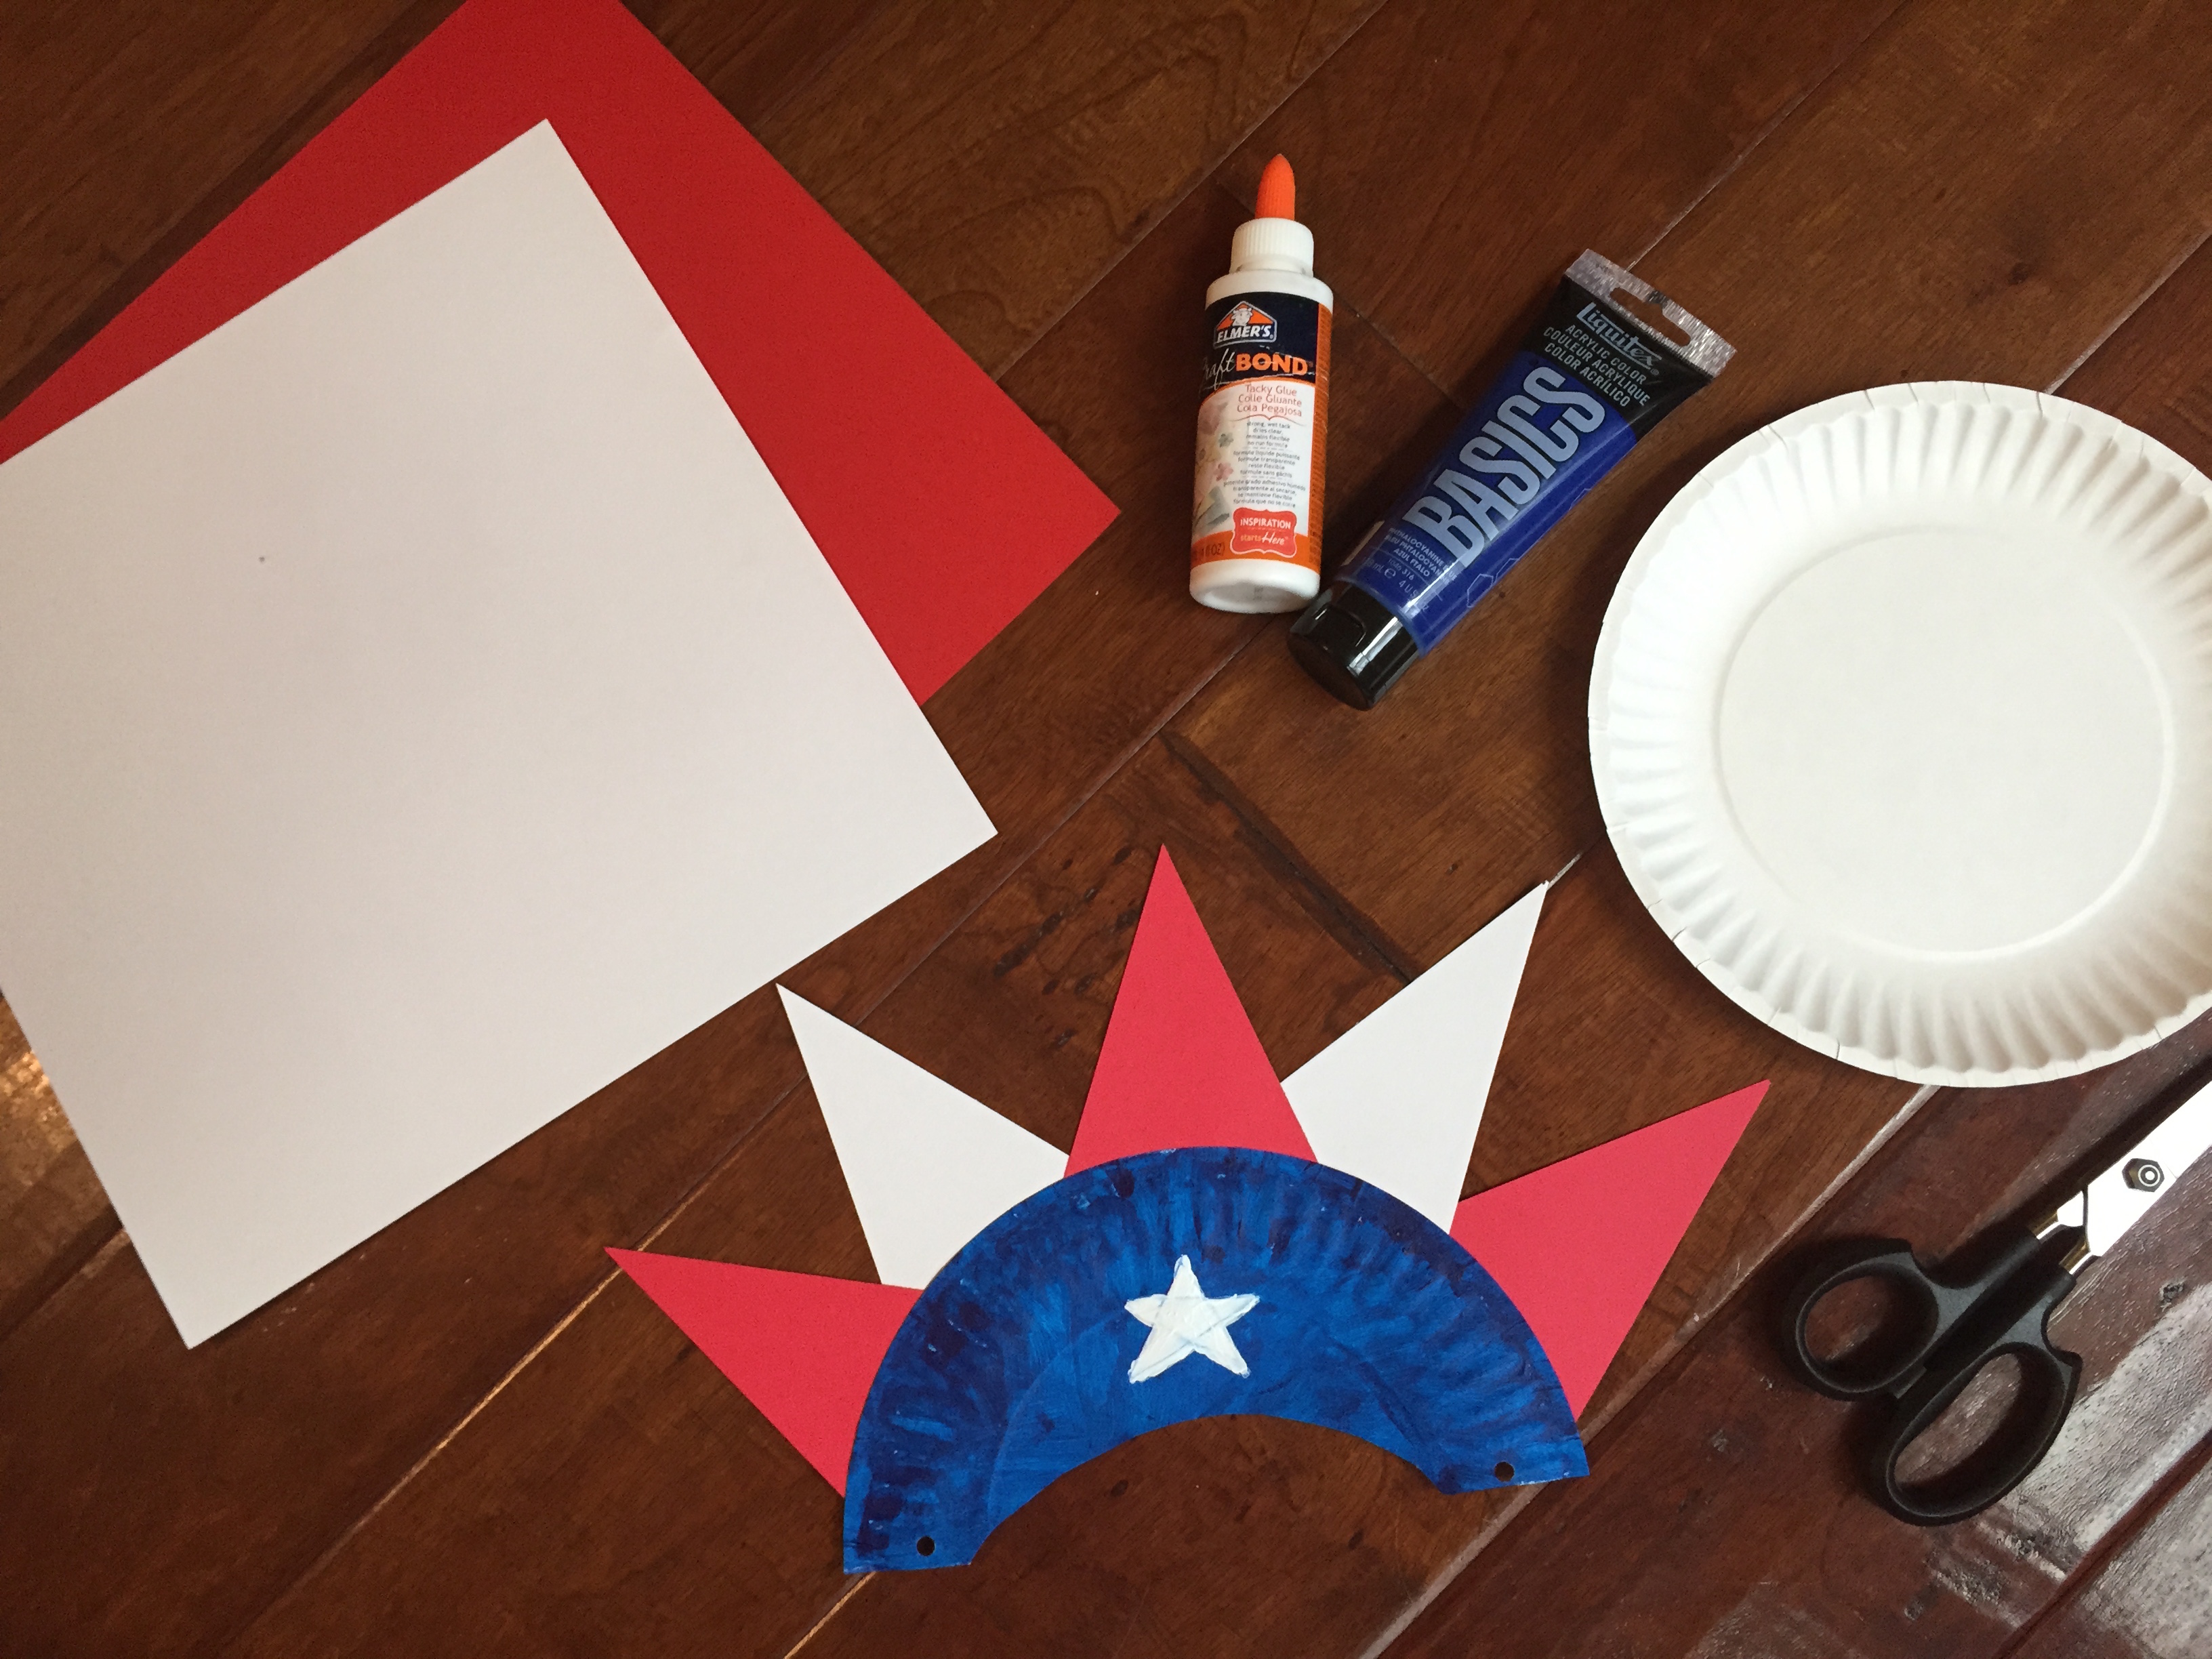
Liberty Paper Plate Hat
This is a simple project that requires just a few items!
What You Need:
White paper plates
Blue acrylic paint & paint brushes
White and red construction paper
Hole punch
Glue or glue dots to eliminate dry time
Elastic
Directions:
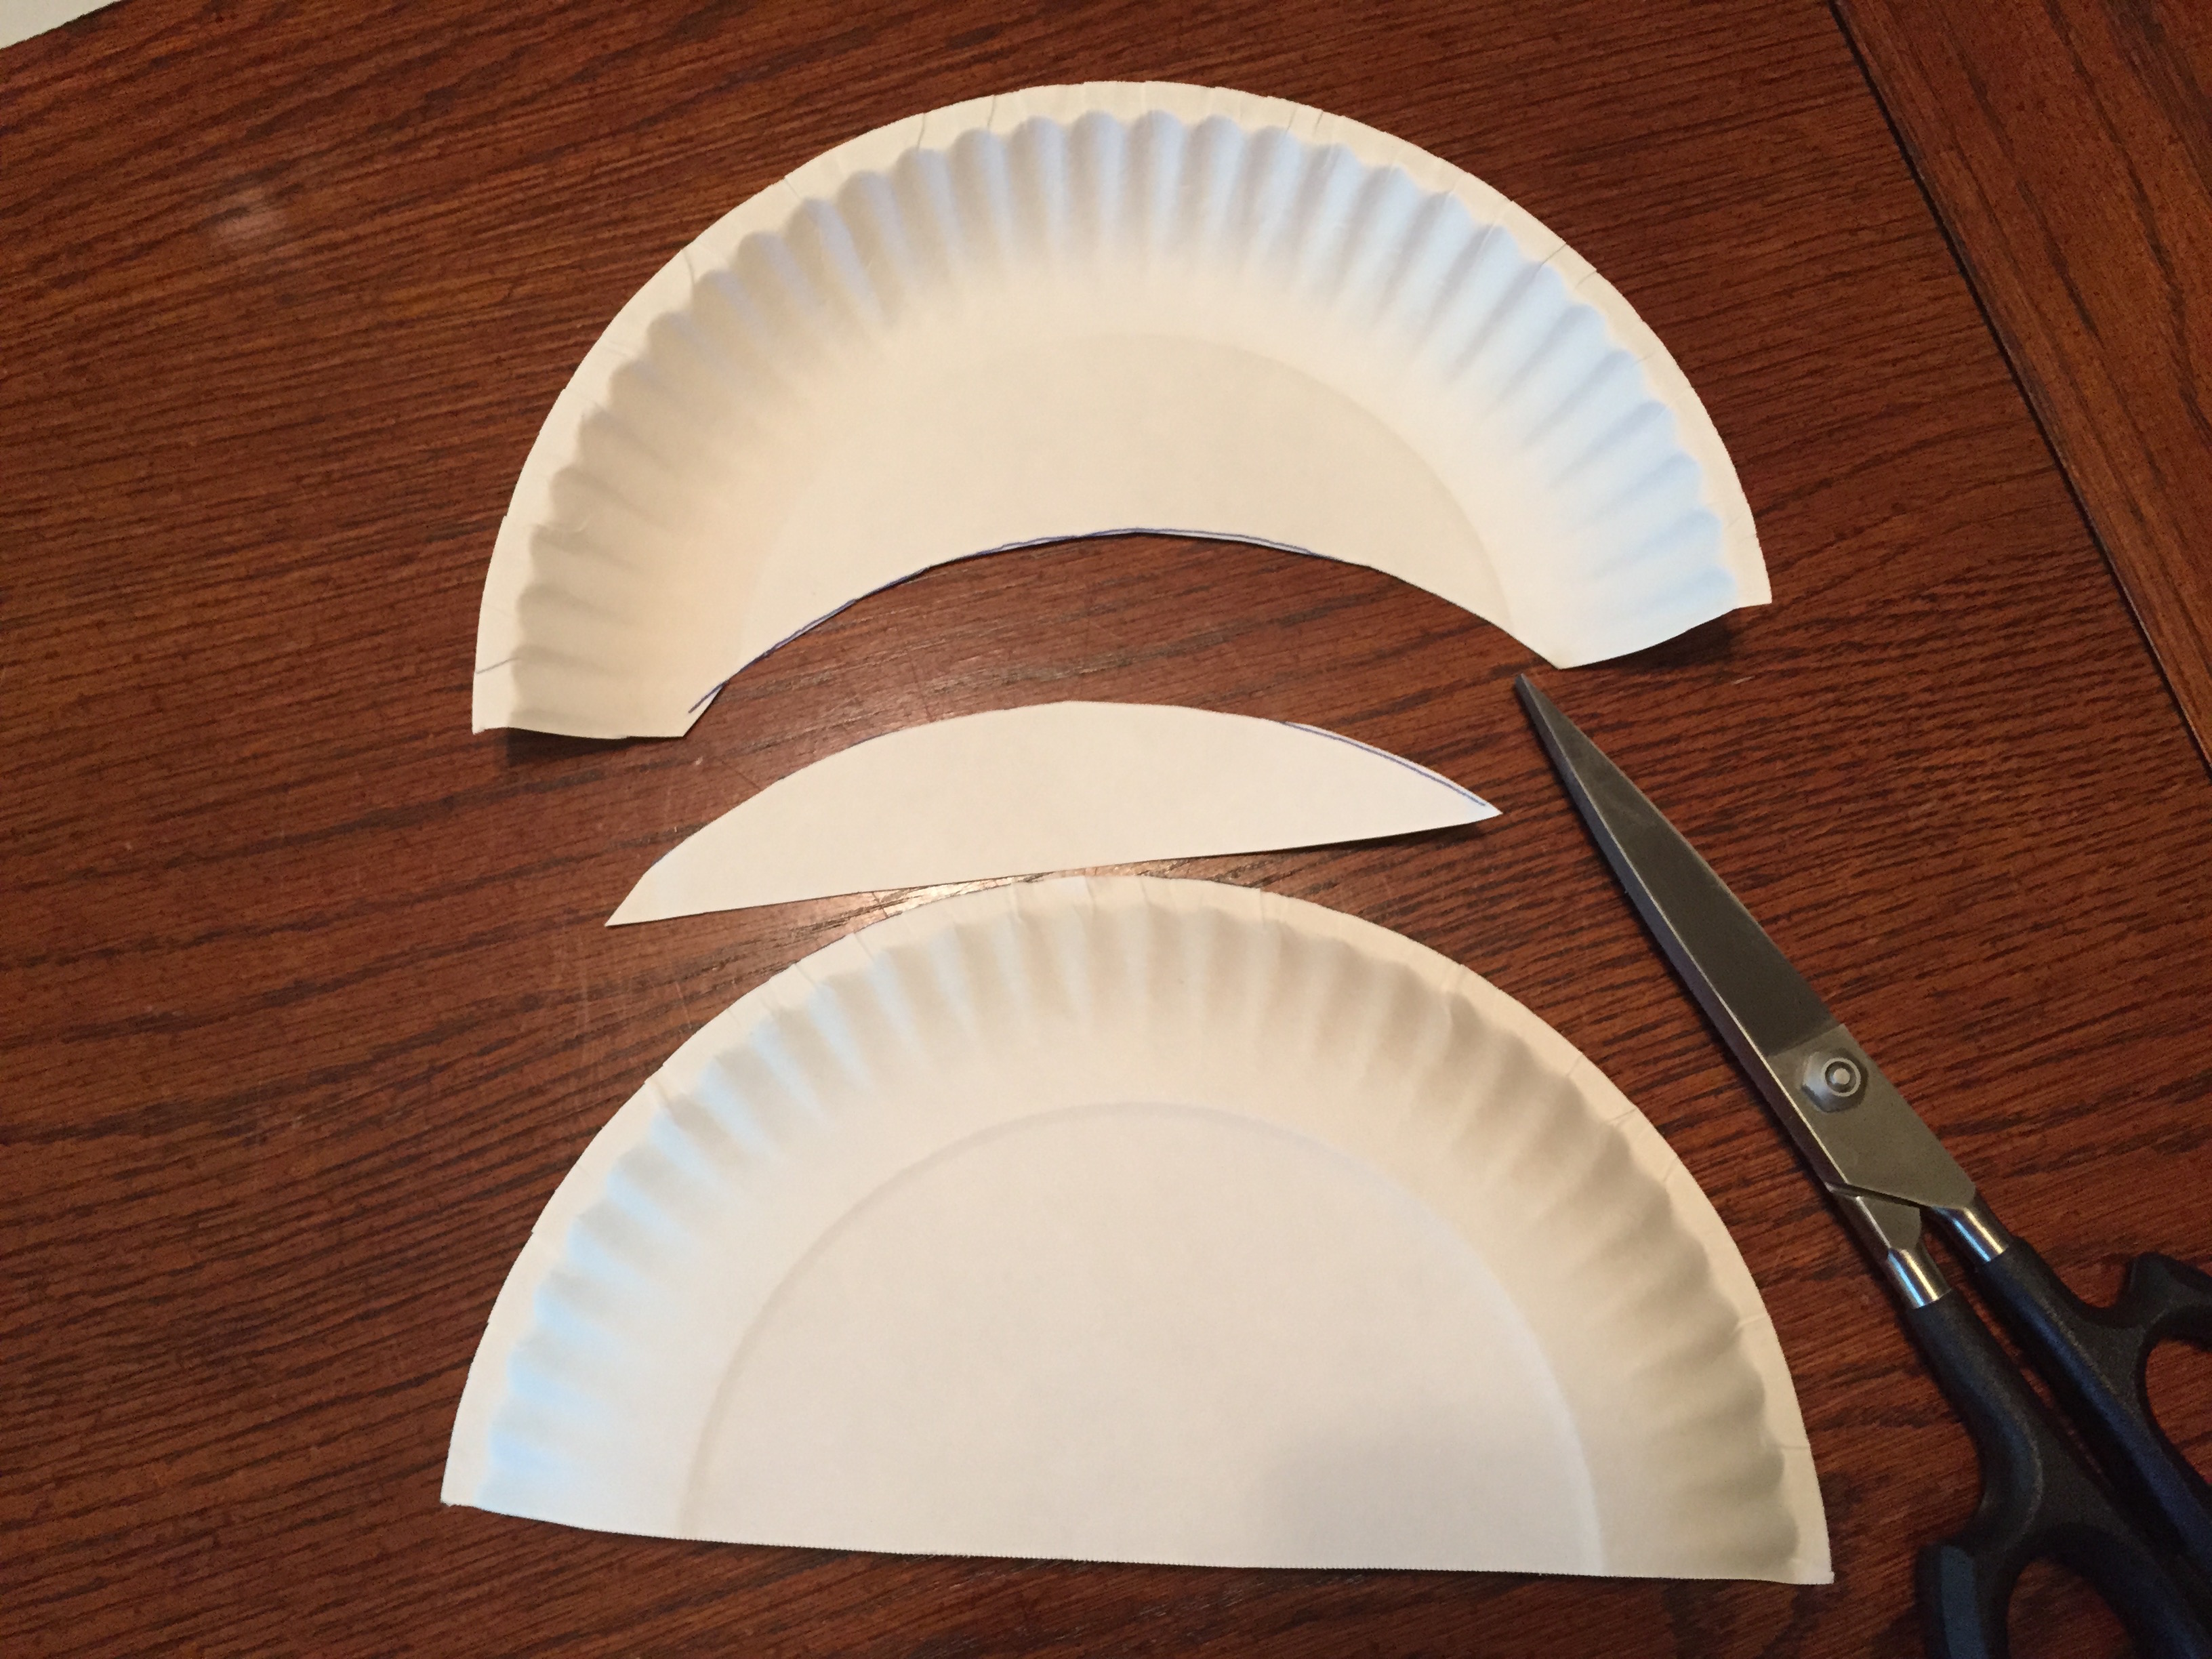
Cut the paper plate in half, then on the cut side, cut a half moon out of the bottom using the other half of the paper plate as a guide (sounds complicated, but see photo below!). Paint one side of the plate blue. Set aside to dry.
Cut elongated triangles out of the red and white paper.
Flip the dried plate over and glue the paper triangles to the back of the paper plate (along the top-curved part), alternating red and white-points pointed up. Allow to dry.
Using hole punch, punch a hole on either side of the bottom of the plate. Thread elastic through each hole and tie off (estimate amount of elastic needed based on the child’s head size). You can also use a hard headband and put the headband ends through the holes on either end!
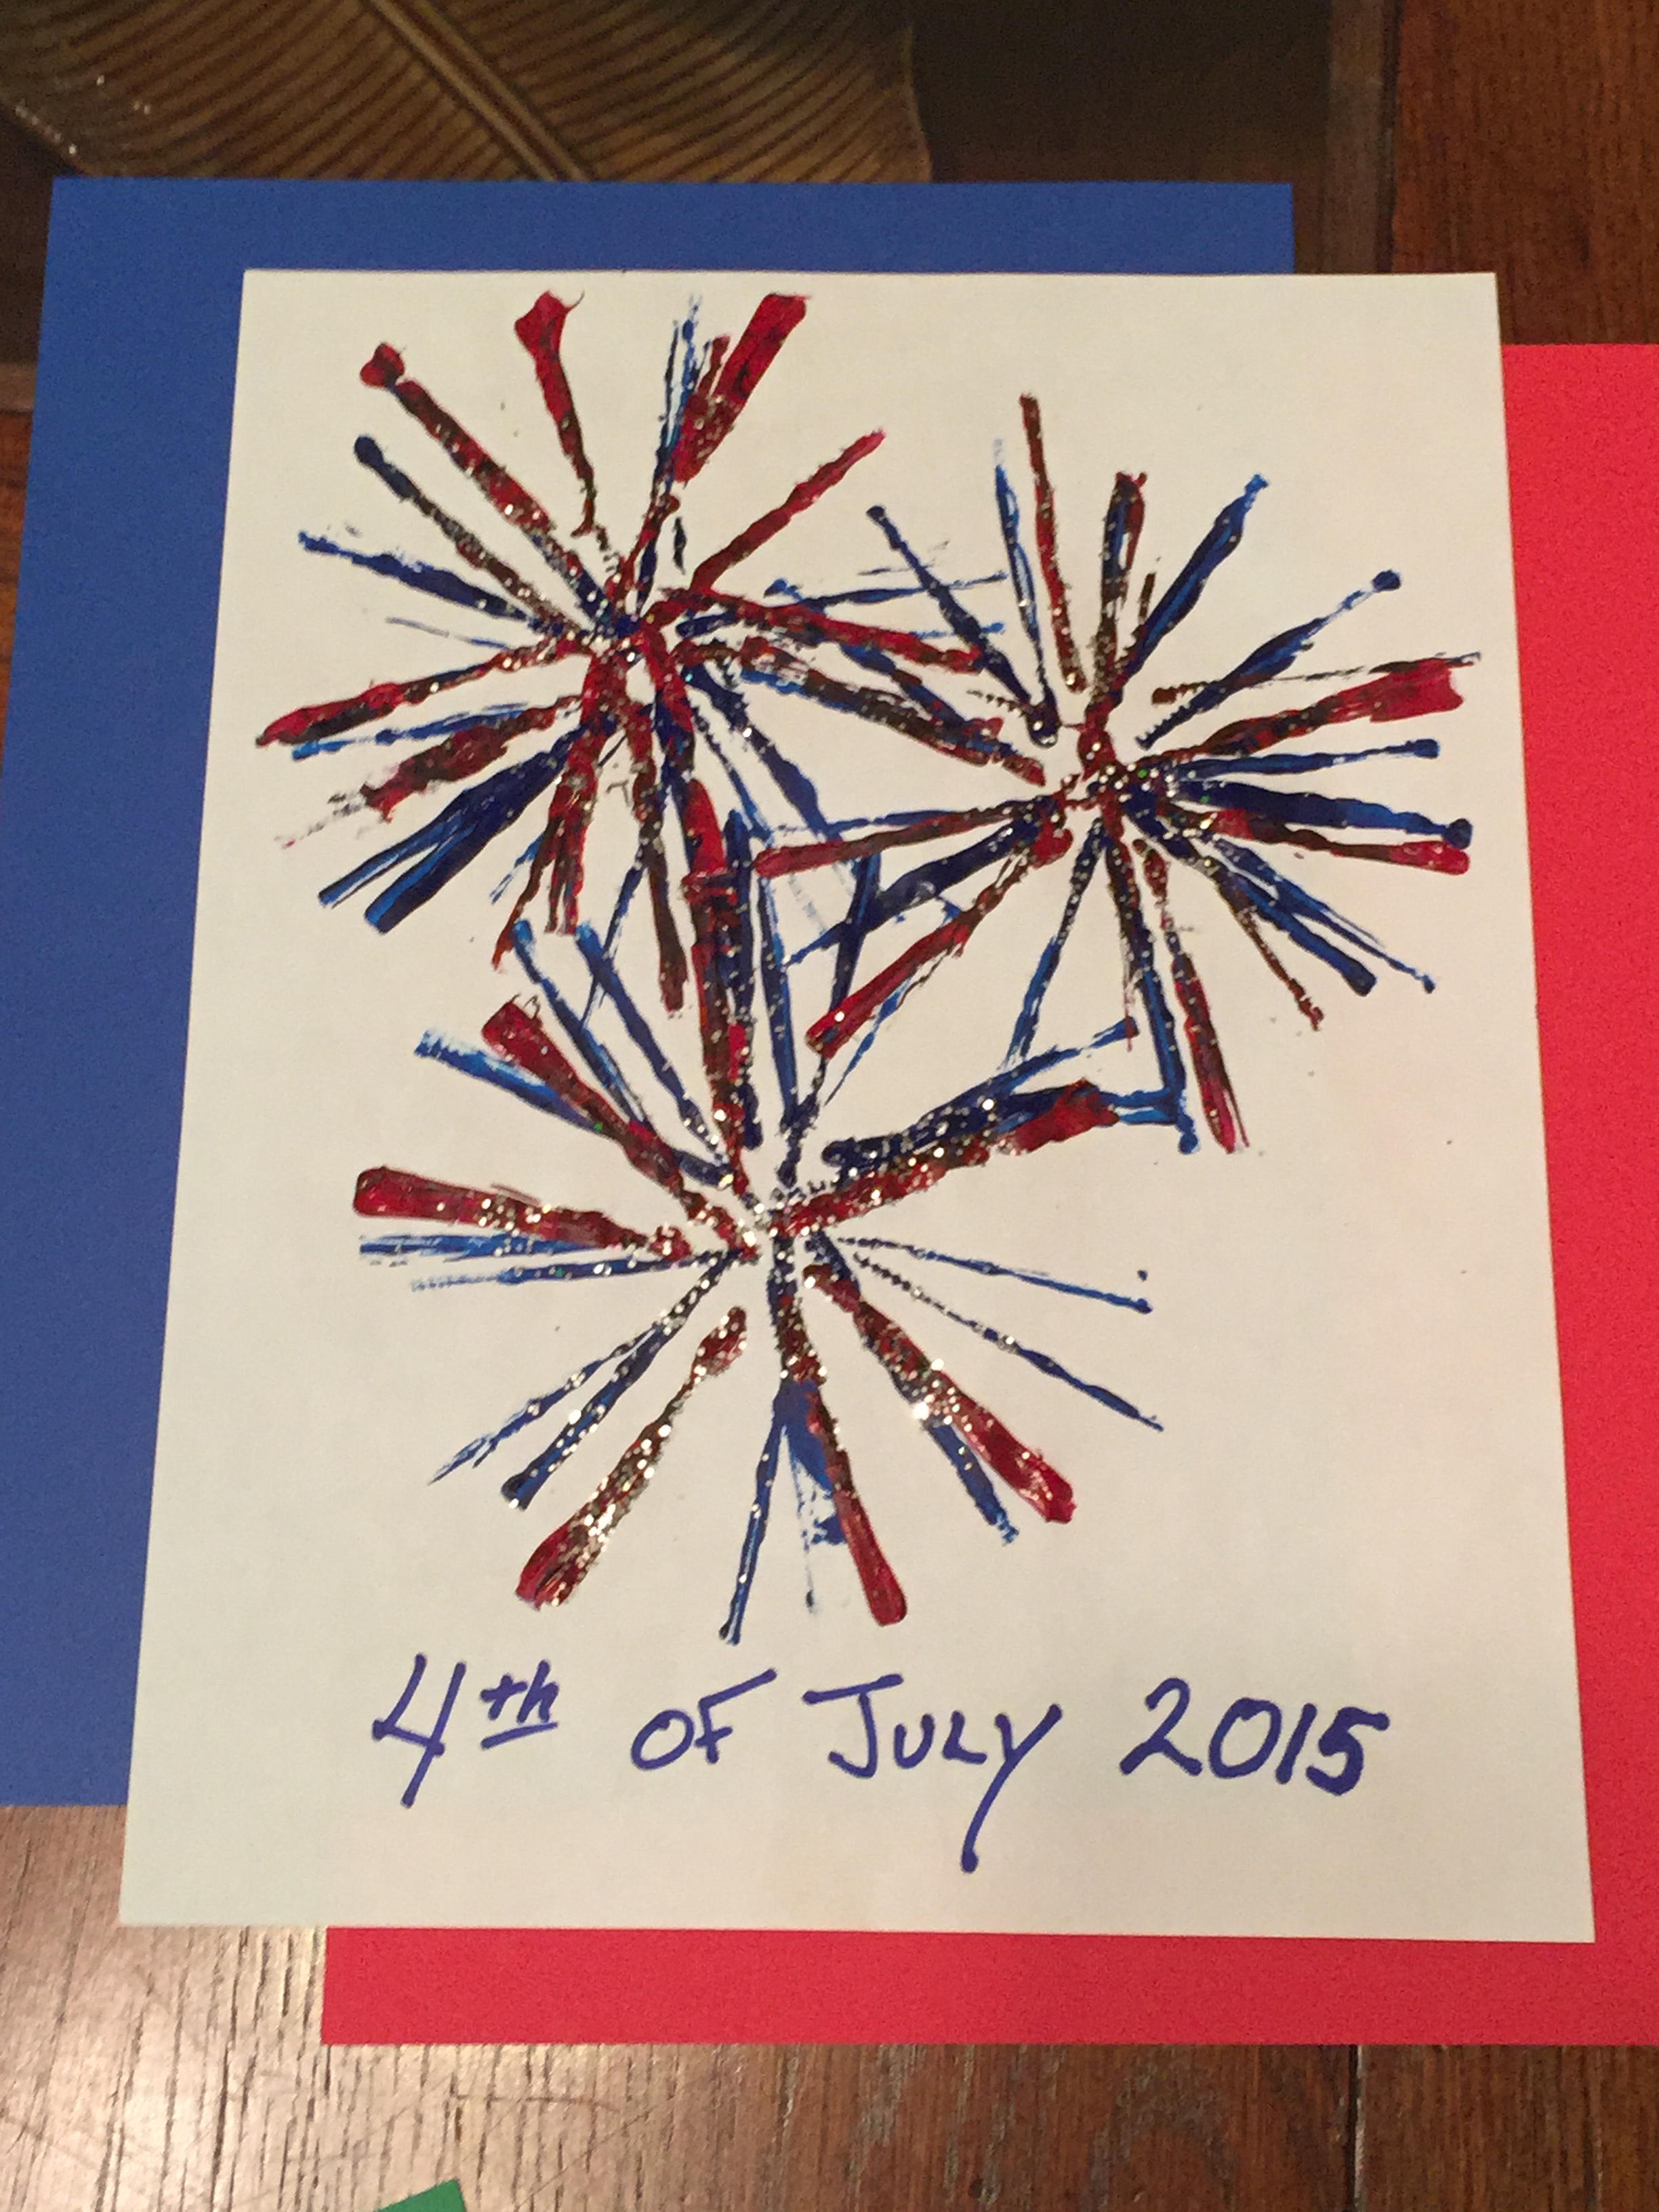
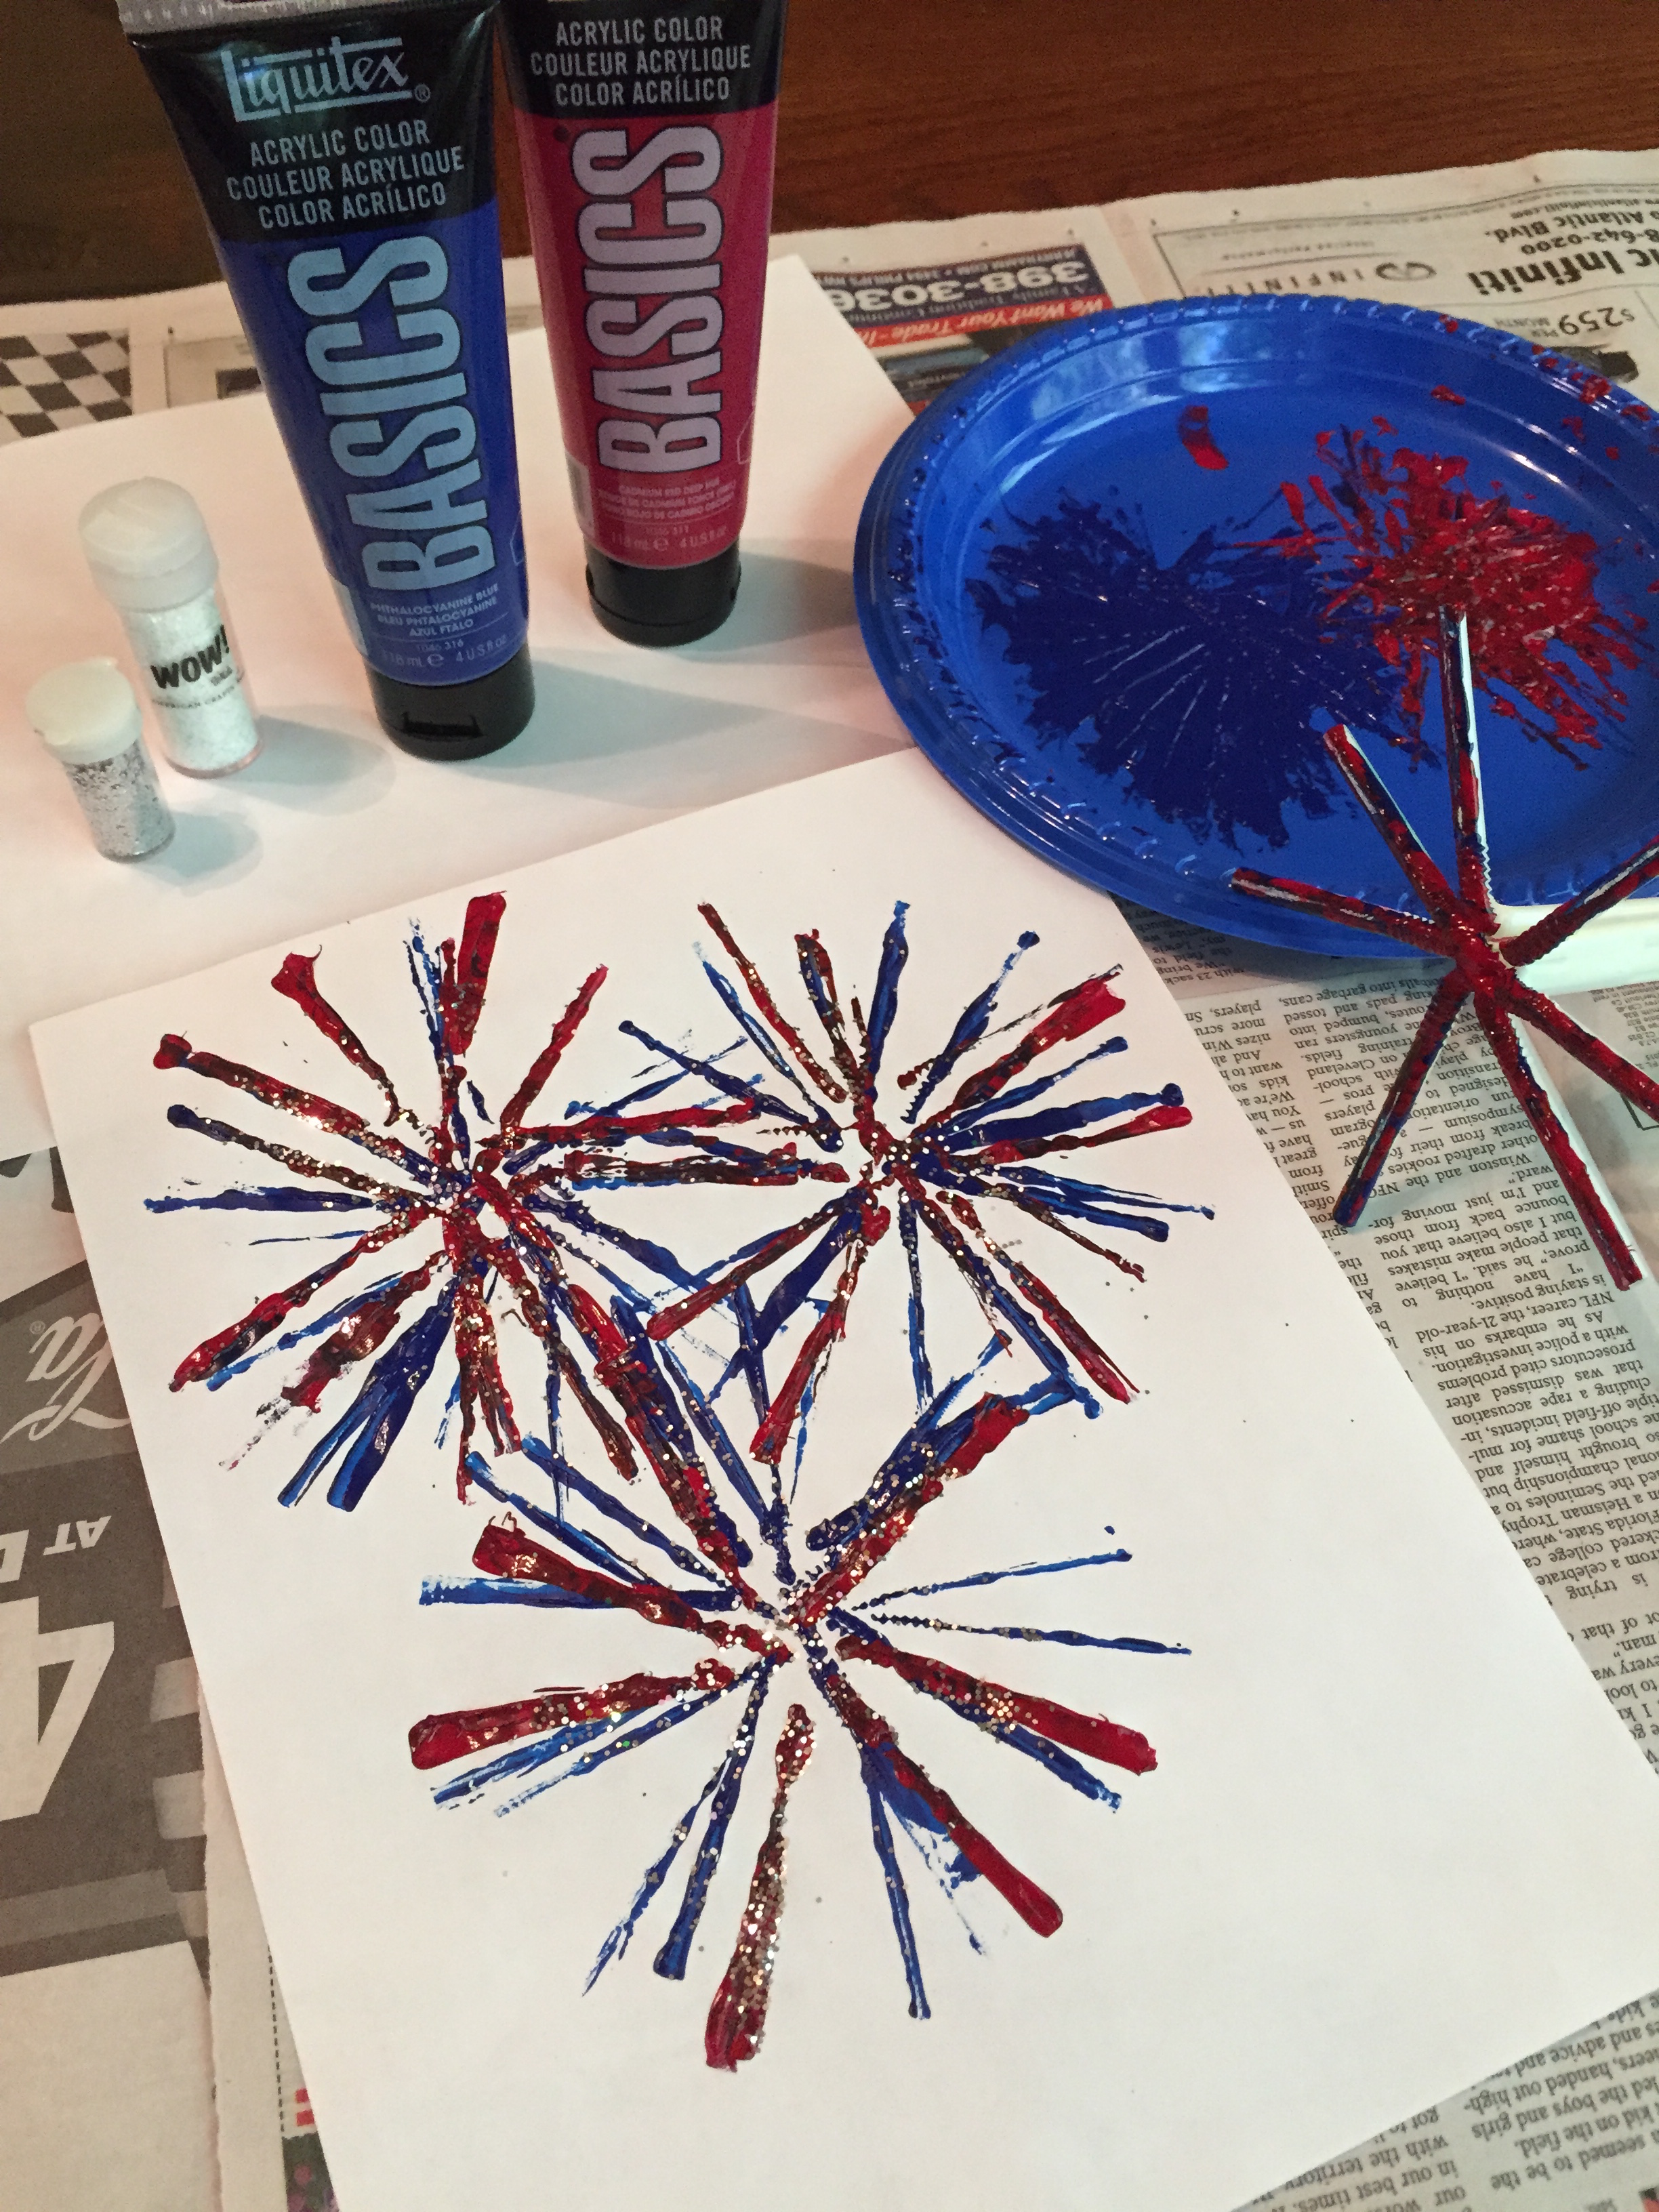
Fireworks Art
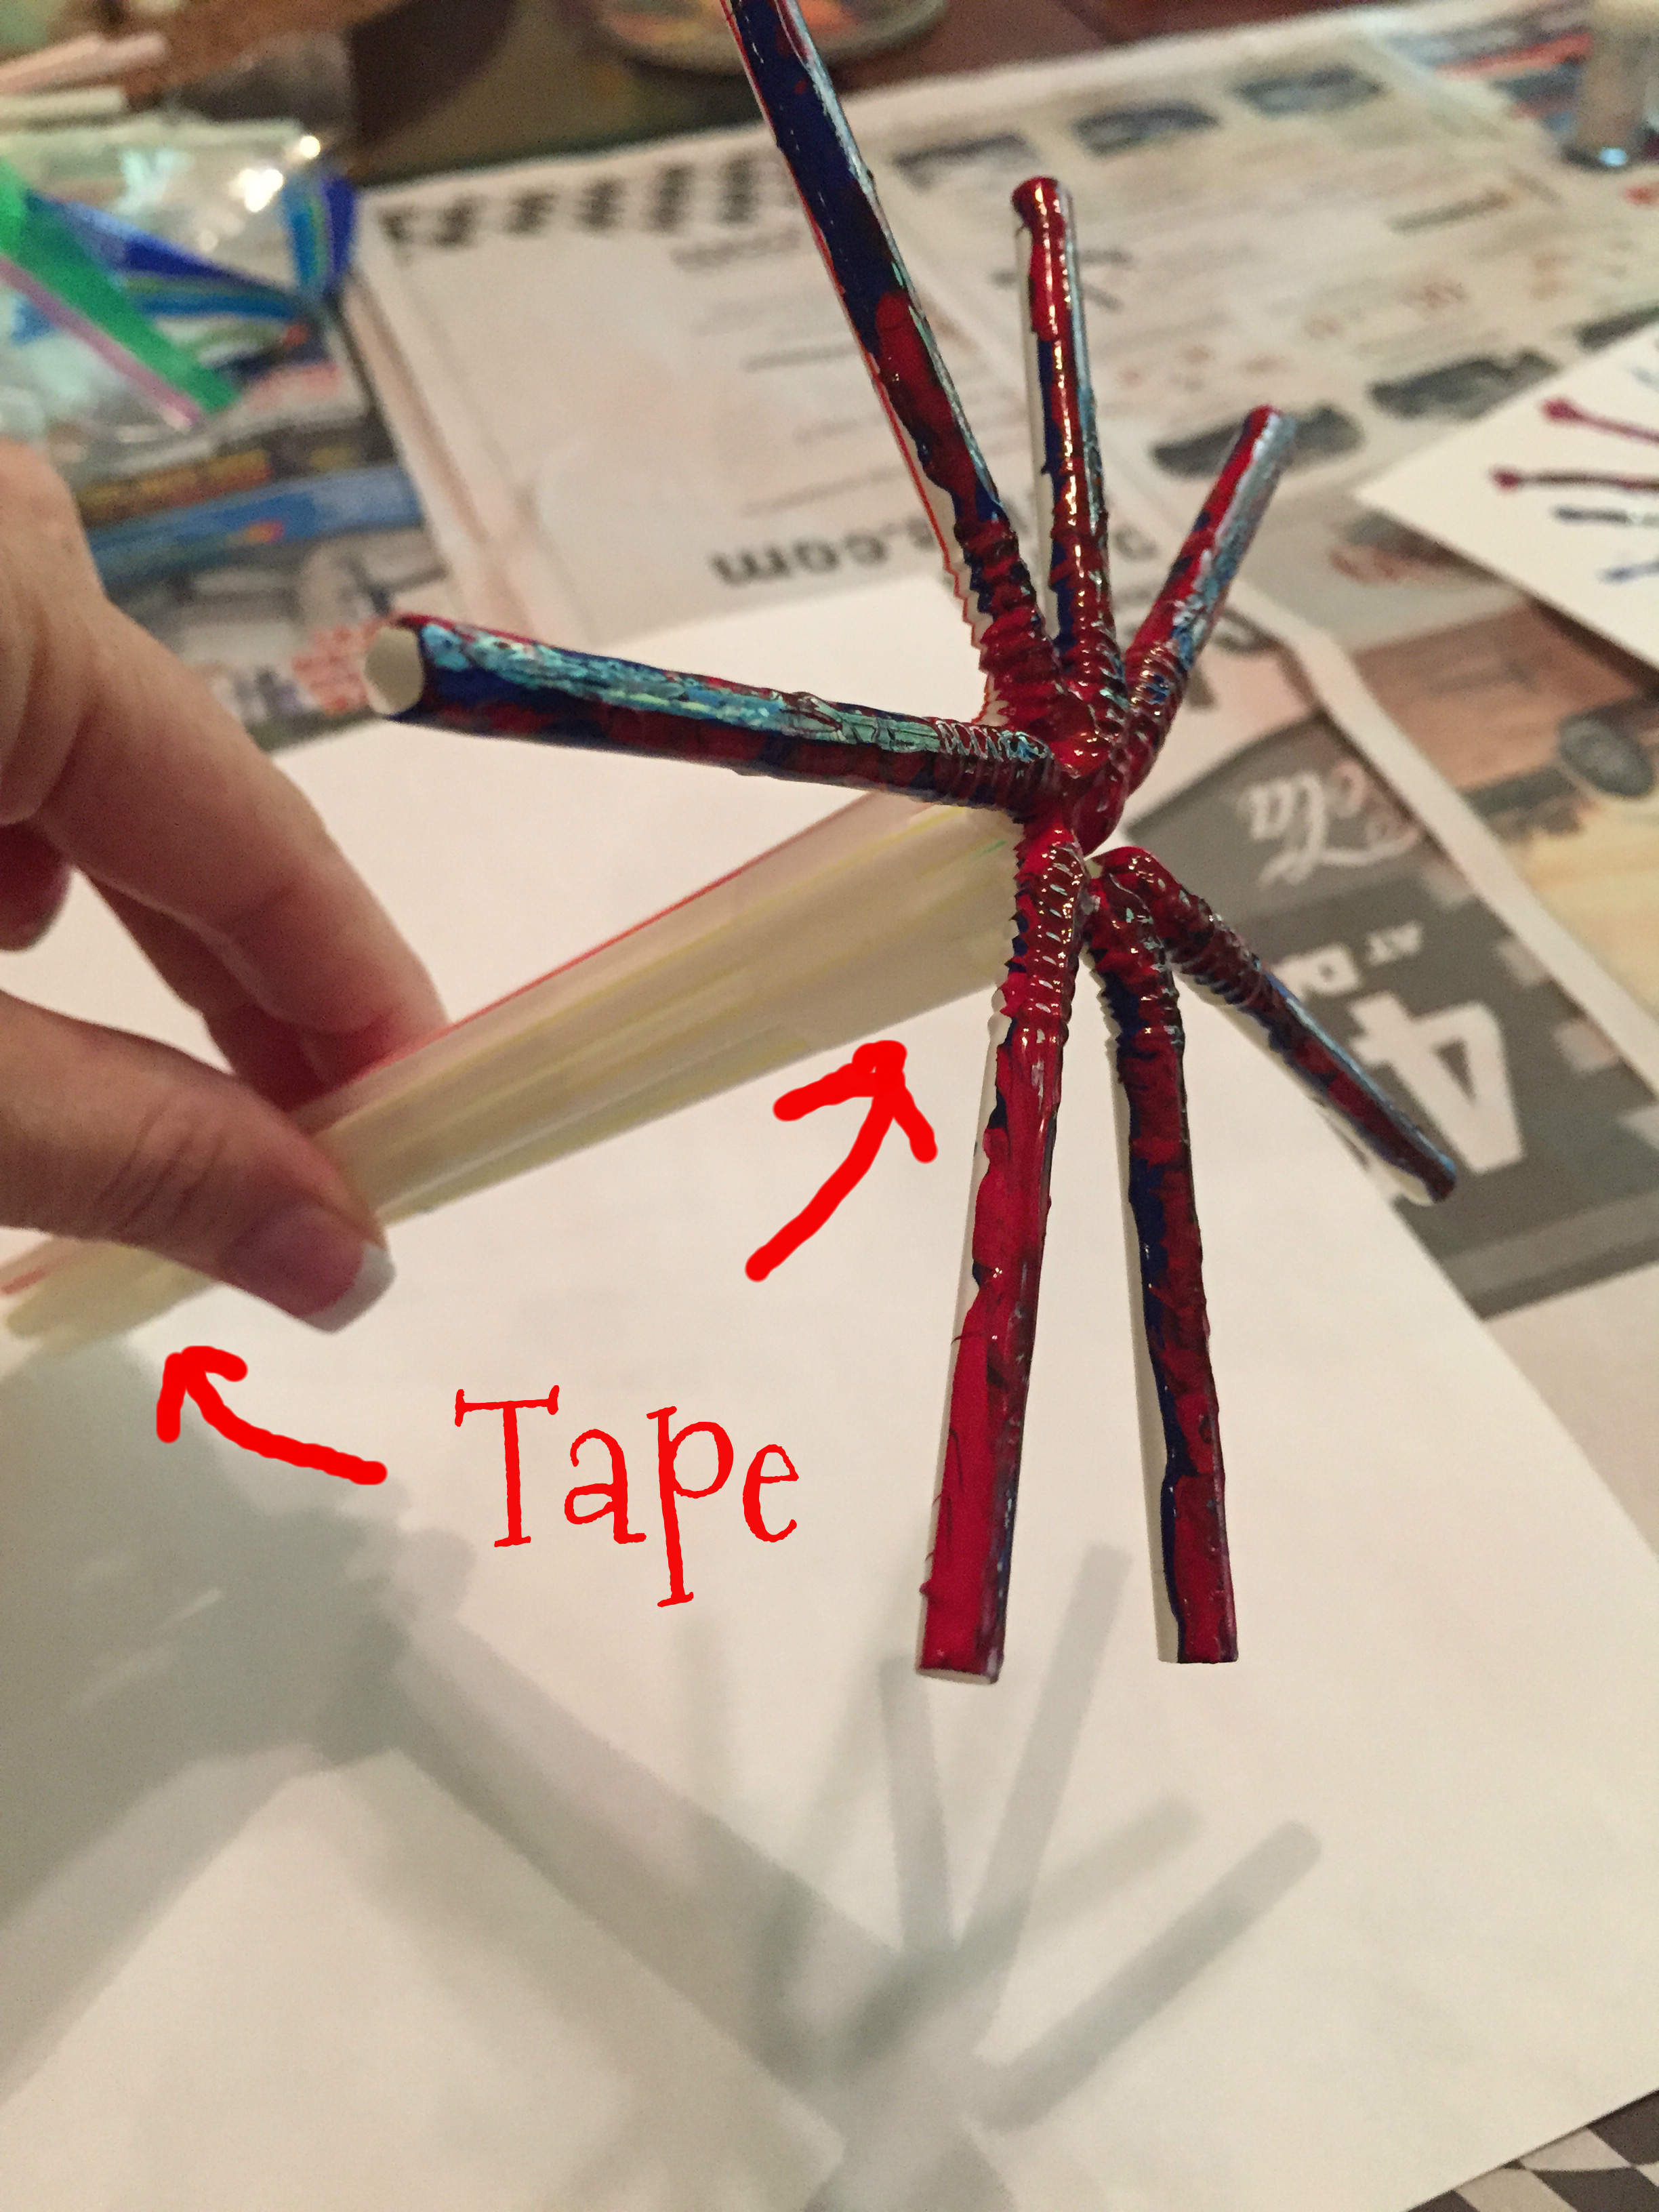
Bendy straws make this simple craft fun AND pretty!
What You Need:
7 bendy straws per person
Tape
Blue and Red acrylic paint
Paper plate
White paper
Red, white or blue glitter (optional)
Directions:
Pull each of the bendy straws so they are fully extended. Holding the 7 straws in a bundle in your hand (making sure the ends are aligned), wrap tape around the bottom and then right under where the straws bend. Once secured, bend and spread out the bendy end of the straws to create a pinwheel shape. (See photo below!)
Pour blue paint onto a paper plate and have the kids dip the pinwheeled end of the straws in the paint. Have them stamp the pinwheel all over the white paper; repeat with red paint. (You may need to press the straws to the paper so they make full contact with the paper.) If desired, while paint is wet, sprinkle sparkles on the artwork.
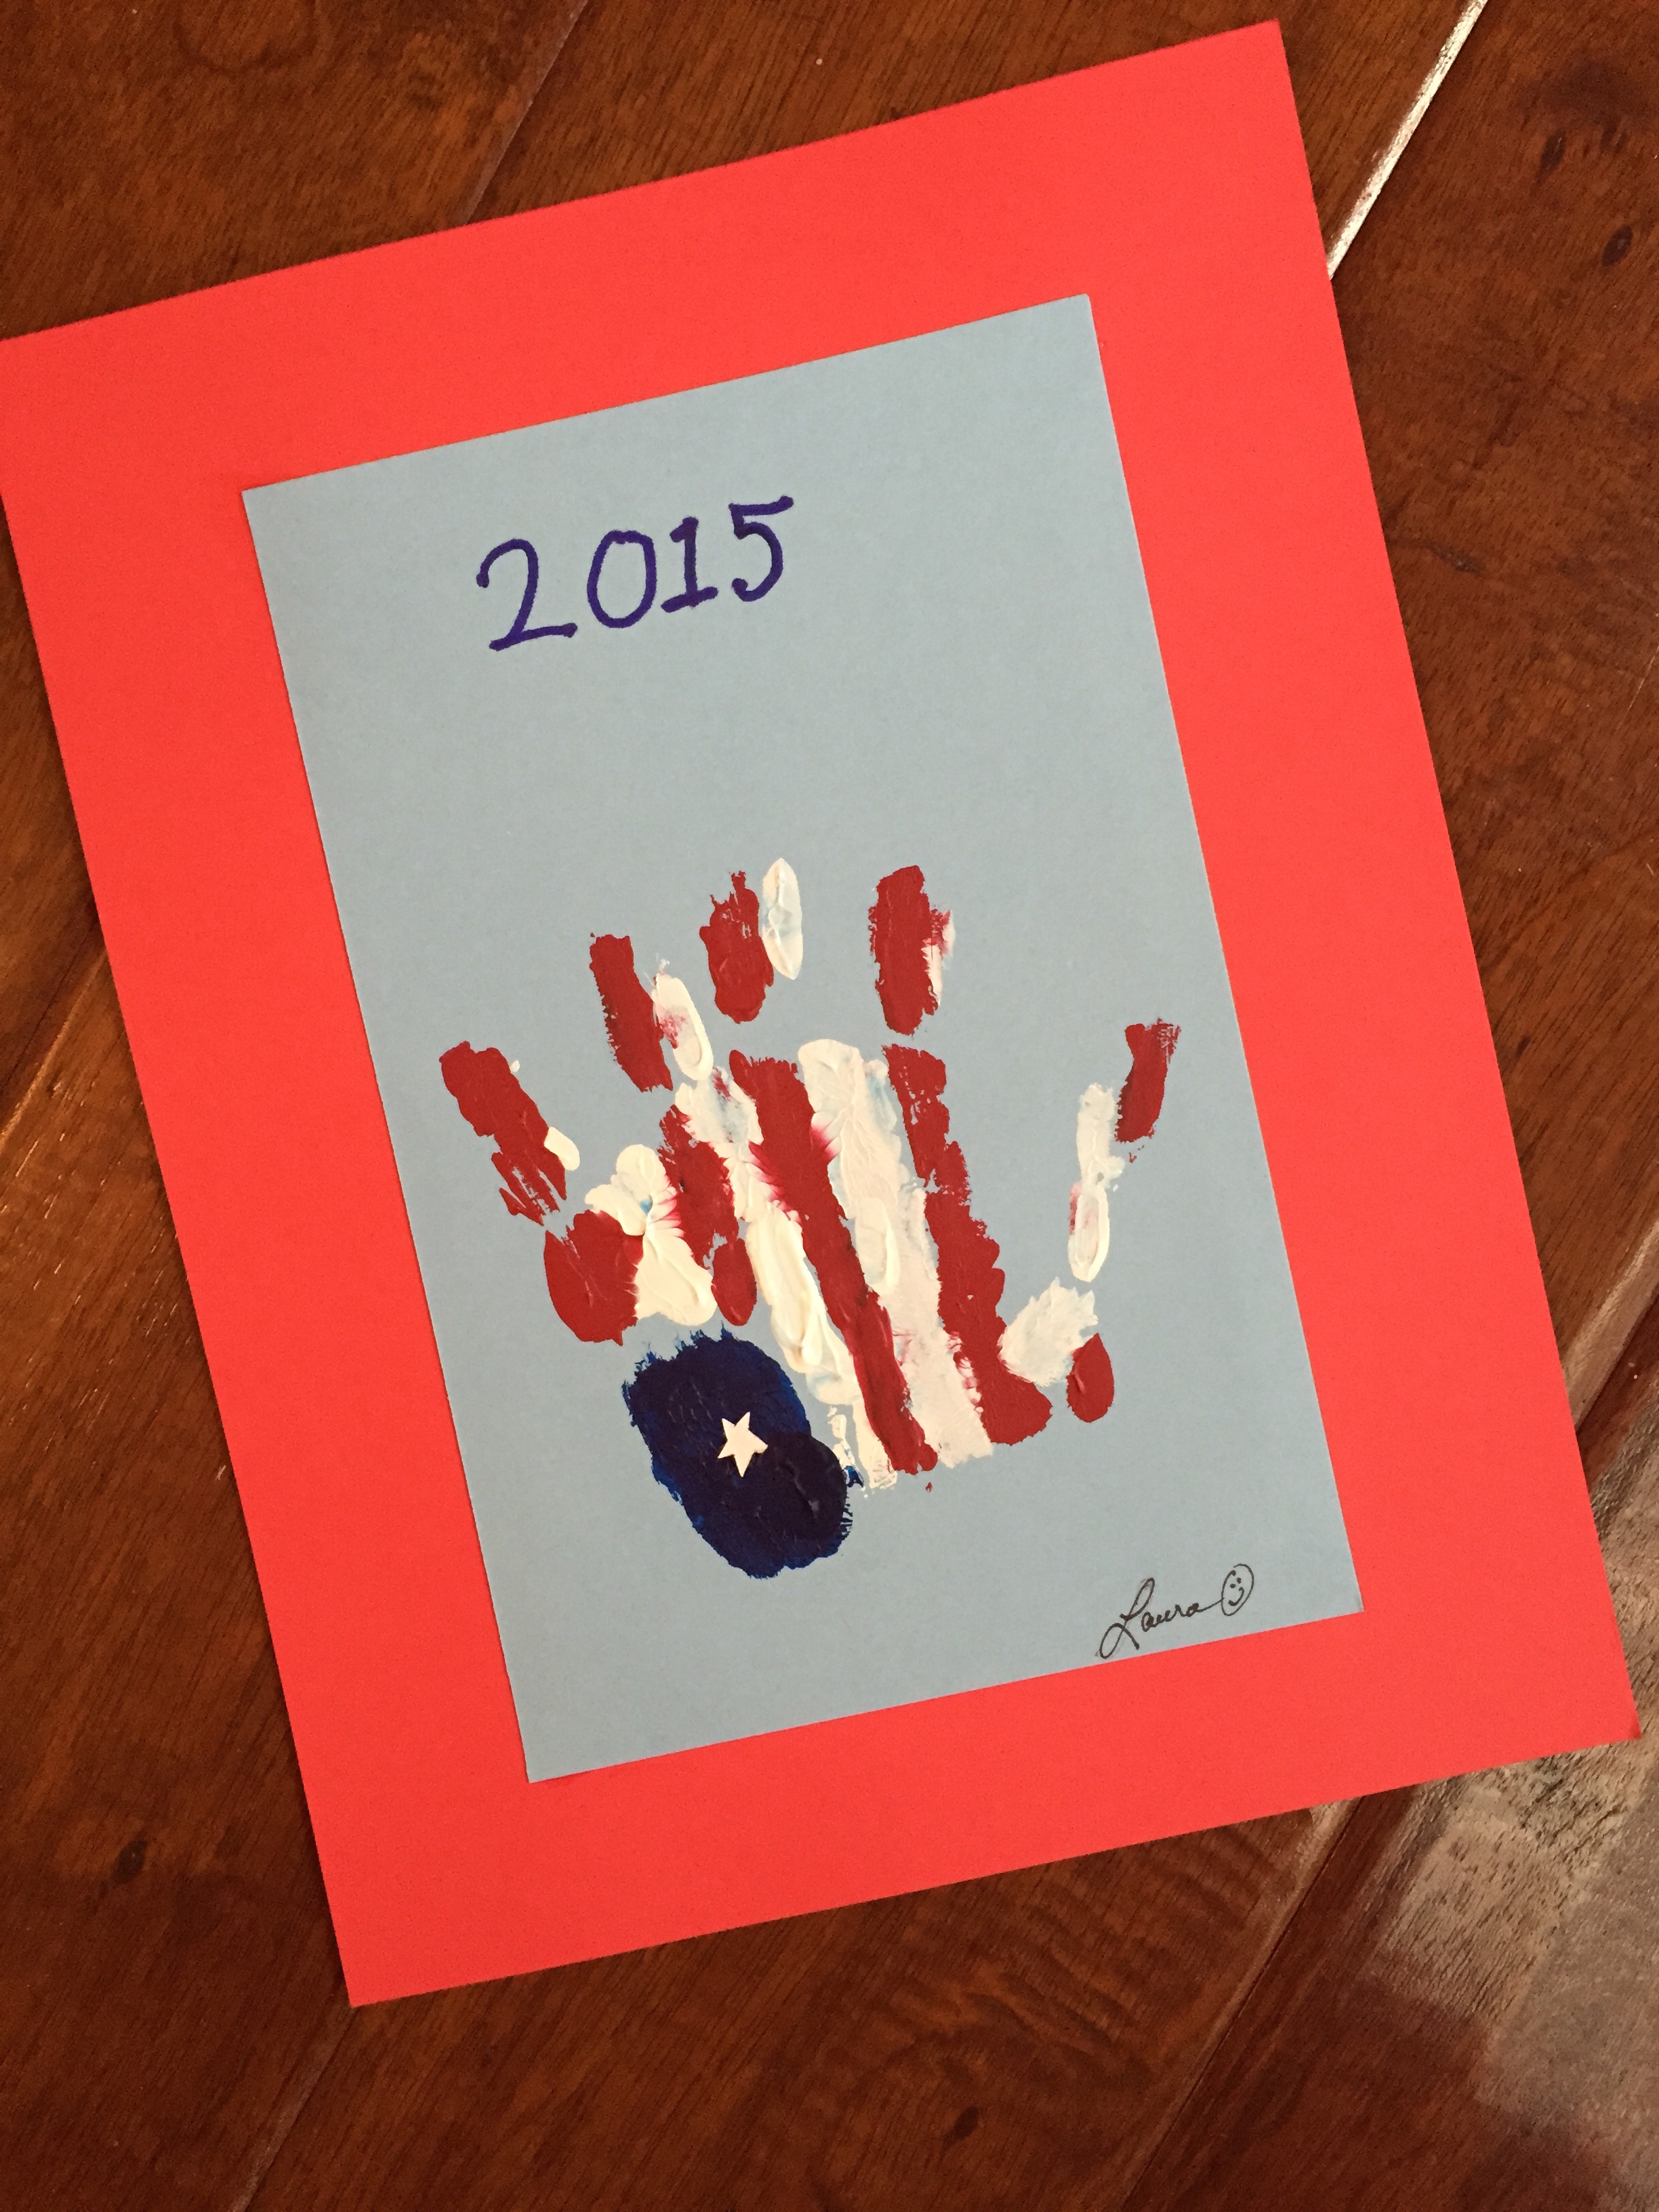
Flag Handiwork!
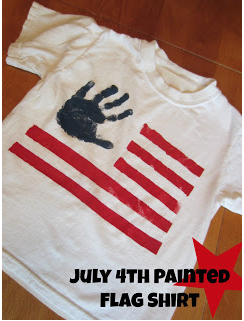
Give the flag a hand! Use your child’s hand to re-create the flag! (Don’t laugh, but since I have teens, not toddlers, at home I used my own hand for demo purposes!)
What You Need:
Red, White and Blue Acrylic Paint
Paintbrushes
Light Blue Paper for the print
Red Paper for Mounting
White Paint or Paint Marker
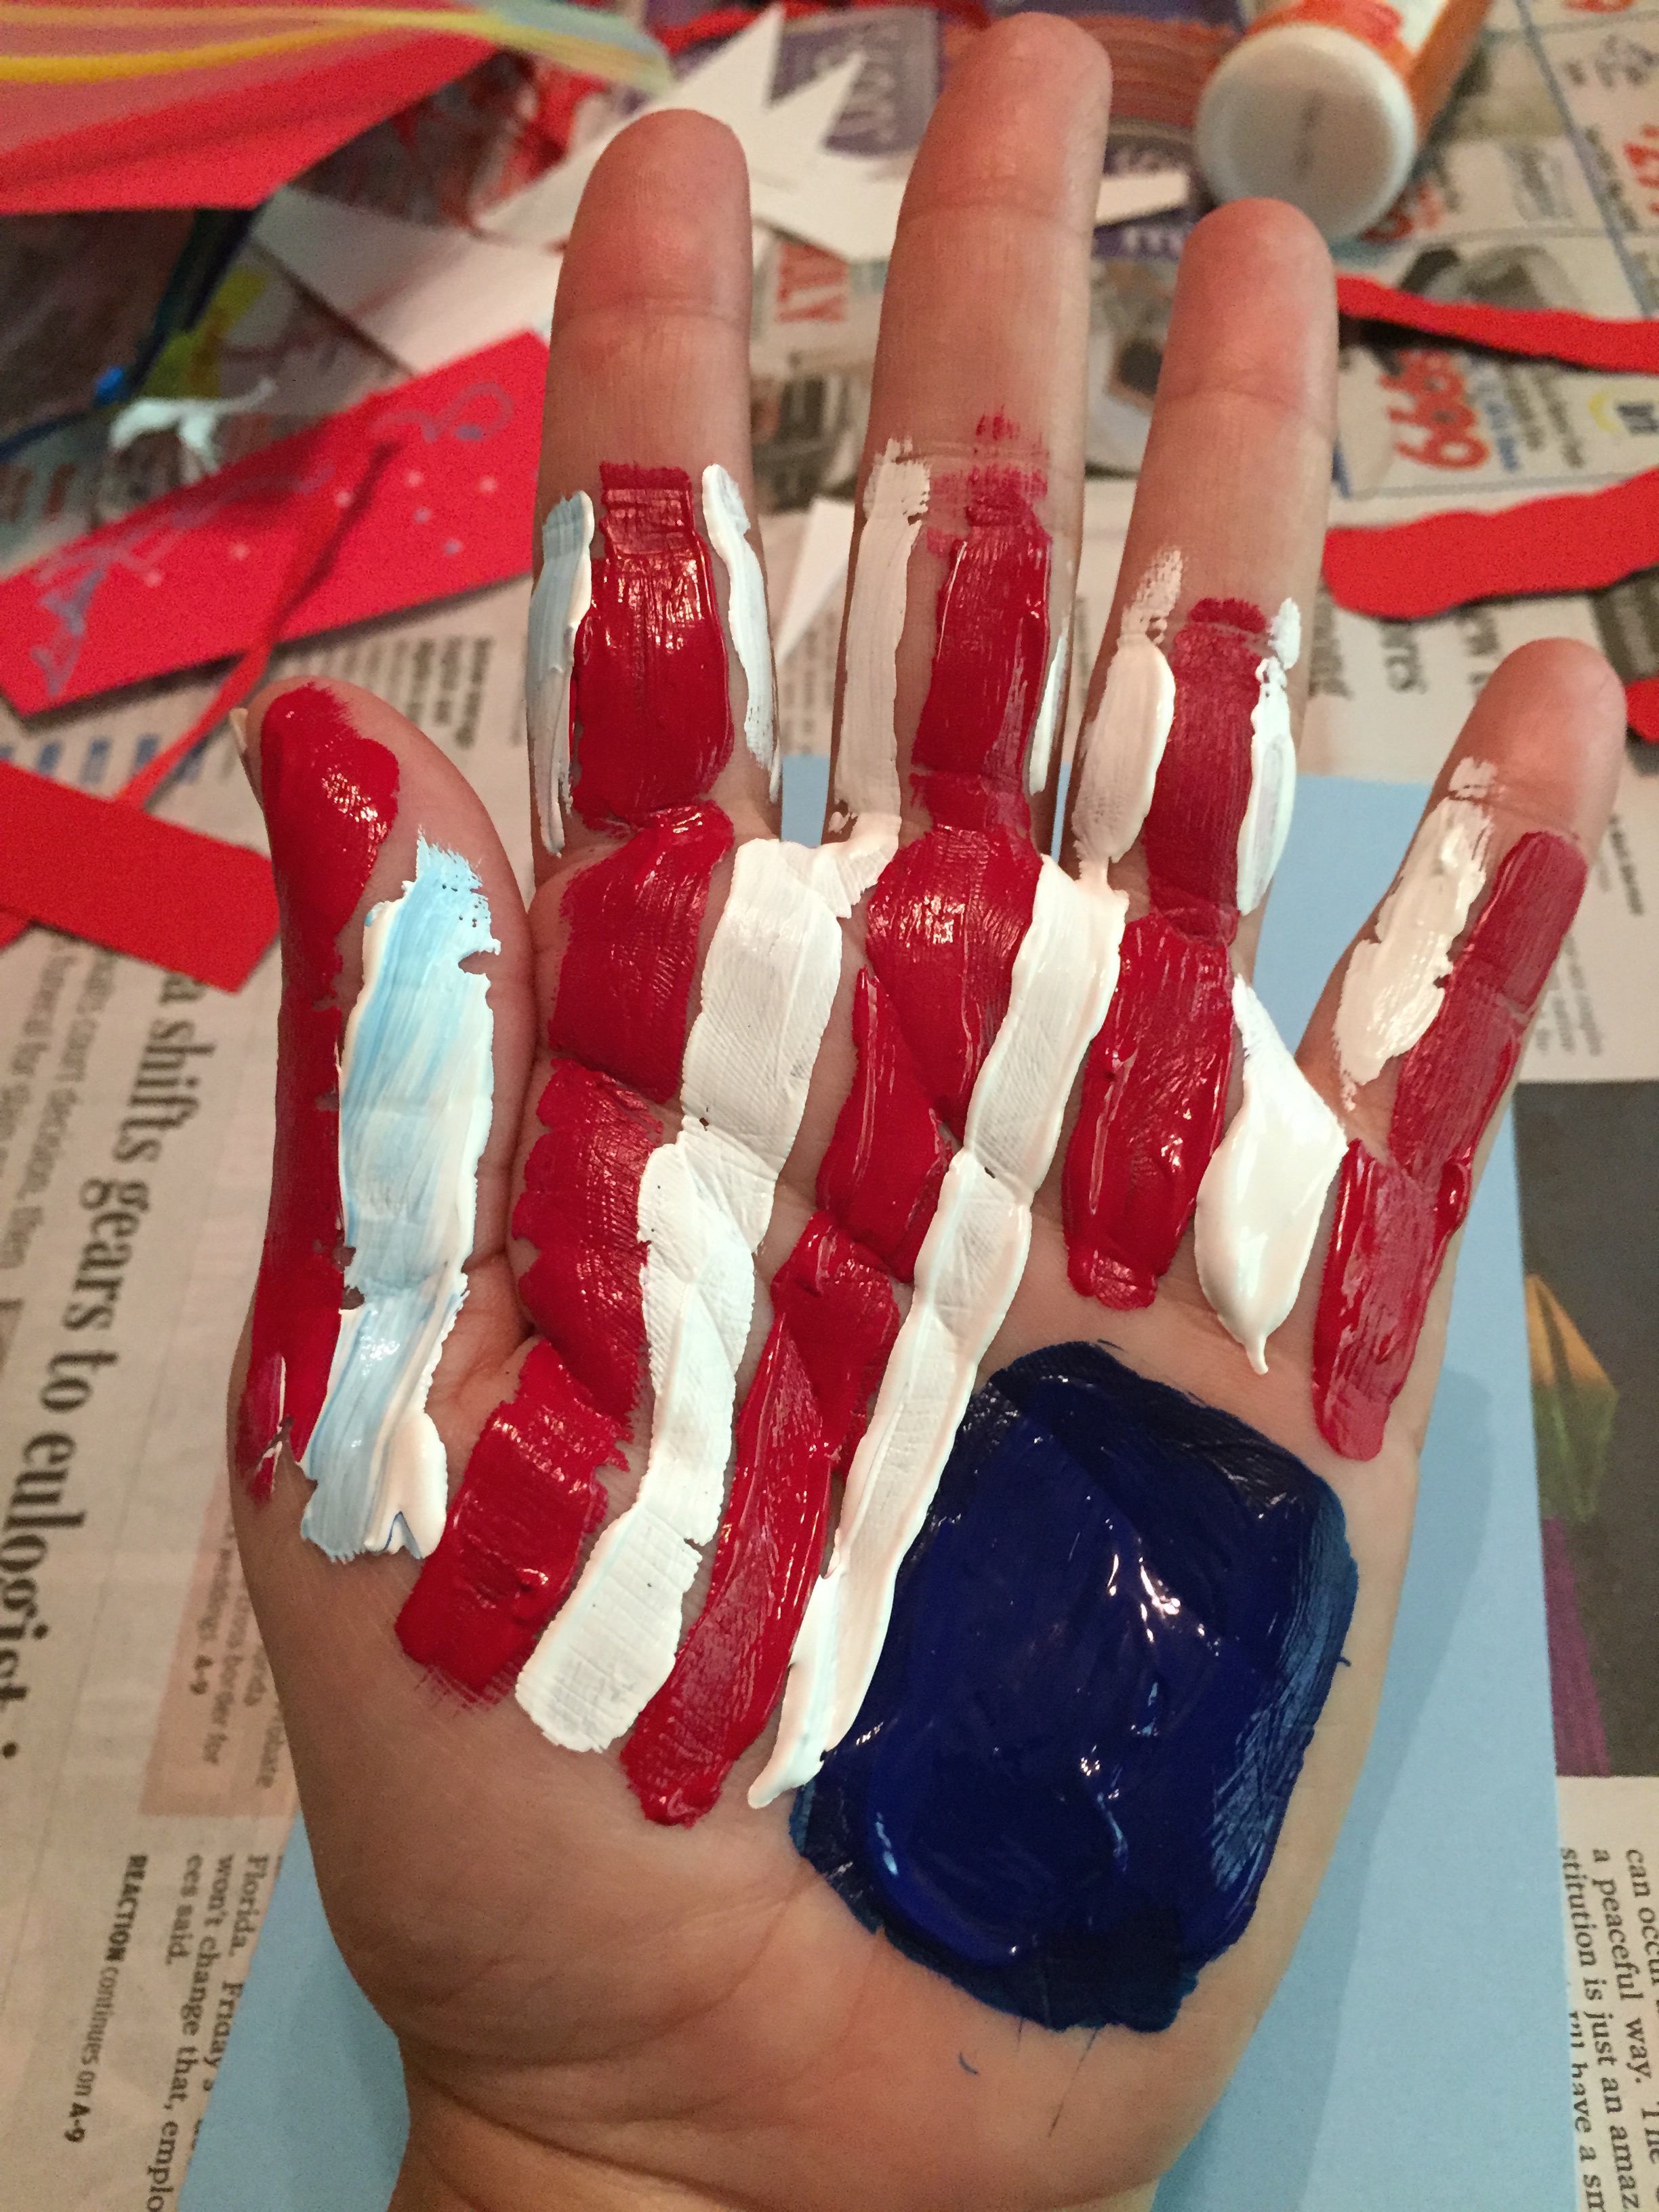
Directions:
Assemble your paints, brushes, and light blue paper. Have your child hold out their hand (I used left hand) and gently paint a blue square on their palm, followed by alternating red and white stripes leading out onto their fingers. (See photo) NOTE: Plan to work quickly so the paint doesn’t dry on their hand!!
Press the painted hand onto the light blue paper. Once dried, paint a white star on the blue square. Mount the artwork onto slightly larger red paper.
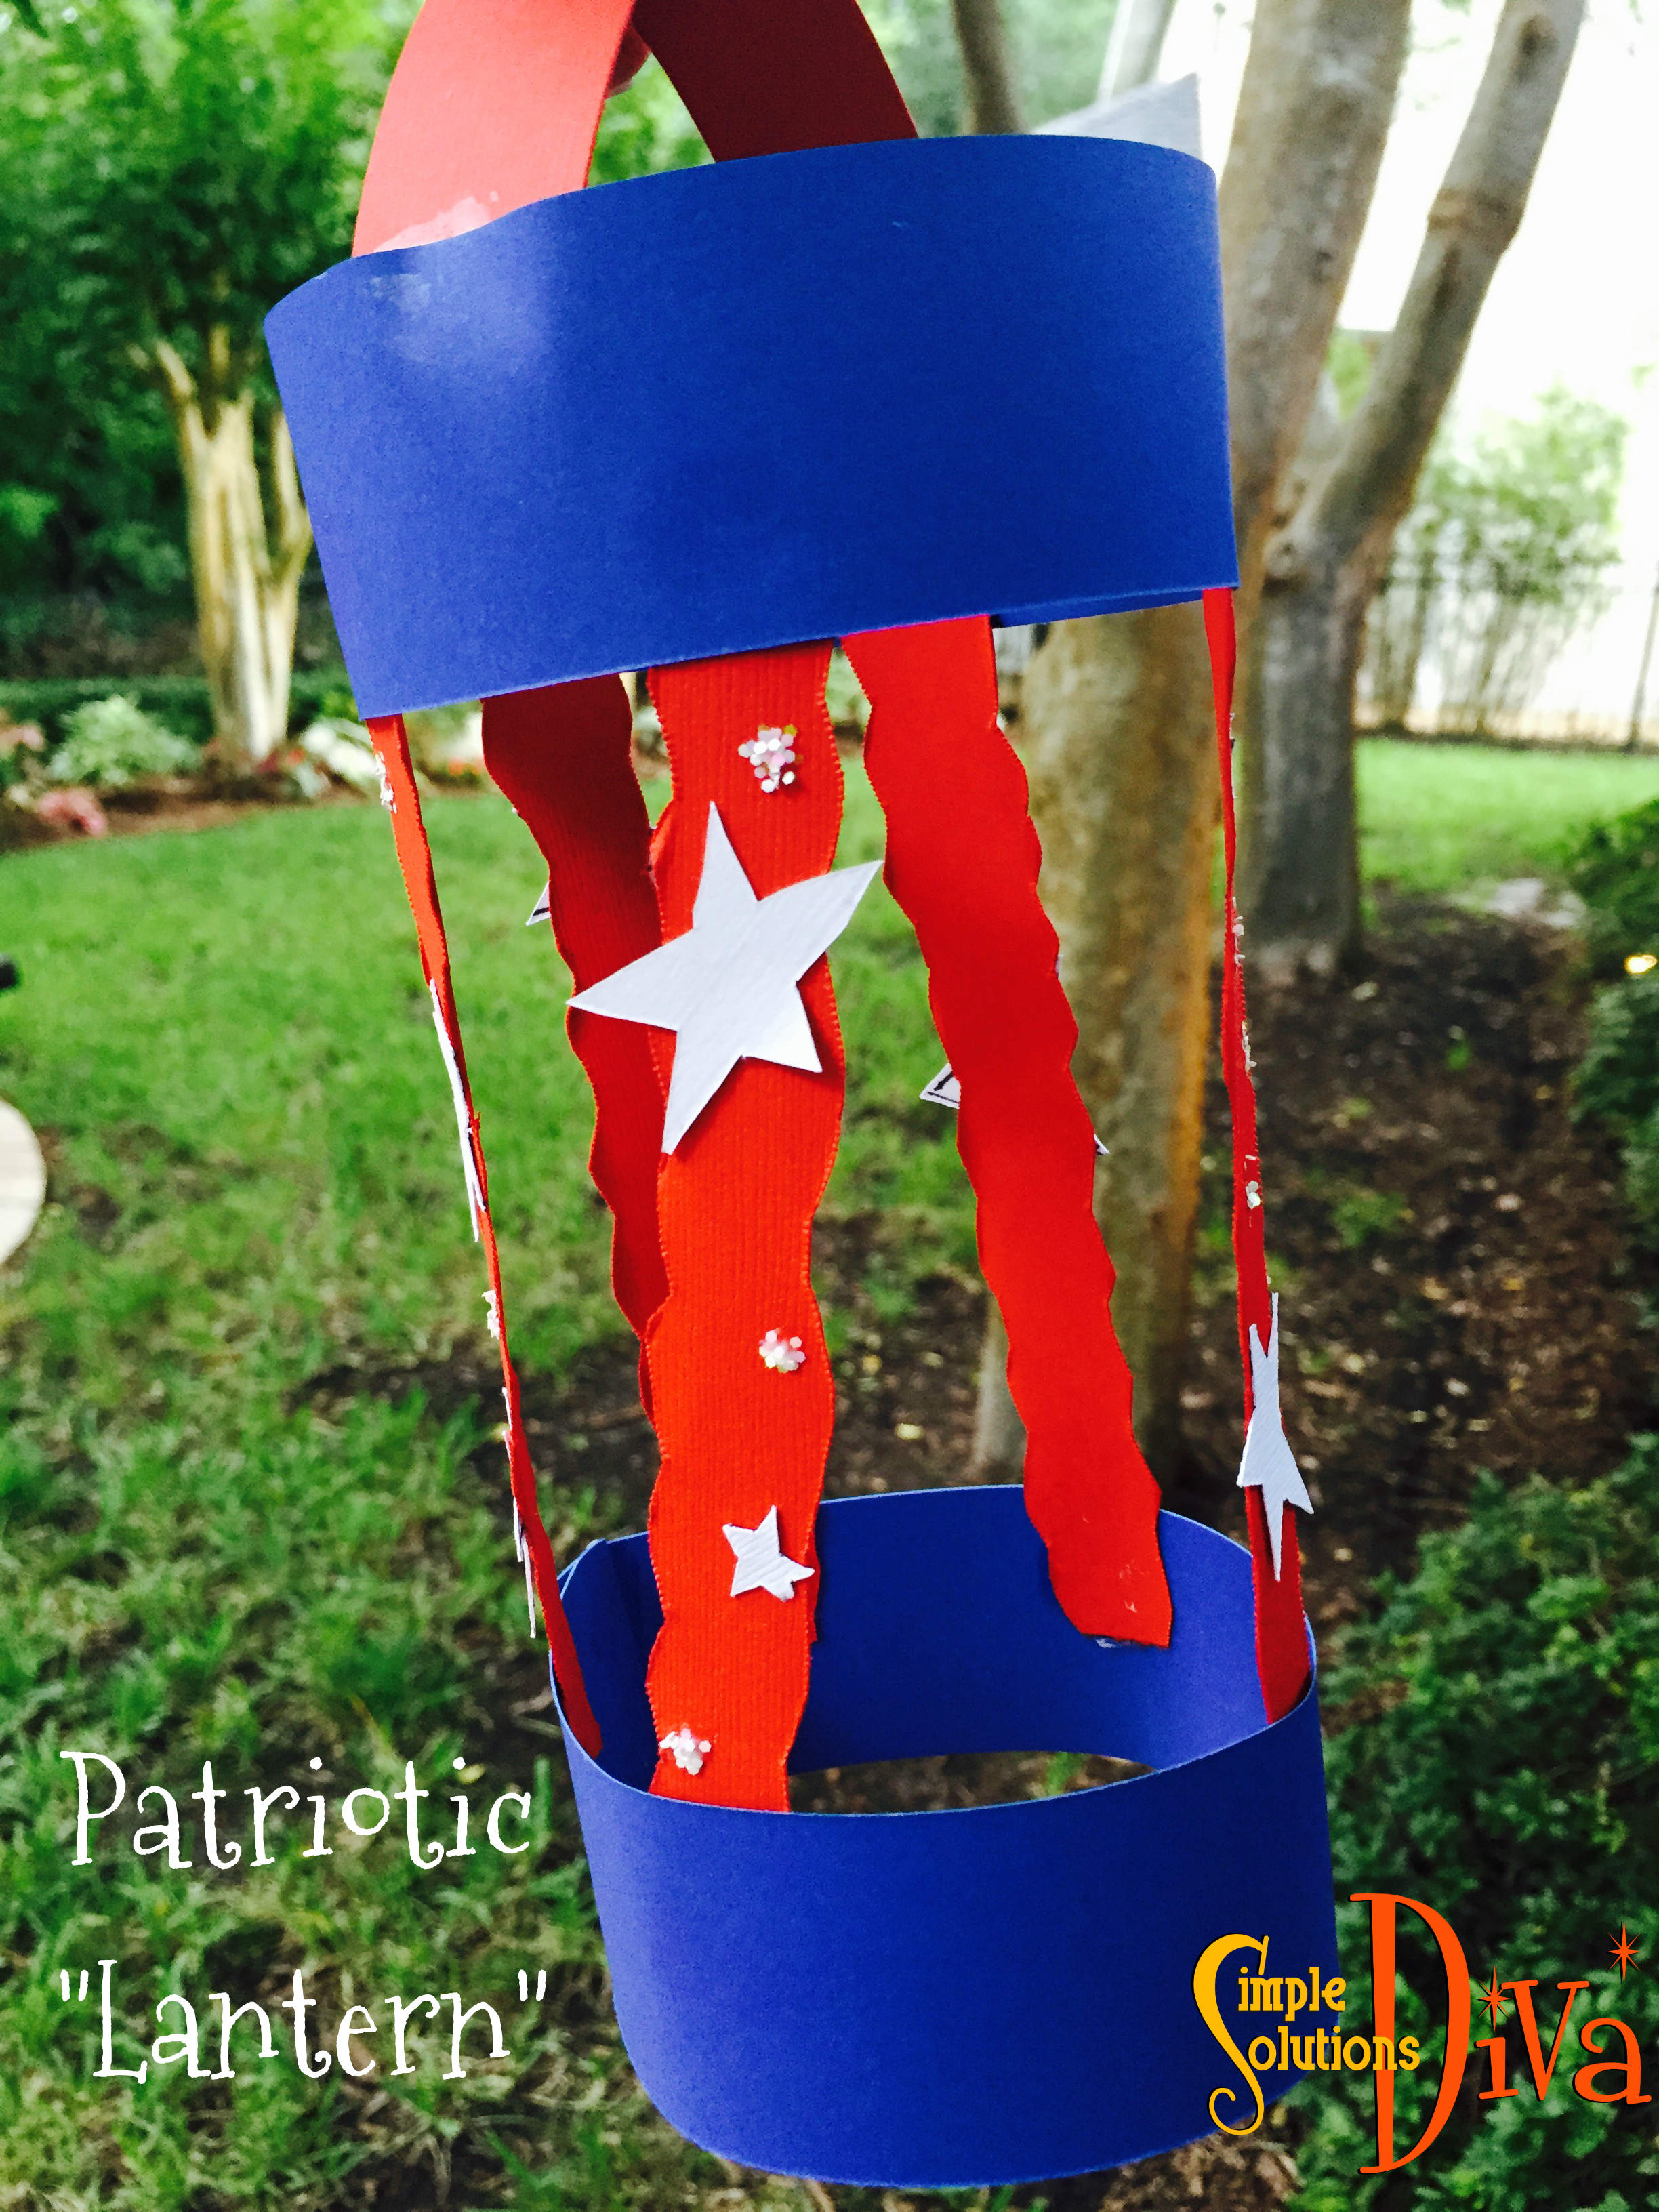
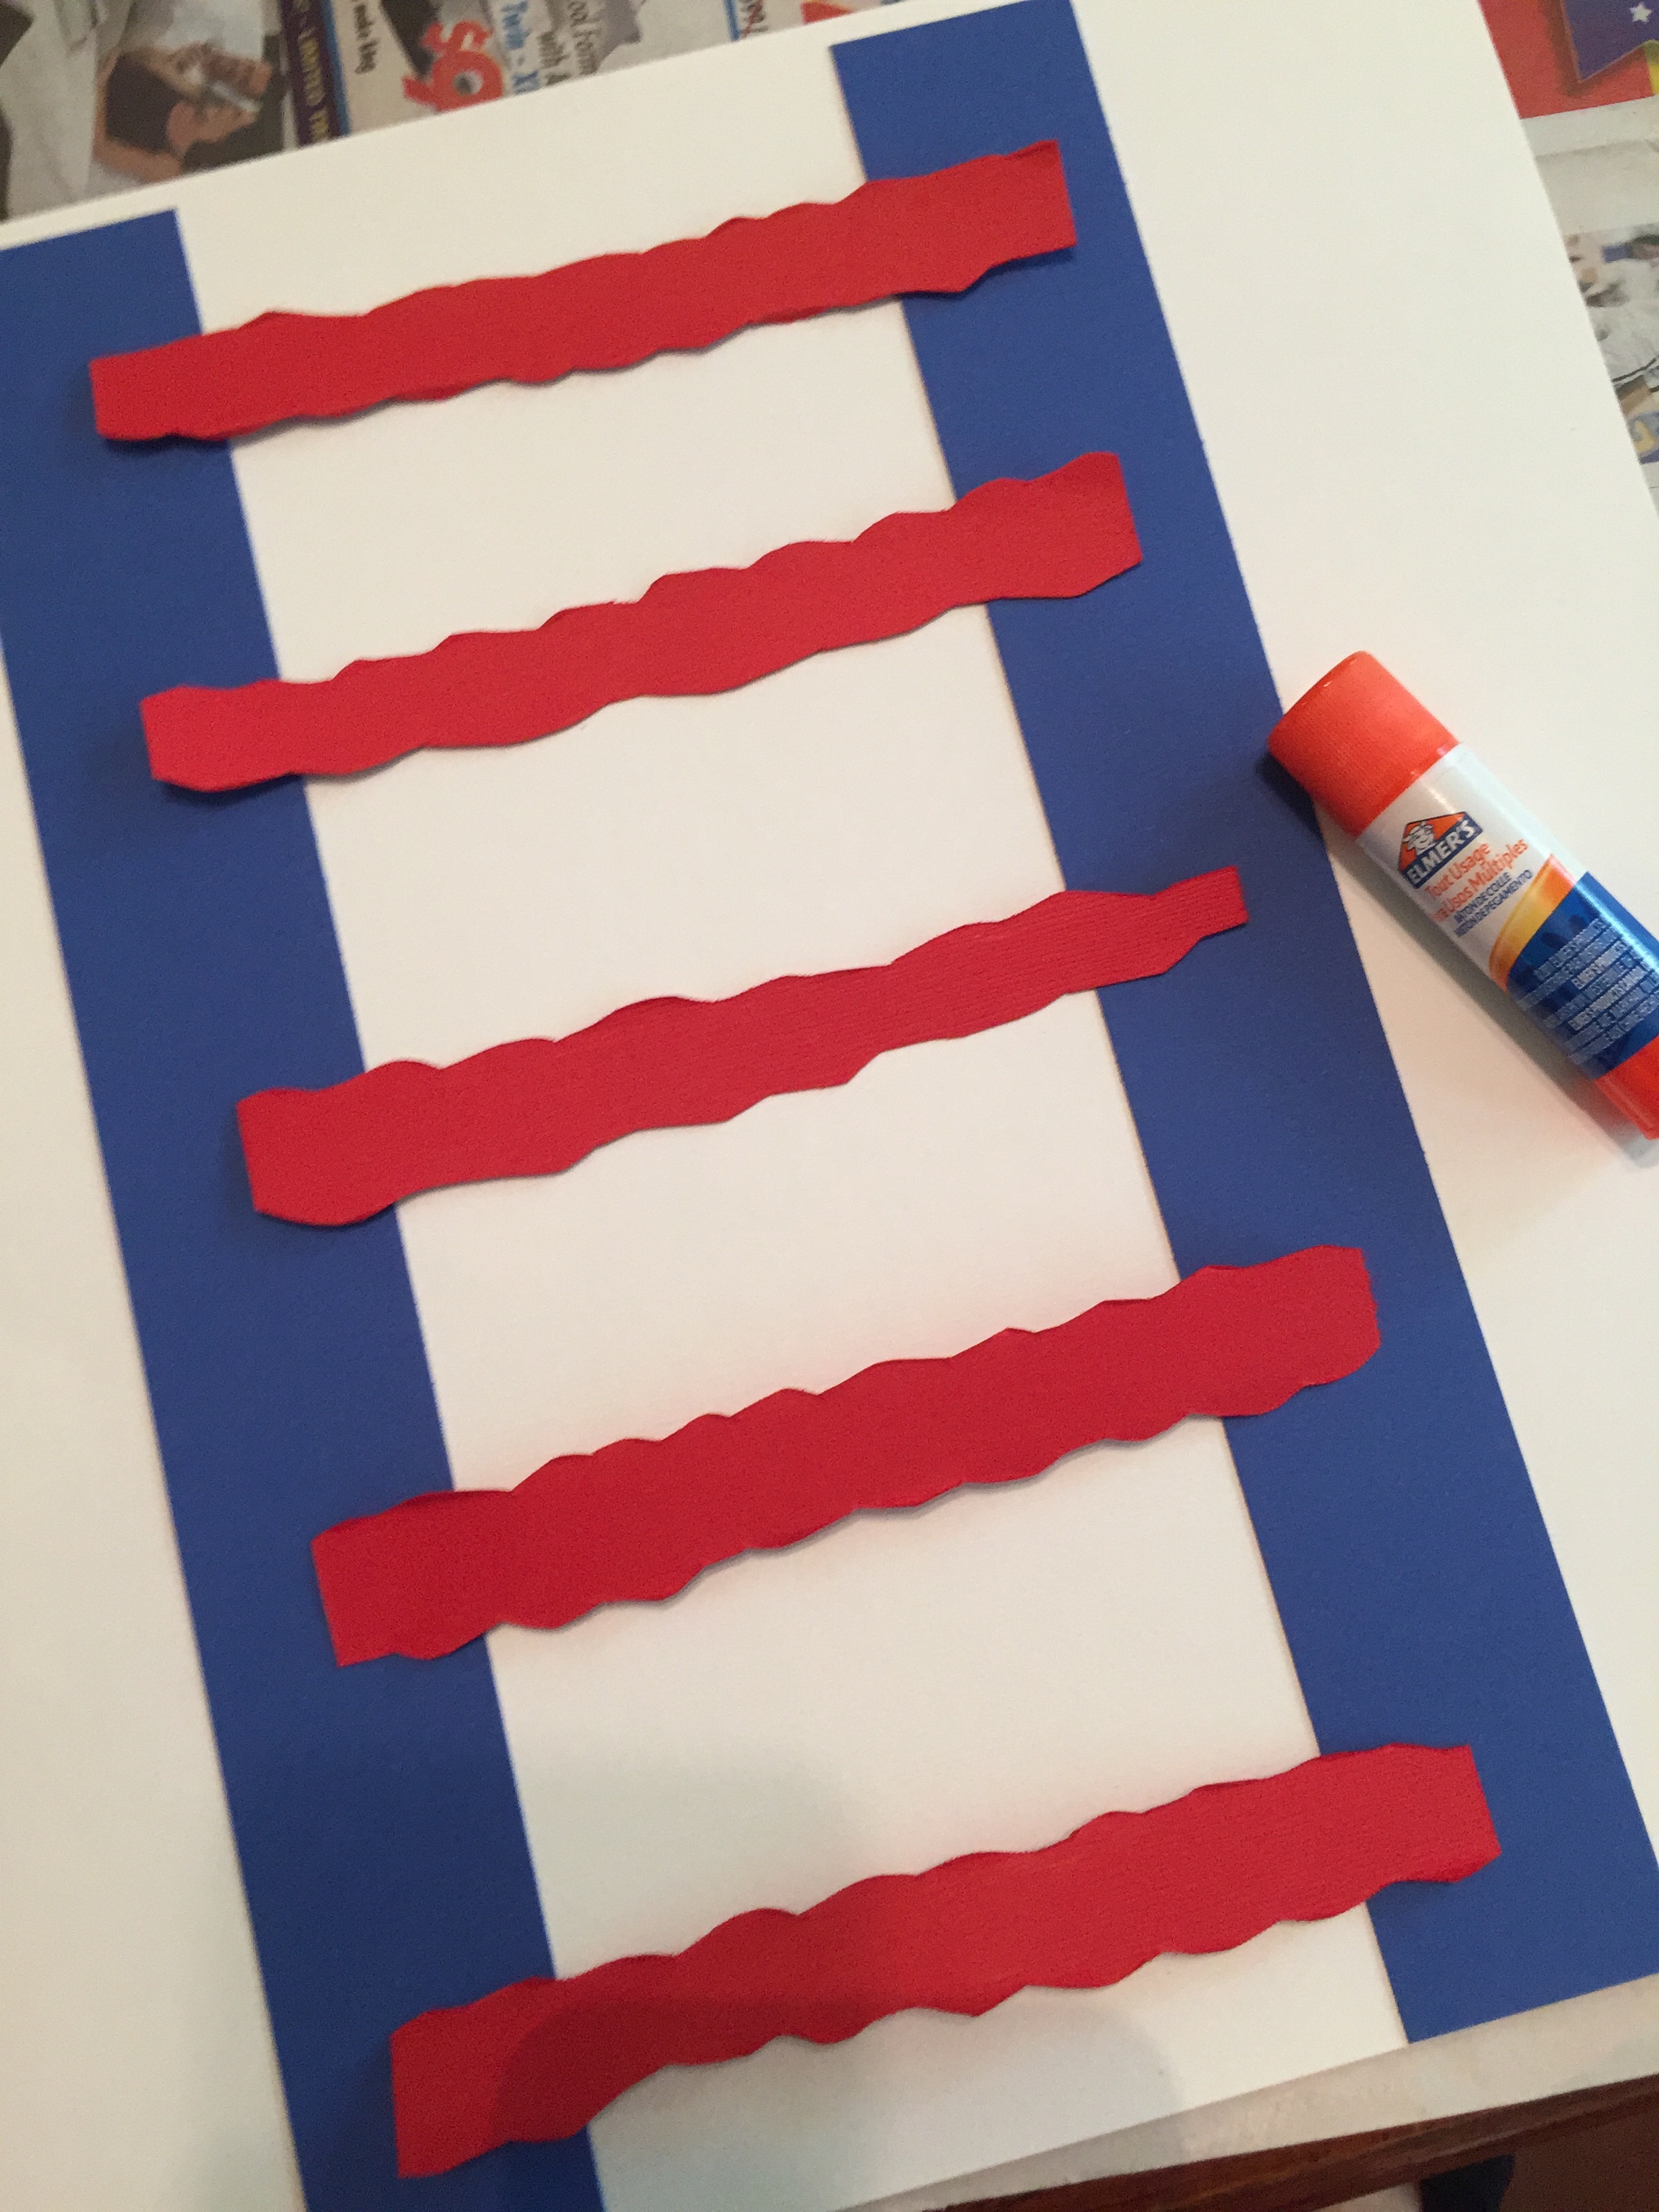
Patriotic “Lantern”
This is always fun for kids to make and they are perfect to display on the porch, in the bedroom or even attached to a stick to carry in the neighborhood bike parade!
What You Need:
Blue & Red Construction Paper, cut into long, inch wide strips (I used heavier paper that I had on hand)
White Paper, cut into free-formed stars, various sizes
Craft Glue
Glitter (optional)
Directions:
Lay two blue strips vertically with a few inches between them. Lay your red strips between the blue strips horizontally and glue (see photo below).
Once dry, join the each end of the two blue strips together and glue.
Add the white stars as desired, and put a few dots of glue here and there, then sprinkle with glitter if you want to add a little more pizzazz! (You could add streamers off the bottom if you want to turn this into a windsock!)
Glue a red strip to the top as a handle and you are ready for the parade!
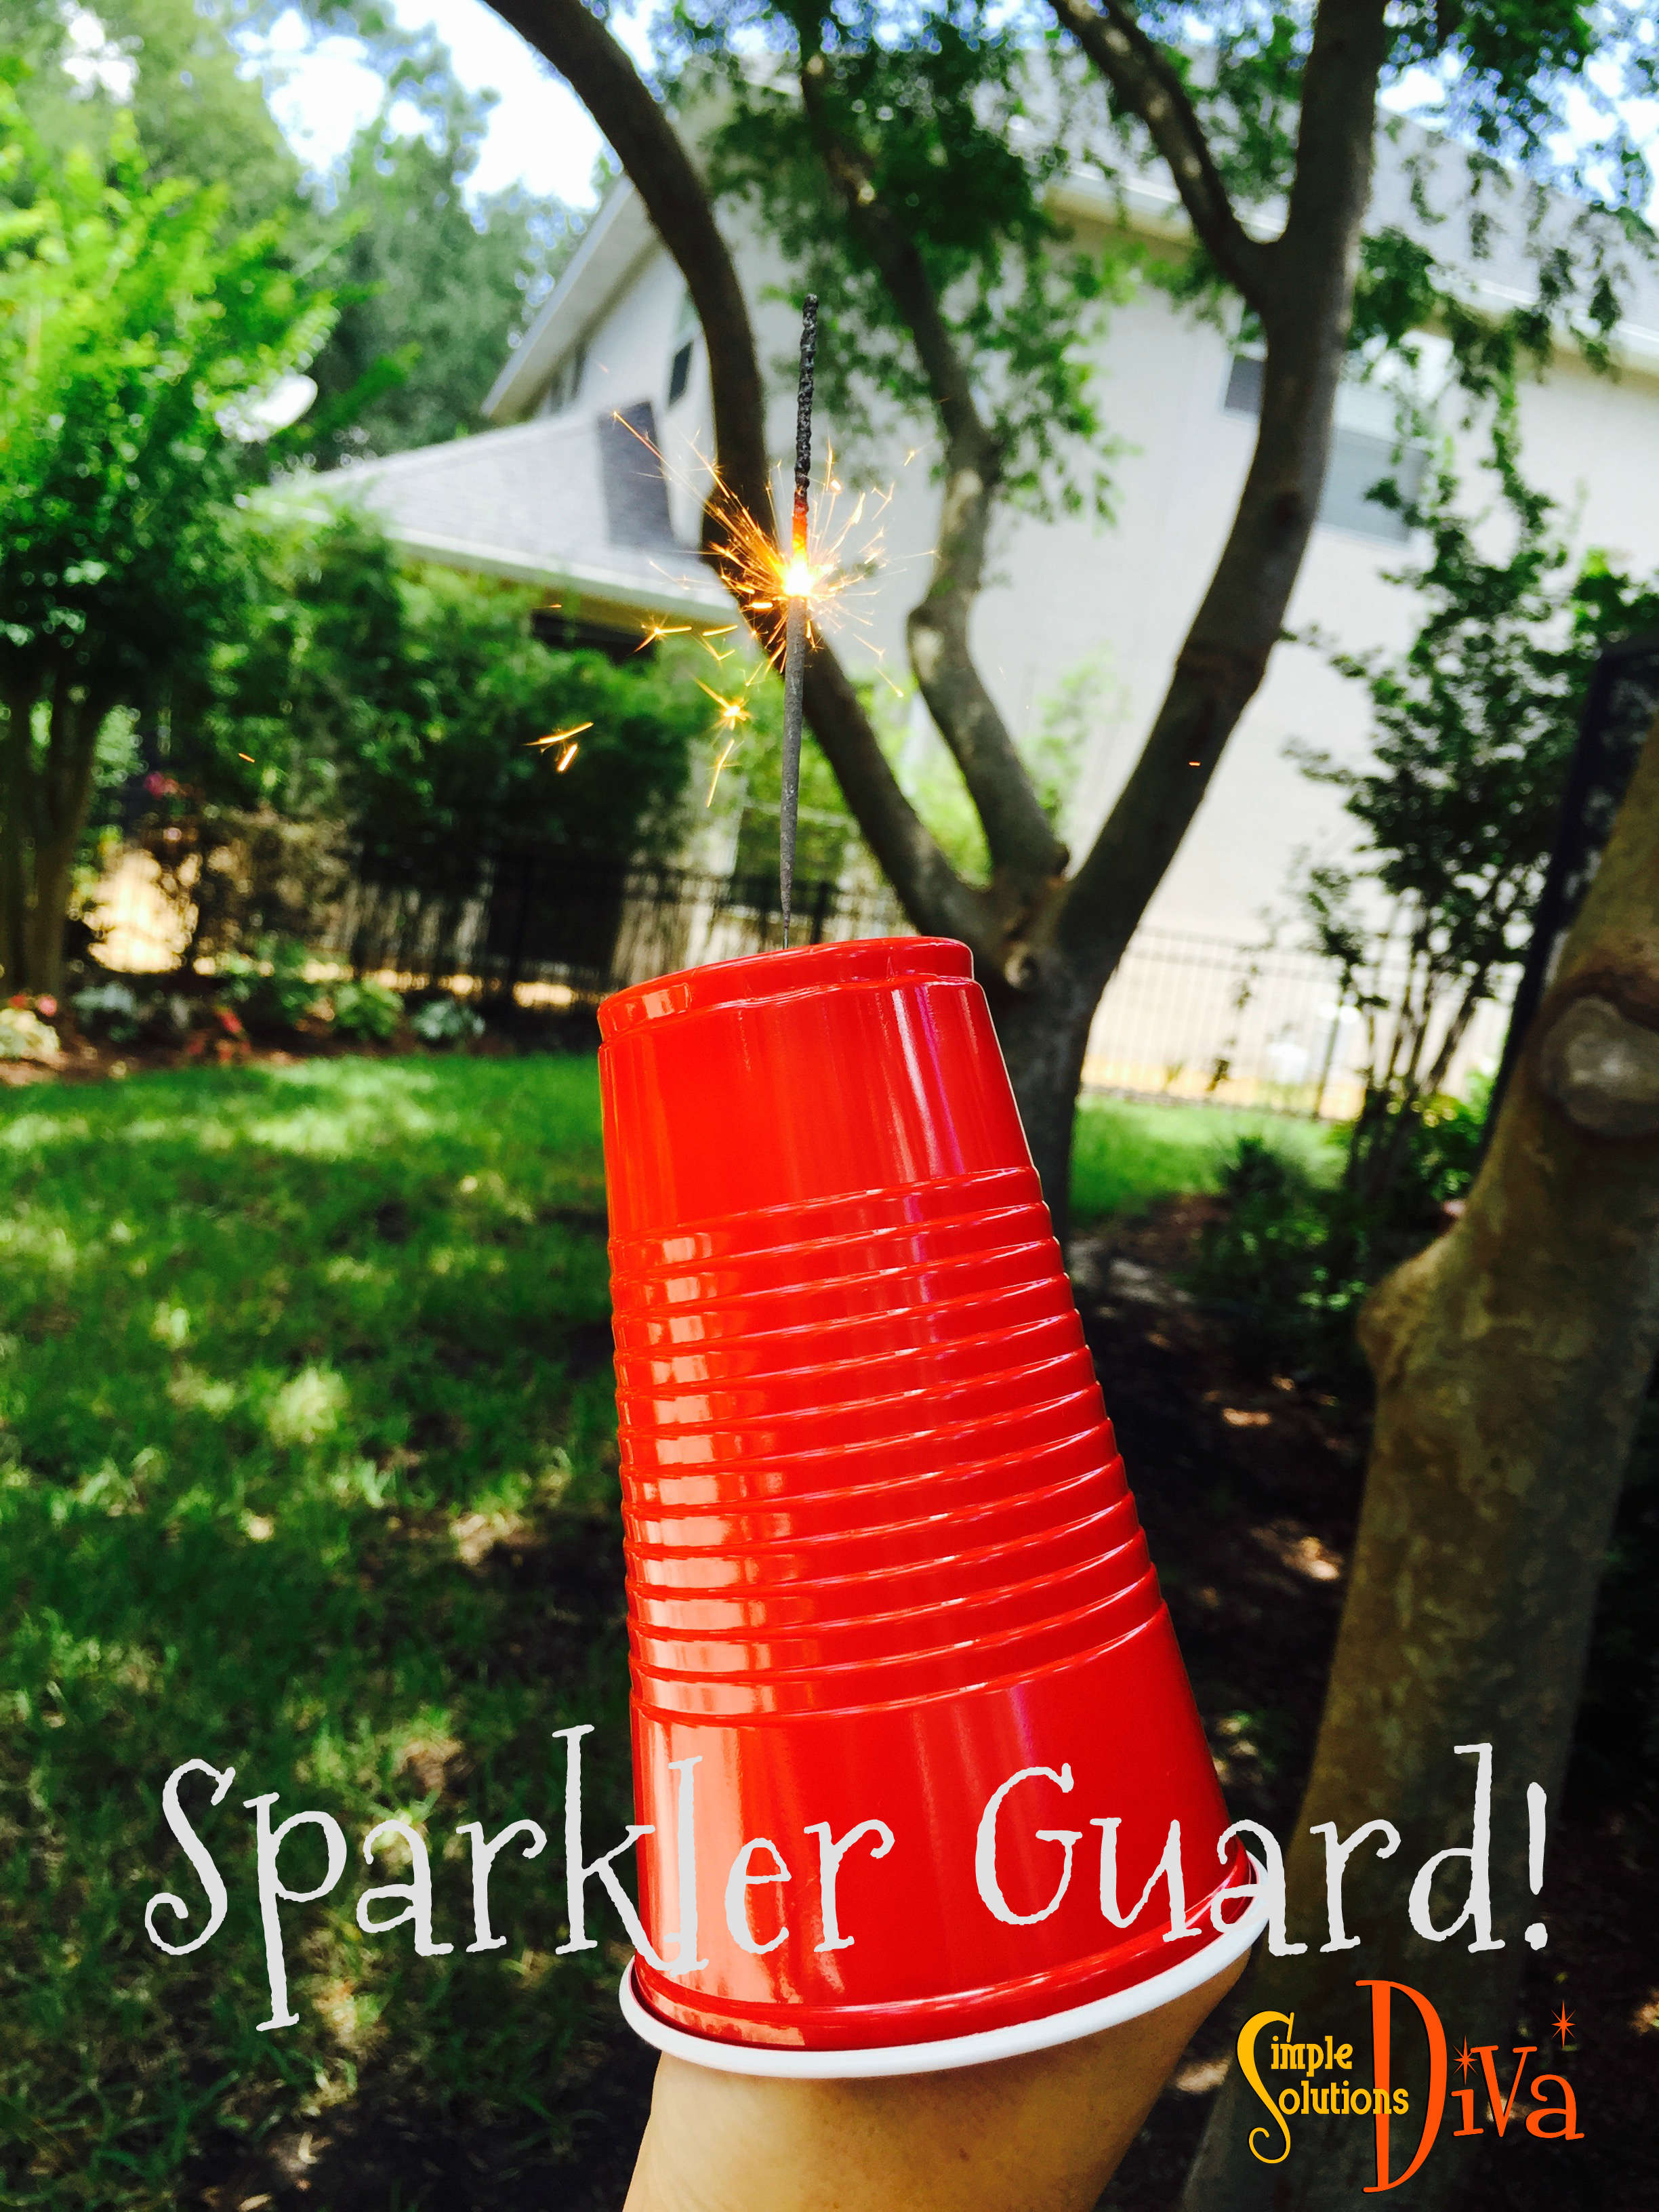
Sparkler Guard
You might see a red cup, I see a Sparkler Guard! I saw this on Pinterest and thought it was brilliant! I love sparklers, but when I was little I was always afraid that I would get burned. This solves that problem!
Just cut a small hole in the bottom of the cup and stick the sparkler handle into the cup. That’s it! But now, a few notes and disclaimers on this one:
Never leave a child alone with matches, sparklers, fire or anything else flammable!
Always supervise your children during this activity – This is not meant to be a “Light It & Leave” activity!
Always have a container of water on hand to place the used sparklers in to douse any heat or flame.
Make sure the entire “business end” of the sparkler is sticking out, so the only part on the inside of the cup is the handle and your hand. You don’t want it to burn down INTO the cup!
Other Great Ideas From Around The Web:
There are so many fun 4th Of July activities & crafts out there, I couldn’t cover them all! I’ve selected a few of my favorites below. Be sure to click on each link to visit the sites for directions!
The Simple Solutions Diva has an answer to an age old question:
How do you get your plate back from a holiday party?
The simple answer? Don’t ask for it back — Create a Season of Giving Plate!
The concept is: you share the plate, along with the food you bring to a party. Then the host is free to use it when THEY go to a holiday party, and the plate moves from home to home throughout the holidays!
The instructions are easy: It is as simple as buying a pretty plate from the Dollar Tree Store, writing a nice verse (for suggestion, see below) on the plate in permanent marker, baking it at 350 degrees for approximately 30 mins. This baking process will set the permanent marker so it won’t wash off.
You can write whatever you would like, but if you are in need of something, try this:
Season Of Giving
In this Season Of Giving, we share so much joy,
& plates full of cookies for all to enjoy!
This plate is for giving, not keeping for one.
So pass this plate on to others, and share all the fun!
It is a beautiful way to share the love this holiday season!
Season Of Giving Plate from SimpleSolutionsDiva.com.
I was amazed at how simple this recipe is! My friends at The Spice & Tea Exchange gave me this recipe – they are a wonderful source for rich spices and flavored teas! If you ever have a chance to go to their store in St. Augustine, FL, it is a treat for your senses! The smells of the spices, the beautiful jars of spices and specialty teas – Wonderful!
The basic recipe is as follows:
Chocolate Truffles
Ingredients:
1 Cup heavy whipping cream
11 oz. Bittersweet chocolate or semi sweet chocolate (I used bittersweet for a dark, rich flavor)
1-2 Tablespoons favorite liqueur (My suggestions: brandy, rum, spiced rum, Chambord, Kahlua or other favorite.)
Place the chocolate in a medium heat-proof bowl. Scald the cream in a small saucepan, pour over the chocolate, and let stand for 5 minutes.
Whisk gently until fully incorporated, add the liqueur and stir until smooth.
Place in fridge until it has hardened. Scoop out about 1 tsp of the cold ganache and roll it into a truffle. Roll in favorite sugars or spices, then chill until firm. Serve at room temperature.
To see the original recipe from The Spice & Tea Exchange, click here.
Spiced Chocolate Truffle (left) and Candy Cane Truffle (right).
What do you do when your turkey gravy is too thin, too thick or just plain pale? Some simple tips from the Diva! These tips also work with other gravies, too!)

 Use masking tape to mark off the four scarves and to provide a straight line to cut along. Scarves should be 8-10 inches wide – on this project I marked off 9.5 inches.