SimpleSolutionsDiva.com

DIY projects

Simple DIY Projects For Our Feathered Friends

SSD Bird Projects

Spring is here and the birds are all aflutter! How about trying a few small DIY projects that are for the birds, literally! With a little creativity and a little elbow grease, you can make some adorable (AND Simple!) projects that will have all the birds tweeting! Best of all, these projects are perfect for the kids to make – with a little adult help!

DIY Bird Feeder
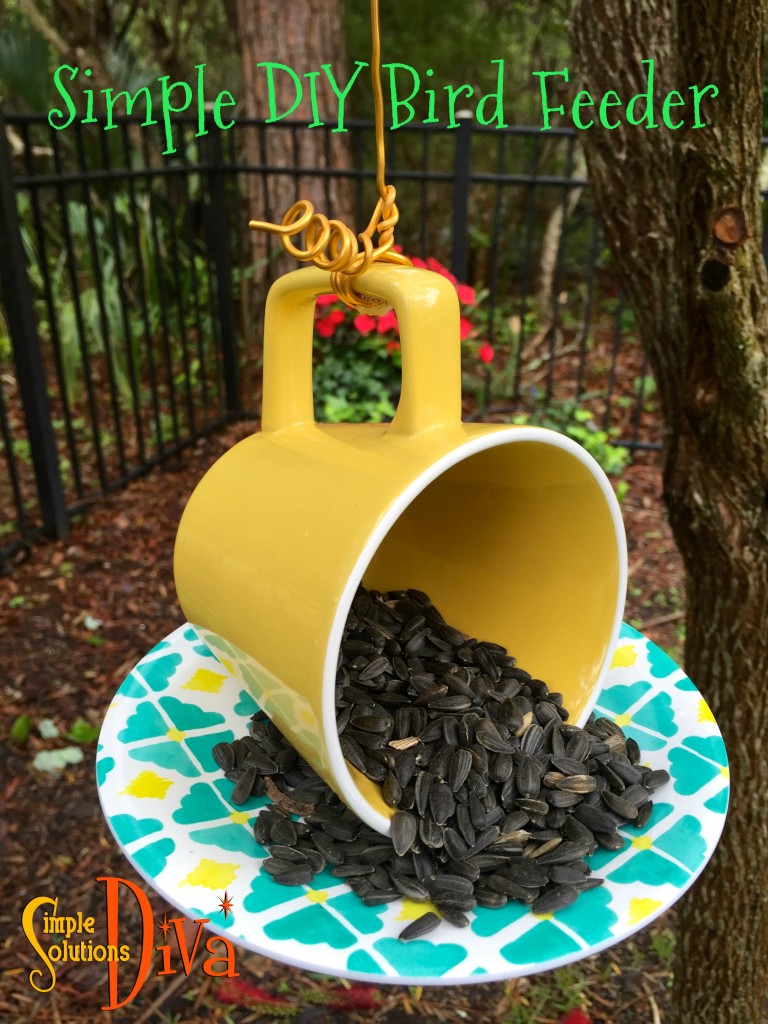
SSD Bird Feeder 2This simple feeder can be made with any teacup and saucer!

What You Need:

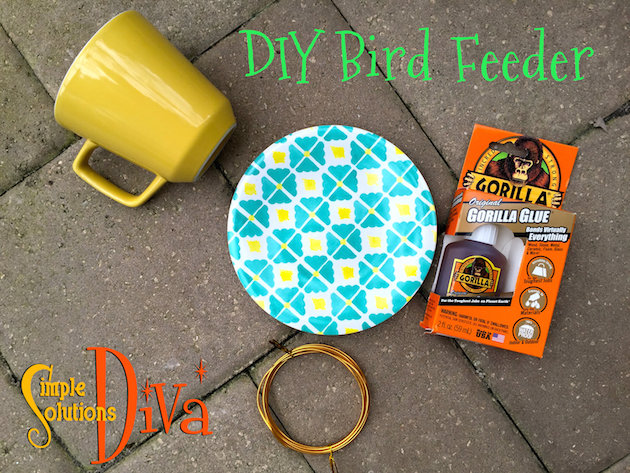
  • Teacup & Saucer (I used a mug small enough to fit on saucer)
  • Gorilla Glue (or other waterproof adhesive that works with ceramics)
  • Copper Floral Wire (optional)
  • Bird Seed
All you need for this little project!

Directions:

Clean and remove all stickers from the teacup and saucer. Dry thoroughly.

With a spray bottle or damp cloth, moisten the saucer. Using the Gorilla Glue, draw a thin line of glue on the side of the teacup opposite of the handle. Place the teacup, glue side down, on the saucer. Hold in place for two hours. (I used a small hand weight to keep constant pressure and to keep teacup in place.) NOTE: These instructions are specific to using Gorilla Glue as your adhesive. If using something other than Gorilla Glue, follow the directions for that product.

You can use the handle of the cup as a hook, or you can create an extended hanger by using copper floral wire (optional). Use the Gorilla Glue to secure the wire in place on the cup handle.

Add birdseed and hang in location where you can enjoy watching the birds visit!

DIY Birdhouse
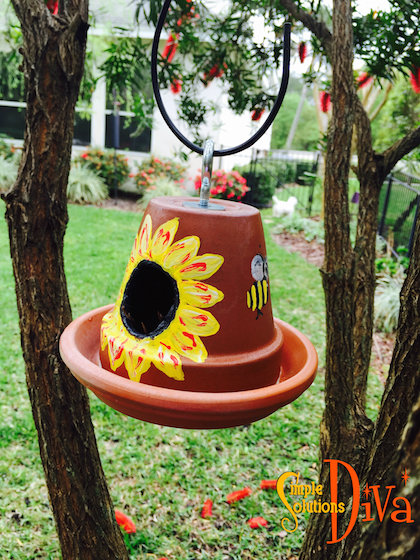
SSD Birdhouse 2A little clay pot, a clay saucer, a hole cutter drill bit and you’ve got one cute Birdhouse! This project requires the use of power tools (a drill), so gather your materials before beginning the project!

What You Need:

  • Clay Pot – I had several on hand in case I broke one while drilling (which I did!).
  • Clay Saucer that is a bit larger than the top of clay pot.
  • Electric Drill
  • Hole Cutter Drill Bit, or progressively larger series of drill bits. I used an adjustable hole saw by Skil – Click link to find a Skil Adjustable Dial Saw
  • Sandpaper
  • Protective Eyewear
  • Gorilla Glue
  • Eye Bolt & Nut
  • Two Fender Washers
  • Clear, Protective Coating Spray Paint (I used Krylon Fusion, Clear UV Protection)
  • Acrylic paints, small paintbrushes (optional)
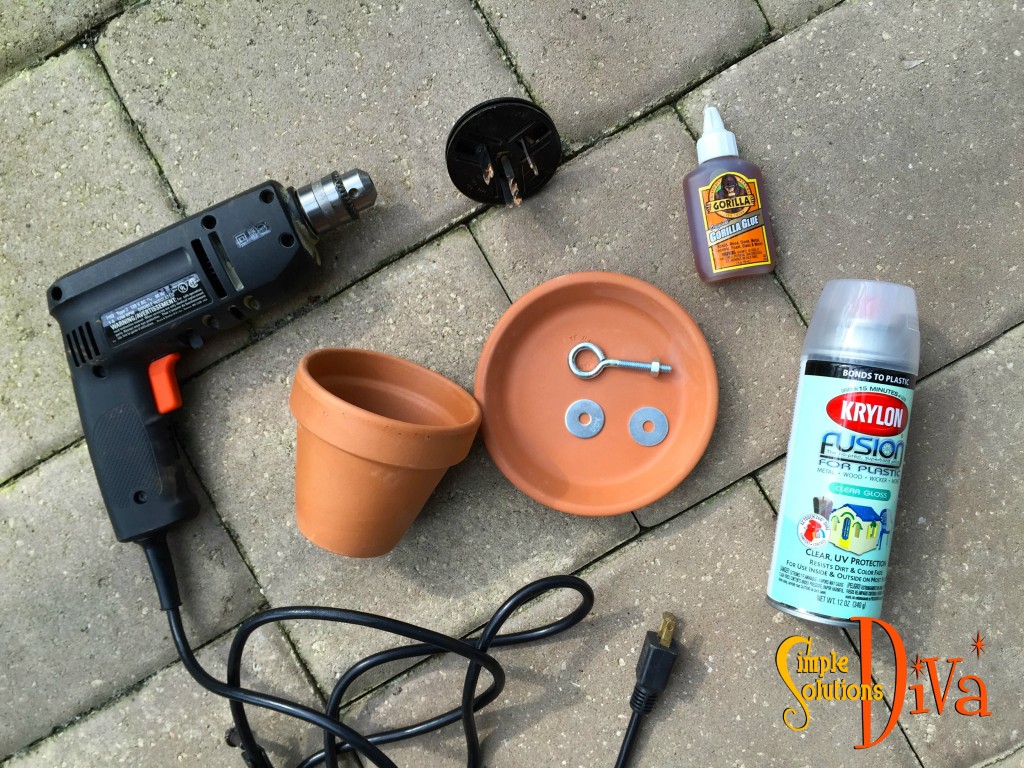
Everything you need to build a simple little birdhouse!

Directions:

Remove all labels from pots and saucers. Soak the pots in water for approximately 5-10 minutes. This will soften the clay and will lessen the likelihood of the pot breaking into shards. (Keep a bucket of water handy while drilling – you may need to dunk the pot in the water occasionally to keep things damp.)

On a safe, flat work surface, using something to secure the pot in place on the work surface, use the drill and hole cutter drill bit to cut the hole in the pot. Be sure to use protective eyewear! Size of hole will depend on the size of the pot. I cut a hole about 1.5 inches in diameter. I also used sand paper to smooth out the edges of the hole.

Turn the pot upside down on a clean, flat work surface. Feed one washer onto the eyebolt, then feed eyebolt through bottom of the pot. Turn pot right side up, feed second washer onto eyebolt. Add the nut and secure the eyebolt to the pot.

Using the Gorilla Glue, and following the directions on the label, glue the saucer to the top of the pot. Allow 2 hours to affix completely.

If desired, paint the birdhouse with acrylic paints. Spray clear, protective coasting spray over entire birdhouse. Hang in a tree and enjoy the new visitors!


Simple Project: Make Your Own Chalkboard Sign

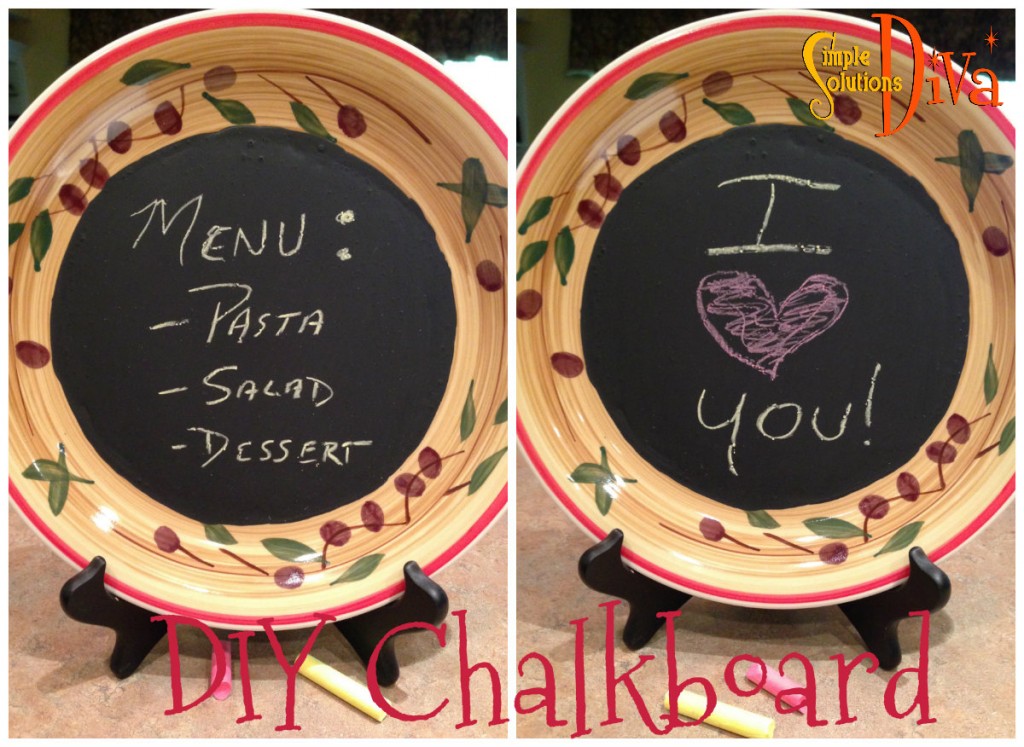
This is such a simple little project! You can make this using the following supplies:

  • Chalkboard Paint (purchase at any craft supply stores or many hardware stores)
  • Small paint brush (I recommend using one with bristles, not a sponge applicator, just to have a smooth finish)
  • A dish or plate (I used one from the dollar store!)

Depending on how large the plate is, you can use it to serve and identify appetizers (like a cheese plate), use it to list the dinner menu, use it as an ever-changing welcome sign, a humorous sign for family, and so much more!

SSD DIY Chalkboard

Simply Smooth Skin: Homemade Sugar Scrubs

Homemade Sugar Scrubs, from SimpleSolutionsDiva.com.

It is the peak of winter, but warm spring and summer days are just around the corner! Start making your skin smooth and soft with these great homemade sugar scrubs!  Did you know exfoliating BEFORE shaving your legs will actually allow for a closer shave?

These scrubs are simple to do, cost very little to make, and are just delicious smelling!

The Basic Sugar Scrub Recipe

Ingredients:

  • 3 Cups white sugar
  • 1 Cup (plus 2 Tablespoons) Extra Virgin Olive Oil  – you can experiment with other oils, such as almond oil, coconut oil, etc.
  • 10 drops favorite essential oils – this amount really depends on how strong you like the scent.  Add more or less to suit your preference.
  • Jars for storing sugar scrubs (The Dollar Store is where I found mine!)

Preparation: 

In a large bowl, mix sugar and olive oil well. Add essential oils and mix well. Store in jars or other oil-safe container.  Use in shower to soften hands and/or body.  Rinse well before drying. (Note: Shower Floor can be slippery after using sugar scrubs in shower. Use caution.)

Types of Essential Oil Combinations:

I found essential oils at my local health food store, and they offered a wonderful variety! Try one of these ideas, or get creative with your own!

  • Lavender and Tea Tree Oils
  • Peppermint
  • Orange Creamsicle –  A mixture of Sweet Orange and Vanilla essential oils.
  • Brown Sugar Vanilla – Replace one of the cups of white sugar with Brown Sugar. Add Vanilla essential oil. (You will want to eat this one!)

If you want a rougher texture to your scrub, replace the white sugar with turbinado sugar. It changes the look AND the feel of the scrub!

Thank you to WTLV-TV’s First Coast Living for inviting me on to share this fun idea! 


Need A Little DIY “Coaching”?

Not everyone is handy with Do-It-Yourself projects, but if you are interested in how to do a few simple things around the house or apartment, check out The HandyWomanDIY.com.

Great website with videos that take you through some simple DIY repair projects for the home. This is the perfect website for a little “coaching,” whether you are an independent woman looking to learn or a manly man just needing a little reminder on how to handle a hammer!

Click on image below to visit The Handy Woman DIY!

Screen Shot 2013-06-05 at 7.19.08 AM

Simple Mother’s Day Project: Cup of Love

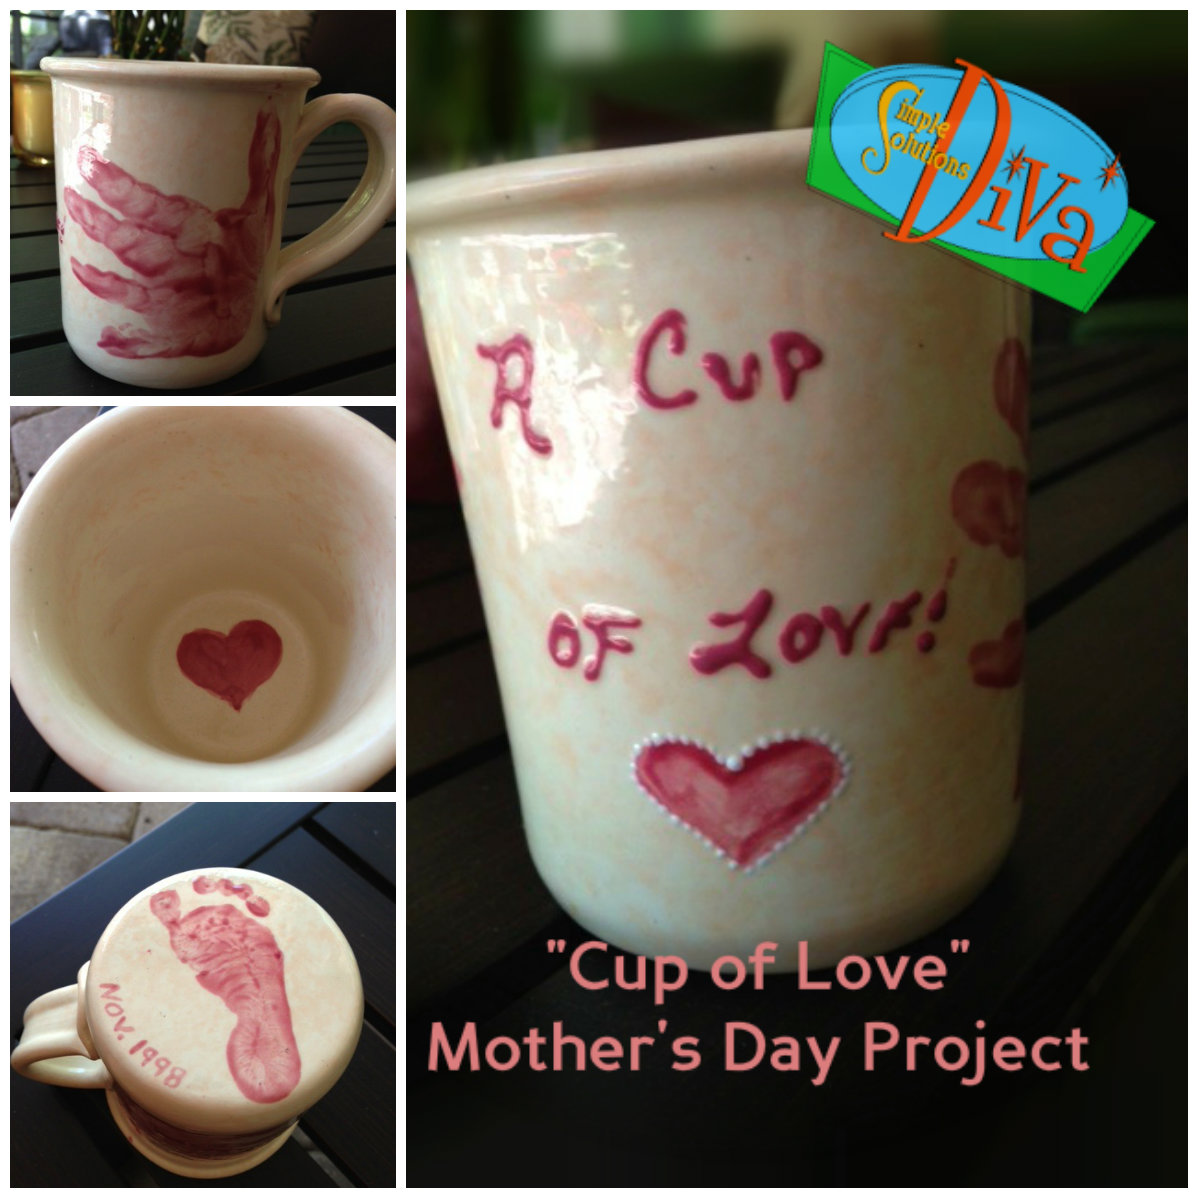
Image 12When my kids were babies, I knew that I would regret not having something that had their hand and footprints. Somehow, in my baby hormone-induced mind, I managed to come up with a cute idea that I still treasure today. A “Cup Of Love” was created in a pottery painting studio.  I chose the cup I wanted, chose my colors, then brought my babies in (my 21 month old and 1 month old at the time).  I took my oldest’s hands, painted them, and had her hold the cup on either side.

I painted a heart in the bottom of the cup and wrote on the outside of the cup, then I painted my baby’s foot, pressed it on the bottom of the mug and put the date. I came back to put the glaze on it, then the pottery studio took it from there!

I did the same project for grandparents, but wrote a “Cup of Love For Nana”, “Cup of Love For Papa”, etc. Cute little gifts that people will save forever.  I drink from this mug once a year – on Mother’s Day!

Note: In my warped sense of humor, it could be funny to do this again with my TEENAGERS’ hands and feet!  Of course, I would have to wrestle them down to do it!

Cup of Love

1 2

© 2015 SIMPLESOLUTIONSDIVA.COM Designed by The Web Design Chic | ADMIN LOGIN