Simple Ideas
Simple Ways To Ring In The New Year
Ringing in the New Year is a fun tradition, and Simple Solutions Diva has a few simple ideas on how to bring in the New Year with a little style and not a lot of money! A BIG thank you to WTLV-TV’s First Coast Living (Weekdays at 11 a.m. and 2 p.m) for inviting Simple Solutions Diva on to share these ideas!
Choose To Make Nicer New Year’s Resolutions
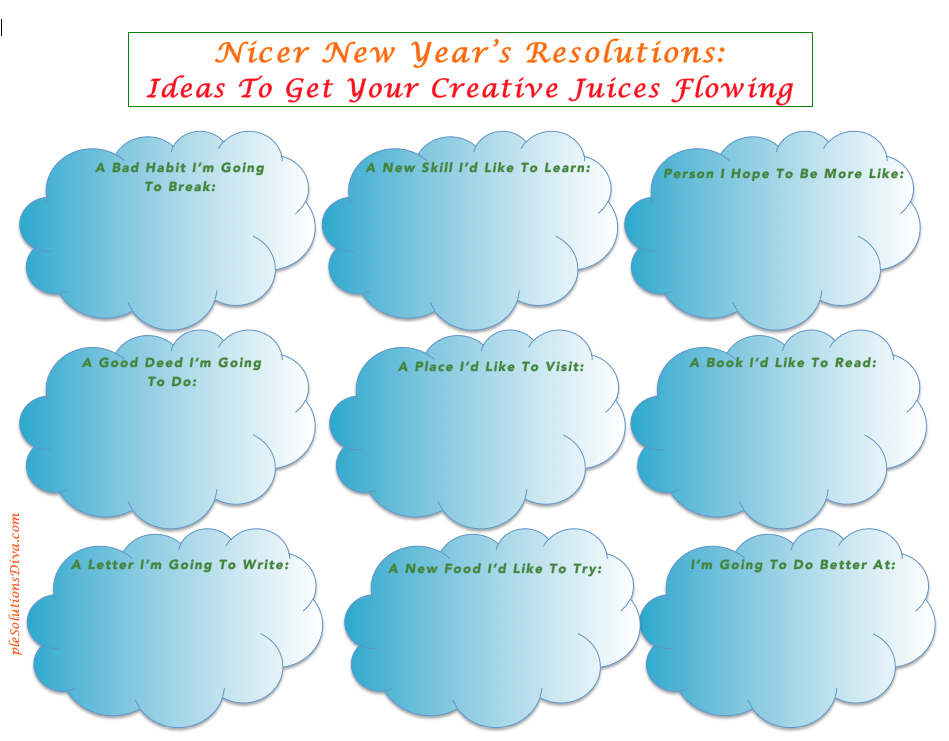
New Year’s resolutions don’t have to be about loosing weight or radically changing behaviors. Those types of resolutions are much harder to keep because they require drastic changes. Try making nicer resolutions that are more like goals you work towards all year. Need some ideas? Print out this Nicer New Year’s Resolution Worksheet below; it includes prompts to help you get your creative juices flowing! (Be sure to print it out in landscape format!)
Plan a Giving 2014 New Year
This is a great idea for a family celebration! Each family member submits several family volunteering ideas for 2014; Use New Year’s Day to decide, as a group, what volunteer opportunities the family will commit to for 2014 and schedule them into your calendar. Giving back and helping others really makes life enjoyable!
Start A Memory Jar For 2014
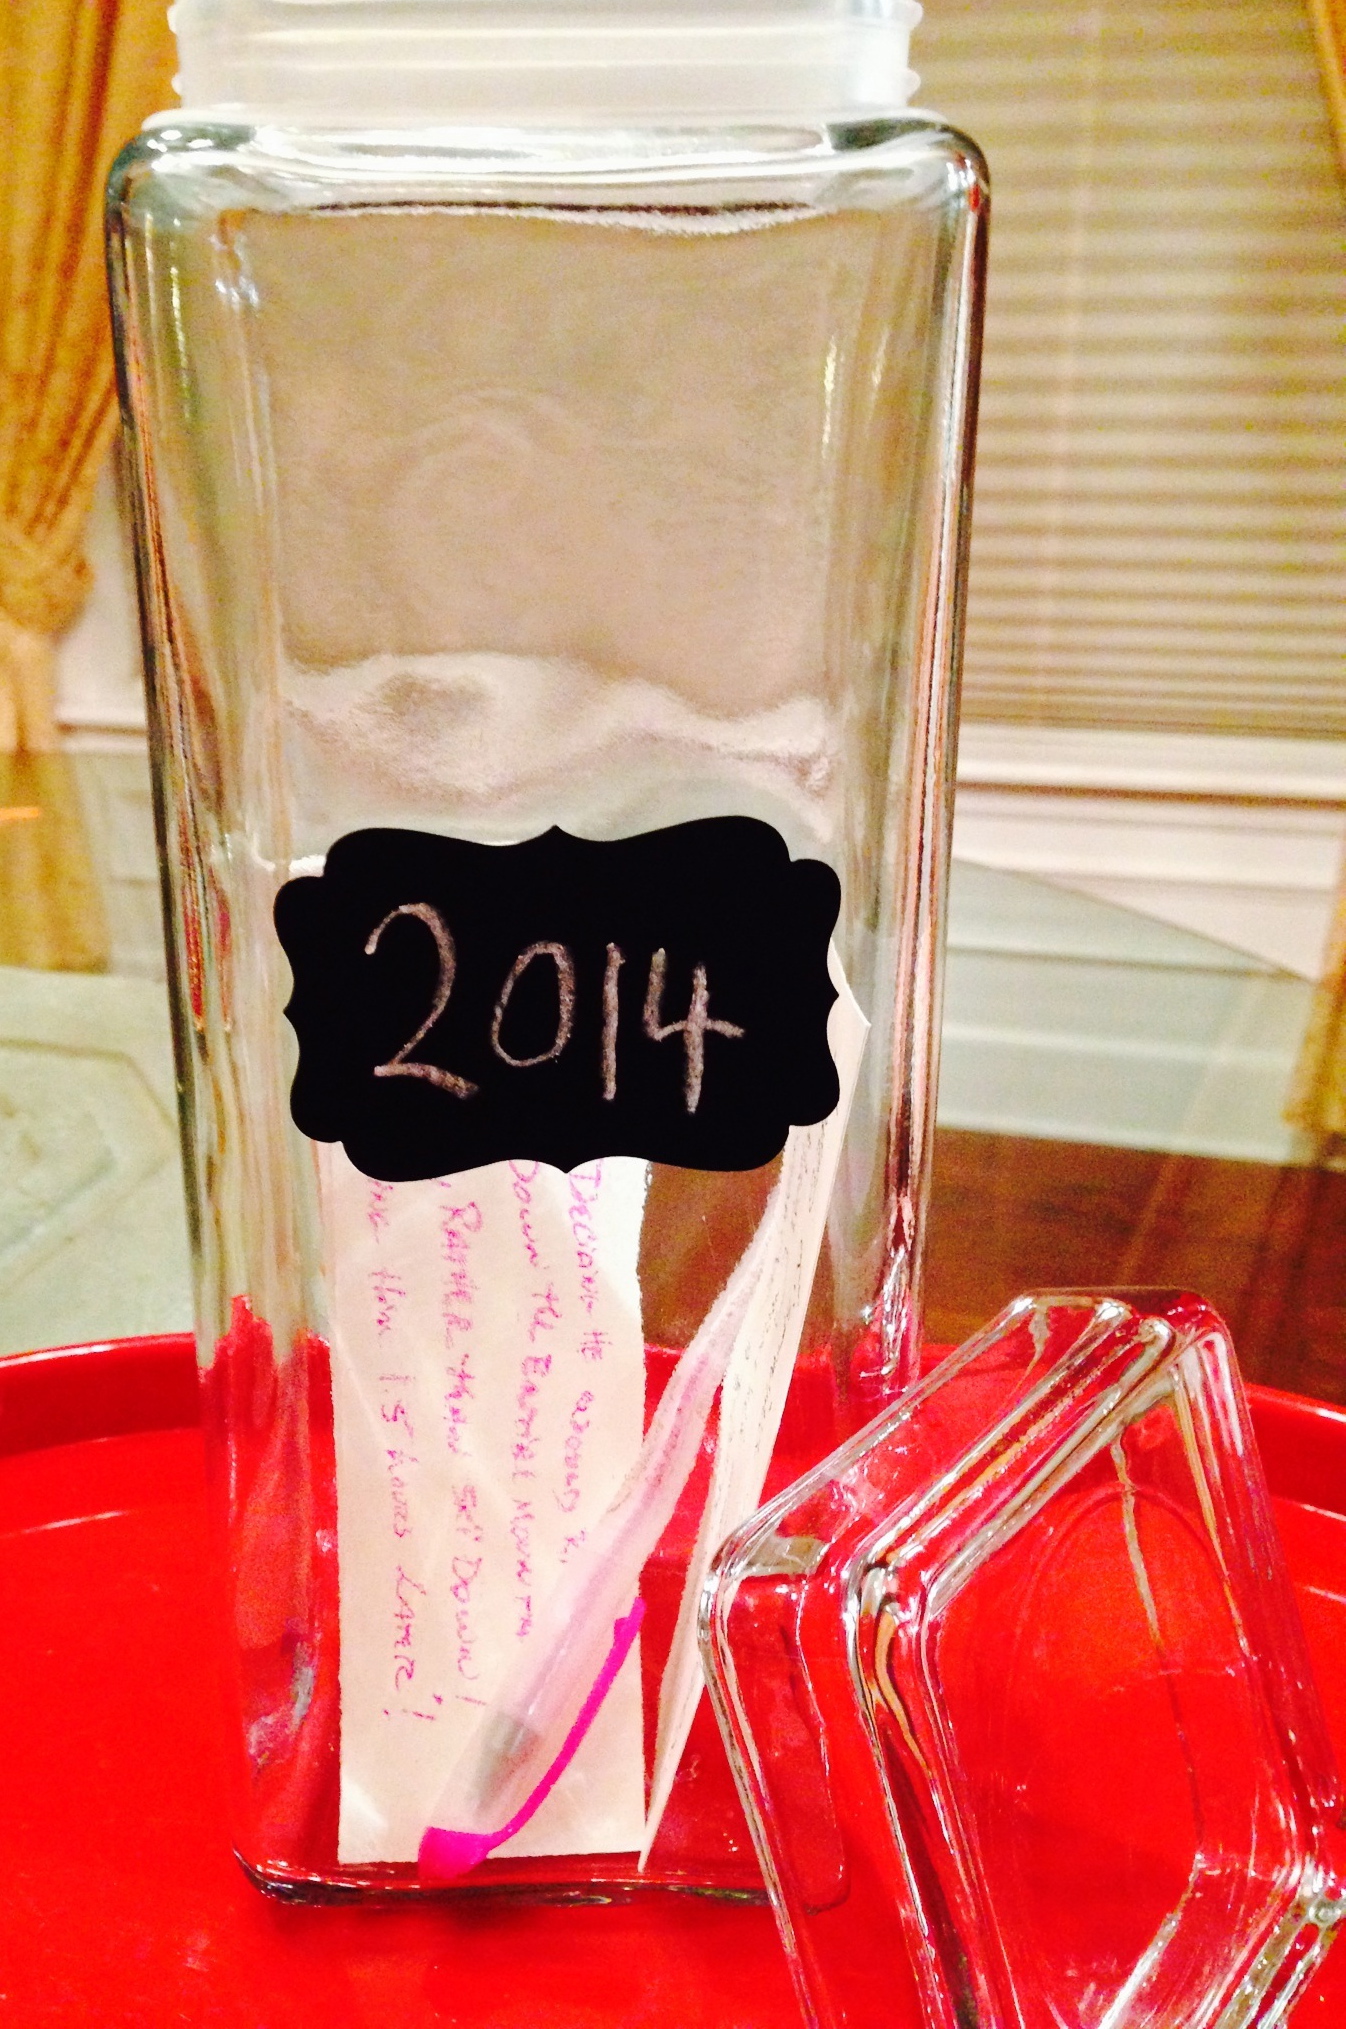
Create a Decorative Jar filled with memories collected over 2014; near New Year’s 2014, open the jar and relive the fun memories from 2014!
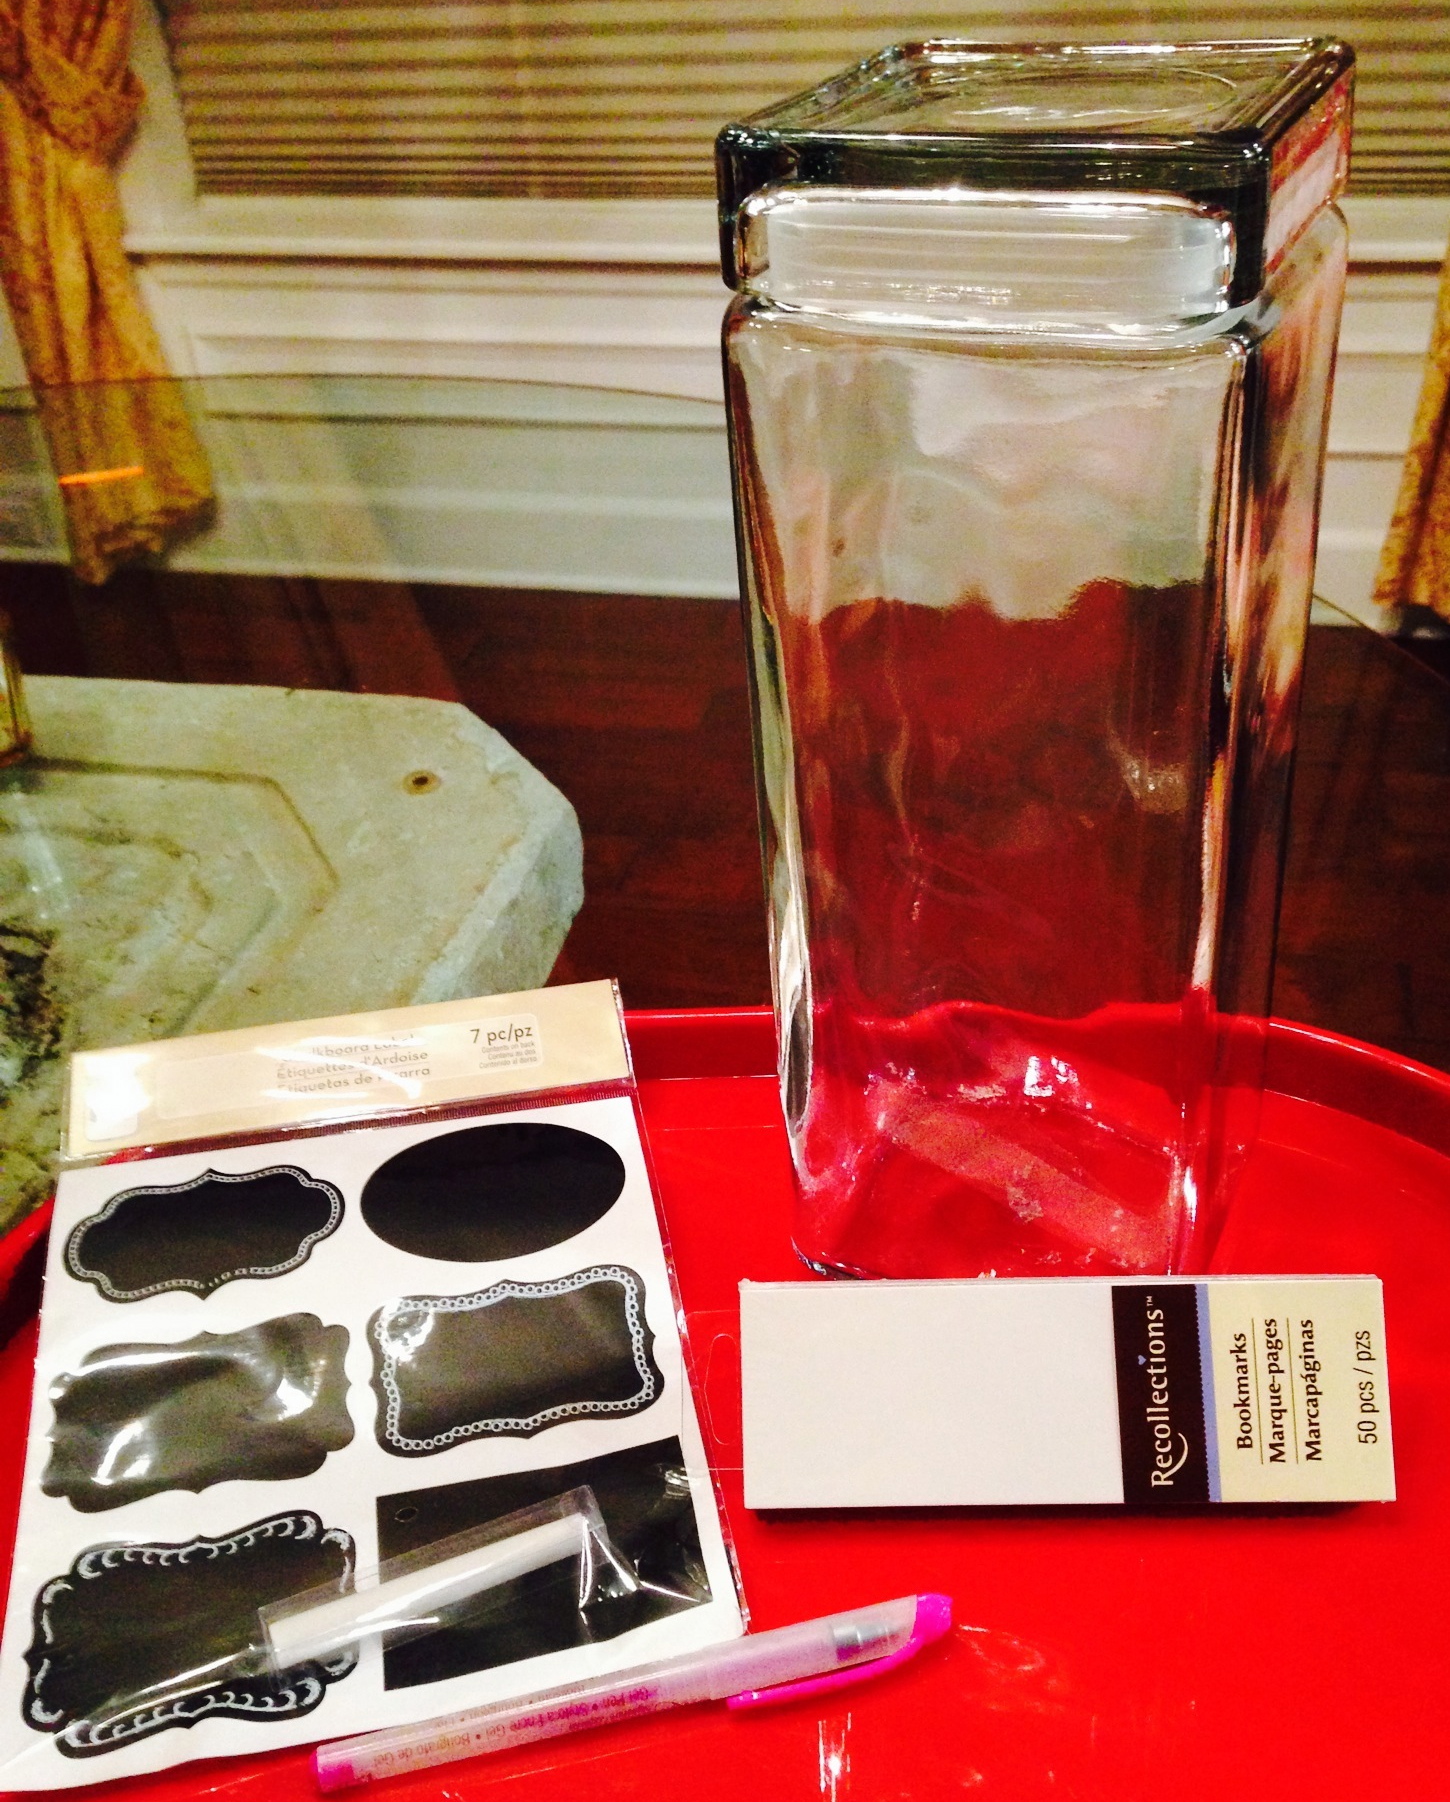 Supplies Needed:
- A Clean Glass Jar
- Small, blank tags, cards, or bookmarks (I used bookmarks)
- Chalkboard Self-Stick Labels (I got this little packet, including chalk, for $1.00 at Michaels!)
- Decorative Pen
Instructions:
Clean the jar and remove all sticky price labels. Let dry. Apply the chalkboard label to the glass jar. Write 2014 on the chalkboard label. Add blank bookmarks or cards and a pen. Place Jar in active place in the house (ours is in the kitchen). As fun events or memories happen, write them down on the blank cards and place them in the jar. At the end of year, sit down with family and revisit all the fun times over 2014 by reading the cards aloud. Wipe 2014 off with a slight damp cloth, and write the new year and start all over again!
Kids New Year’s Eve Party
Pick a time in the early evening to invite the kids over and toast the New Year early with DIY Noise Makers and a Cookies & Milk “Midnight” Toast!
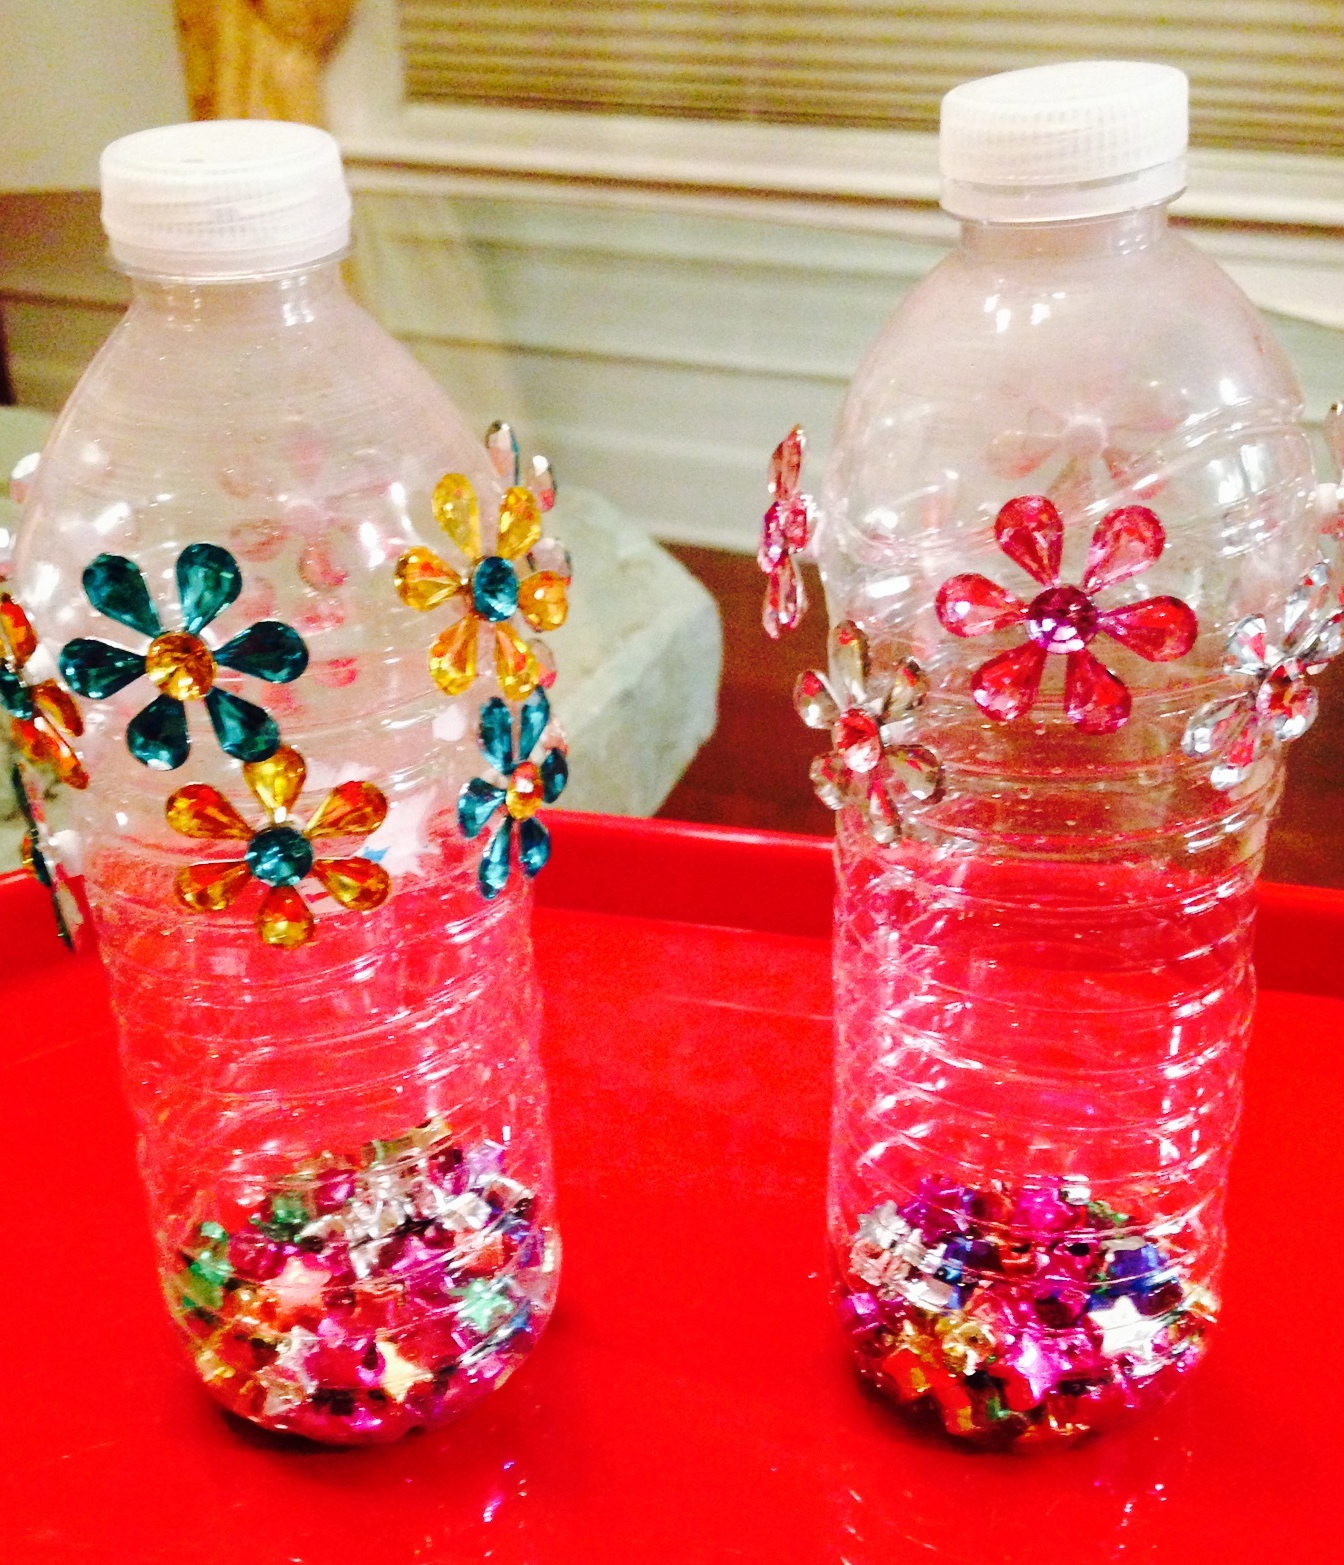
 DIY Noise Maker Supplies:
- Empty and clean water bottles, with labels removed.
- Craft Beads
- Variety of stickers
Instructions:
Add a handful of craft beads to the empty water bottles and secure the top. Lay out the stickers and let the kids decorate their own shaker.
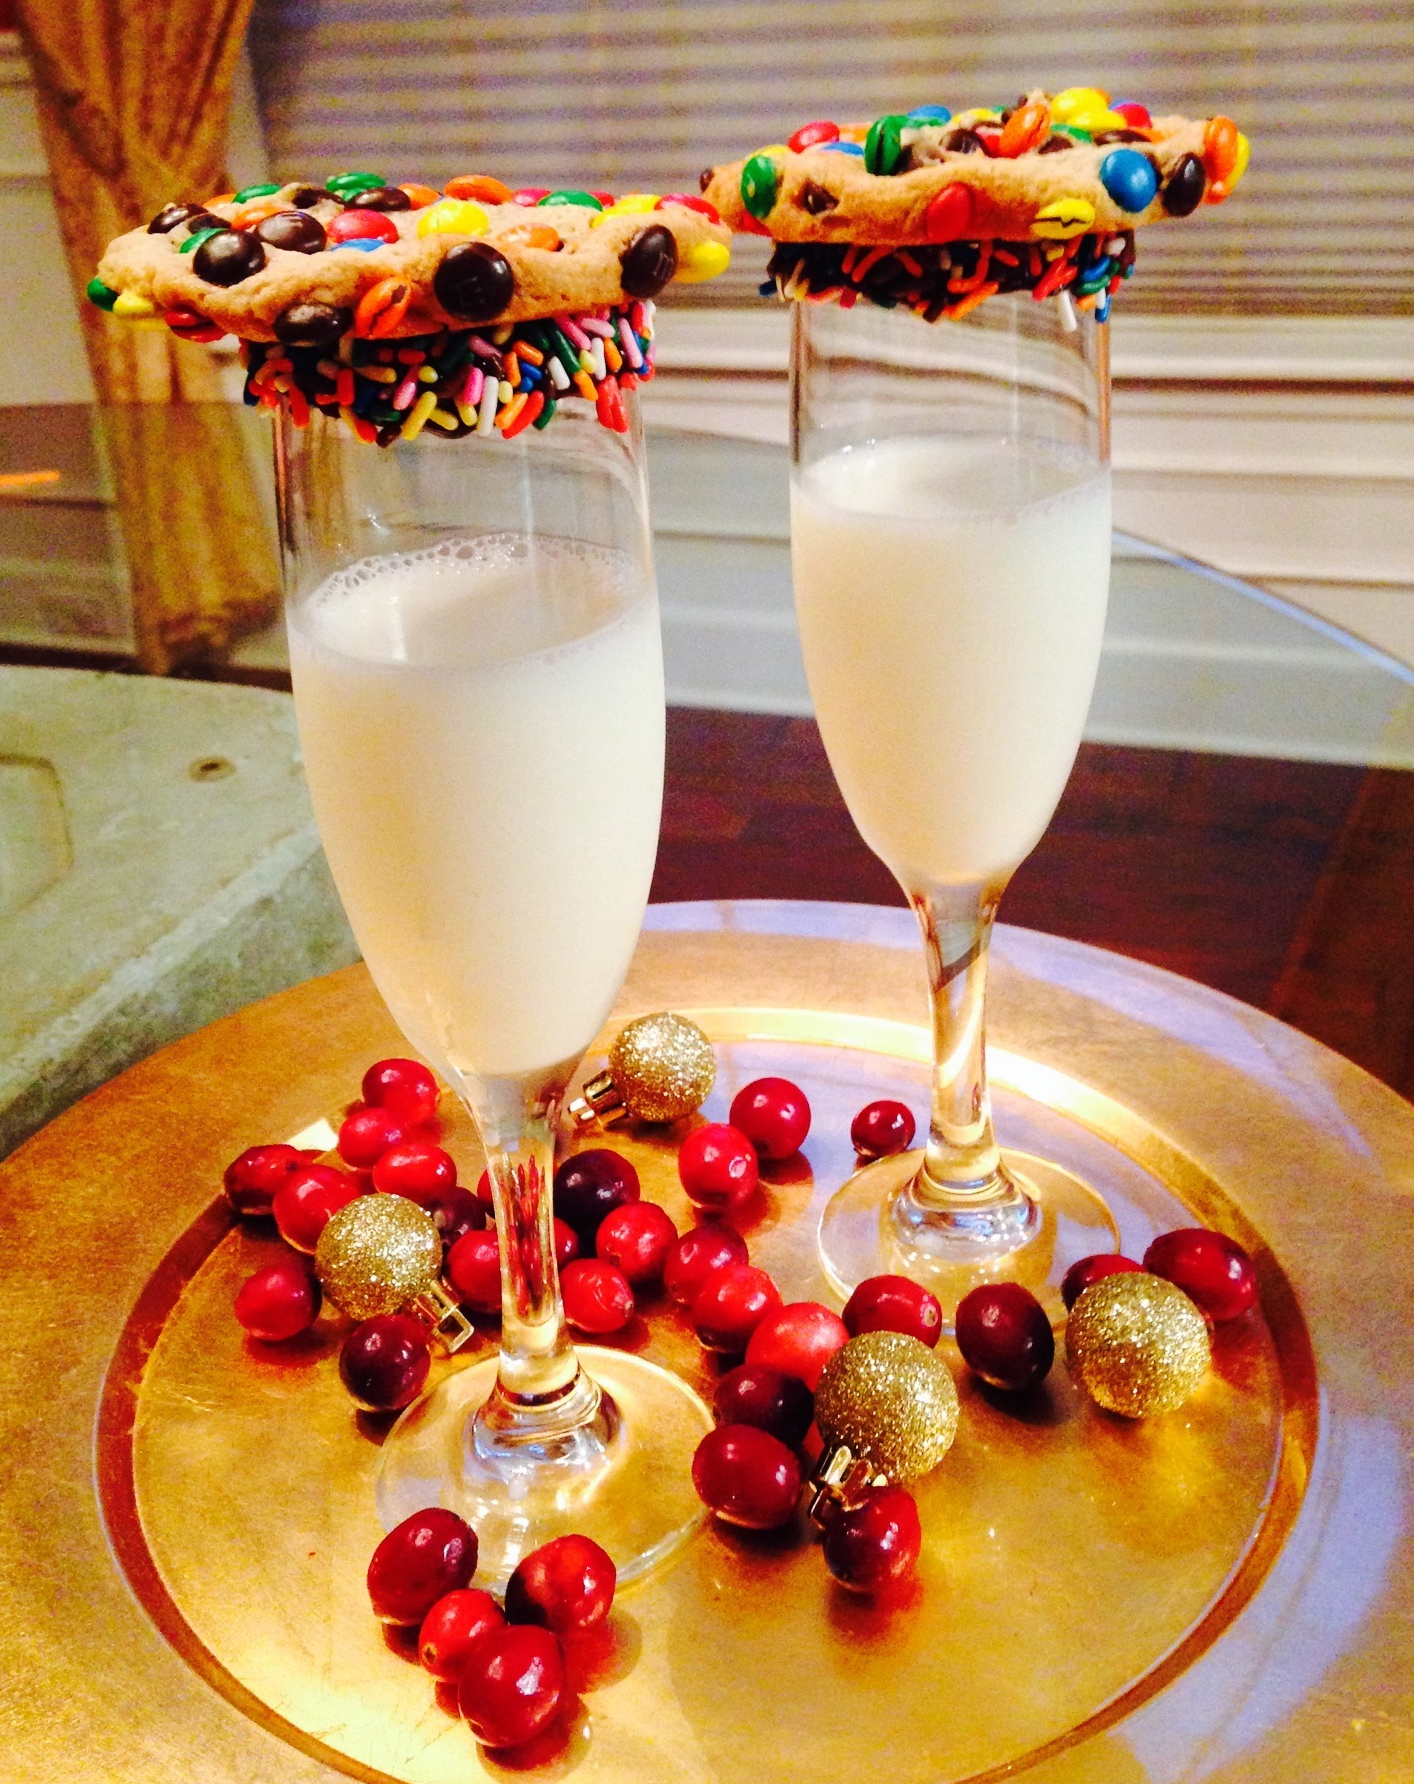
Cookies & Milk “Midnight Toast Supplies:
- “Fancy” glasses (these can be champagne glasses, wine glasses or whatever works for you)
- Hot Fudge Sauce (I used Smucker’s brand)
- Colored Sprinkles
- Milk
- Chocolate Chip or M&M cookies (I bought mine pre-made from the grocery store)
Instructions:
Using a knife or back of a spoon, rim the top of the glasses with room-temperature hot fudge sauce. Pour sprinkles into a bowl or small plate. Roll the fudge covered rims of the glasses in the sprinkles, so sprinkles adhere to the glass & fudge. Fill with milk. Place a cookie on top of glass and serve.
Simple Party For The Adults
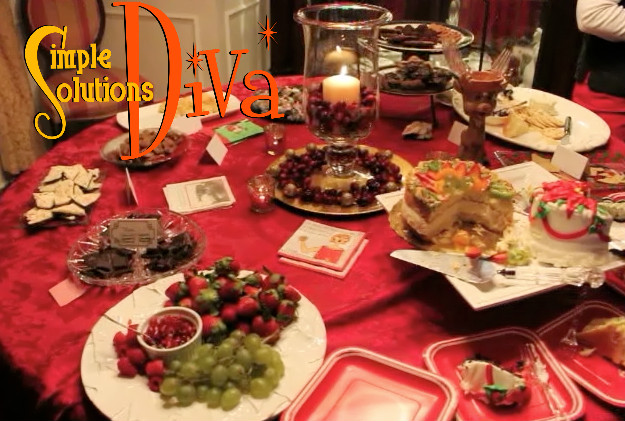
Try a Dessert & Champagne Party! Simple Solutions Diva featured a whole “how-to” video and outline to create a simple party. Click Here to see the video and all of the suggestions to make a party easy for you!
Simple Tip For Reducing Holiday Stress
Dessert And Champagne, Anyone? How To Host A Simple Holiday Party
Simple Solutions Diva’s Tips For
A Simple Holiday Party:
For easy invitations, try using the website Evite.com, where you can customize one of their great designs and import email addresses to send out invites electronically! Good for you AND the environment!
A Champagne Bar is easy to do! Offer a variety of add-ins for your champagne, like cranberry, peach, pomegranate juices, strawberries and pomegranate seeds. For Champagne, I served Jaume Serra Cristalino Brut, recommended by the wine expert at World Market. With a price point under $7.00, I was a bit wary. I was extremely surprised by how wonderful the champagne tasted! It was rated by Wine & Spirits Magazine as the Value Brand Of The Year for 2013 (3rd year in a row!).
Desserts are so simple! Use a combination of store-bought and homemade desserts. Items on my dessert table included:
- A tasting plate of flavored dark chocolates – Chipotle Chili, Pomegranate and Strawberries & Champagne.
- Ginger Crisp cookies and Chocolate Lace cookies from World Market.
- Two beautifully decorated mini cakes from Publix Supermarket.
- Store-bought Chocolate Truffles
- Homemade Coconut Macaroons – Wonderfully easy recipe from JoansFoodWanderings Blog.
- Homemade Peppermint Bark – Here is my recipe for peppermint bark.
- Store-bought Chocolate Truffles
- Homemade Candied Pecans – This recipe was so simple! I made them in the crockpot! You can find the recipe Here!
- A Cheese Plate featuring Manchego, Triple Cream Brie, and Boursin Cheese.
- A Fruit Plate
- The big hit on the dessert table was the Toasted S’mores Bar, from the website by South Florida Chef, Ron Lock.
Have a wonderful holiday!
Simple Holiday Survival: Gift Wrapping Secrets!
Simple Thanksgiving Craft Ideas
Thanksgiving is a time for family and friends to gather and be thankful for all they have. Simple Solutions Diva has a few simple ideas to add to the Thanksgiving festivities, keeping family and friends connected, and keeping the conversations going! Thanks to WTLV-TV/Channel 12’s First Coast Living for inviting me to share these ideas on air!
May you all have a wonderful Thanksgiving!
Father, we thank Thee for this food, for health and strength and all things good. May others all these blessings share, and hearts be grateful everywhere. — Traditional American Blessing, circa 1800’s
Thankful Tree
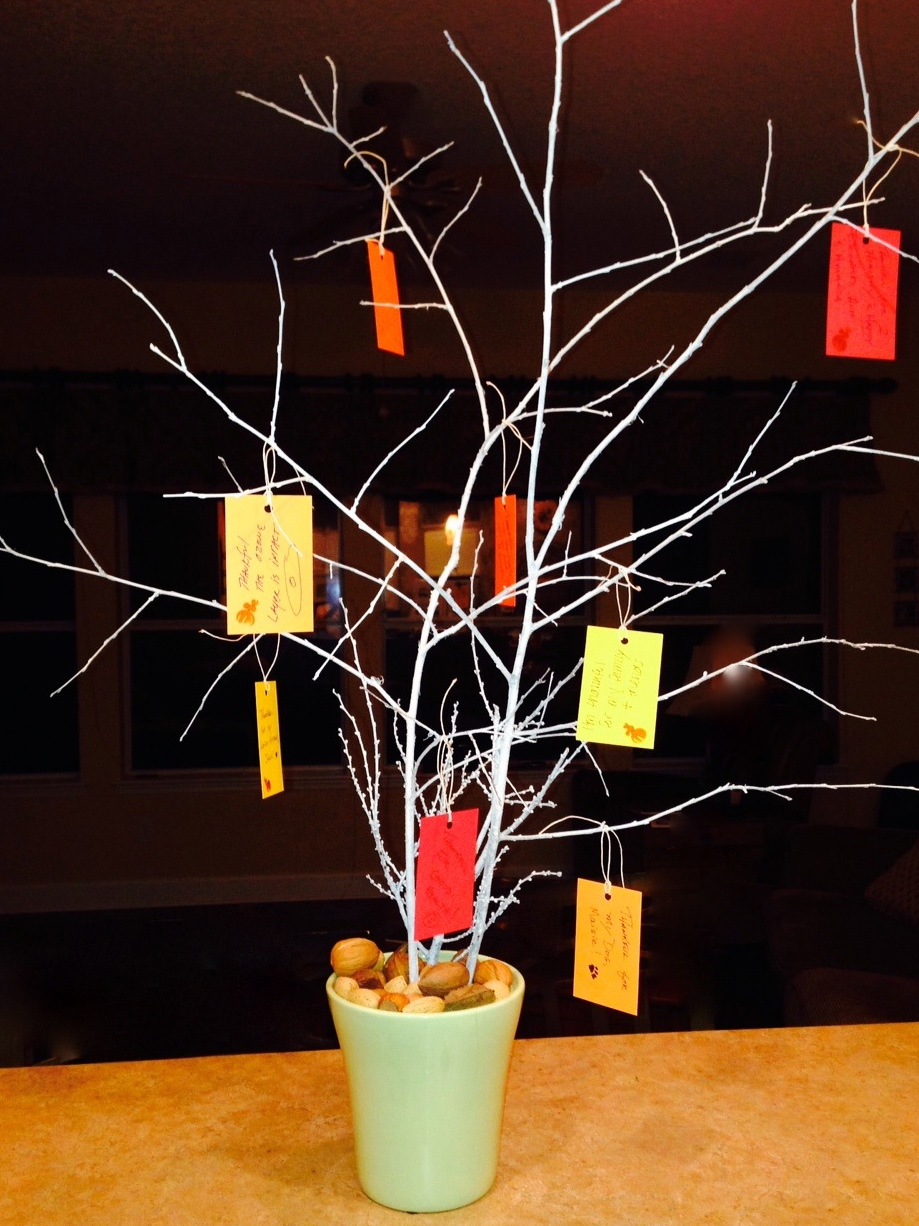
This project is very simple to make. You need the following items:
- Heavy vase or clean, outdoor pot
- Branches from trees in your own back yard, stripped of foliage and cut to the appropriate size for pot. You can paint the branches white or black, or you can leave them natural. I used white spray paint.
- Styrofoam block or floral dry foam block.
- Filler (I used nuts, but you could use fabric, autumn leaves, etc.)
- Blank tags with ties. I made my own with construction paper, and hole punch and natural cord/string.
- Pens
Place your pot on a flat surface. Place styrofoam or floral dry foam block inside pot; secure with tape if needed.
Insert branches into the foam block. Add filler material around the base of the branches to cover the foam block.
Place the Thankful Tree, tags and pens in a prominent place in your home and ask guests to write what they are thankful for and to tie it to the tree.
I found this thoughtful idea from Yesterfood.com – to see their beautiful post, click HERE.
Thanksgiving Conversation Starter Centerpiece
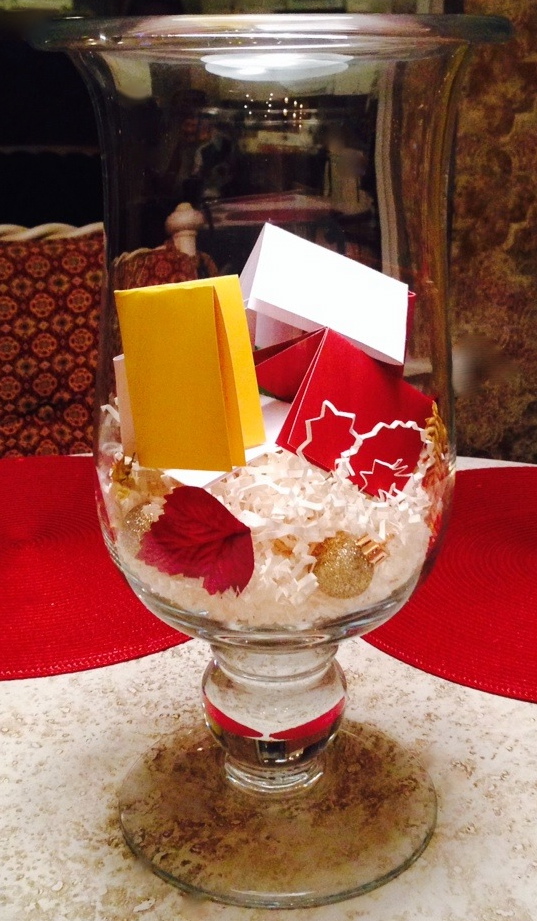
Keep the fun conversation going at the Thanksgiving table! For this project you can use many items from around your home. You will need:
- Large glass vase or decorative glass bowl
- Thanksgiving themed filler – you can use nuts, ornaments, ribbon, leaves, felt pumpkins. Basically whatever calls to you!
- Small blank cards or squares of construction paper
- Pens
- Stickers or other decorative elements – optional
Assemble your filler of choice in the vase or bowl. Write conversation prompts on the small cards and fold them (or roll & tie them). Place the cards into the bowl. Place bowl on or near the Thanksgiving table. Reach for the the bowl whenever the mood or need arises! Make sure you have at least one prompt per person.
Stumped for prompt ideas? Try some of these:
What life advice would you give a younger person?
What is your favorite holiday memory?
What is your favorite Thanksgiving food?
What is your favorite part of Thanksgiving?
How is Thanksgiving different today from when you were a child?
When you were a child, what were the popular toys everyone wanted for Christmas?
I found this great idea on CraftyChica.com. Here is the original post!
Turkey Day Table Runner
Let your guests get creative during the Thanksgiving meal! Let them discover their inner artist! And most importantly, keep them at the table by giving them something to do between courses!
You will need:
Brown or white plain wrapping paper or white butcher paper. I used postal wrapping paper because it is a little heavier than wrapping paper and there is no gloss to it. It is also significantly cheaper – $4.99 for 75 sq. ft of paper, versus $4.99 for 45 sq. ft. of wrapping paper.
Pens, crayons, markers (no bleed).
Thanksgiving themed stickers or other decorations
Run the wrapping paper down the center of your table. Add your major table elements, like your candles, centerpiece, salt & pepper – whatever you plan to place on the table for dinner.
Add a few decorative elements to your table runner, to let people know they can write on it. Add stickers or other decorations. Or even use it to write out place cards for your guests!
Place markers and or crayons in small cups along the table within easy reach of guests. Be sure to let them know they are free to doodle!
Cornucopia Place Card Holders
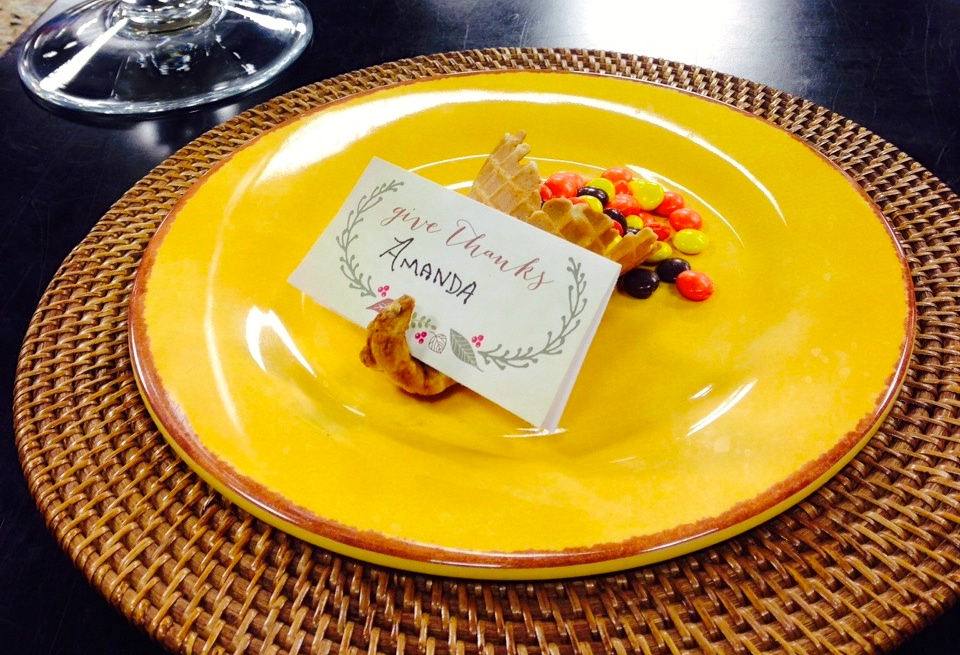
This is a perfect project to get your kids involved in, but be sure to have plenty of the candy filler around!
You will need:
- Waffle cones
- A bowl of water
- A fat pen
- Candy filler – you can use the Harvest mix candies (they are like candy corn, but veggie shapes), or you could use Reese’s Pieces (they are perfect harvest colors!), or even use a nut based trail mix.
- Place cards (you can find a free place card printable at EleganceAndEnchantment.com.)
Take your waffle cone and soak the pointy end in the bowl of water for about 30 seconds (not too soaked – you don’t want it to get too mushy). Place cone in microwave for approximately 30 seconds, until the ends is just softened and pliable.
Remove cone from microwave and using the fat pen, flatten and curl the cone’s end up around the pen to create a cornucopia effect.
Fill cornucopia with candy or nut filler and lay at the place setting. Filler can spill out for effect, or you can wrap the open end in plastic wrap and secure with ribbon.
Lay the place card on the back end of the cornucopia.
This creative idea came from Squiddo.com.
Sugar Cone Teepees

A simple little craft to entertain the kids while waiting for dinner!
You will need:
- Sugar cones
- White frosting
- Black gel icing tube
- Harvest color edible decorations – Reese’s Pieces, sprinkles, etc., placed in dishes
- A flat, clean work surface safe for kids.
Smear white icing to cover the cones. Let the kids go to town decorating their teepees!
Simple Solutions Diva Is Now A Contributor To 30SecondMom.com!
 Simple Solutions Diva is excited to share that she is now a contributor to the website, 30SecondMom.com. The website, full of great tips and ideas provided in a short and sweet 30 second format, is perfect for the busy mom!
30Second Mom’s goal is to provide mobile moms with quick and helpful tips from other moms – each in about 30 seconds or less – delivered straight to their phones. Whether moms read the tips or watch them on video, they are delivered in clear and concise – and fun! – formats that won’t take much of moms’ most precious asset: their time.
Check out Simple Solutions Diva’s 30Second Mom.com profile and tips by clicking HERE.
The Luxury Of Time At The Holidays – Simple Tips To Enjoy What’s Important To YOU
With the craziness of the season, time is a Luxury during the holidays! Simple Solutions Diva’s Laura Morey shares simple tips to make time for what is important for YOU, in a guest blog post on LikeLoveWantNeed.com. Check out her simple tips by clicking on the photo below!

Simple Holiday Survival Starts Saturday, November 16, 2013!
Let’s face it, the holidays can get a little crazy! Between cooking, cleaning and general holiday celebrating, it can get a little exhausting! Join Simple Solutions Diva every Saturday through Christmas for Simple Holiday Survival, where she celebrates this harried season with simple ideas to make things a little easier!
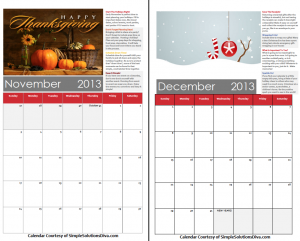
And to help you get into the mood, and hopefully a little more organized, she has a Free Printable: the Simple Holiday Survival Calendar. This 11×17 inch, two page calendar features helpful tips on planning your holidays and really enjoying what truly matters to you. Use it to plan out your holiday activities!
Be sure to check out Simple Solutions Diva on Facebook and Twitter as she rebroadcasts her 2012 Simple Holiday Survival videos – or simply click on the Simple Holiday Survival link under the Topics Bar to the right of this page.
Here’s to Happy, and Simple, Holidays to you!!
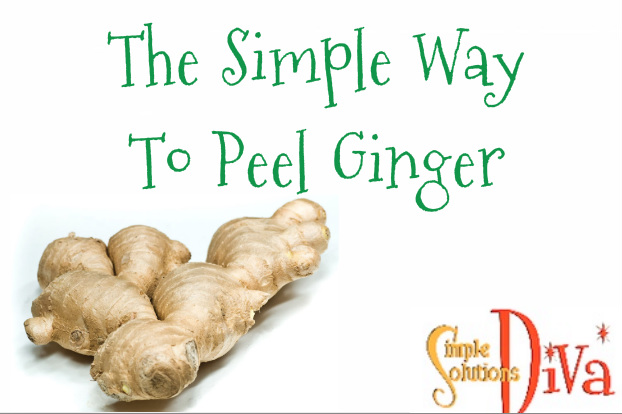
Simple Kitchen Tip: Peel And Store Fresh Ginger