With this video, the Clear The Clutter Challenge is coming to a close! Chris Stone of NeatlyDesigned.com and I have brought you through the whole process: where to start, how to let go of things, and how to prep the space for the new, organized closet. Now we put things back together!
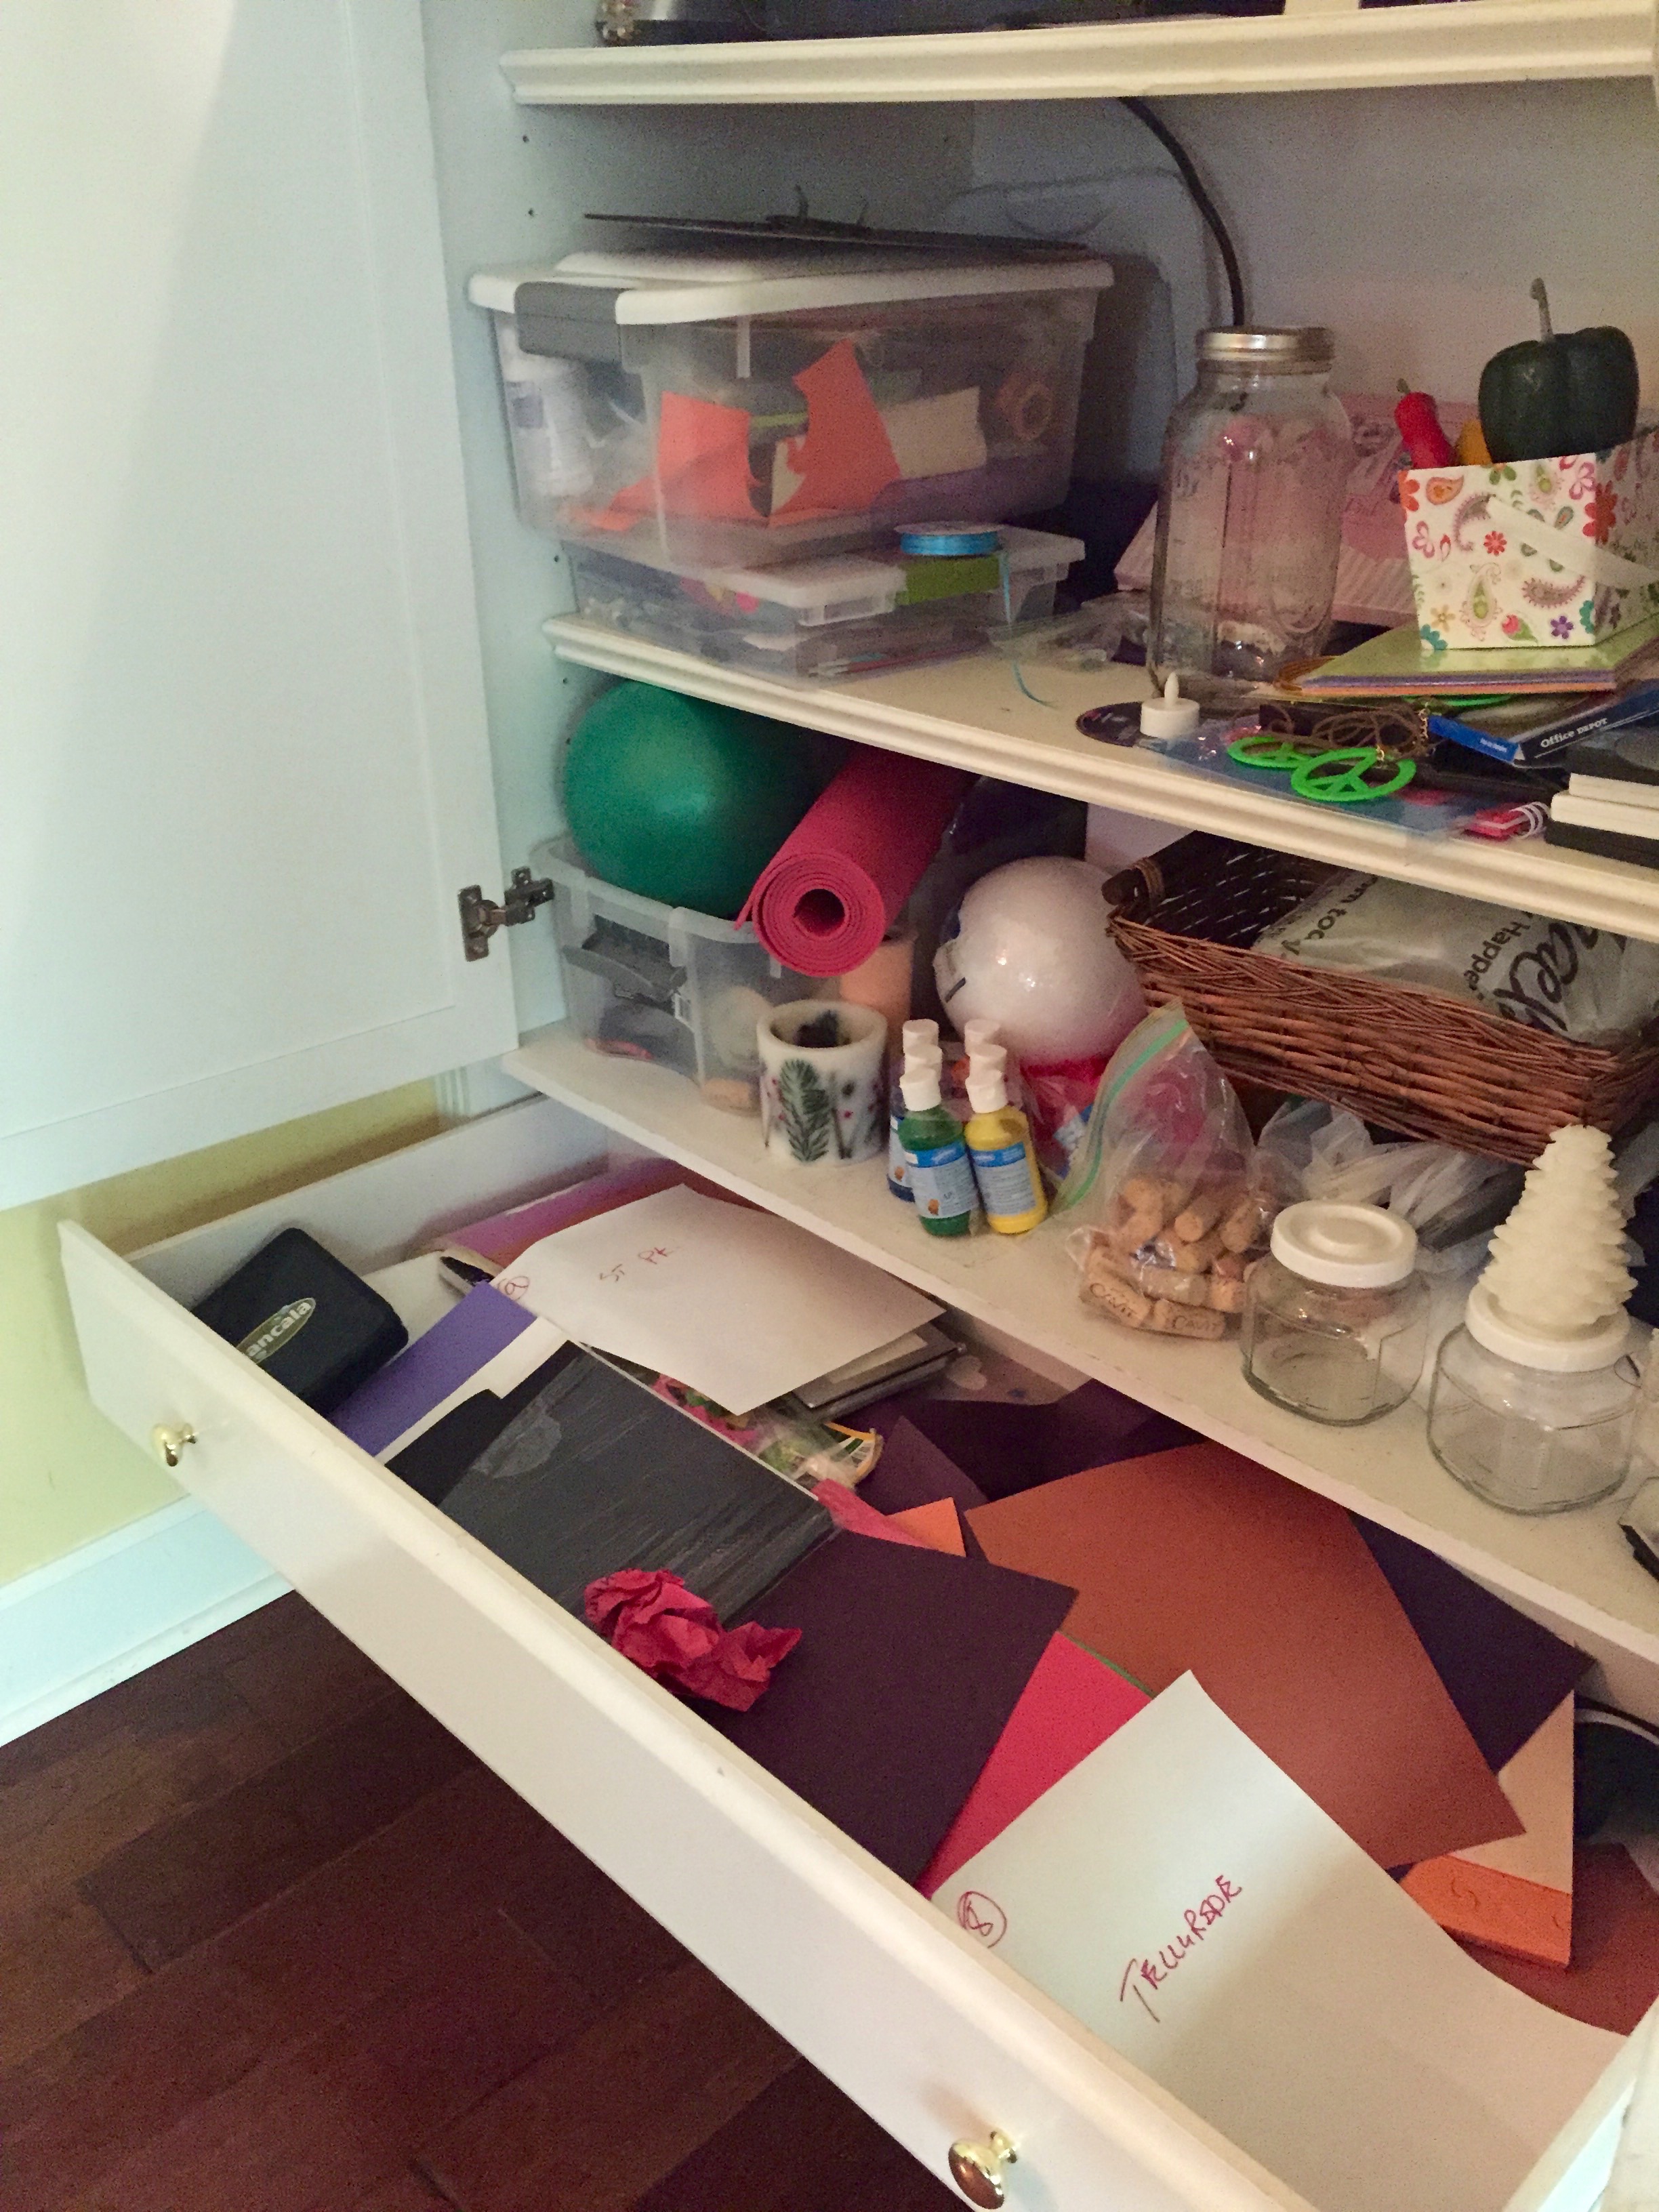
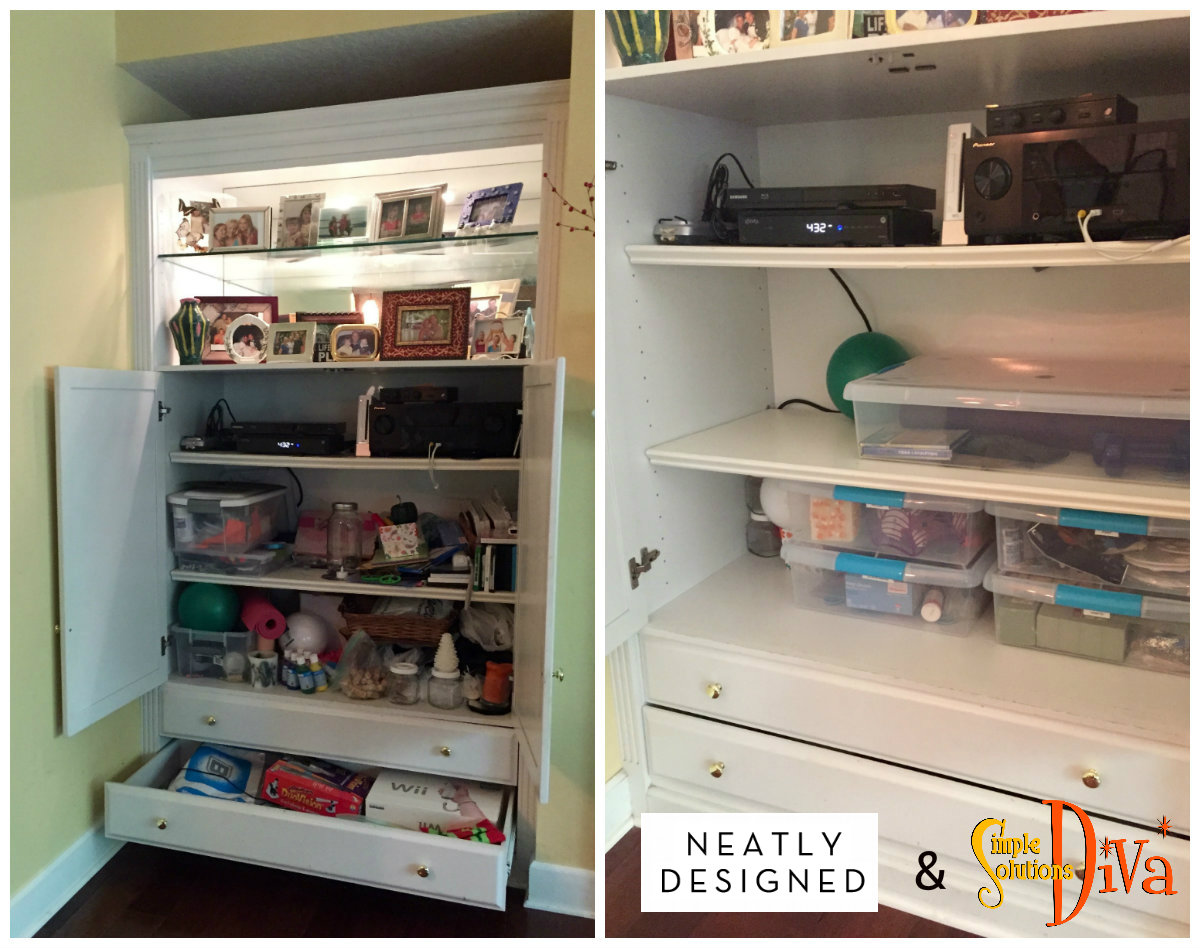
Let me refresh your memory of what we started with – a very disorganized, cluttered craft closet!
This process has been tough on me – I had to learn to let go of some things, not just because they made things messy, but because they were making me feel overwhelmed! Letting go really made me feel lighter, less stressed and ready to take on new challenges!
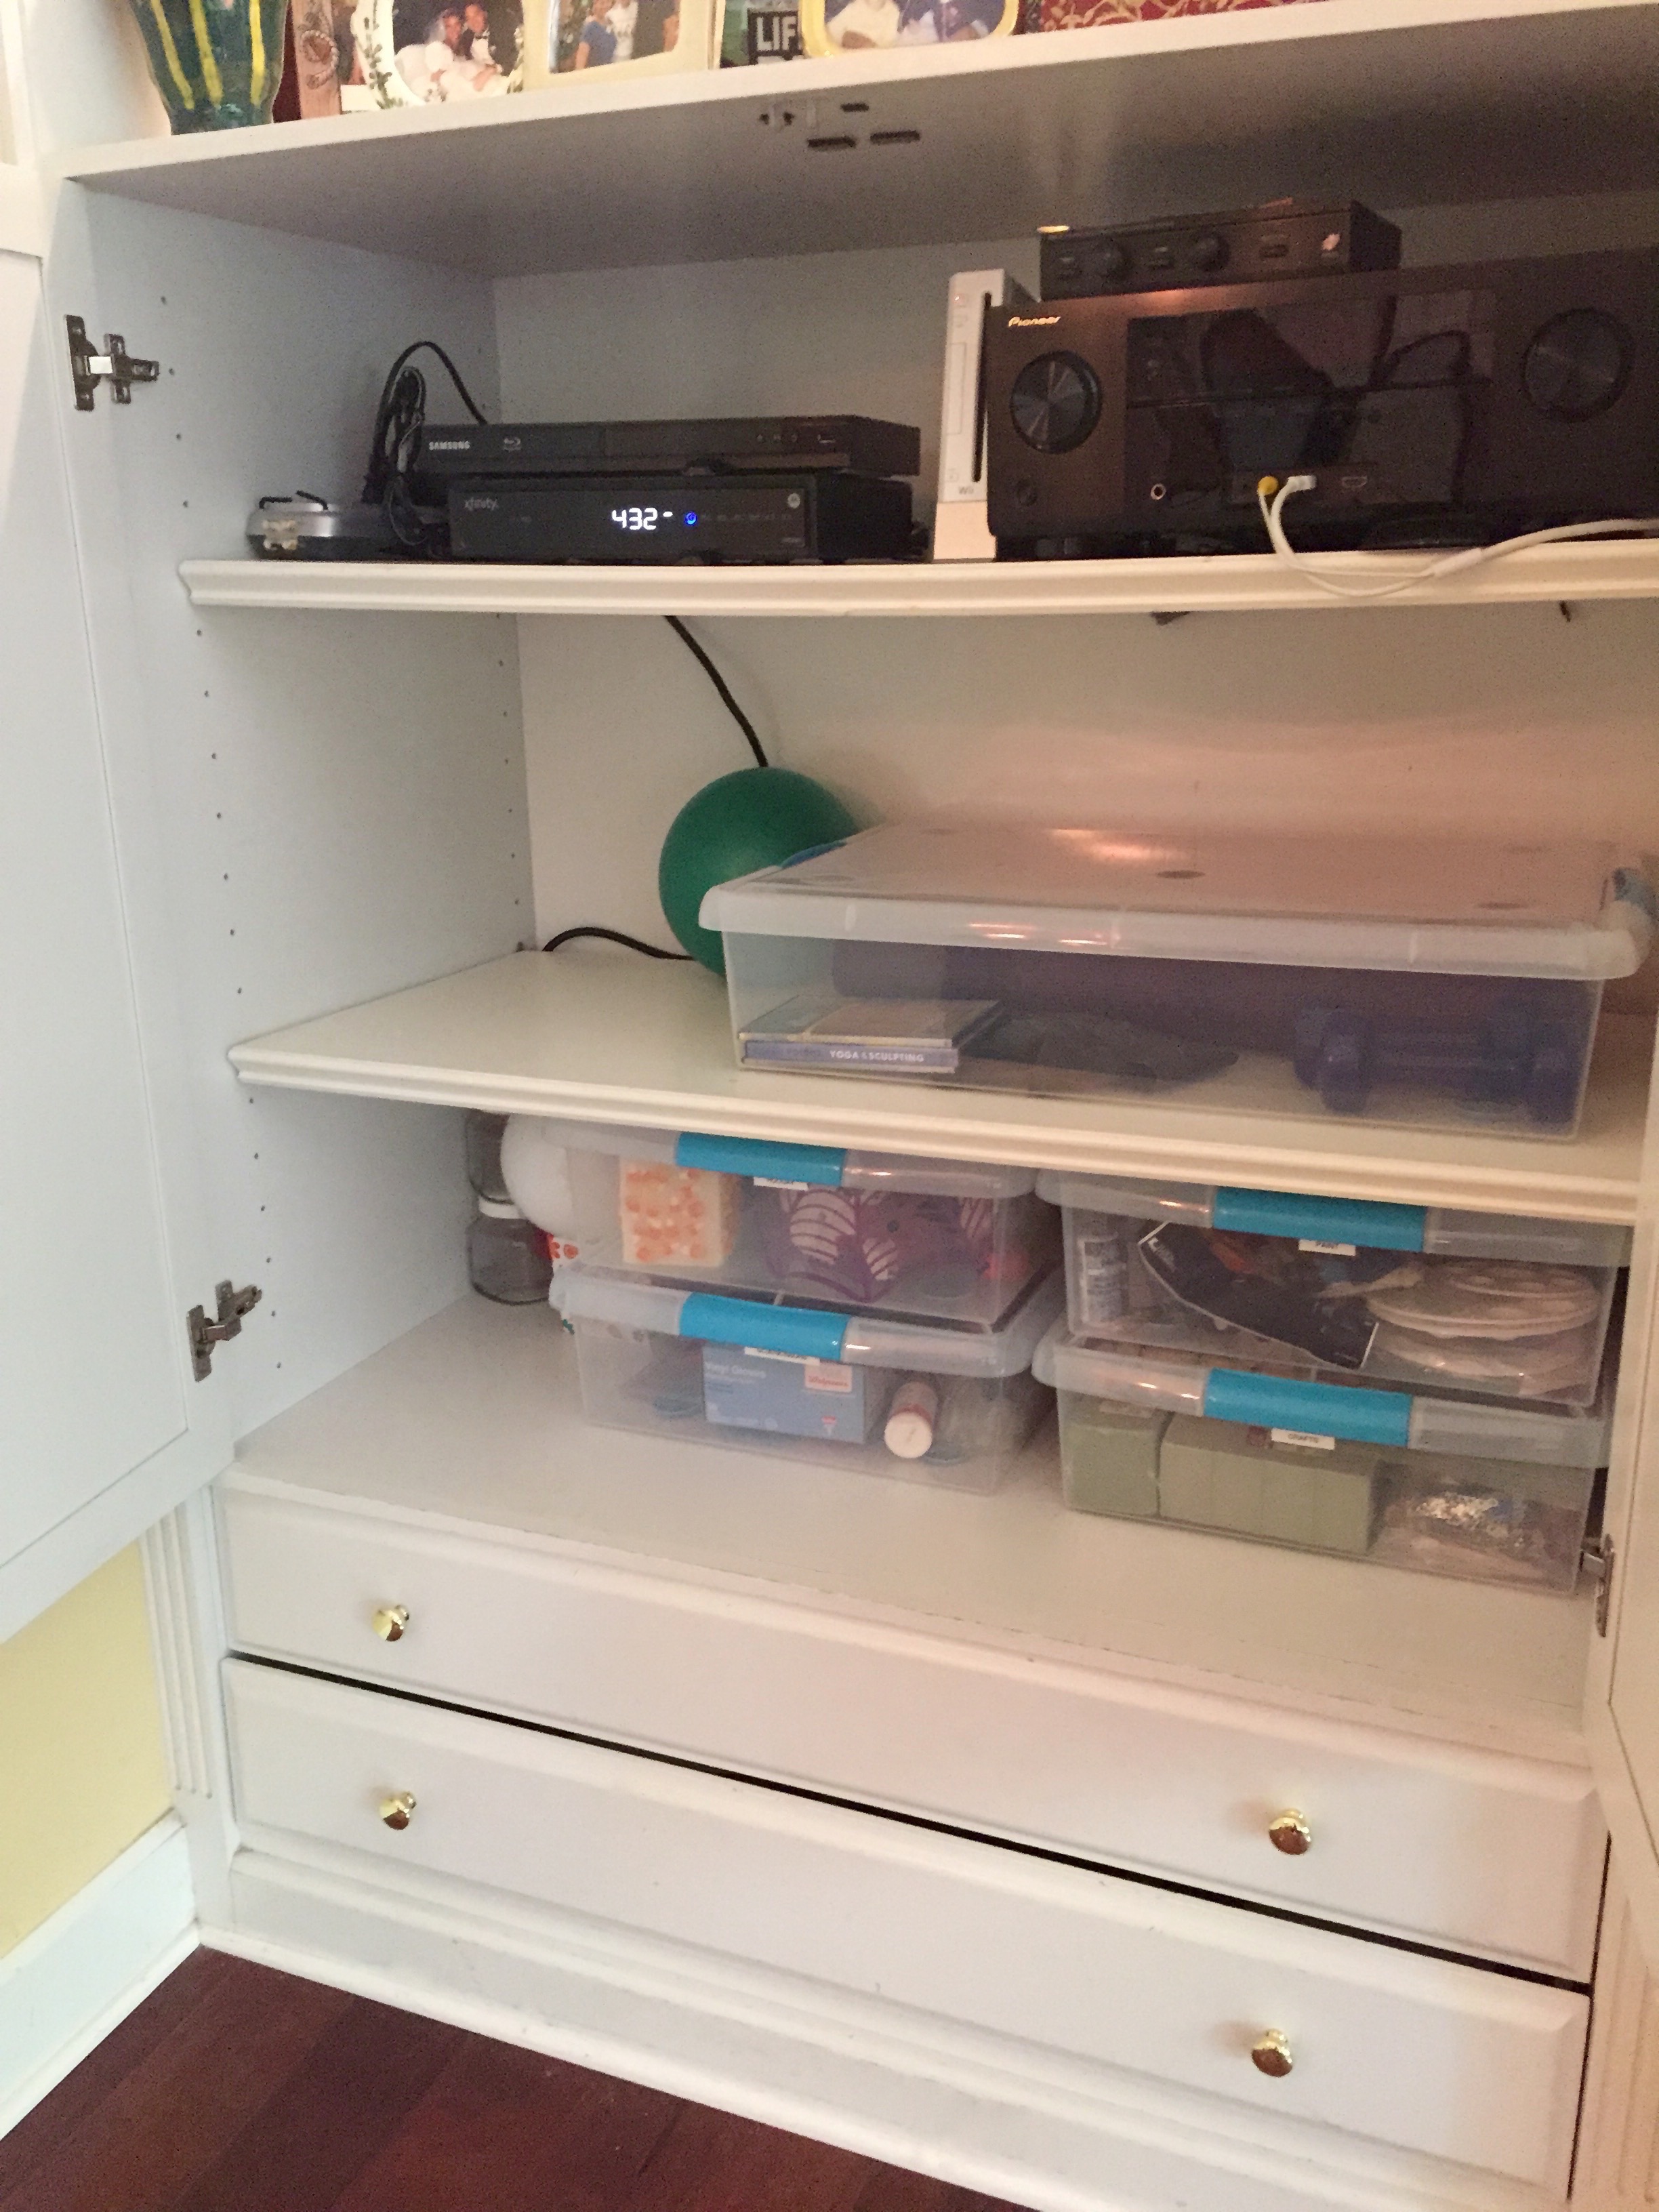
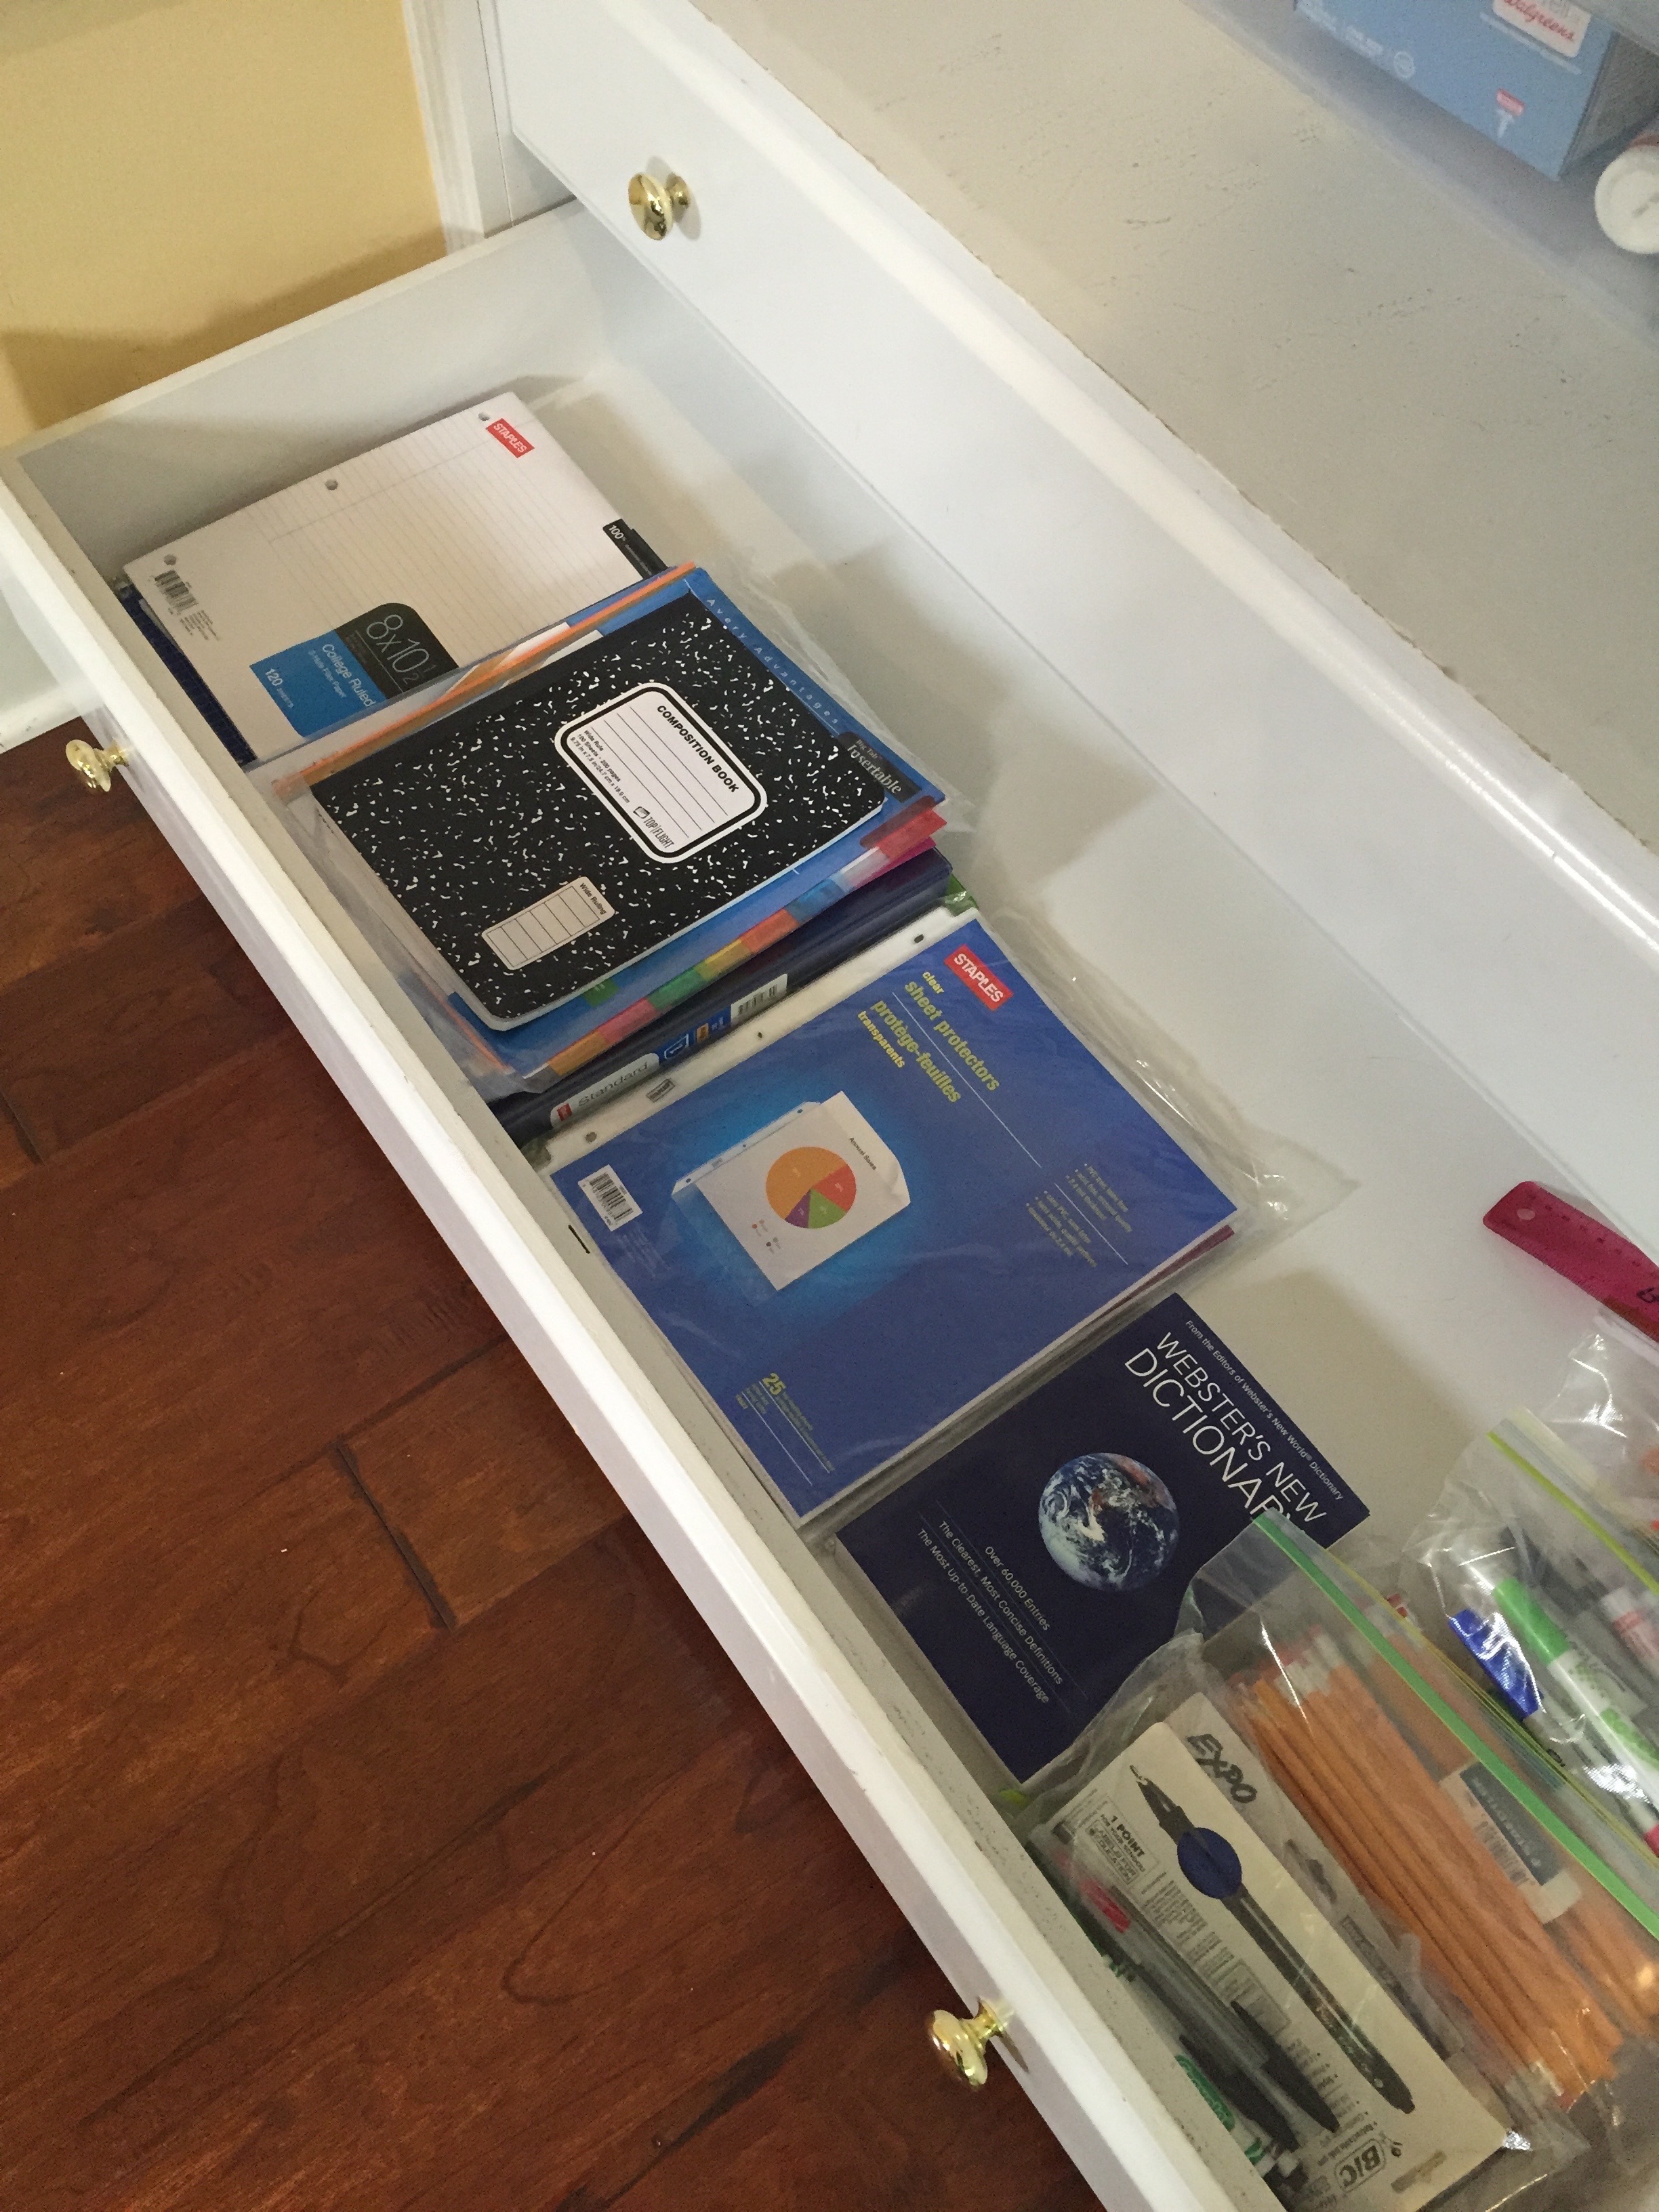
I now take pleasure in opening the doors and seeing this:
All neat and tidy! I feel less stressed already!
Take The Challenge!
It was our hope we could motivate you to take on the challenge of clearing the clutter in your home – whether it is a big or small project! If you need help, don’t be afraid (or embarrassed!) to contact a professional organizer to help you.
The reality is, if you aren’t on a episode of Hoarders, you are probably normal and just need a little help letting go!
And if you live in Northeast Florida, I highly recommend contacting Chris Stone to help you through the process! Here’s how to reach her:
Christine Stone, Owner, Neatly Designed
Professional Organizer, Member of NAPO (National Association of Professional Organizers)
With the decluttering finally finished, the next step in my journey from cluttered to clean had arrived! Prepping the storage area & measuring for the storage boxes!
Here’s where I begin to see the fruits of my labor!
Chris Stone of NeatlyDesigned.com has shepherded me through this process, gently (plus a dash of humor & firmness!) helping me clear out this mess!
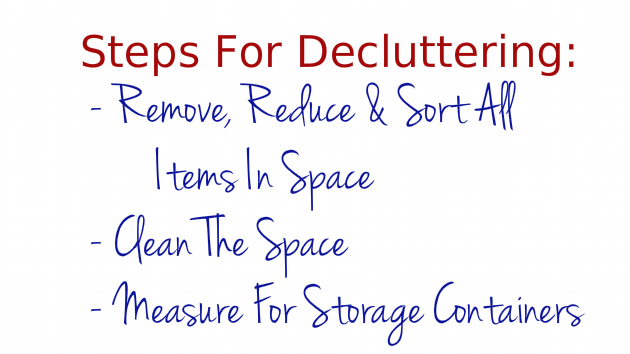
So here are the steps for this decluttering process so far:
A clean space to organize is a treat! You know you don’t want to put all your nicely organized items back into a dirty area! You also want to make sure you have the right sized storage bins, so you can actually close the doors! So follow along! And next week, you can see how we put it all back together!
So when I decided to do this video series with Chris Stone of NeatlyDesigned.com, I thought to myself,
This will be great! I will get organized and someone will actually HELP me do it! Easy Peasy! . . . Well, I was in for a shocker!
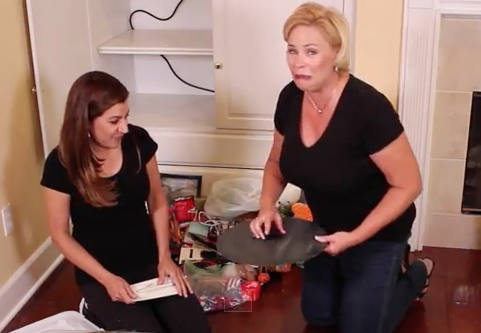
What I didn’t expect was to feel a combination of anxiety, embarrassment and attachment to silly things like fuzzy balls and googly eyes (watch the video and you will understand)!
Laura is not too happy!
When you have clutter, there is a reason you are keeping it around, whether you know why or not. When you start to get rid of it, you start to see patterns. This video is meant to really illustrate the sometimes difficult process of letting go of the clutter! These are my true and honest reactions; I’m not acting. And the funny thing is, Chris knew it was going to happen! She’s a pro, she’s seen this before with all of her clients, and knows how to help people get through it to a nice, clean, organized space!
So sit back and enjoy! And realize, if I can do it, so can you!
Welcome to the first in the video series, A Simple Challenge: Clear The Clutter. I’ve teamed up this month with professional organizer Chris Stone of Neatly Designed to give you a helping hand in getting started in your decluttering process. In today’s video, Chris and I begin the process to tackle the hidden clutter in my media cabinet/craft closet – AKA My Anxiety Closet!
BTW – I highly recommend subscribing to Chris’ blog for great tips & little nuggets of motivation! They really do help keep you going!
My Personal Clutter Journey
For years, I was really good at a mass purge every six months or so – I was forced to when the kids were little to go through their stuff because they were outgrowing everything so fast! But as time sped up (parents of teens and pre-teens will understand this concept of time flying!), I seemed to have less and less time to get things done!
Now, I believe most people have clutter, whether hidden or in plain site. Many will go along and live in their clutter, either unaware or unwilling to deal with it. Avoiding, putting it off, waiting until they have a quiet day, etc. That is, until something happens and they force themselves — or are forced — to deal with it! My moment of truth came when my oldest left for college. I have, for at least the last year or so, been ignoring the piles of junk accumulating in and around my house!
My Media Cabinet/Craft Closet/Junk Hideaway! AKA, My Anxiety Closet!
Between doing projects for SimpleSolutionsDiva.com, family activities, sports, and just wanting to eek out those last few moments with my “baby’ before she left for college, etc., I found myself throwing things in a closet saying, “I’ll get to it soon!” Well, I think I reached that point of being just grossed out by it all!
And the subtle (and not so subtle) requests from my patient husband just got to be too much to ignore. . .
So join Chris Stone and I, as she shepherds me through the process of clearing out my clutter! I hope it will help motivate you to take care of some of the piles in and around your home!
P.S.: I have to say, I find this has helped me feel lighter, more organized, and I actually have more time and energy to do the things I want to do. I think I was being paralyzed by the piles!
The Heat is on this summer, and we all are looking to cool things down a little. The Simple Solutions Diva has a few icy beverage recipes & ideas (all non-alcoholic), perfect to chill out with this summer!
Fruit Kicks Up Drinks To The Next Level
Put the fruits of the season to work! If you have strawberries, peaches or raspberries, and they are about to become overripe, puree them in a blender and freeze the puree in ice cube trays – pop a few cubes into a glass to add a refreshing, fresh flavor to any lemonade or iced tea!
Fruit Puree Recipe:
2 Cups Fruit (Wash and remove stems – like strawberries – or peel fruit – like mangos or peaches – first)
2 Tablespoons sugar – I used 1 Tablespoon turbinado sugar
2 Tablespoons water
1 teaspoon lemon
Directions:
Combine ingredients in a blender or food processor and blend until smooth. Pour puree into ice molds, cover with plastic wrap and freeze 24 hours. Pop out and serve immediately in favorite beverage like iced tea or lemonade. Save remaining in freezer bag, removing as much air as possible from the baggie!
Perfect Iced Coffee
This is a bit of a process, but so worth the effort! Start it in the early morning (or the night before!), so you have it in the late afternoon! This will make a large batch for the week. Plus, you can freeze any leftovers in ice cube trays to add to your future iced coffee the next week (and the coffee ice cubes won’t water down your coffee)! Best Review From The Biggest Critic – My husband says:
This iced coffee maintains its integrity as the ice melts!
This large-batch recipe is from the Pioneer Woman, Ree Drummond – you just can’t improve on perfection with this recipe! She has two types – regular iced coffee and vietnamese iced coffee – both are YUMMY! Click HERE to go to her fantastic recipe!
Crank Up The Heat To Chill Out
Sometimes it takes adding a little heat to get you to cool down! The theory is, if you sweat a little, it is your body’s way to cool you off! This Jalapeño Watermelon Limeade is a perfectly tasty way to cool you off – just enough of a kick, balanced with sweetness!
Jalapeño Watermelon Limeade
Ingredients:
4 cups watermelon, pureed in blender
1 cup fresh squeezed lime juice (about 5 limes)
1 cup water
1/4 cup sugar
2-3 pinches of sea salt (optional)
1/2 teaspoon Jalapeño Simple Syrup (see recipe below) in each serving glass. Use this amount as a guide-add more or less to taste!
Jalapeño Simple Syrup Directions: In a saucepan, cook 1 cup sugar, 1 cup water, 1 tablespoon chopped jalapeños-I used canned, but you can use fresh- boil for five minutes, Set aside and allow to cool; strain through a sieve, store in air tight container in fridge for up to 1 month)
Directions:
Combine the watermelon, lime juice, 1/4 cup sugar, and water in blender and blend! Serve in ice-filled glasses, stirring in 1/2 teaspoon Jalapeño Simple Syrup (more or less to taste!). Garnish with a slice of lime and a wedge of watermelon!
When you are in a hurry for a decadent dessert, who doesn’t like chocolate? Here’s a recipe that is perfect to make and eat with the kids! Warning – this serving was so big, one mug (an oversized mug!) would have been plenty for two people!
Ingredients:
4 Tablespoons flour
4 Tablespoons sugar
2 Tablespoons cocoa
1 egg
3 Tablespoons milk
3 Tablespoons vegetable oil
3 Tablespoons chocolate chips, optional (really, if you are making cake, GO FOR IT!) 😉
1/2 teaspoon vanilla extract
Directions:
Add the dry ingredients to a large, microwave-safe coffee mug, and mix well. Add the egg and mix thoroughly, being sure to scrape the sides and the bottom well to incorporate the mixture. Add the chocolate chips and vanilla and mix.
Place mug in microwave and cook for 3 minutes. The cake will rise and will peek out over the top of the mug, so don’t worry and think that it will explode!
Cake right out of the microwave – looks a little spongy and it is oh, so good!
Allow to cool, add some vanilla ice cream (why not!?!) and enjoy! So good you don’t need frosting!
Thank you so much to my assistants in today’s video, Dylan and Kingston! They were a big help AND they did a great job!
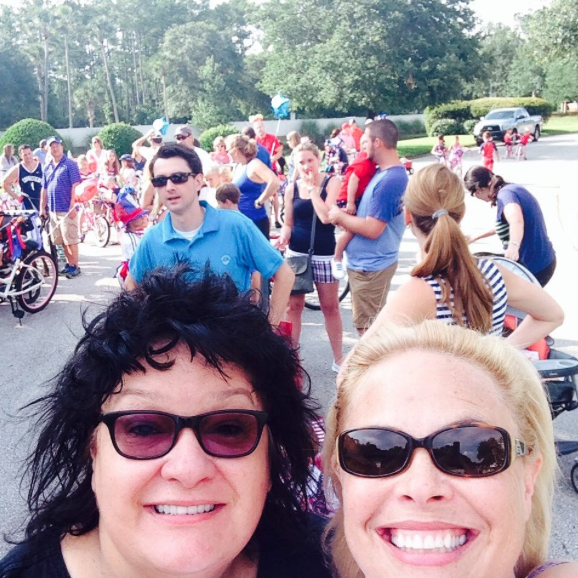
Independence Day is a favorite holiday in my house! It happens to be the day AFTER my birthday, so I always looked at it as a celebration of MY birthday as well as our country’s! My neighbor and I both love it so much, we started our neighborhood’s Fourth Of July Bike Parade 15 years ago and it is STILL going strong!
My partner in crime, Pegine and I, celebrating at last year’s Neighborhood Independence Day Bike Parade we established 15 years ago!
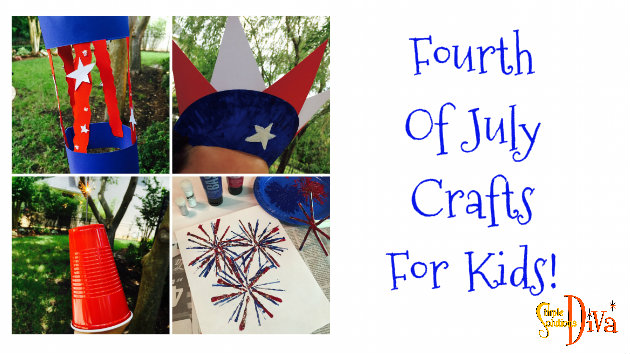
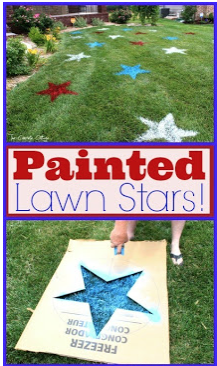
Here are a few simple crafts you can do with the kids this year, plus a few decorating & celebrating ideas I found that were just too good not to include!
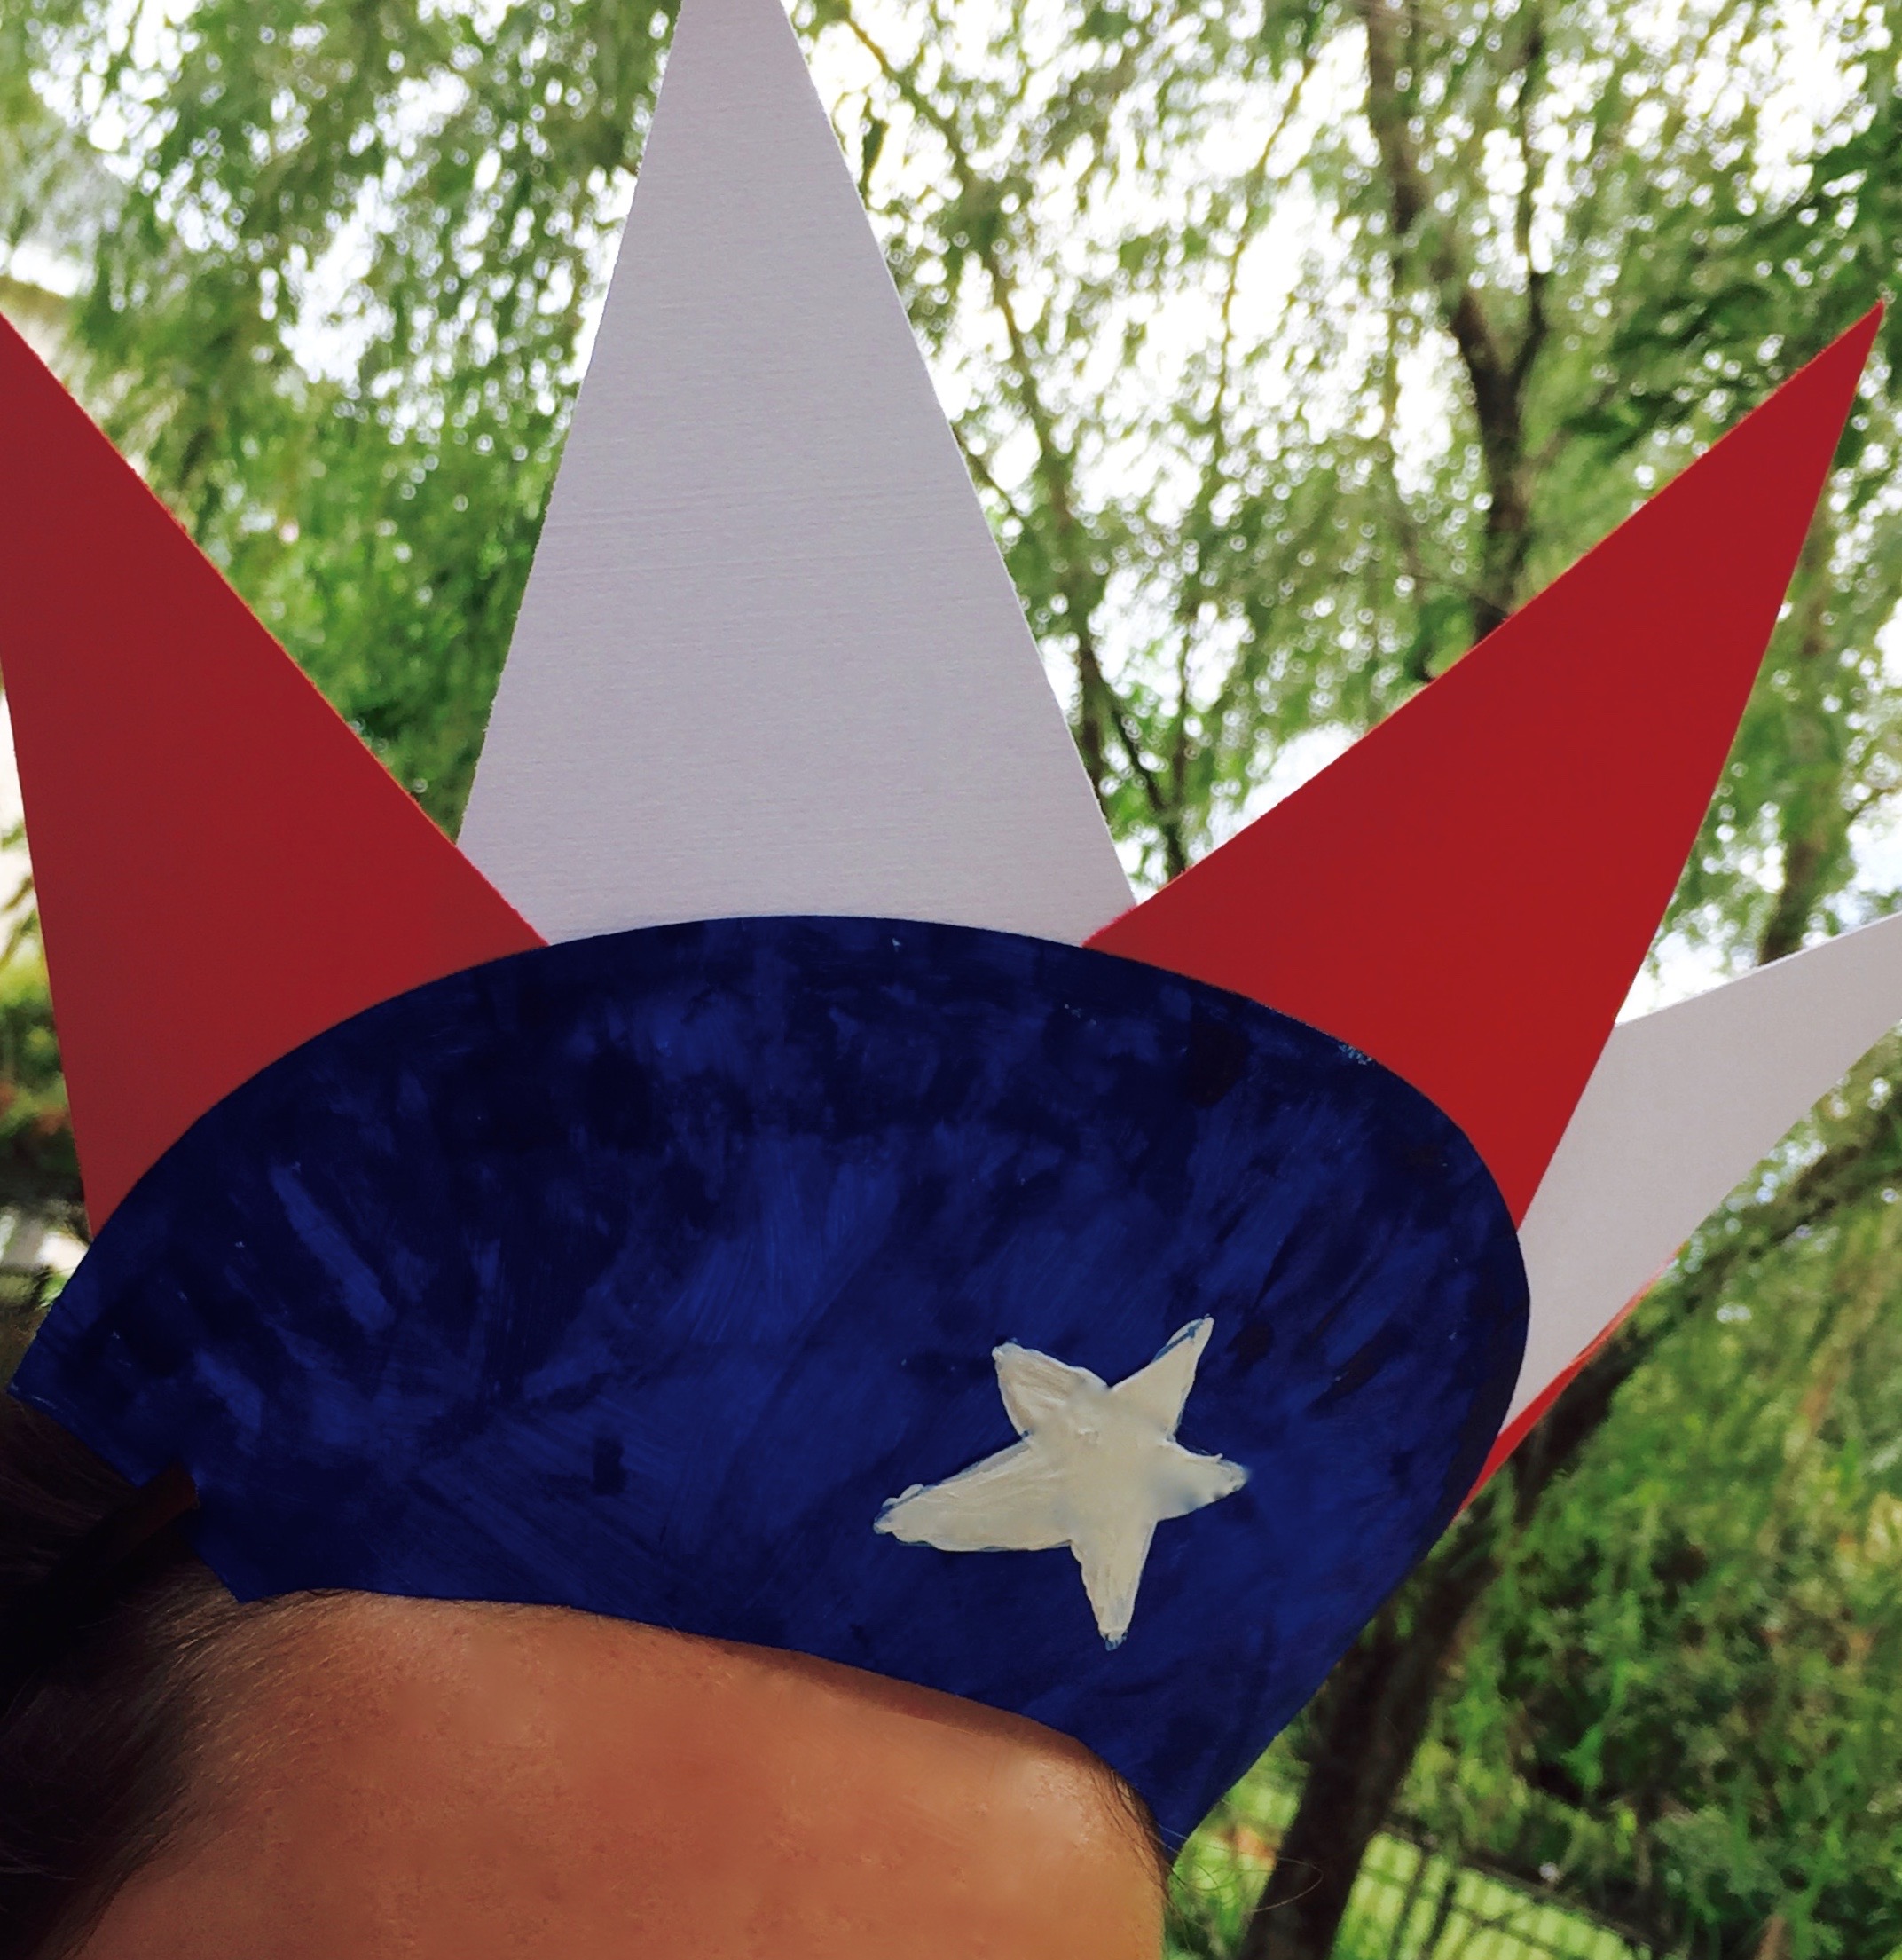
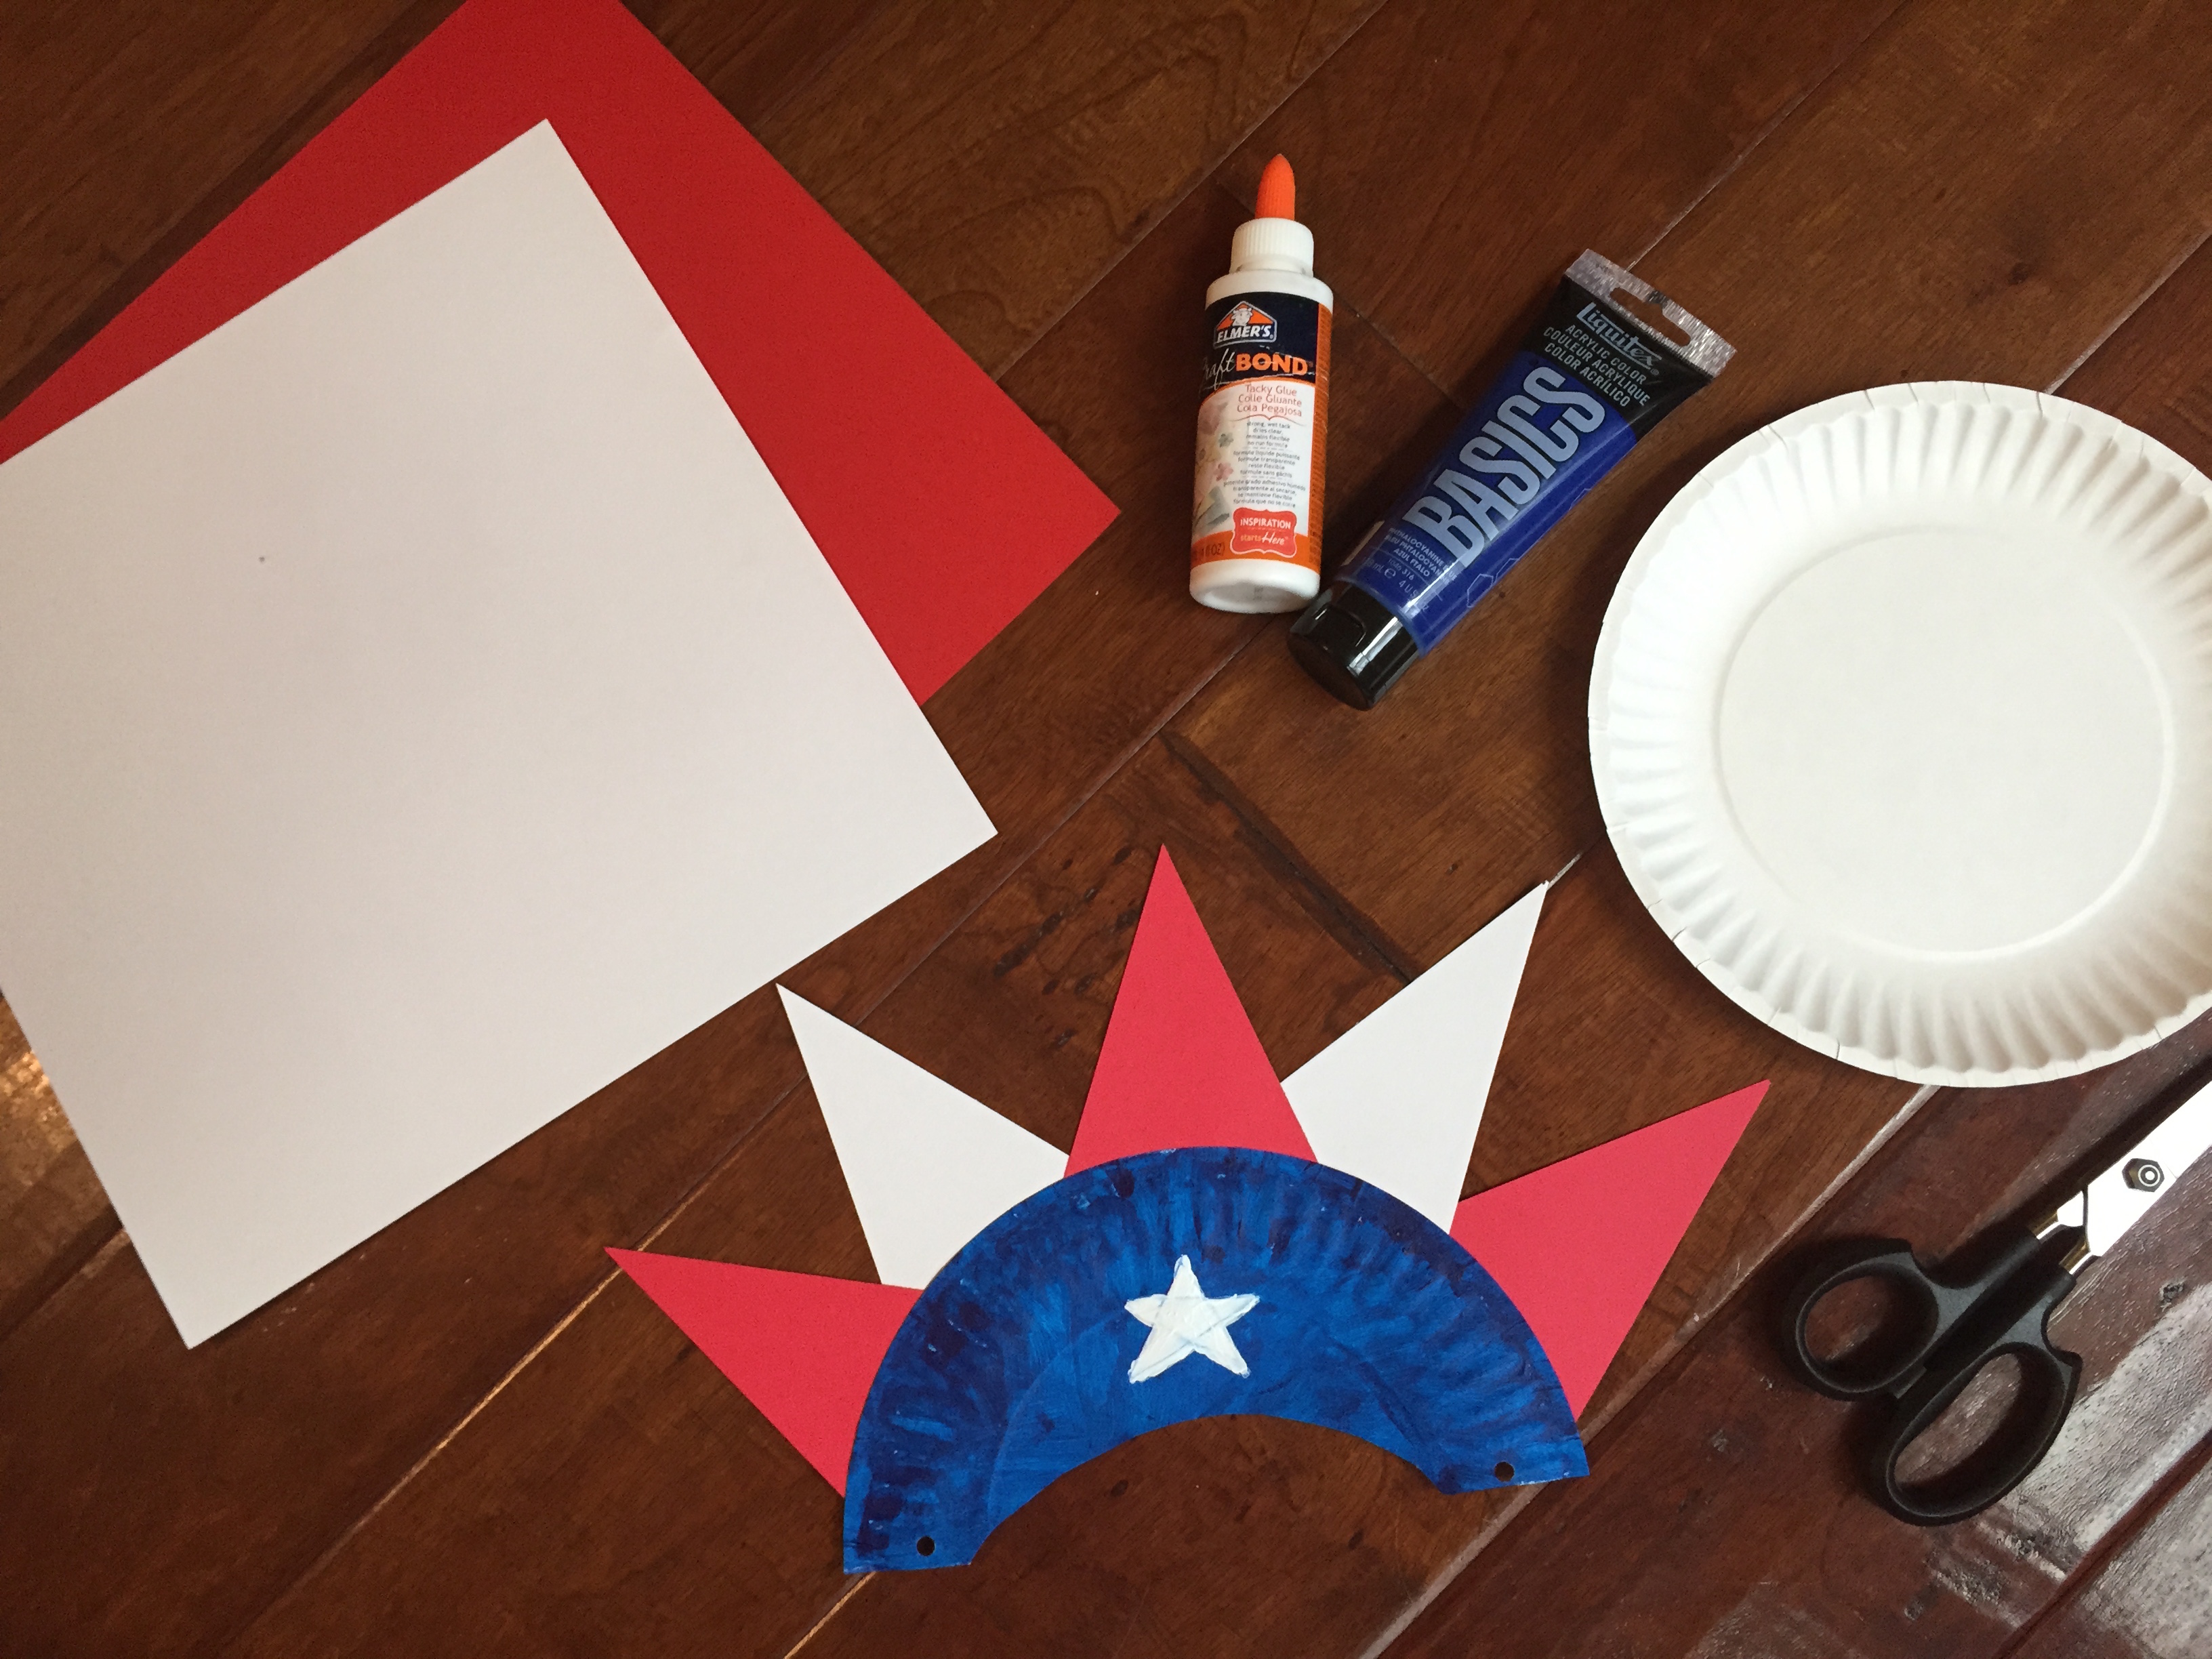
Liberty Paper Plate Hat
This is a simple project that requires just a few items!
What You Need:
White paper plates
Blue acrylic paint & paint brushes
White and red construction paper
Hole punch
Glue or glue dots to eliminate dry time
Elastic
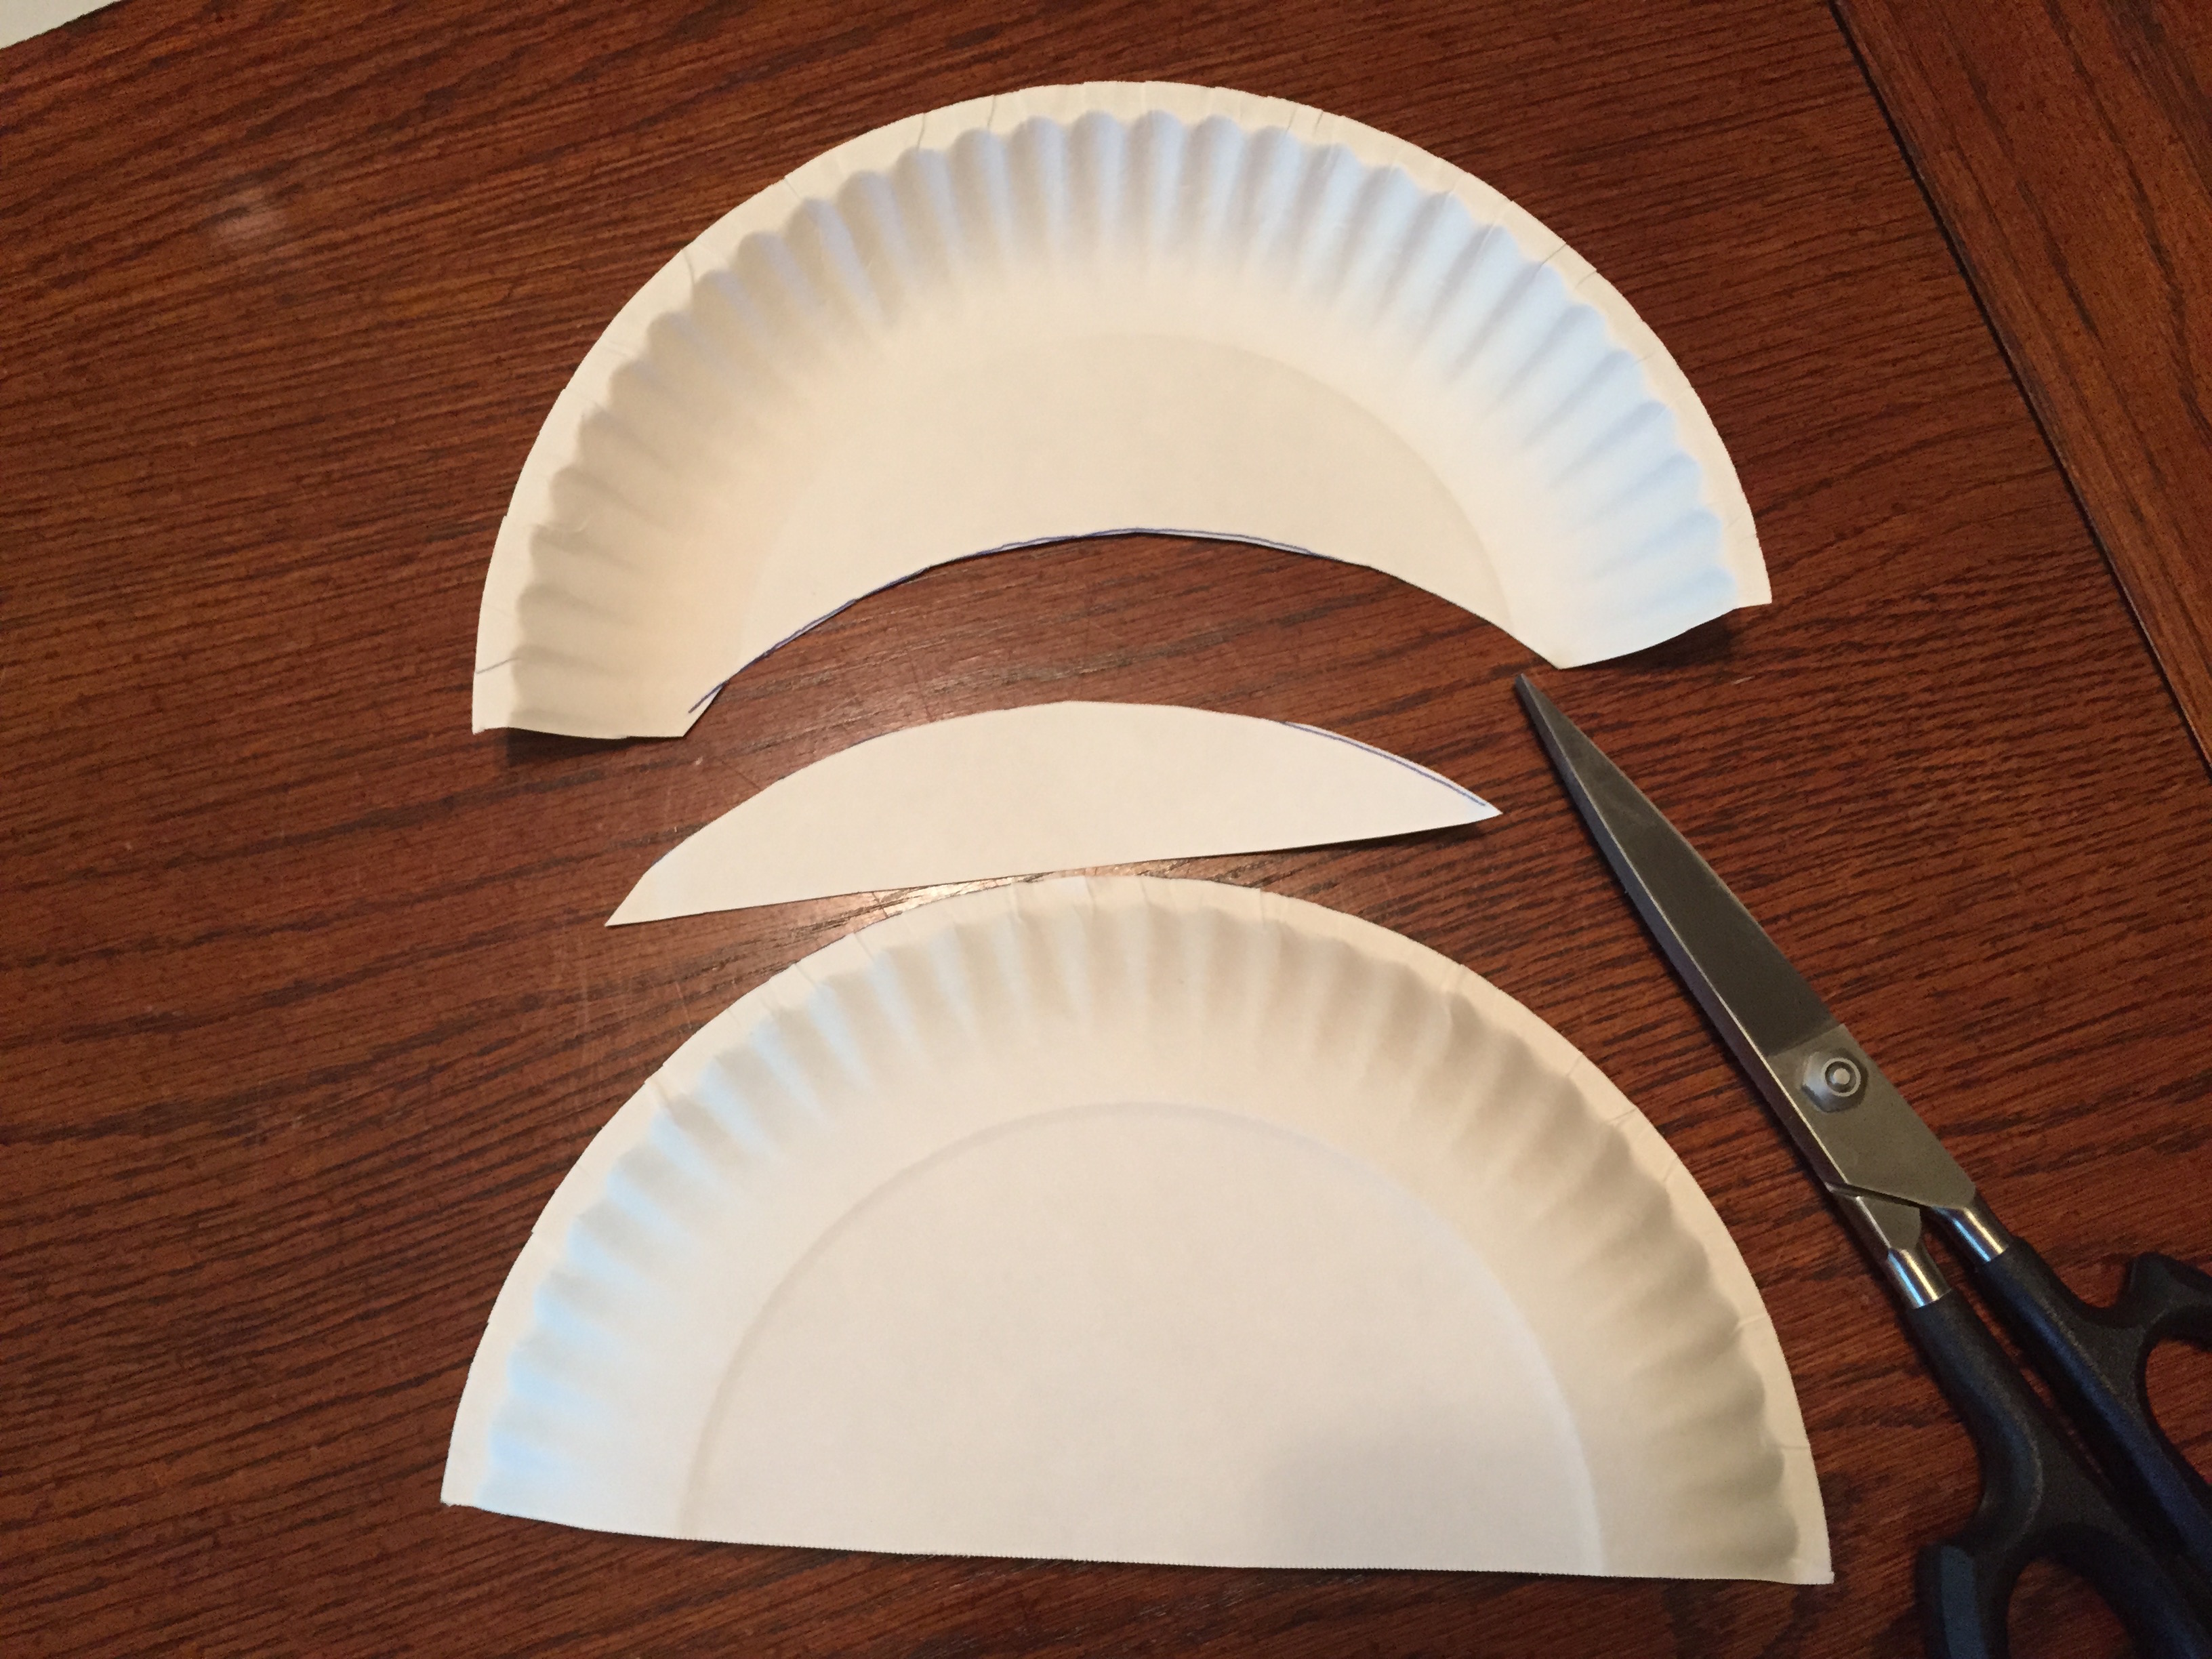
Directions:
Cut the paper plate in half, then on the cut side, cut a half moon out of the bottom using the other half of the paper plate as a guide (sounds complicated, but see photo below!). Paint one side of the plate blue. Set aside to dry.
Cut elongated triangles out of the red and white paper.
Flip the dried plate over and glue the paper triangles to the back of the paper plate (along the top-curved part), alternating red and white-points pointed up. Allow to dry.
Using hole punch, punch a hole on either side of the bottom of the plate. Thread elastic through each hole and tie off (estimate amount of elastic needed based on the child’s head size). You can also use a hard headband and put the headband ends through the holes on either end!
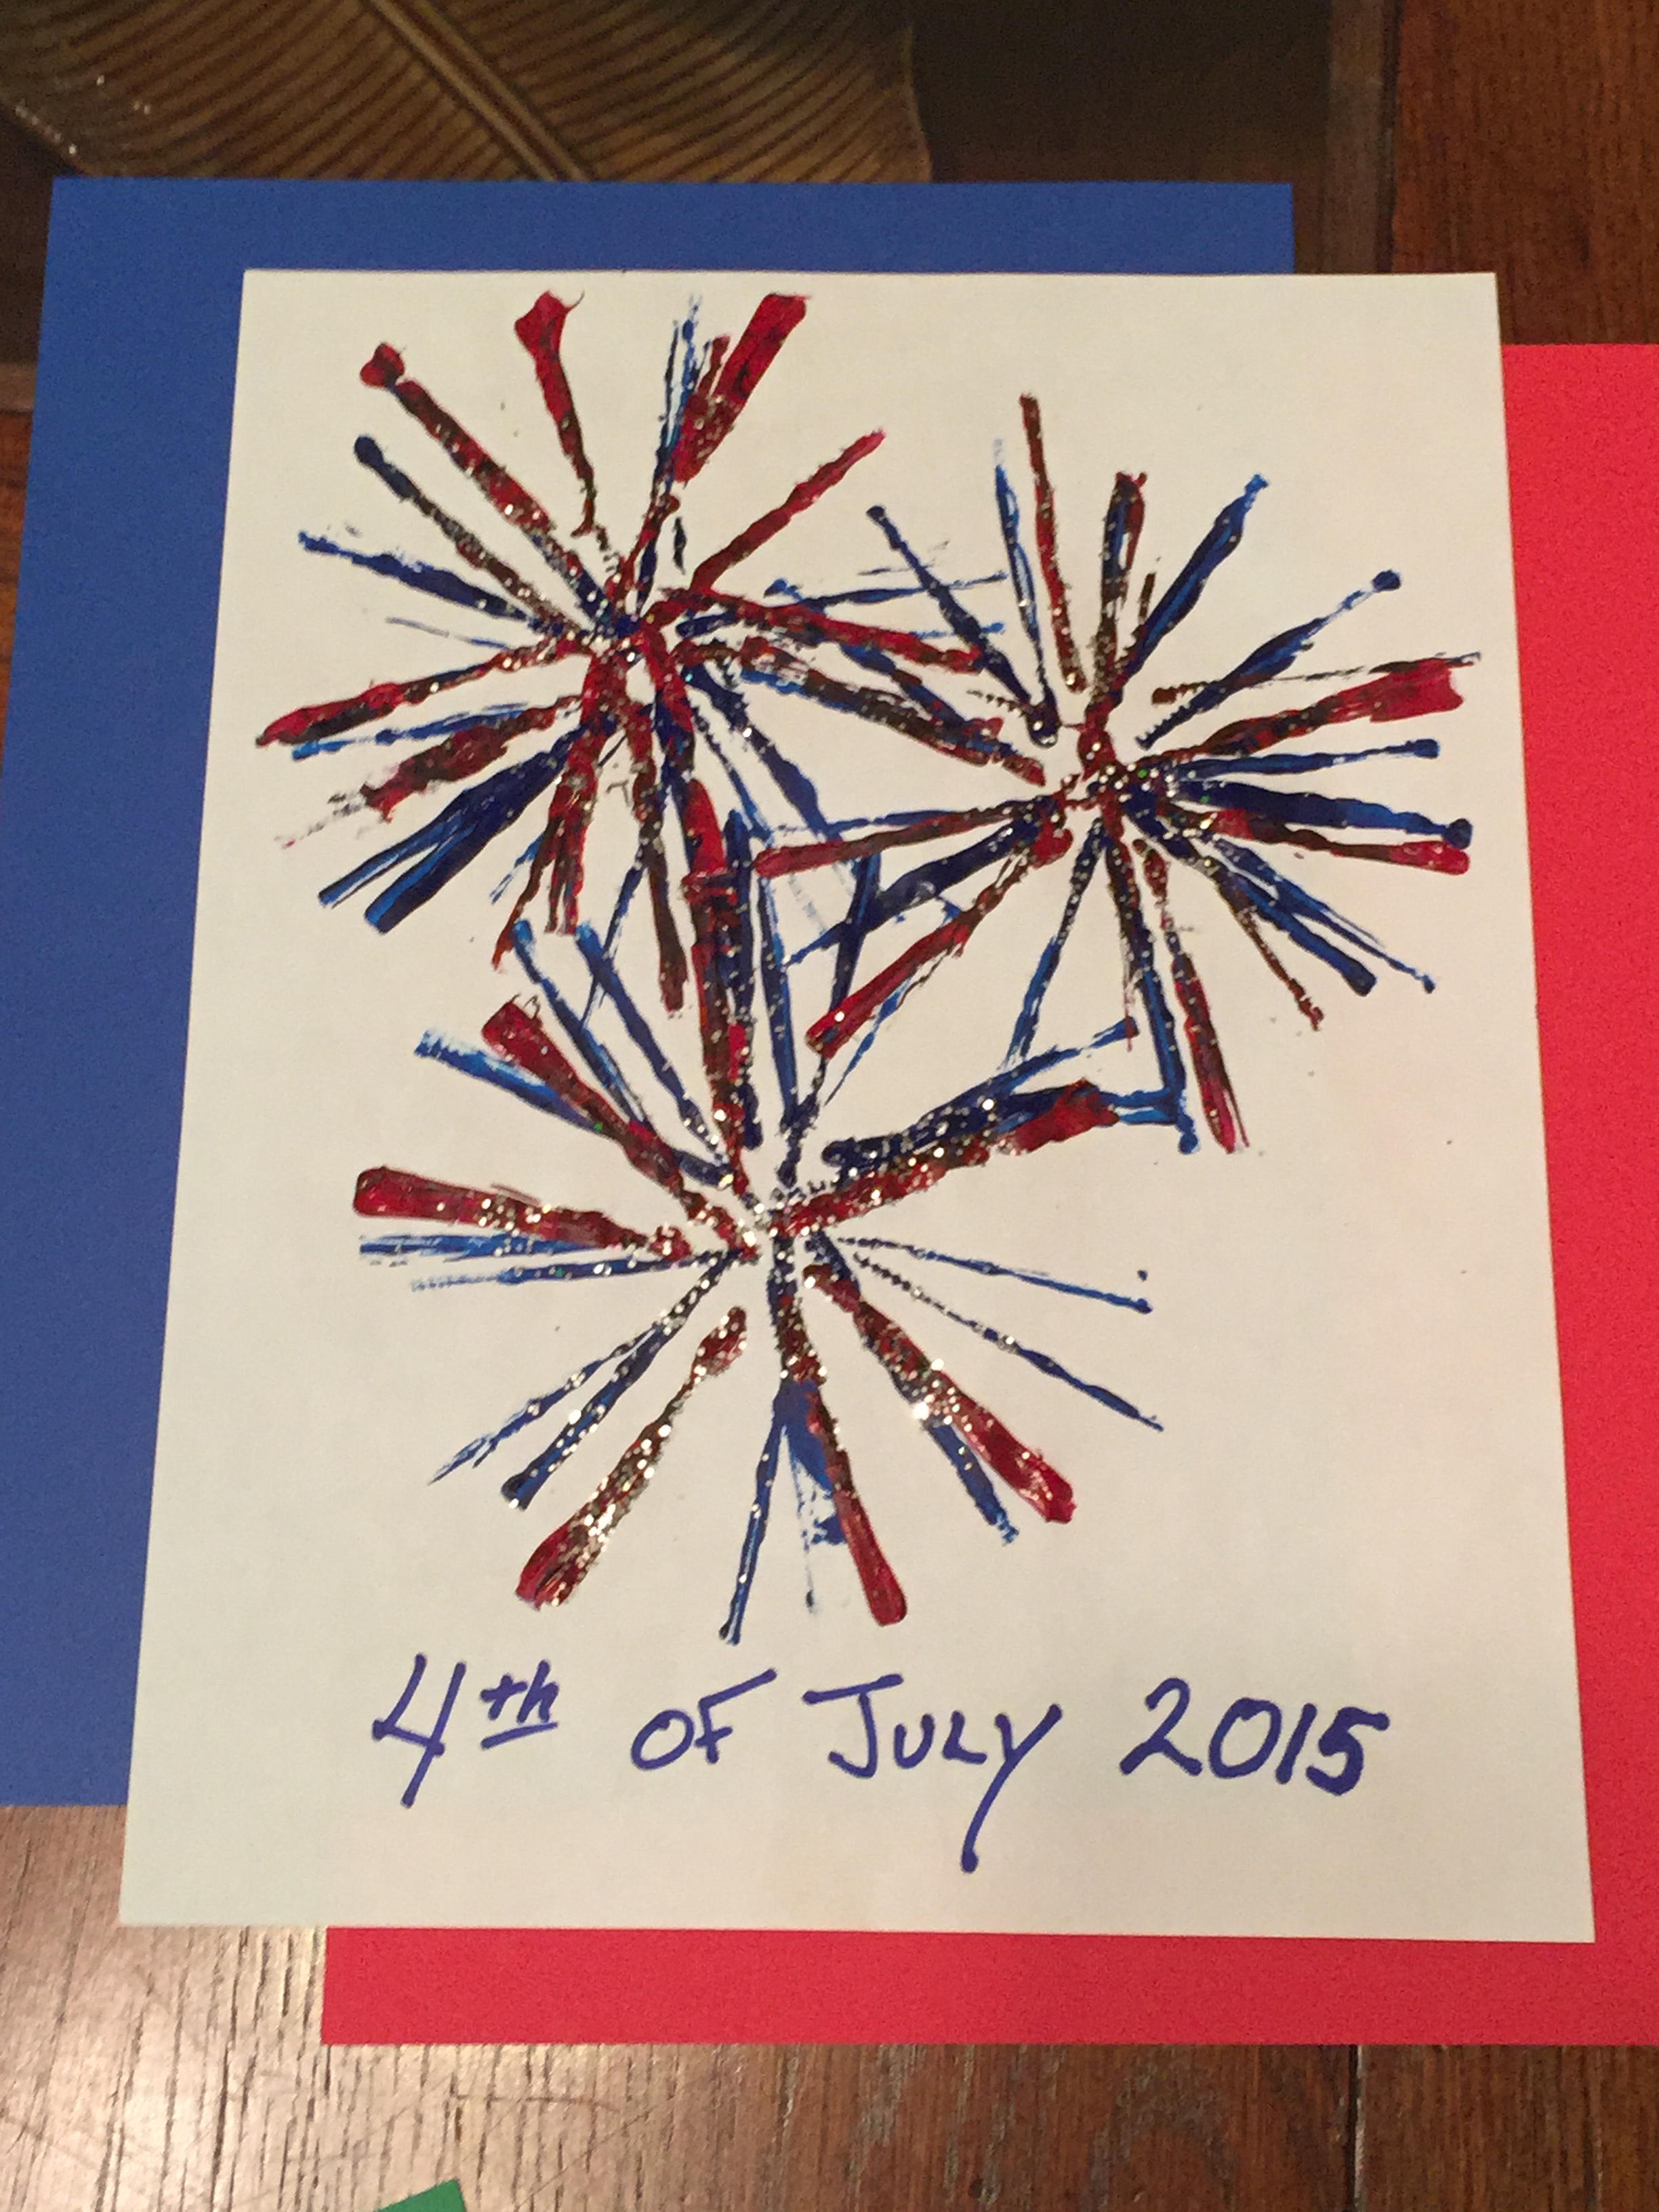
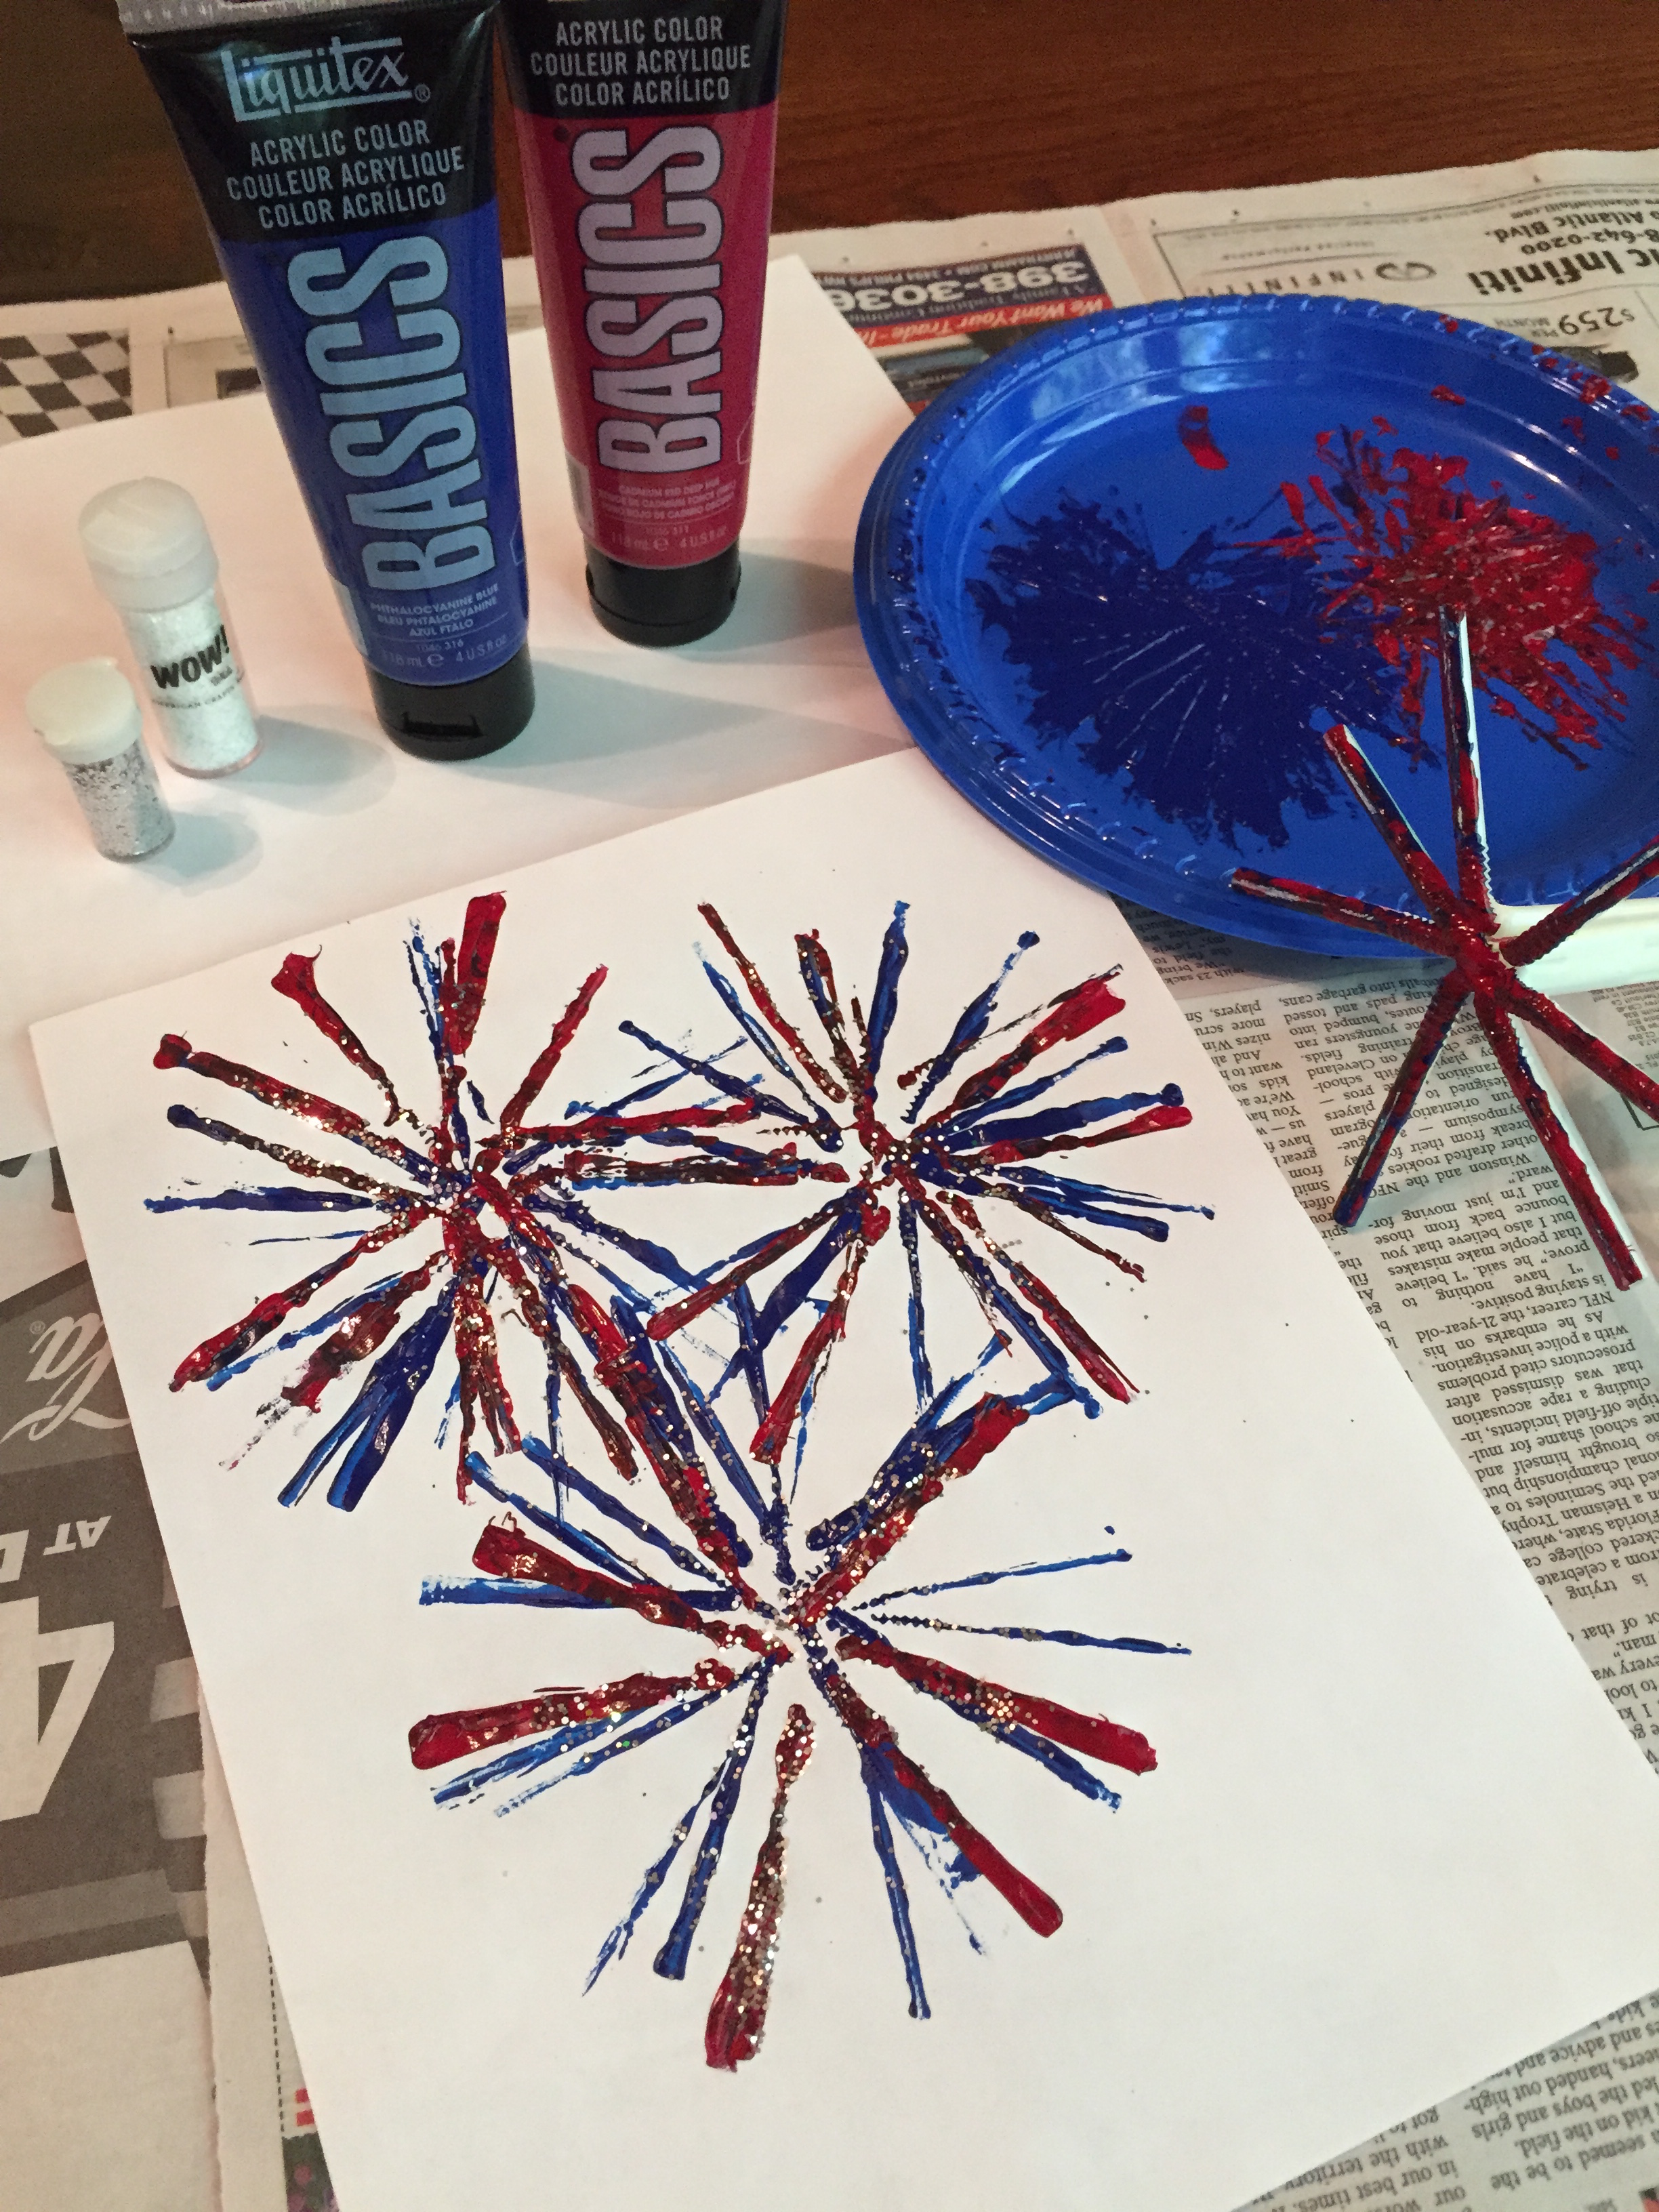
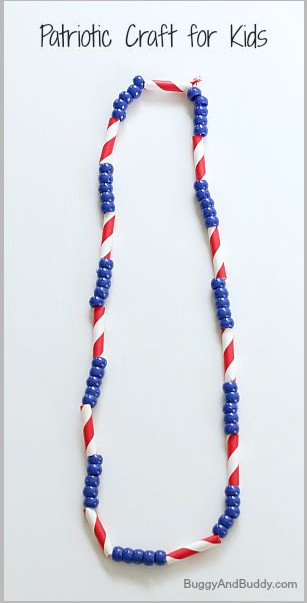
Fireworks Art
Bendy straws make this simple craft fun AND pretty!
What You Need:
7 bendy straws per person
Tape
Blue and Red acrylic paint
Paper plate
White paper
Red, white or blue glitter (optional)
Directions:
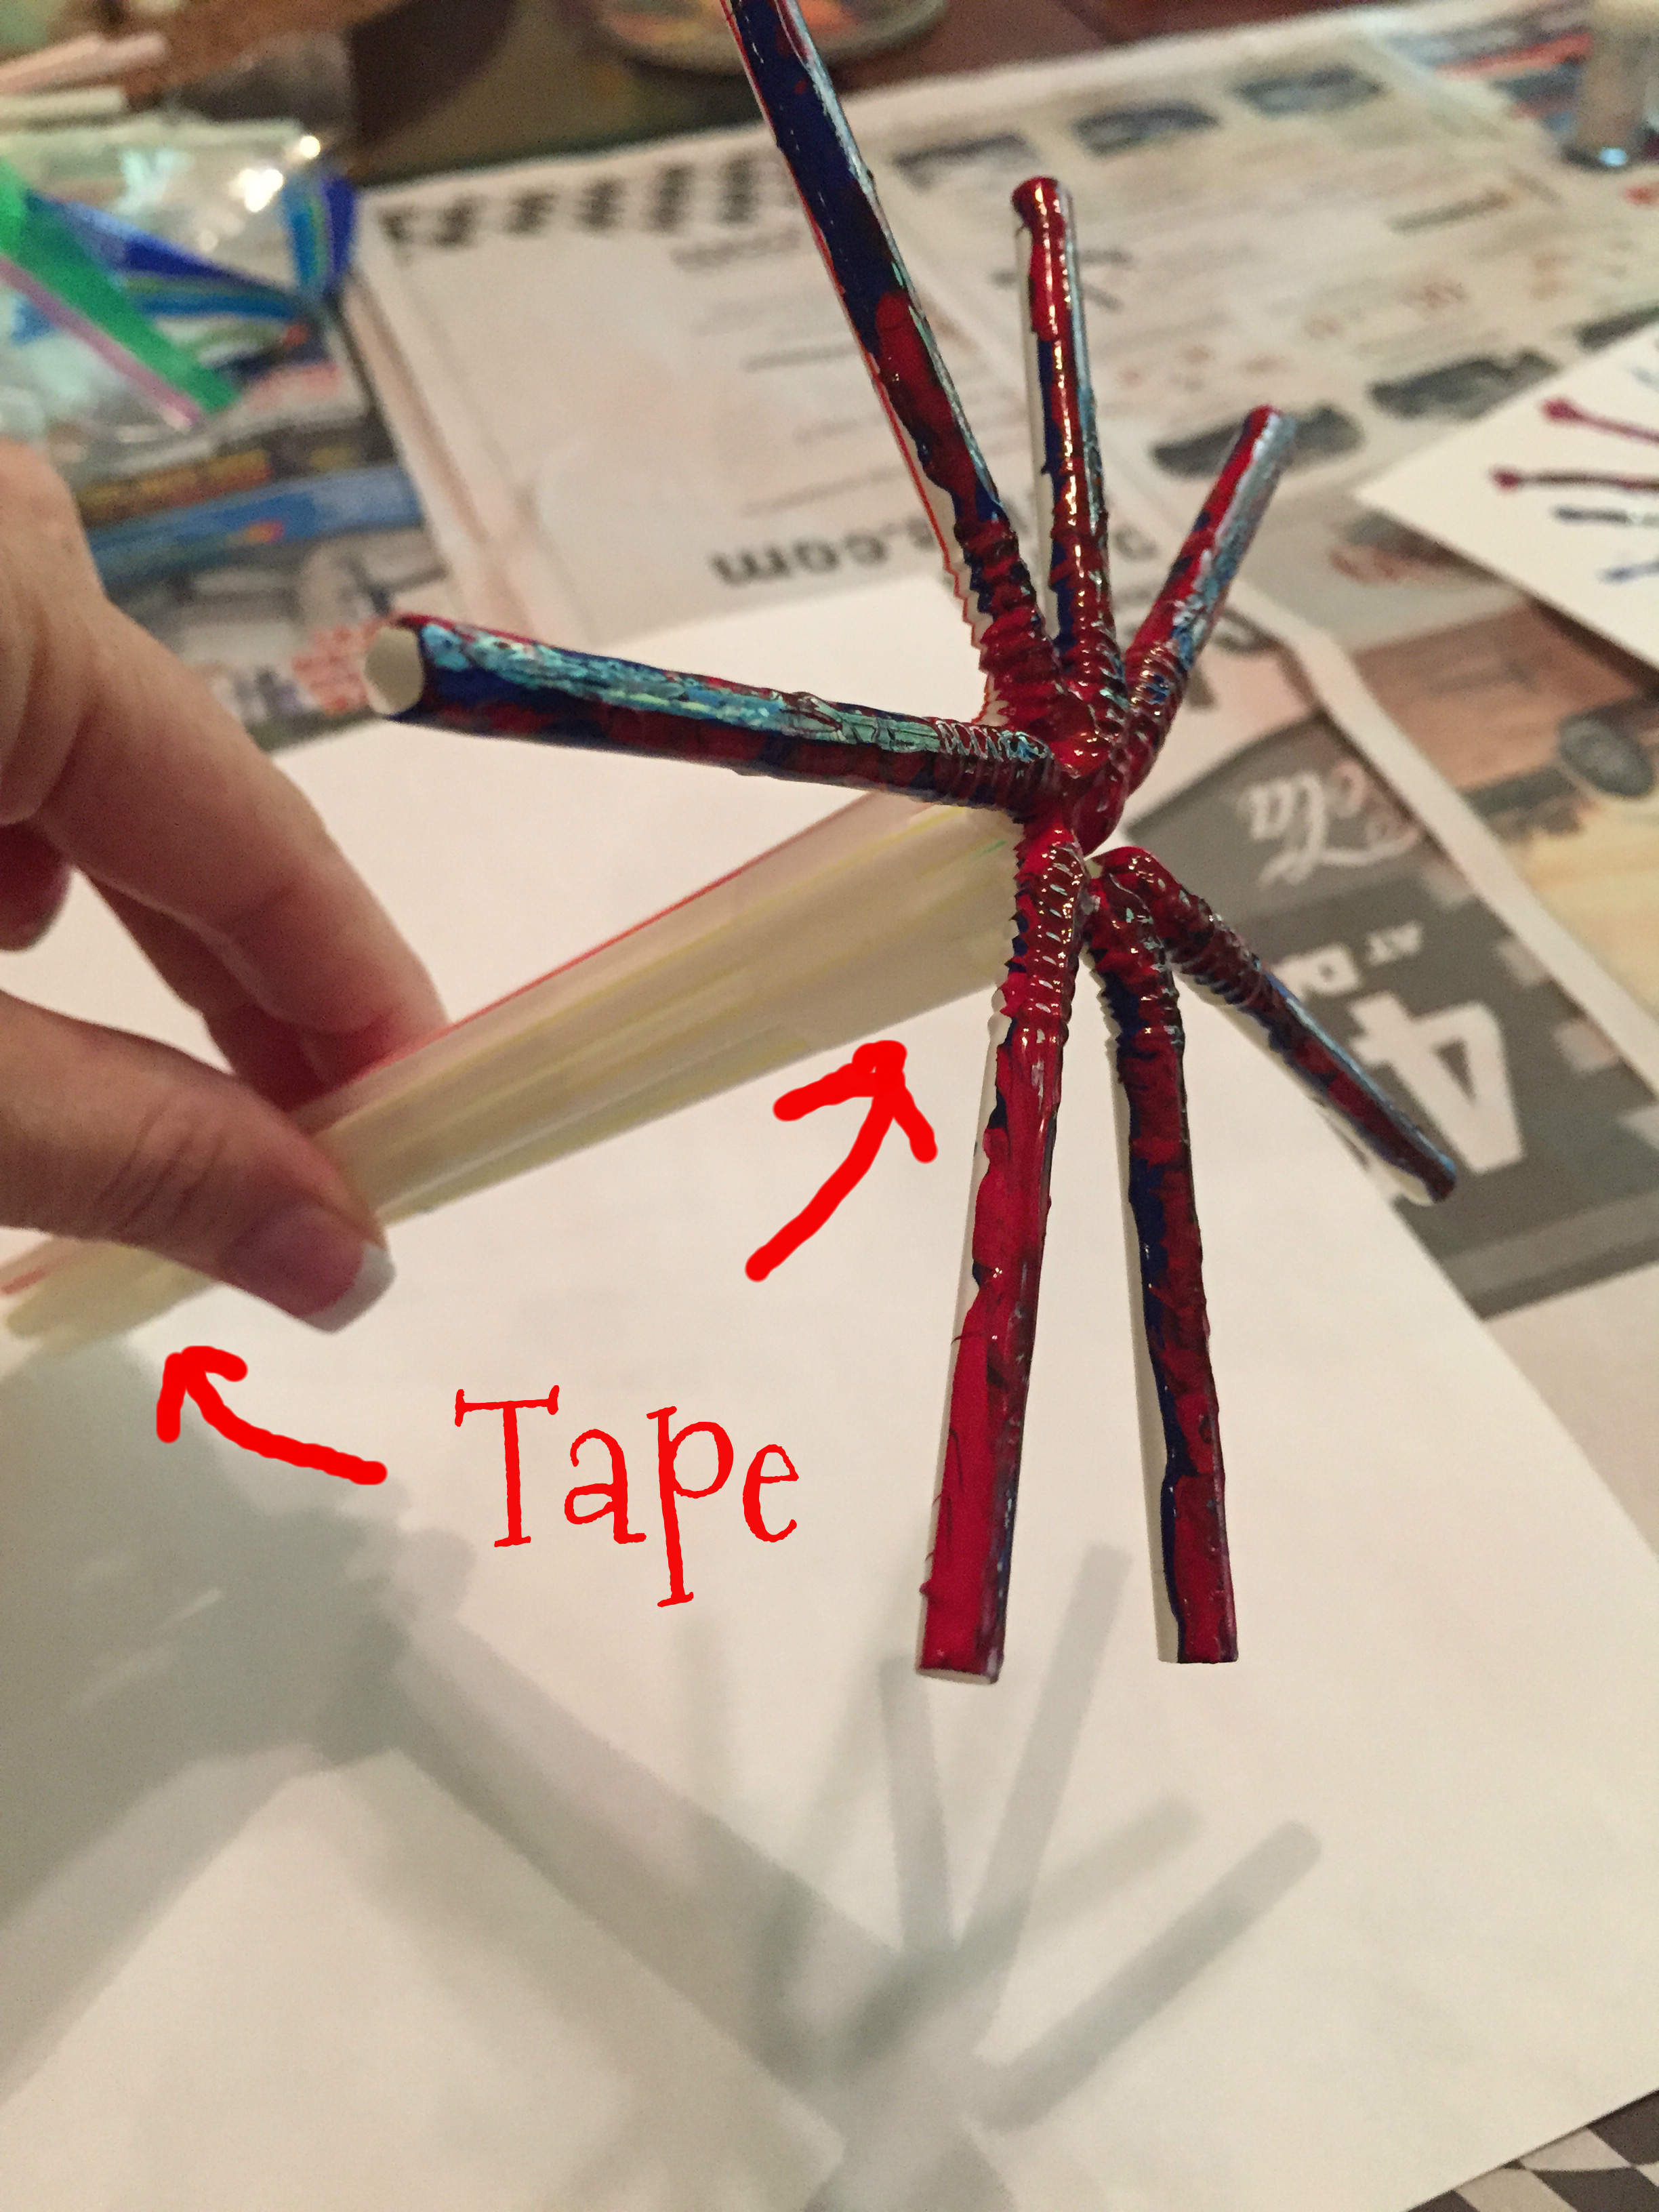
Pull each of the bendy straws so they are fully extended. Holding the 7 straws in a bundle in your hand (making sure the ends are aligned), wrap tape around the bottom and then right under where the straws bend. Once secured, bend and spread out the bendy end of the straws to create a pinwheel shape. (See photo below!)
Pour blue paint onto a paper plate and have the kids dip the pinwheeled end of the straws in the paint. Have them stamp the pinwheel all over the white paper; repeat with red paint. (You may need to press the straws to the paper so they make full contact with the paper.) If desired, while paint is wet, sprinkle sparkles on the artwork.
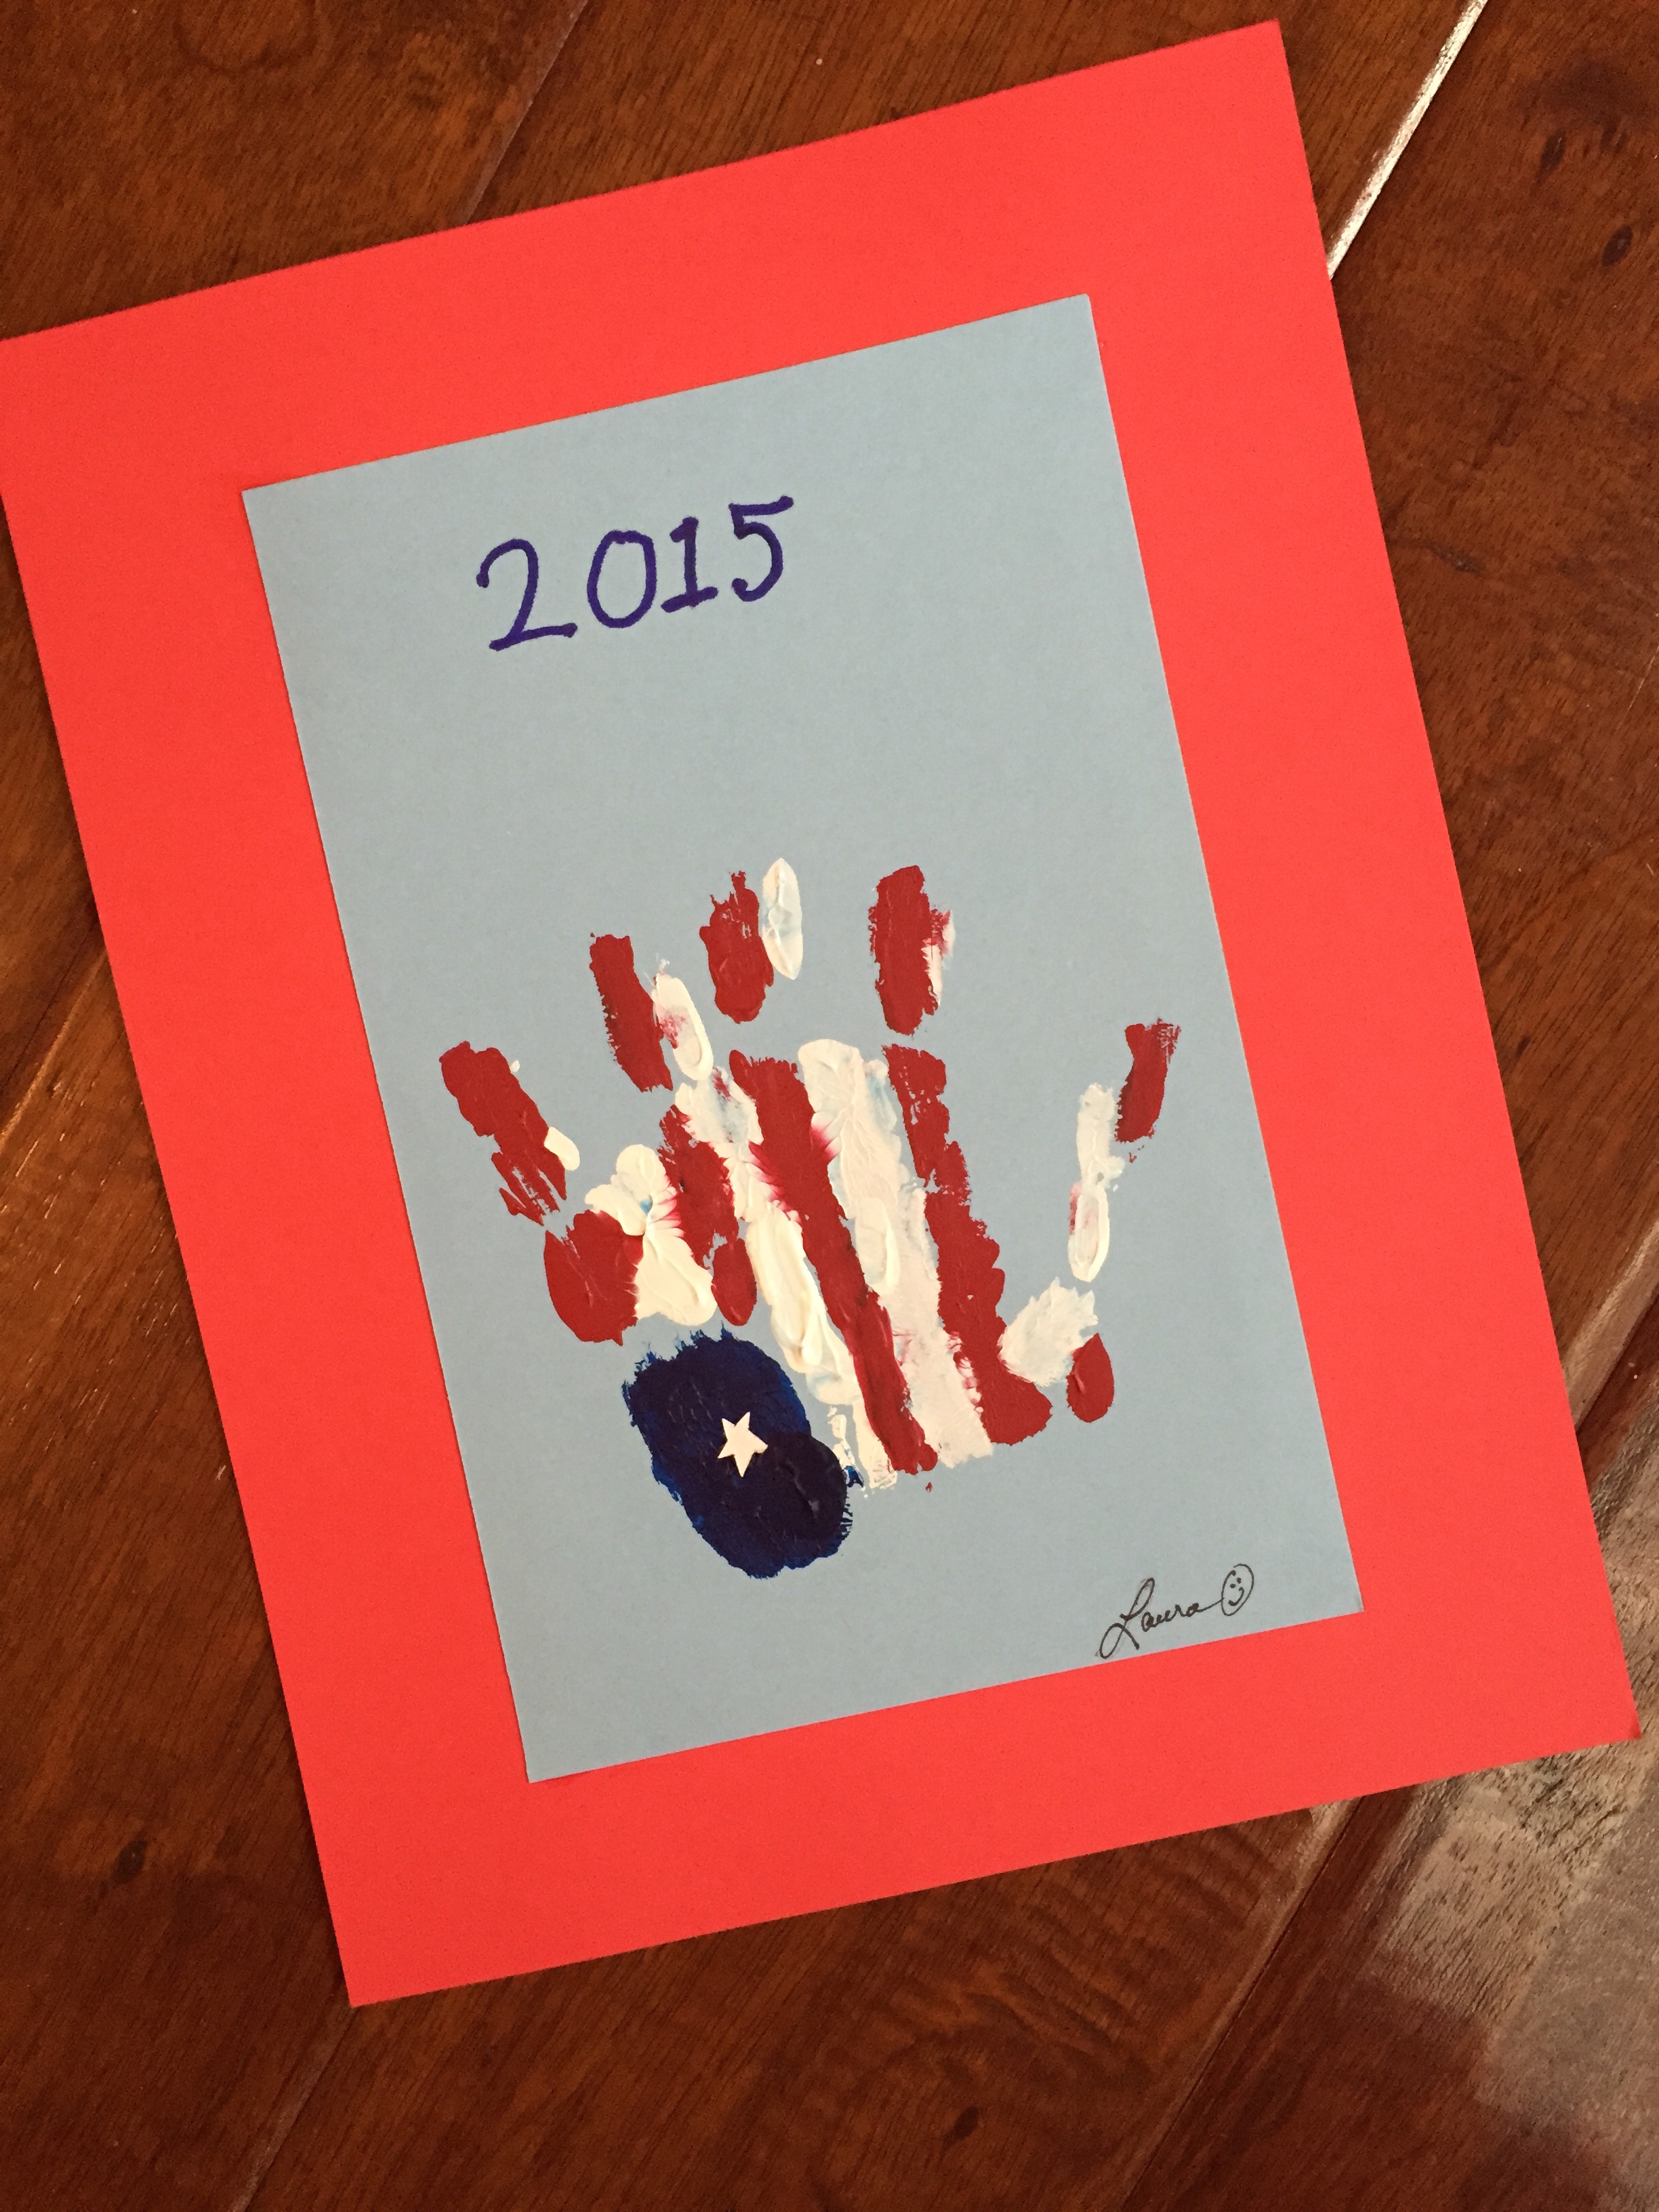
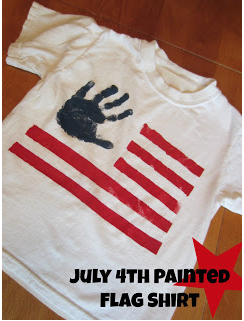
Flag Handiwork!
Give the flag a hand! Use your child’s hand to re-create the flag! (Don’t laugh, but since I have teens, not toddlers, at home I used my own hand for demo purposes!)
What You Need:
Red, White and Blue Acrylic Paint
Paintbrushes
Light Blue Paper for the print
Red Paper for Mounting
White Paint or Paint Marker
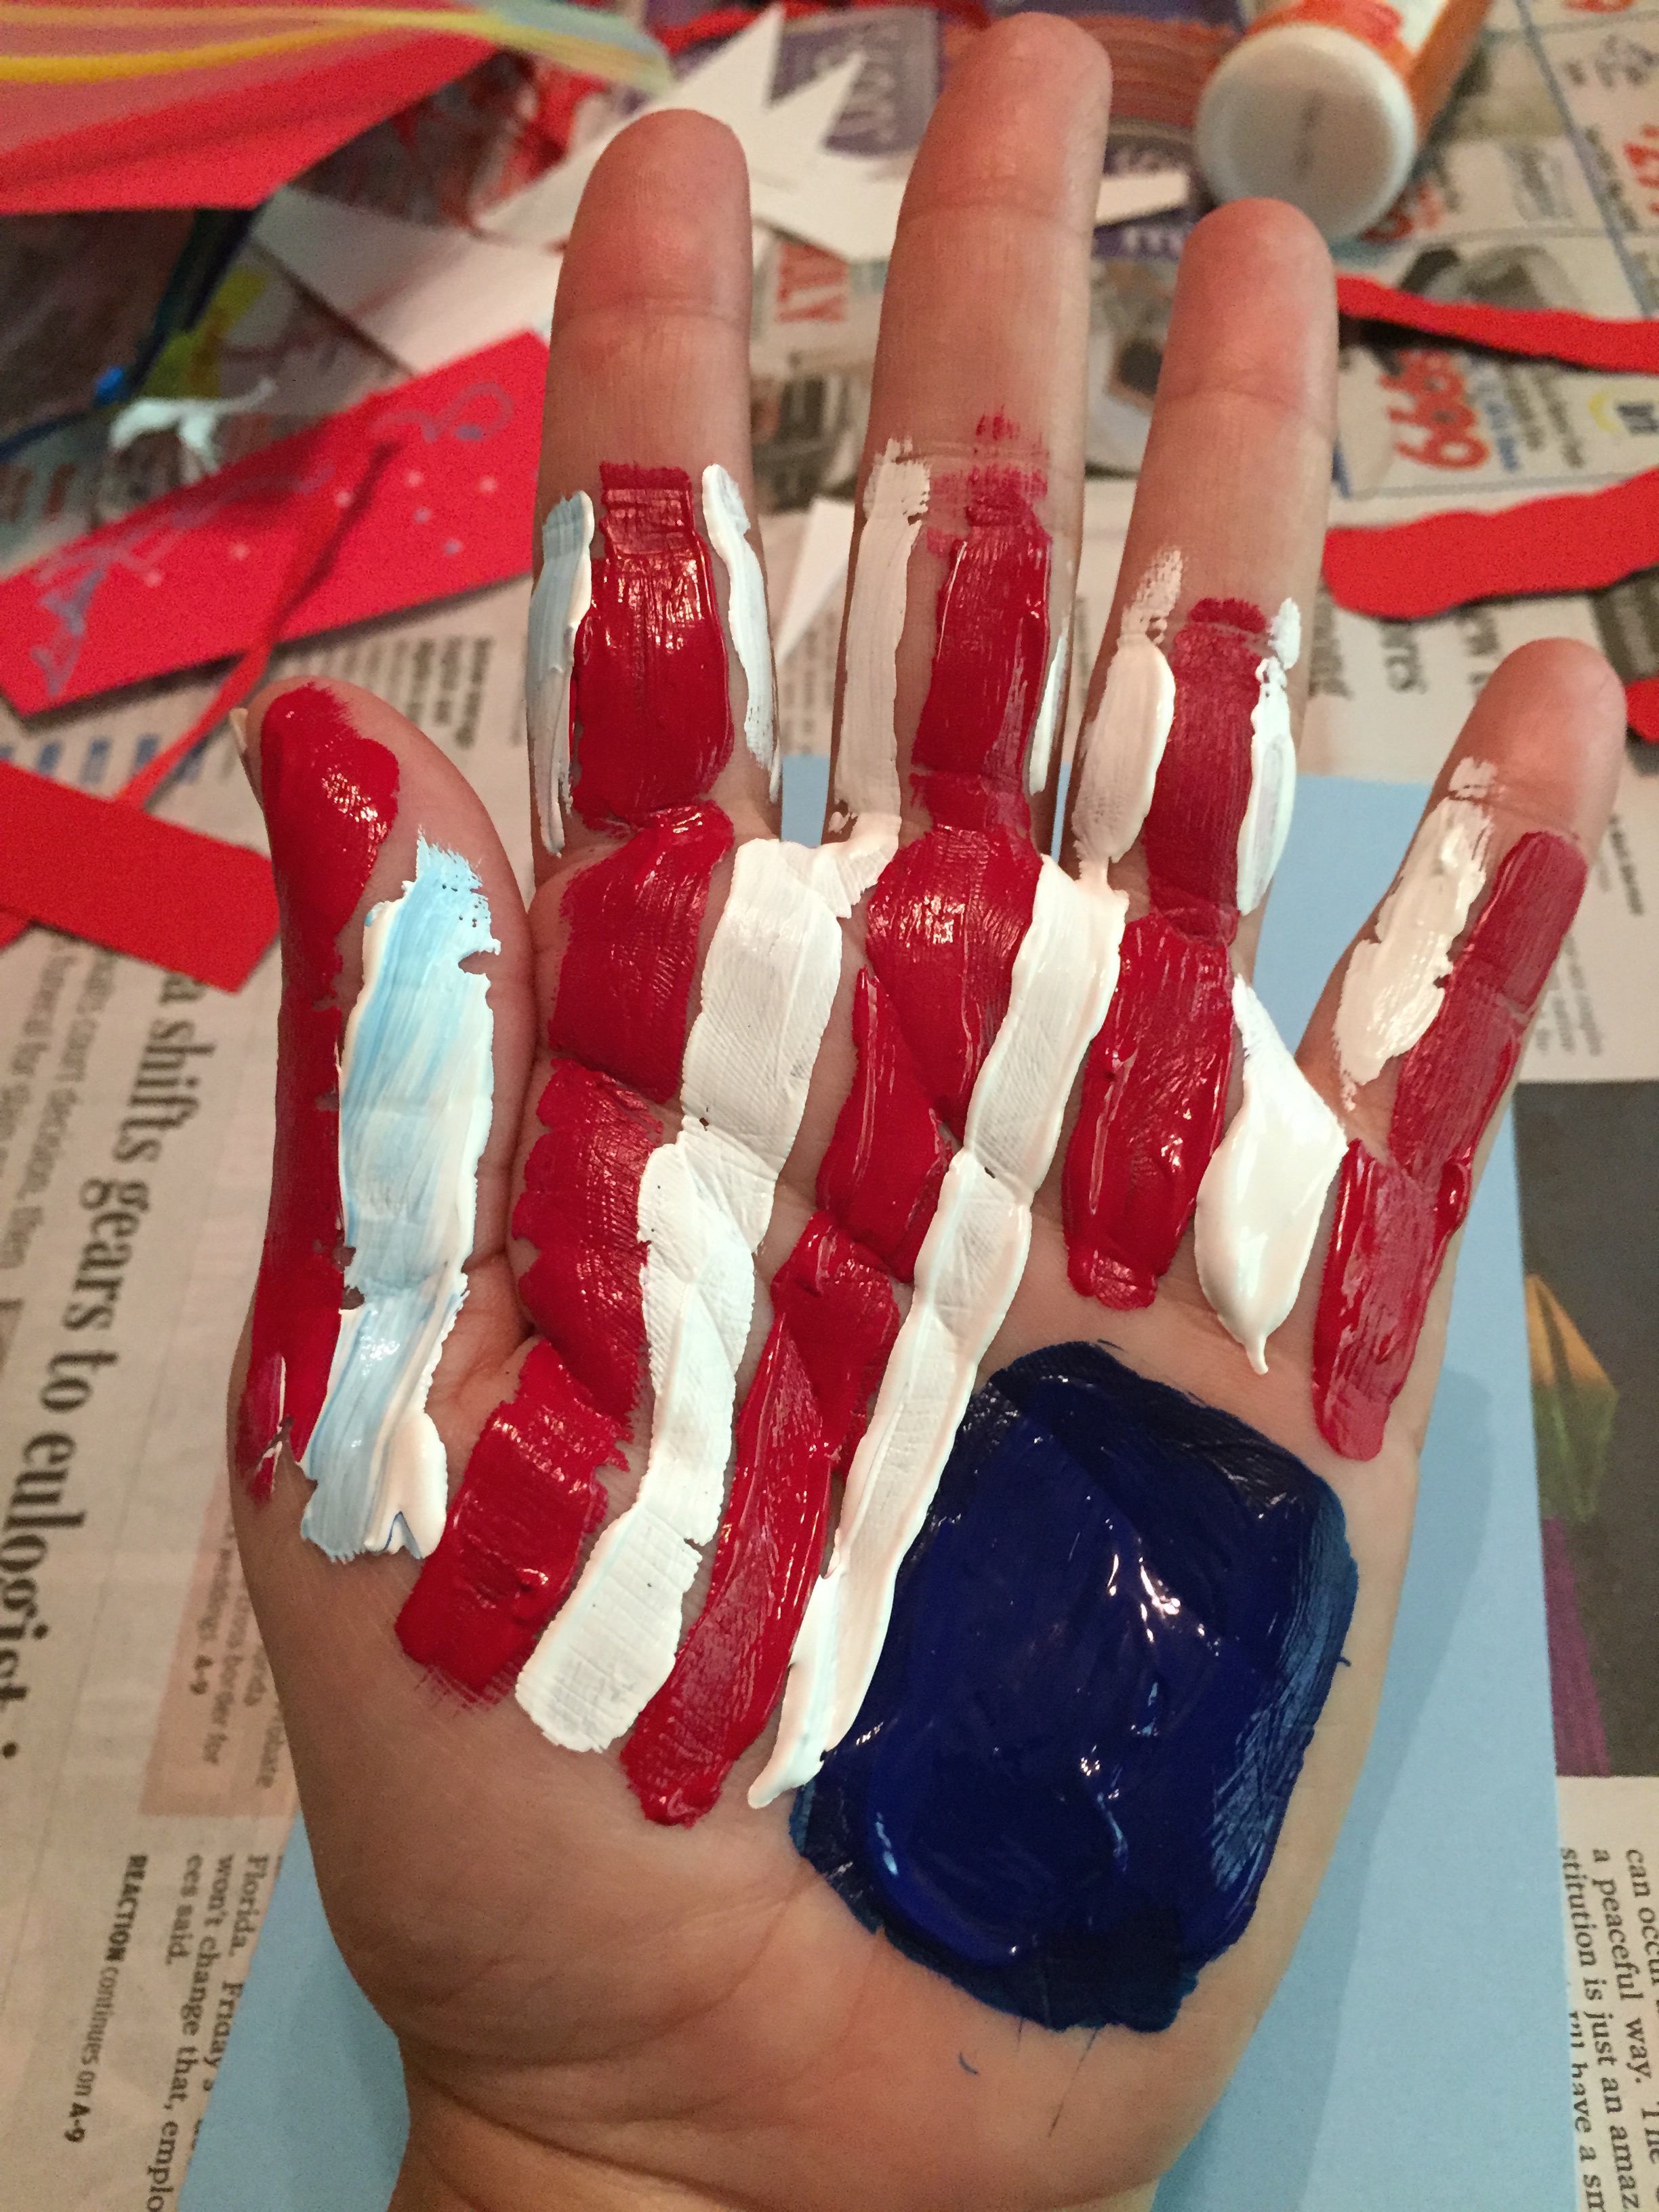
Directions:
Assemble your paints, brushes, and light blue paper. Have your child hold out their hand (I used left hand) and gently paint a blue square on their palm, followed by alternating red and white stripes leading out onto their fingers. (See photo) NOTE: Plan to work quickly so the paint doesn’t dry on their hand!!
Press the painted hand onto the light blue paper. Once dried, paint a white star on the blue square. Mount the artwork onto slightly larger red paper.
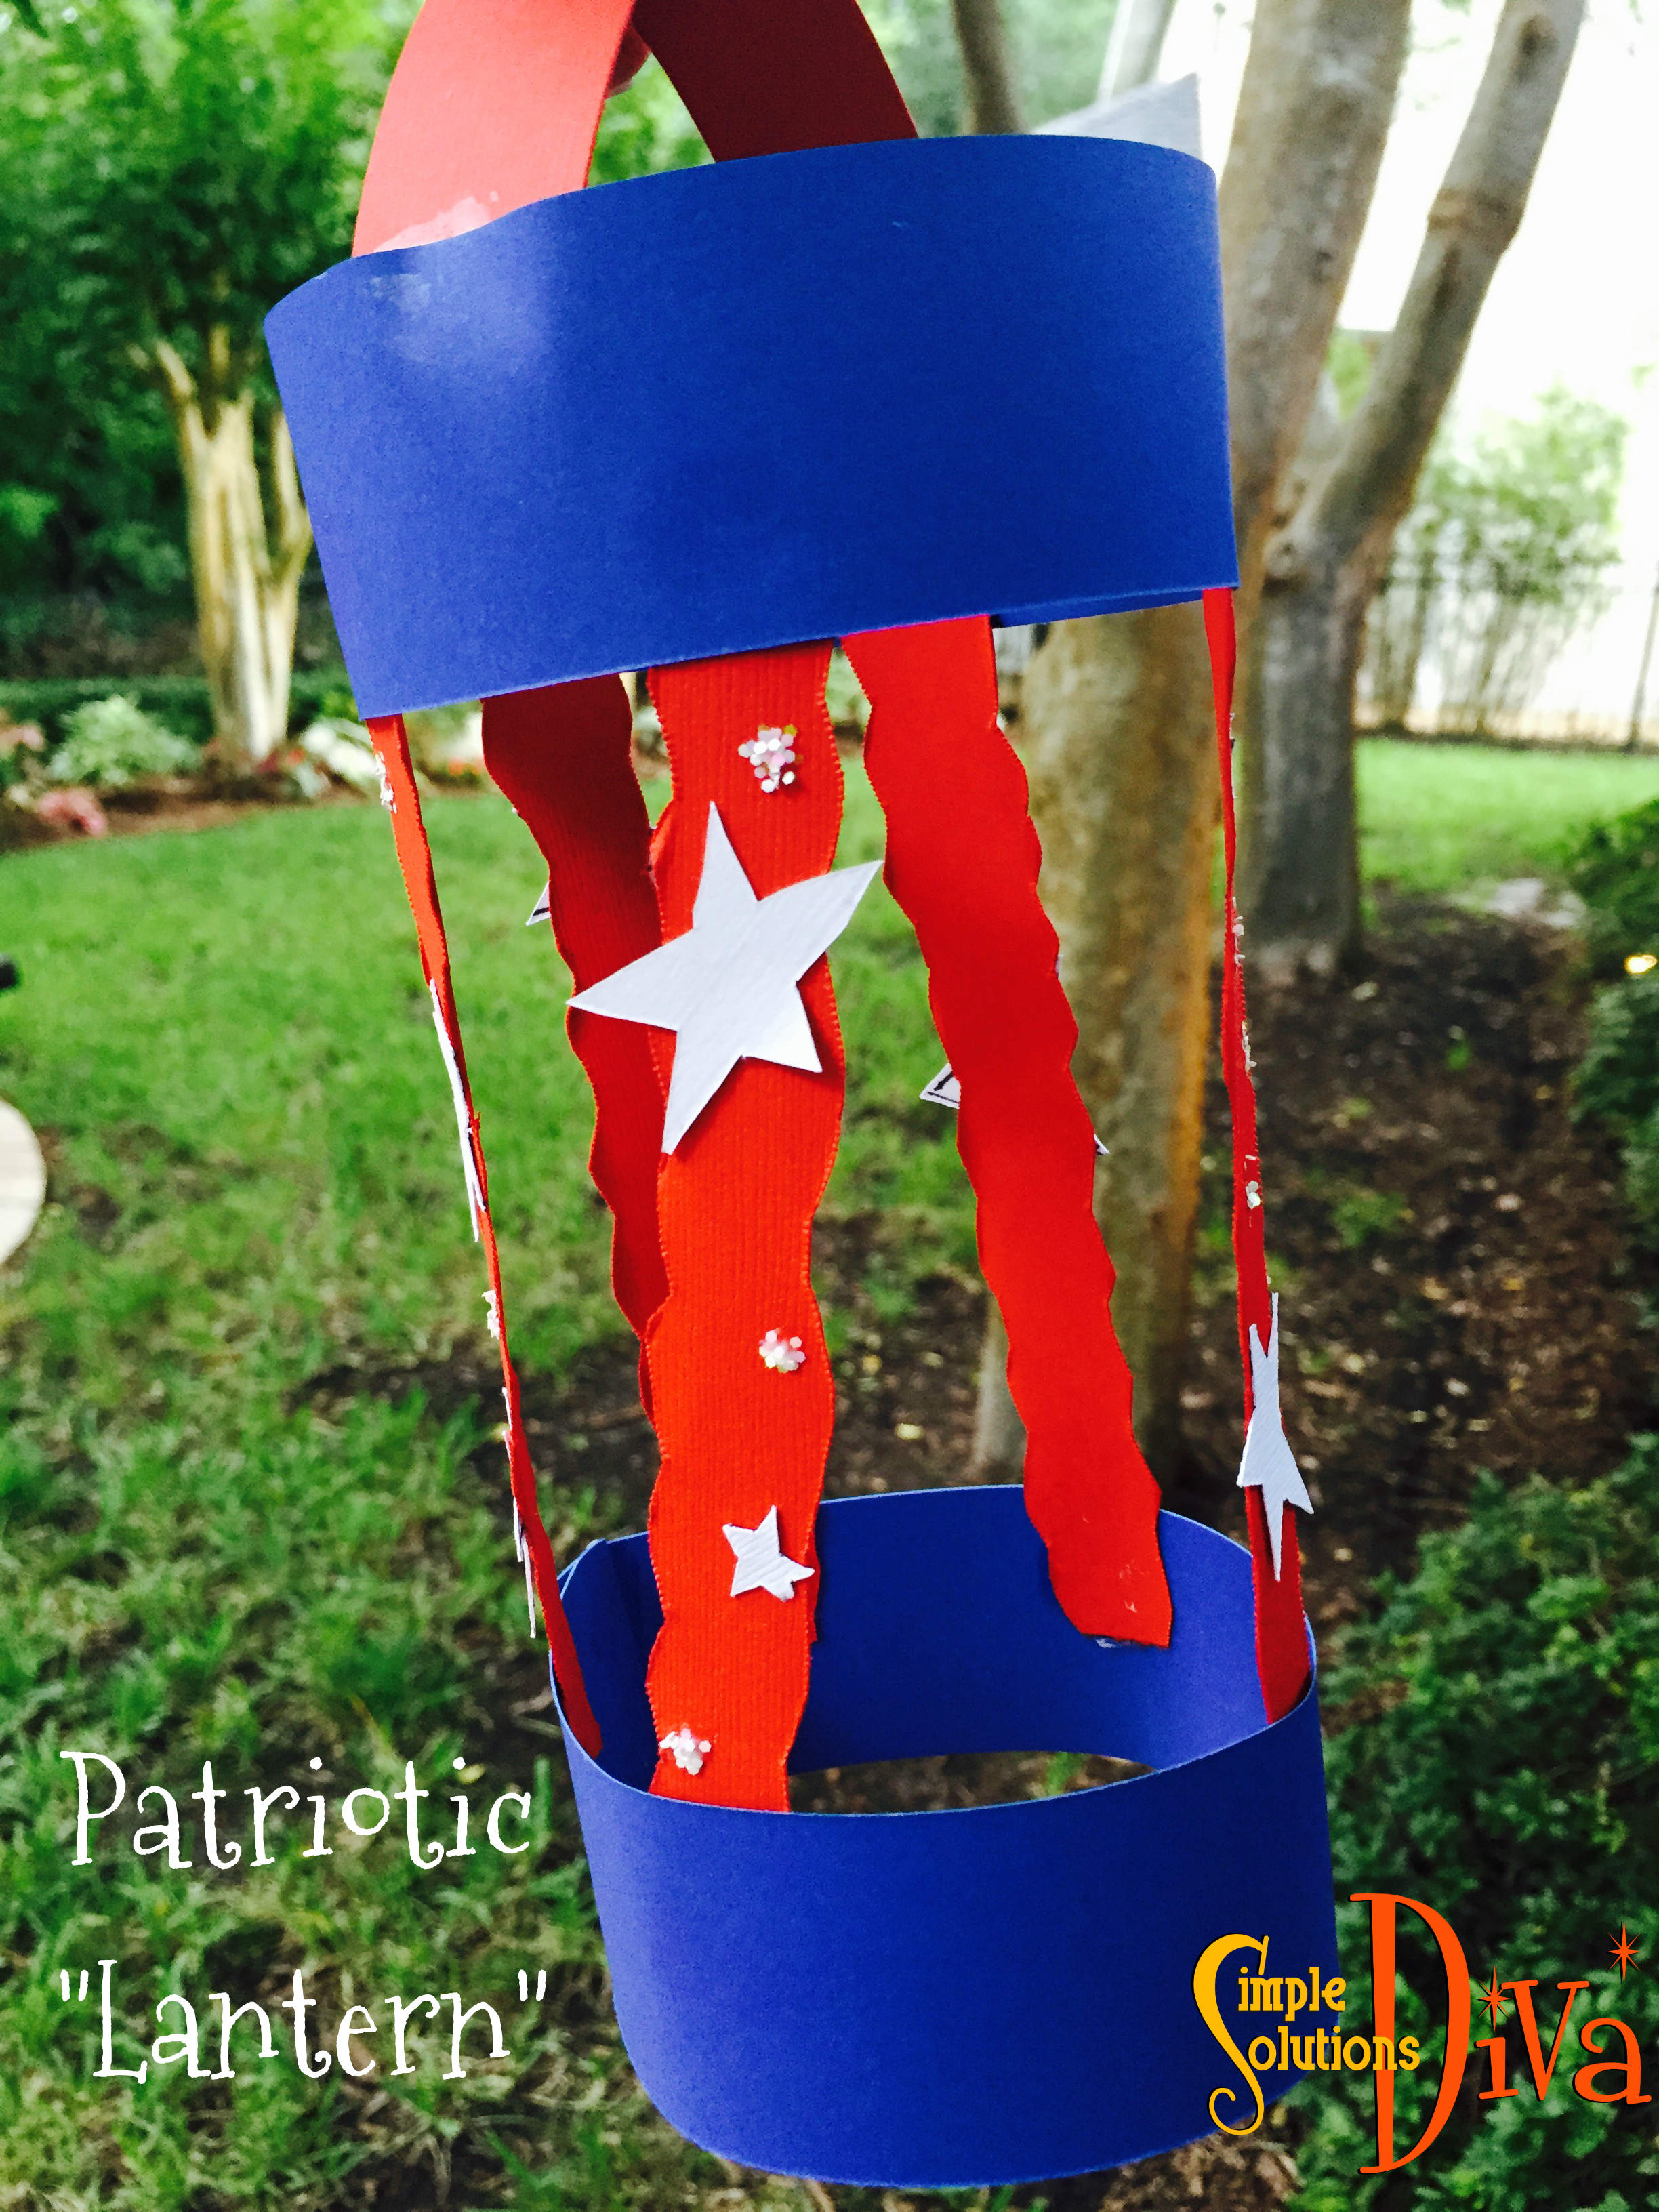
Patriotic “Lantern”
This is always fun for kids to make and they are perfect to display on the porch, in the bedroom or even attached to a stick to carry in the neighborhood bike parade!
What You Need:
Blue & Red Construction Paper, cut into long, inch wide strips (I used heavier paper that I had on hand)
White Paper, cut into free-formed stars, various sizes
Craft Glue
Glitter (optional)
Directions:
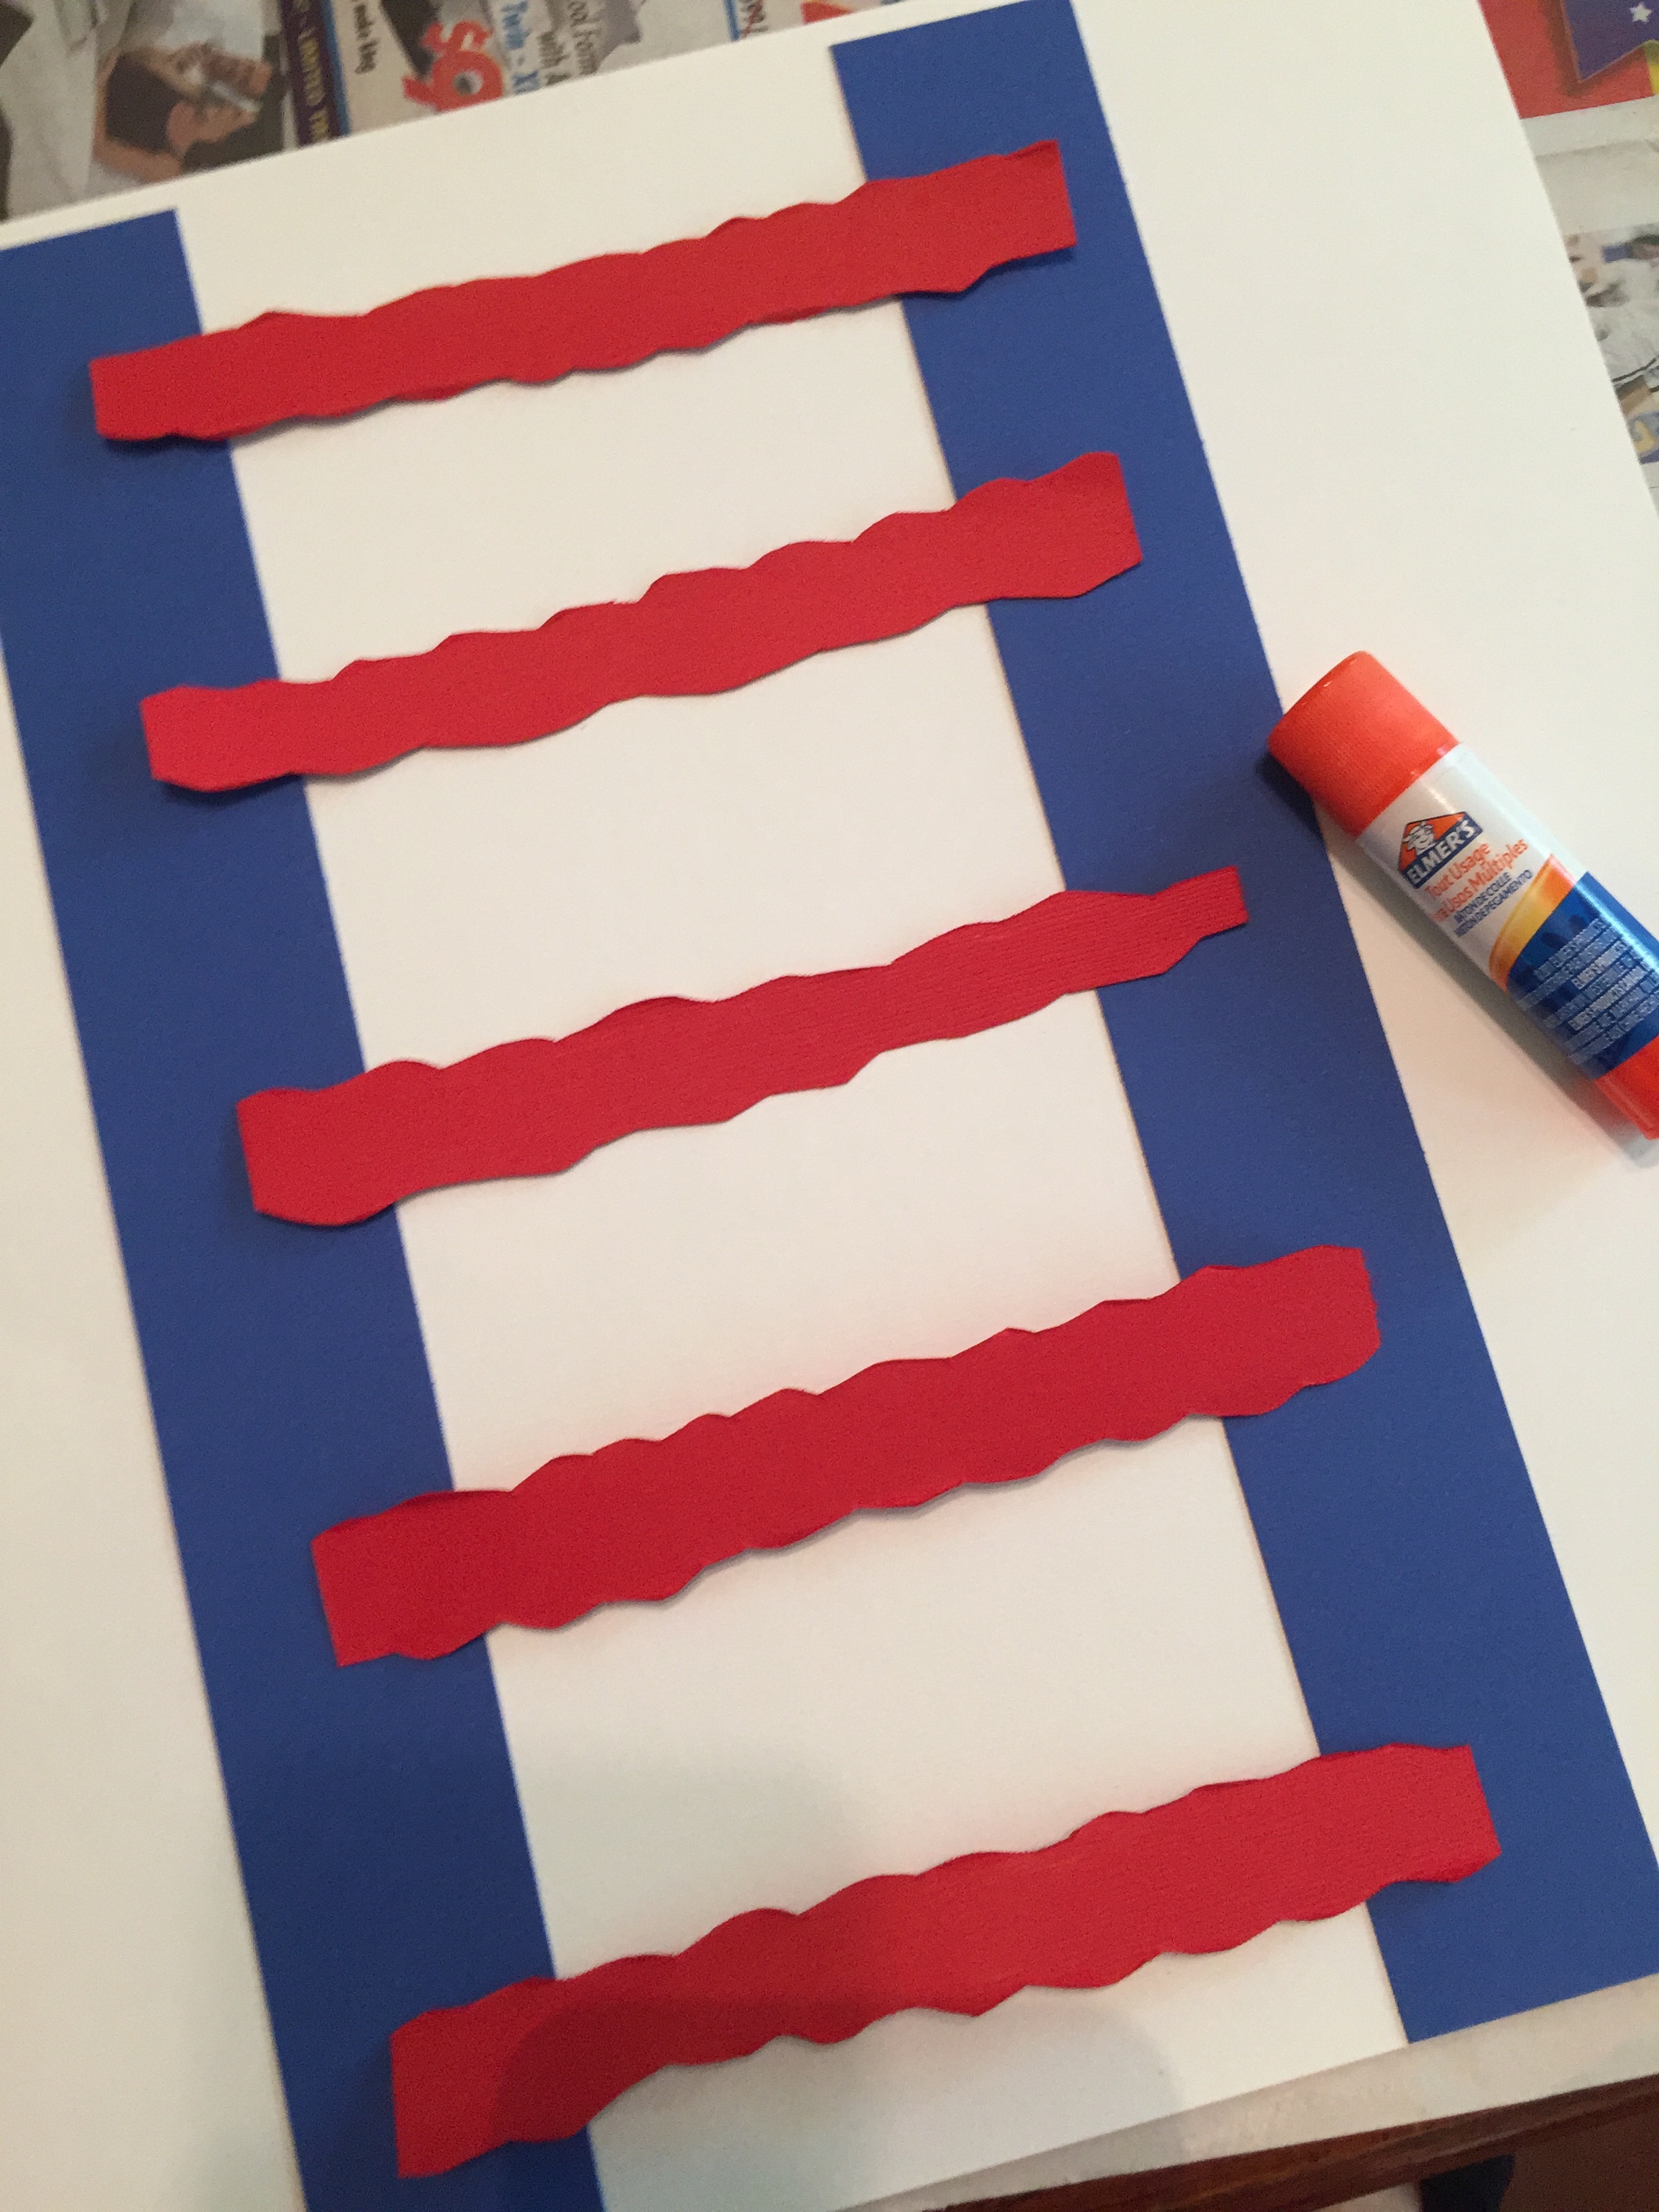
Lay two blue strips vertically with a few inches between them. Lay your red strips between the blue strips horizontally and glue (see photo below).
Once dry, join the each end of the two blue strips together and glue.
Add the white stars as desired, and put a few dots of glue here and there, then sprinkle with glitter if you want to add a little more pizzazz! (You could add streamers off the bottom if you want to turn this into a windsock!)
Glue a red strip to the top as a handle and you are ready for the parade!
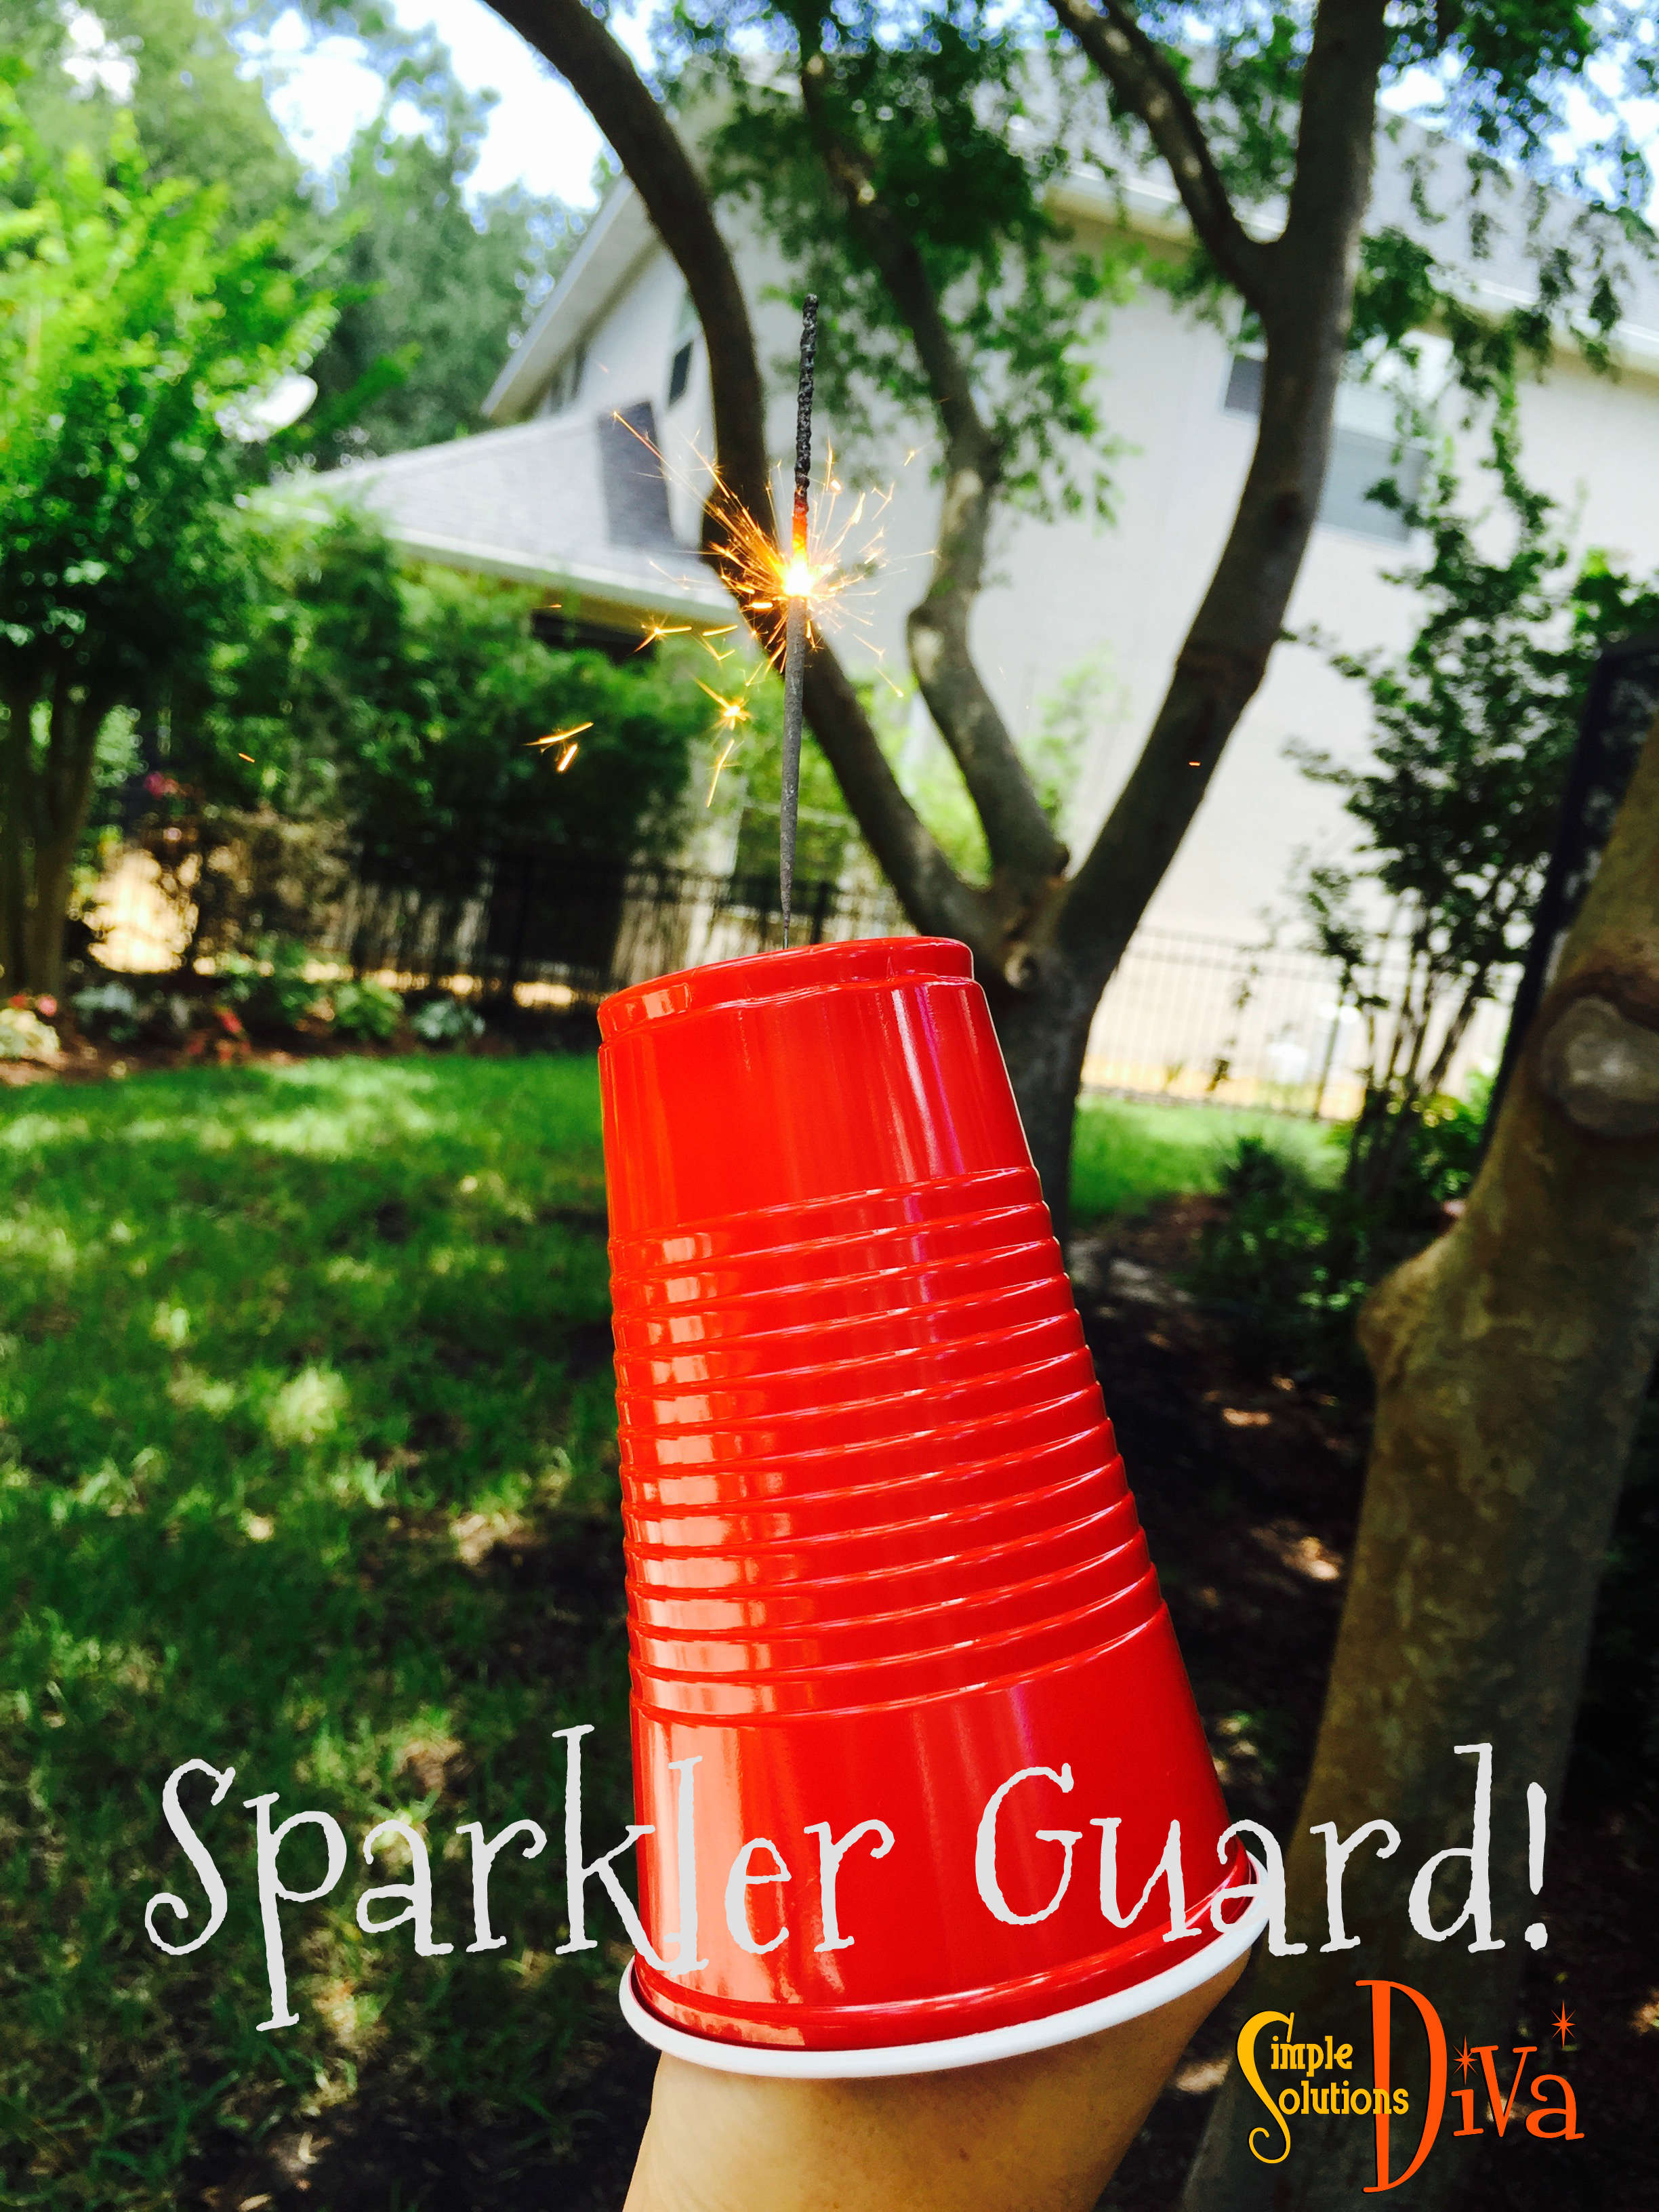
Sparkler Guard
You might see a red cup, I see a Sparkler Guard! I saw this on Pinterest and thought it was brilliant! I love sparklers, but when I was little I was always afraid that I would get burned. This solves that problem!
Just cut a small hole in the bottom of the cup and stick the sparkler handle into the cup. That’s it! But now, a few notes and disclaimers on this one:
Never leave a child alone with matches, sparklers, fire or anything else flammable!
Always supervise your children during this activity – This is not meant to be a “Light It & Leave” activity!
Always have a container of water on hand to place the used sparklers in to douse any heat or flame.
Make sure the entire “business end” of the sparkler is sticking out, so the only part on the inside of the cup is the handle and your hand. You don’t want it to burn down INTO the cup!
Other Great Ideas From Around The Web:
There are so many fun 4th Of July activities & crafts out there, I couldn’t cover them all! I’ve selected a few of my favorites below. Be sure to click on each link to visit the sites for directions!
This recipe is fun to make with the kids and is a healthy alternative to fried mozzarella sticks. These little mini-bites of gooey deliciousness are baked, not fried, so you can feel good about enjoying them – and MAYBE even share with the kids! This recipe is a snack size; double or triple the recipe for more than 2 people.
Baked Mozzarella Mini Bites
Ingredients:
3 Mozzarella Cheese Sticks, sliced into thirds (about one inch in length)
1/3 cup panko crumbs
1/3 cup egg substitute
1/2 cup marinara sauce
cooking spray
Directions:
Preheat the oven to 425 degrees.
Toast the panko crumbs over medium heat in a pan (no oil or grease). Stir continuously until the crumbs are a light golden brown. Place the crumbs on a plate.
Pour the egg substitute into a small bowl.
Dredge the cheese stick pieces in the egg, then in the panko crumbs, and place on a cookie sheet sprayed with cooking spray. (Make sure to cover all sides of the cheese with the panko crumbs, or else the cheese will melt and lose shape – as you can see in the video!)
Place in oven and cook until the cheese has started to melt (but not spread all over the place!) — approximately 3 minutes. Remove from oven, place on serving plate and serve immediately with warm marinara sauce.
This recipe couldn’t be easier! I discovered the Walking Taco when I helped at my daughter’s high school sports concession stand. As i was happily pushing my Crockpot Ropa Vieja (find recipe HERE), more and more people were ordering this Walking Taco! It is a favorite at sports concession stands, and kids and adults love them! It is also a great way to serve up tacos for a bunch of kids at a party. I’ve also heard that it is a great way to do tacos while camping!
Walking Tacos (AKA Tacos In A Bag)
Ingredients:
1 pound of your favorite taco meat recipe, cooked
Individual sized bags of your favorite flavored Doritos® or Fritos®
Crush the chips in their bag. Gently open the top of bag, being careful not to rip it from top to bottom.
Add meat and popping of your choice into the bag. Close bag and gently “mush” the ingredients around. Open the bag and walk around, eating the awesome “Walking Tacos”!
Now, there are just some recipes that as you cook, you become more hungry. It’s the smell as the recipe cooks. I know my nephew, Dylan, and I were hungry, but as we cooked this Chili Mac & Cheese, our mouths were watering! We had people coming over after we taped the video, and all I can say is – we didn’t have any left to take a photo of! We ate every last bit of this oh so yummy recipe!! So, sorry about no photos to share of this delectable treat!
I believe that is a sign of a good recipe!
So here it is!
Chili Mac & Cheese
Ingredients:
1 teaspoon canola oil
3/4 pound lean ground beef
1 teaspoon garlic powder
1 teaspoon ground coriander
1 teaspoon ground cumin
1 teaspoon onion powder
2 teaspoons chili powder
2 cups fat-free, lower-sodium beef broth
1 cup water
1 (10-ounce) can mild diced tomatoes and green chiles, undrained
Heat a Dutch oven over medium-high heat. Add oil. Add beef and next five ingredients; cook until the meat is thoroughly cooked through. Add the broth, water, and diced tomatoes and bring to a boil. Stir in the macaroni; cover and cook 10 minutes or until macaroni is done.
While the macaroni is cooking, heat milk and cream cheese in a saucepan over medium heat. Cook until cheese melts, stirring frequently (using a whisk really helped!) Remove from heat. Stir in cheddar and continue stirring until smooth. Add cheese sauce to macaroni mixture; toss well to coat. Serve hot!


