SimpleSolutionsDiva.com

Month: January 2014

Super Simple Game Day Recipes For A Crowd

Part of the fun of a Super Bowl Party, besides the game and the commercials, is the food! But you don’t want to spend your entire day in the kitchen and be exhausted when guests arrive. I like to prepare a main dish that cooks in a crockpot, where people can serve themselves when they feel like it. Then I supplement with simple appetizers and finger foods.  Here are a few of my favorites:

Crockpot Beef Barbacoa

Crockpot Beef Barbacoa from SimpleSolutionsDiva.com.

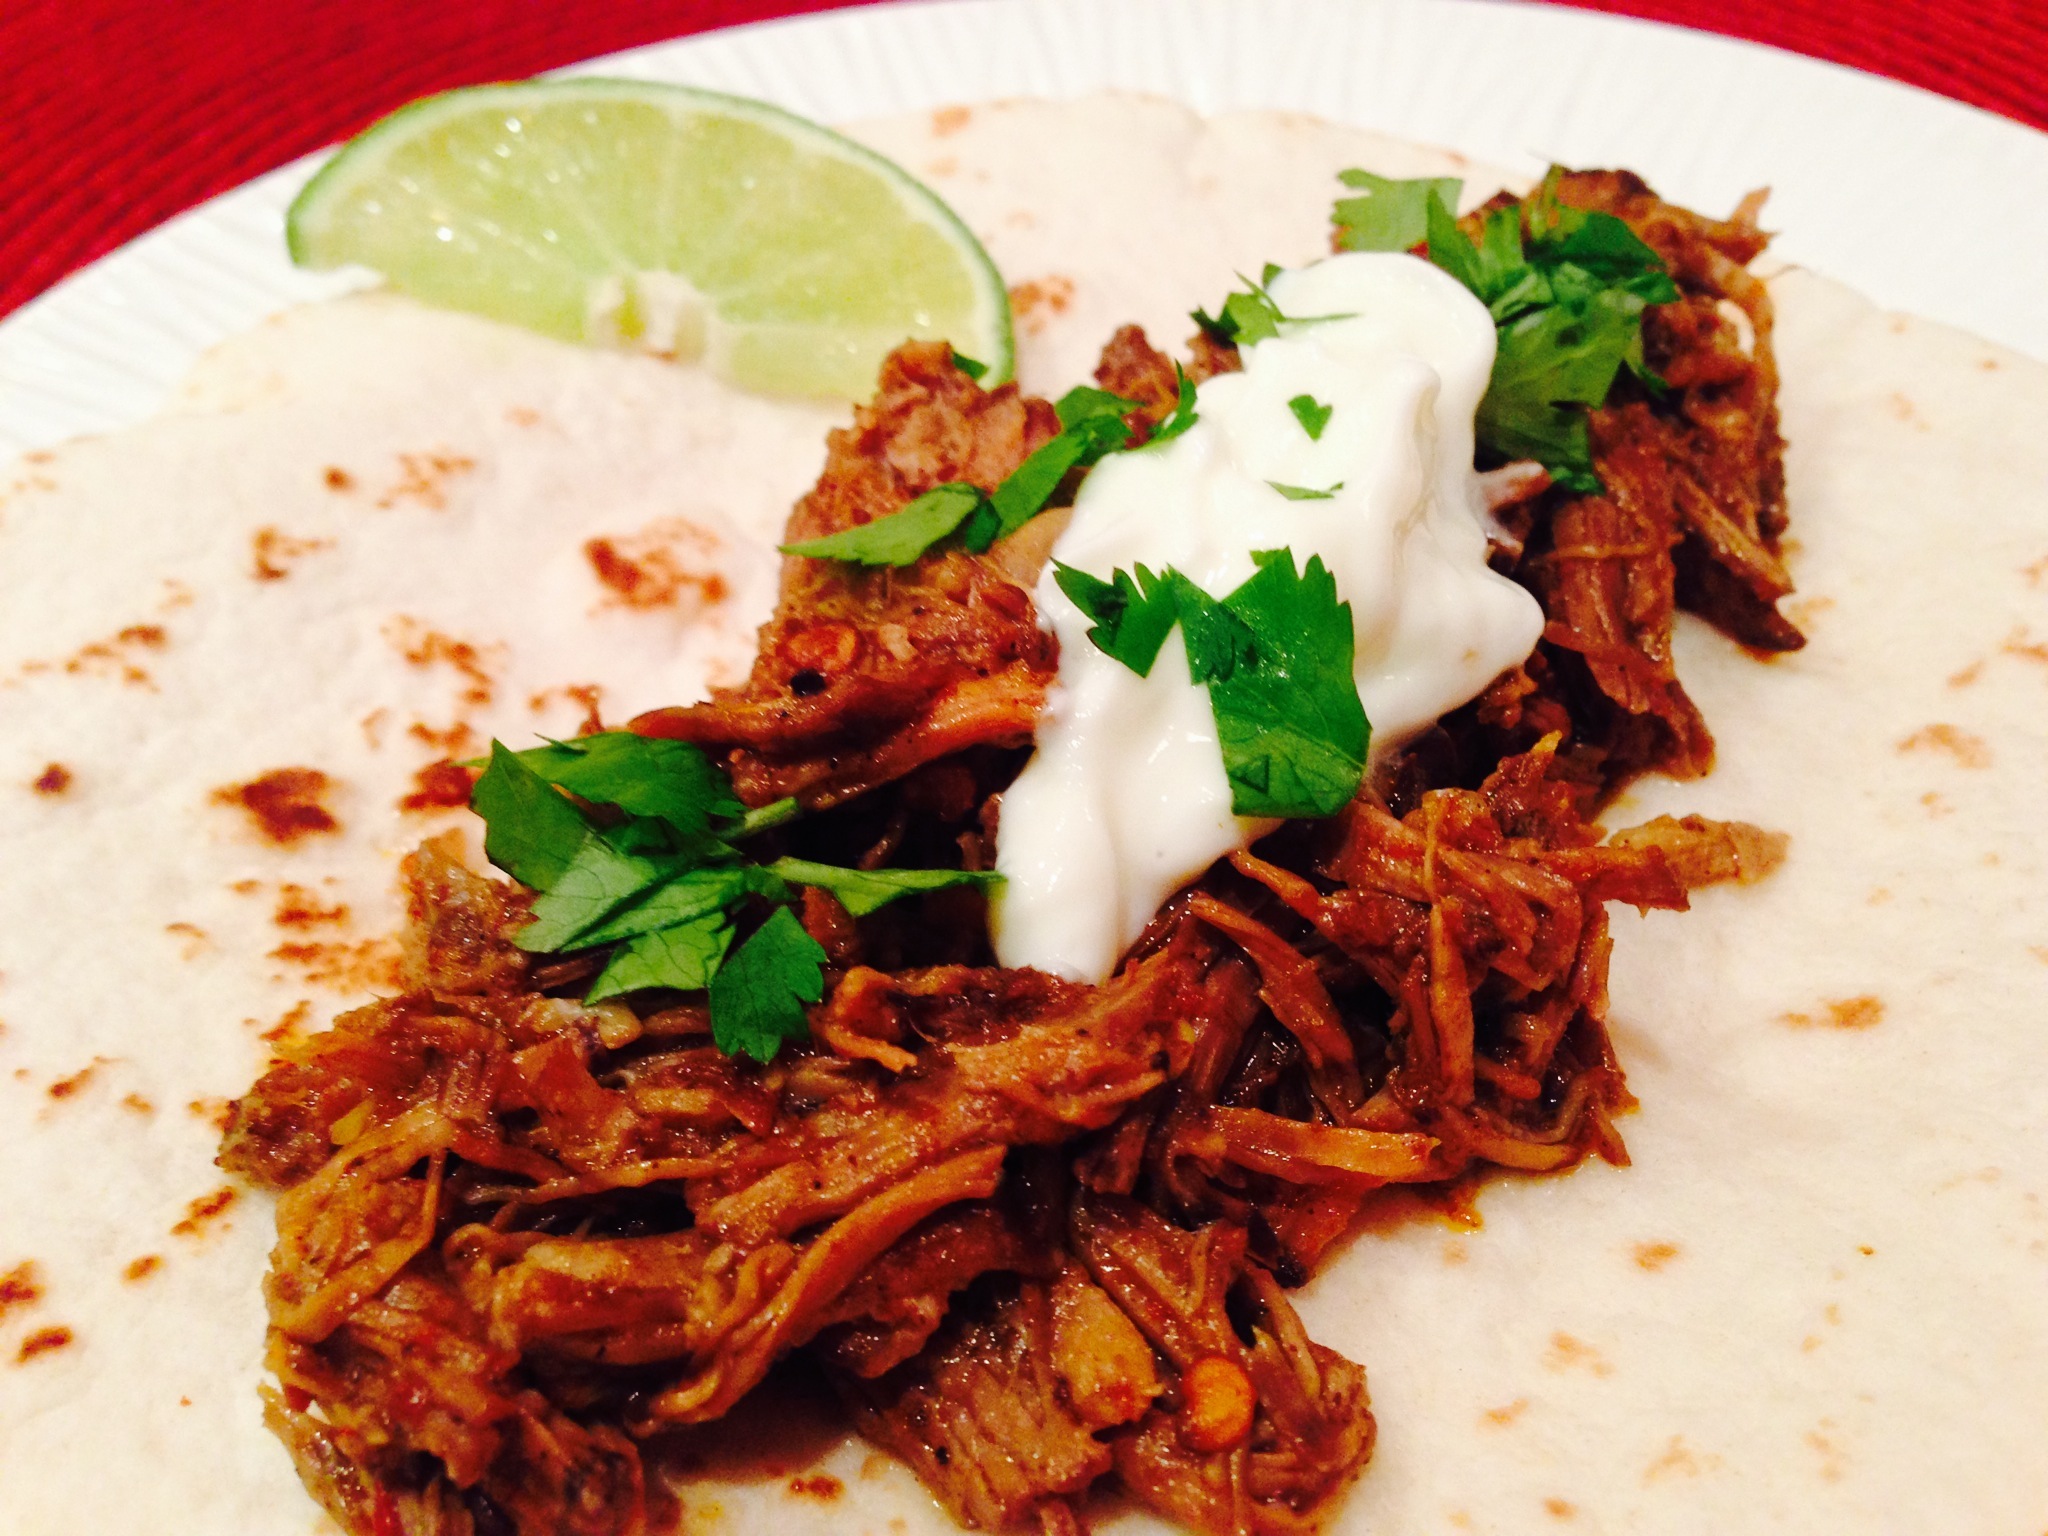
Barbacoa refers to a way of cooking meat that originated in the Caribbean, and eventually was adopted in Mexico and the Southwest.  It is where the term “barbecue” came from, but this has nothing to do with an open flame! It is meat, slow cooked with wonderful spices, then shredded and served in a flour tortilla. In this recipe, I’m using chuck roast cut of beef.

Ingredients:

  • 1/3 cup apple cider vinegar
  • 1/2 medium yellow onion
  • 2 tablespoons fresh lime juice
  • 4 cloves garlic
  • 4 teaspoons ground cumin
  • 2 teaspoons oregano
  • 1 teaspoon ground allspice
  • 1/2 teaspoon ground cloves
  • 1 teaspoon salt
  • 1 teaspoon ground black pepper
  • 3/4 Cup beef stock
  • 3-4 chipotle chiles in adobo sauce, chopped  (The amount depends on the heat level you like)
  • 3-4 pound beef chuck roast

Preparation:

Combine vinegar, onion, lime juice, garlic,cumin, oregano, allspice, cloves, salt and pepper, beef stock in a blender and puree.

Place roast (trim off excess fat from roast) in crockpot and pour puree over the roast. Cover and cook on low for 8-10 hours, or high for 6 hours. Shred beef in crockpot and serve in soft (and warm) flour tacos. Serve with sour cream, shredded cheese, salsa, beans, or whatever else suits your tastes!

Un-Sloppy Joes

I loved sloppy joes as a kid, but they were always so messy! Well, a simple solution to that is serve them in pita bread halves! Use your favorite sloppy joe recipe (or use mine below!) and serve them in pita pockets! In this recipe, I use Stonefire Authentic Flatbread Pitas (yes, I love their products and use them a lot!). Stuff shredded cheese on top, add a dash or two of hot sauce and you have the neatest sloppy joes on the block! You can make this up ahead of time and put the beef in a crockpot to keep warm – guests just help themselves! Double the recipe for larger groups.

Ingredients:

  • 1.5 pounds lean ground beef
  • 1/2 Cup onion, chopped
  • 1/4 green pepper, chopped
  • 1 teaspoon garlic powder
  • 1 teaspoon prepared yellow mustard
  • 1/2 Cup ketchup
  • 1 can tomato paste
  • 6 oz. water
  • 3 teaspoons brown sugar
  • salt and pepper to taste
  • 3 Stonefire Authentic Flatbread Pitas, halved to create 6 pockets

Preparation:

In a large pan, cook beef, onion and green pepper over medium high heat until beef is cooked.  Drain off liquid.  Add garlic powder, mustard, ketchup, tomato paste, salt, pepper, water and brown sugar. Stir until thoroughly blended, reduce heat to low and cook for 30 minutes. Serve in pita halves with shredded cheese and hot sauce as desired.

Thai Chicken Flatbreads

Thai Chicken Flatbread from SimpleSolutionsDiva.com.

For a flavor change, try making a variety of flatbreads! Since I am a SIMPLE Solutions Diva, I used pre-made flatbreads by Stonefire Authentic Flatbread Naan because they are light and have a variety of flavors;  you can make your own flatbread dough if desired. Prep the flatbreads in advance, then toss in the oven as needed!

This is a nice spicy recipe with an asian twist:

Ingredients:

  • 1 Cup cooked chicken, cut or shredded into small, bite-sized pieces (I used store-bought rotisserie chicken)
  • 6 Tablespoons thai peanut sauce (I used House of Tsang Bangkok Peanut Sauce)
  • 2 Tablespoons shredded carrots
  • 1 1/4 Cups shredded mozzarella (use more or less, depending on how cheesy you want your pizza)
  • 1 Tablespoon green onions, sliced on bias, for garnish
  • 2 Stonefire Authentic Flatbreads Naan, original flavor.

Preparation:

Preheat oven to 400 degrees (if using a pizza stone, place stone in oven before preheating).

In a bowl, toss chicken with 4 tablespoons of thai peanut sauce. Sprinkle mozzarella on both flatbreads. Divide the chicken mixture between the two flatbreads. Sprinkle with carrots and green onions. Drizzle each flatbread with 1 tablespoon of remaining thai peanut sauce.  Place flatbreads in oven for 5-10 minutes until cheesy is melty.

Serve warm!

A BIG THANK YOU to Stonefire Naan for providing me with a large selection so Stonefire Naan Flatbreads to use in this post!

Buffalo Chicken Dip

Love Buffalo Chicken Wings but want to avoid the mess and the bones? Try this simple recipe, courtesy of my sister-in-law, Jennifer.  This stuff is truly addictive! Serve warm with corn chips or pita wedges.

Ingredients:

  • 1 Rotisserie chicken, shredded and cut into bite-sized pieces (approx. 2.5 cups)
  • 1 6 oz. bottle of Texas Pete Hot Sauce
  • 8 oz. cream cheese
  • 1 Cup Ranch Dressing
  • 1 8 oz. bag mexican shredded cheese

Preparation:

Preheat oven to 350 degrees. Grease a 13×9 pan. Place shredded chicken in bottom of pan and pour hot sauce over the chicken, covering the chicken in sauce.

In a microwave safe bowl, place cream cheese and microwave for 30 seconds (until the cream cheese is softened). Add the ranch dressing and stir well. Pour mixture over the chicken; top the dish with the cheese and place in oven until the cheese is melted and the entire dish is bubbly (approximately 15-20 mins). Serve with chips.

Magic Cookie Bars

Magic Cookie Bars from SimpleSolutionsDiva.com.

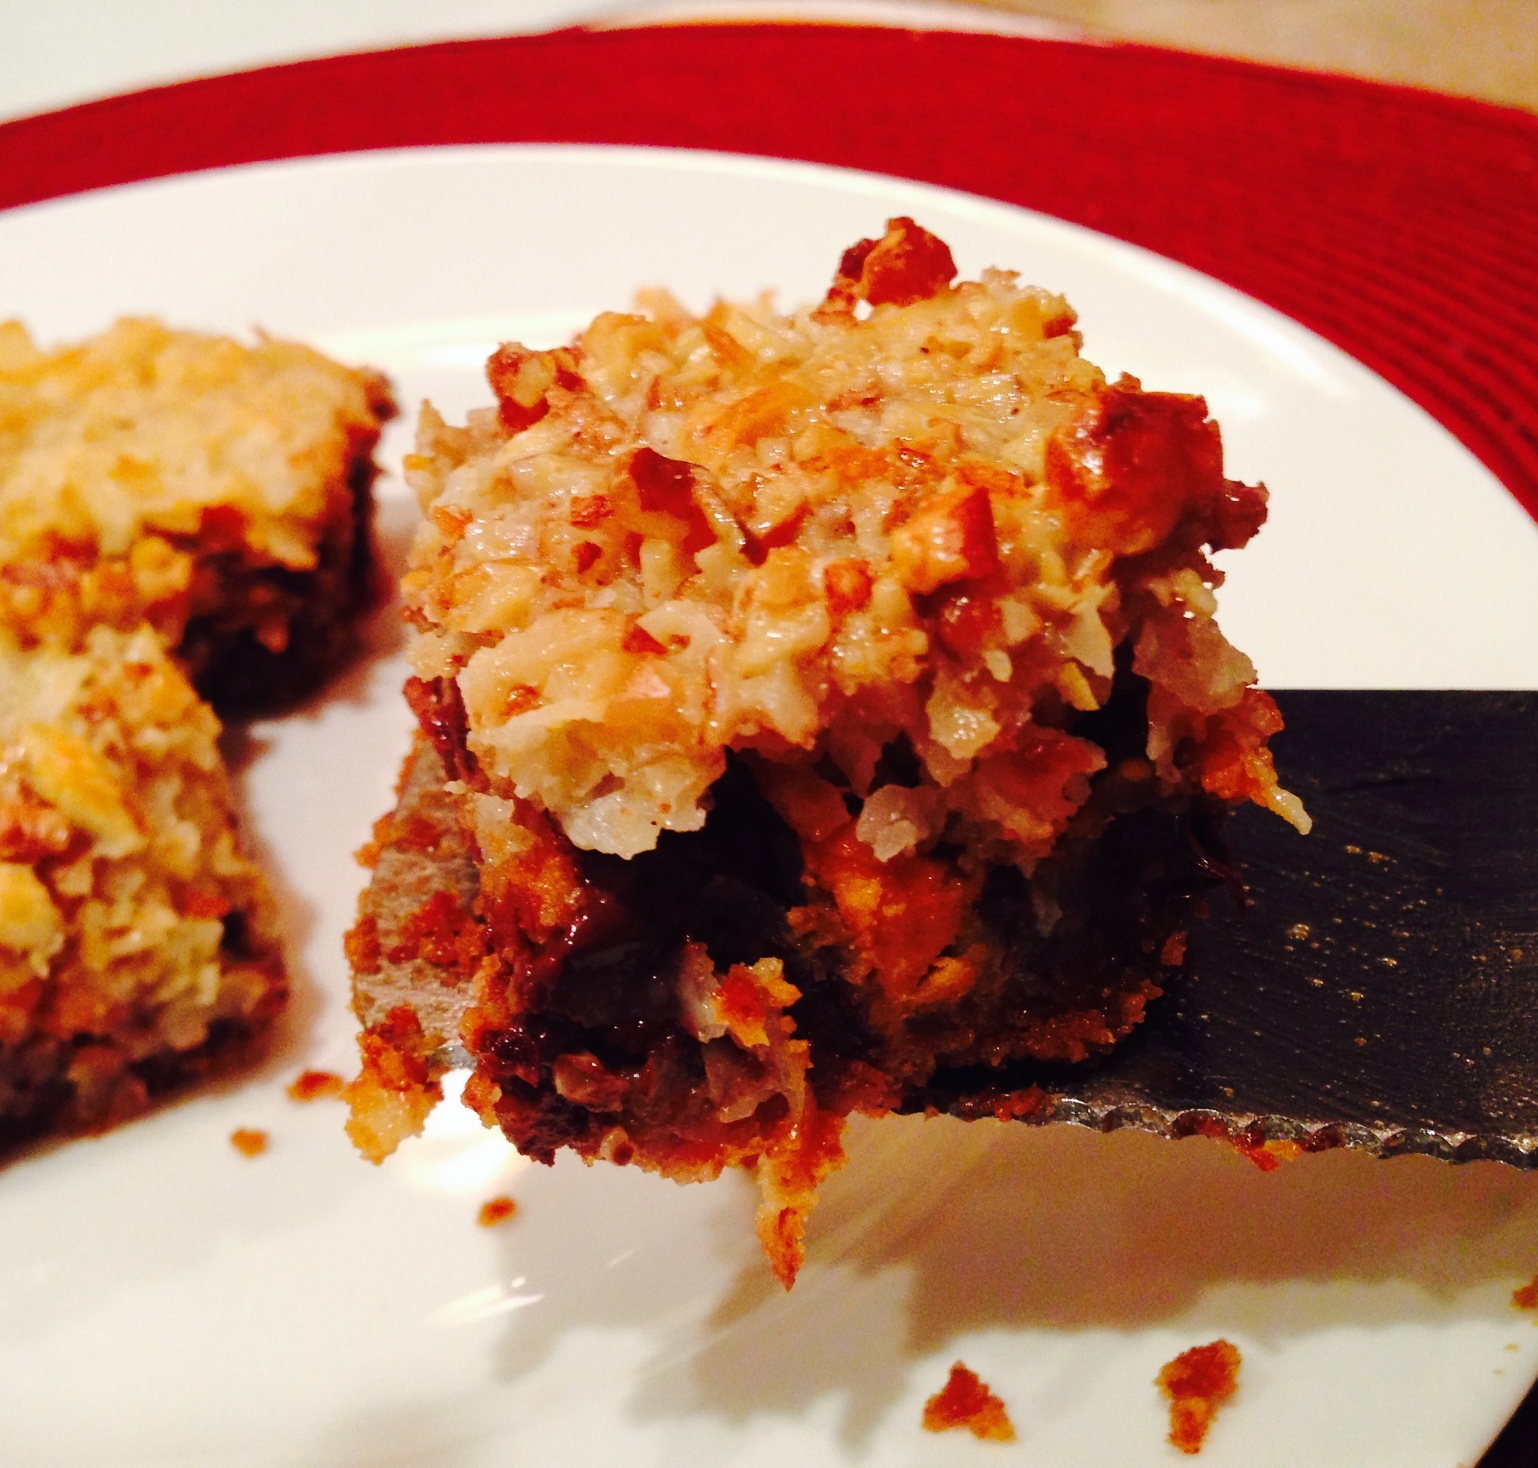
A blast from childhood, these scrumptious bites of chocolate and coconut goo are so sweet, just one or two will do! Make them the day before and store at room temperature.

Ingredients:

  • 3/4 Cup butter, melted
  • 2 1/4 Cup graham cracker crumbs (about 18 crackers)
  • 1 (14 oz) can sweetened condensed milk
  • 1 1/2 Cup semisweet chocolate morsels
  • 1 Cup butterscotch flavored chips
  • 1 Cup sweetened flaked coconut
  • 1 Cup chopped pecans (Not everyone likes pecans, so I use 1/2 cup and place pecans on one side)

Preparation:

Heat oven to 325 degrees. Coat 13×9 inch glass baking pan with non-stick cooking spray (I actually used a 9×9 pan, made the layers thicker, and cooked them longer.)

Melt butter in the glass dish, and add graham cracker crumbs. Mix thoroughly and press into bottom of prepared pan. Layer evenly with chocolate chips, butterscotch chips, coconut, and nuts. Pour sweetened condensed milk over mixture, making sure it covered entire surface of the pan.

Bake approximately 25 minutes or until lightly browned. Cool. Cut into bars. Store covered at room temperature, well hidden so everyone does not eat them all at once!


More Simple Super Bowl Recipe Ideas:

Looking for other simple, crowd pleasing recipe ideas for Super Bowl?  Try these:

Crockpot Ropa Vieja (Cuban Shredded Chicken or Pork) – Perfect to serve on yellow rice, in tacos or burritos!

Creamy White Chicken Chili – Crowd pleaser!

Simple Flatbread Appetizer Done Four Ways

Chipotle Chicken and Rice Soup – Warm and spicy!

Taco Cupcakes – Perfect for kids to make AND eat!

Toasted Coconut Refrigerator Cake – A wonderful sheet cake serves a crowd.

Simple Cocktails Round Up – Several recipes to choose from!

Roy’s Hawaiian Martini -Large Batch!

Sangria Di Cava – A White Sangria made with champagne

Thank you to WTLV-TV’s First Coast Living for inviting me on to share these yummy recipes!

Simple Ways To Bring The Garden Indoors

Right about this time of year (late January), I start imagining all the things I want to do in my garden. Lush plantings, beautiful and colorful flowers, clever statues or topiaries. Now mind you, most of those things never actually happen, but a girl can dream, right?!

So to satisfy my need for soil under my nails, I’m featuring a few, simple ways to bring the garden indoors, even in winter!

For The Cook: An Indoor Herb Garden


Herb Planter

If you love to cook with fresh herbs and you have a room that has enough bright light, you can have a mini garden at your fingertips.  I selected some healthy looking herbs that I use when cooking (oregano, peppermint and thyme), planted them in a beautiful pot, and added cute plant markers I made from leftover wine corks and long wooden skewers.

Herb Planter 2

A decorative and useful planting that has a touch of whimsy!

For The Brown Thumb Gardener:  A Colorful Cactus Garden


cactus

Cactus  are easy, don’t require much, and if you choose the right ones, they can be very colorful!  The key is to have a soil that supports the cactus’ needs – Think sandy! I mix together potting soil and simple play sand from the hardware store. Add a base layer at the bottom of the pot of pea stone to allow for good drainage.  Once I have the stone, soil and cactus in place, I add a top layer of decorative stone (I used polished, black river rocks) to make it attractive and to help keep the soil in place.  A little bit of water goes a long way to keep the cactus alive. A good, sunny spot in the house will help keep the cactus happy and healthy.

Bulb Happy!


paperwhites1

A burst of Spring in the middle of Winter – I love using fast growing bulbs and setting them up in shallow glass containers with river rocks and water. They grow so quickly and it is wonderfully satisfying to see them change from brown, ugly bulbs to fragrant, flowering plants in a matter of weeks! Paper Whites or Narcissus are terrific, and you can chose decorative stones to enhance the color of your flowers.  Keep an eye on the water level – you want it to just touch the very bottom of your bulbs. It is also a fun project to do with kids – they can see the roots of the plants growing daily. A suggestion: Be sure to rotate your container so the plants don’t grow sideways.

Create A Simple Seed Starter Kit


Seed Starter Kit

All you need is a sunny window, potting soil, an old ice cube tray or empty egg carton, and your selection of seeds. Fill the ice cube tray’s reservoirs with potting soil, plant your seeds to the proper depth according to the back of the seed packet, water and place in a sunny window! Monitor the water, and you should see your plants growing within a week or two (depending on the types of seeds you selected). Another great project to do with the kids – select some veggie seeds and get your kids interested in growing their own veggies (if they grow them, they may eat them!).

Encourage Stealth Gardening With Seed Bombs

Image 3

A great project to do with your kids! As I walk along the public sidewalks in my home town, I’m always impressed when I see wildflowers growing where nothing else grows. They are a beautiful pop of color. Try helping nature along by making your own Seed Bombs! In the Spring, you can do a little stealth gardening with the kids – plant or throw your seed bombs into open or bare areas around your neighborhood or town! The newspaper cocoon gives the seeds a medium in which to start growing, and once wildflowers get growing, WATCH OUT! Flowers everywhere!

IMG_4842You need:

  • 4 Sheets of Newspaper, shredded into small pieces
  • A tall glass container (you will be mixing in this)
  • Warm Water (approximately 1 cup)
  • An Immersion Blender
  • Cheese cloth (or you can use an old, thin rag)
  • A selection of wildflower seeds or other hearty flower seeds (if in doubt, ask your garden center for recommendations).
  • Ice cube tray or other molds (I used ice cube tray and I experimented with small, decorative cookie cutters that worked out well)


IMG_4846Place shredded newspaper into the tall glass container and add warm water until the newspaper is covered. Using immersion blender, blend until the paper is completely shredded.


IMG_4853Add seeds and mix using hands so seeds are dispersed through the mixture. place cheese cloth into a strainer and pour mixture into the cheese cloth. wrap the cloth around the mixture and squeeze out as much moisture as you can.


IMG_4856 Take small balls of the mixture and press into the trays (or molds). Let dry overnight. Remove the seed bombs from the tray and let them continue to dry until there is no moisture left. (I actually had them sit on my dryer while a load was drying!)


Now you have a bunch of seed bombs you can use to share with the community!


Thank you to WTLV-TV for inviting me on to First Coast Living to speak on this topic!


Simple Cleaning Tips From Simple Solutions Diva

Cleaning is not always on the top of our list of “Fun” things to do, but it is something that we have to do at some point! Here are some simple solutions to some common cleaning challenges:

But I HATE Cleaning! – Hate tackling cleaning jobs (like I do)? Pick one project to do, put on some good music, set a timer for 15-20 minutes and tackle just one job. When the timer goes off, stop and move on. And don’t feel guilty! I use this tip to tackle some of the paper piles that build up on my desk, or to do a speed pick up of a room.

Screenshot 2014-01-16 20.43.49Vinegar – The Super Cleaner! I love using vinegar to do some simple cleaning jobs around the house. It is non-toxic and does a great job! Try out some of these cleaning tips using white vinegar:

  • Clean Your Microwave – Fill a microwave safe bowl with ½ c. white vinegar and ½ c. water. Run in microwave 3-4 minutes. Take a damp cloth and wipe down inside of microwave– the steam, plus vinegar, helps to loosen cooked on debris and deodorize the inside of the microwave.
  • Simple Way To Clean Gunk Off Shower Head– Do mineral deposits clog your shower head? Fill a quart-sized baggie with white vinegar. Take a rubber band and attach the vinegar-filled bag to your shower head, making sure the shower head is covered completely with the vinegar. Leave on overnight. The vinegar will do the cleaning for you! The next day, remove the bag, take an old toothbrush (you will toss after using!) and gentle scrub the shower head.  The crusted on gunk should come off easily! To see the process in action, Click Here.
Non-Toxic Way To De-Gunk Your Shower Head, from SimpleSolutionsDiva.com.

Dust It? No, Roll It! – Have dusty lampshades but find it awkward to vacuum the shades? Use a lint roller to get the dust off the shade.

Remove Sticky Stickers from Dishes or Glassware– Use rubbing alcohol and a cotton ball or Q-tip to tackle the job. If it doesn’t come off, soak a cotton ball in the rubbing alcohol and let sit o the sticker for 5 minutes before trying again.

You can check out more links to other video cleaning tips from Simple Solutions Diva:

Putting Pinterest To The Test: Clean Your Top Loading Washer

How To Remove Mildew From Towels

Uses For Vinegar Around The House

And finally, here is an interesting link from BuzzFeed.com on 16 Common Product Combinations You Should Never Mix.

Thank you to WTLV-TV’s First Coast Living for inviting me on the show to share these tips!

Simple Ideas, Gadgets and Applications For Healthy Eating

We are almost two weeks into 2014 and many of us have made healthy eating one of our New Year’s resolutions. Simple Solutions Diva shares a few simple ideas, gadgets and applications designed to help you move towards healthy eating. Many thanks to WTLV-TV’s First Coast Living for the opportunity to share these tips on air!

Simple Ideas:

Flavored Water – Water is great for flushing out your system, hydrating your skin, and making you feel full. Add natural flavors to it and you are more likely to drink it! So try this recipe from Pinterest for making your own flavored water:

Ingredients:

  •  96 fl. oz. of Water (I used filtered water from my fridge)
  • 1 lemon, sliced
  • 2 limes, sliced
  • One bunch of fresh mint, rinsed and rough chopped
  • 1 cucumber, peeled and sliced
  • 4 24 oz water bottles (optional)

Preparation:

If you are using the 4  water bottles, divide all ingredients between the bottles. Or place all ingredients (except the bottles) in a large beverage container. Place in fridge and drink frequently.

Simple Gadgets:

These are my favorite simple gadgets that make healthy foods like apples and salad easy and accessible!

Screen Shot 2014-01-09 at 8.26.10 AM
Pampered Chef ‘s Apple Wedger


Apple Wedger – I use the Pampered Chef Stainless Steel Apple Wedger to slice and core apples in one move. You can find other brands of apple wedgers (also known as apple corers) online and in stores like Bed, Bath and Beyond.


Zyliss Lettuce Knife

Lettuce Knife– When you cut/chop lettuce with a steel knife, the steel reacts with the lettuce, causing browning of the lettuce.   By using a plastic lettuce knife to cut lettuce, the lettuce doesn’t brown up!  I use the Zyliss Lettuce Knife
to make my own, preservative-free bagged salad. Check out my video on how to make your own bagged salad and cut out the preservatives!


Simple Applications:

Using technology to help you eat healthy is easy with some of these simple applications:

Fooducate.com – Download this app to your cell phone to scan barcodes of your favorite foods in the grocery store. It gives foods a grade and tells you why the food got that grade.  I love the idea of using this with your children to help you make healthier choices at the store.  Thanks to young Maddie and her mom for taking the time to show me how to use this at the grocery store a few weeks ago!  Cost:  The basic app is free, with plenty of upgrade options if you want the “extras”.

MyFitnessPal.com – This website and app is highly recommended by nutrition experts as an easy way to track your food and exercise and help you set realistic goals.  I have been using it for a week and so far find it very easy and manageable.  Cost: The app is free!

eMeals.com– A great way to plan healthy meals!  You pick the type of dinner meal plan you want  to follow, like healthy meals, low calorie, low carb;  choose if you are cooking for a family or for smaller group;  select recipes from the suggested list for the meal plan; print out a shopping list for those meals. Easy peasy! It also suggests recipes that coordinate with sales going on in the grocery stores! Cost: Annual subscription costs $58.00 (under $5 per month).

Additional Websites Recommended From Friends:


Nike Training Club – Over 100 full body workout videos inspired by top Nike athletes and designed by NTC Master Trainers. My friend uses this on her cell phone while she is working out at the gym – the videos inspire her and help her make sure she is doing the exercise correctly.  Cost: Free

Lose It! – If weight loss is your goal, this was highly recommended as an easy, manageable app to track food, exercise and more.  Cost: Basic is free, with premium upgrades.

Many thanks to all my friends, as well as the wonderful, fellow contributors of 30SeondMom.com, who helped me with these recommendations! 

Cold Weather Calls For Warm Soup: Beef and Barley Soup

I love making a hearty soup on a cold winter’s day. This Beef and Barley Soup is easy, flavorful and really warms you up! I love it when my kids ask if I made this from scratch, and I can say “YES”!

Warm and Hearty Beef & Barley Soup from SimpleSolutionsDiva.com.

Ingredients:

  • 1 pound sirloin tip steak, cubed
  • 1 Tablespoon flour
  • 1-2 Tablespoons olive oil
  • 2 cups water
  • 1/2 teaspoon ground thyme
  • 1/2 teaspoon ground black pepper
  • 2 cloves garlic, pressed
  • 2 bay leaves
  • 1 pound carrots, sliced
  • 1 can (16 oz.) crushed tomatoes
  • 1 cup barley (I used quick cooking)
  • 1/2 teaspoon salt (optional)

 Preparation:

Place cubed steak and flour into a gallon-sized zip-lock plastic bag; close and shake, thoroughly covering steak with flour.

Heat olive oil in heavy soup/stock pot over medium heat. Add flour-covered steak to oil and brown meat.  Add water to pot, covering the meat and let simmer until meat is tender (approx. one hour). Note: Do not drain off fluid – this is the homemade beef stock for the soup!

Add thyme, pepper, garlic, bay leaves, tomatoes, and carrots to pot (add salt, if desired). Simmer until carrots are tender (approx. 1 hour).

Add barley and let simmer until barley is cooked (with quick cook barley, takes approximately 20 minutes).  Feel free to add 1/2 cup water if soup is too thick.

Serve with crusty bread!

Note: I let this simmer all afternoon, then add the quick cooking barley in the last half hour of cooking.


Catch Simple Solutions Diva On TV Every Friday In January

Join Laura Morey, your Simple Solutions Diva, every Friday in January on First Coast Living, WTLV-TV/Ch. 12 at 11 a.m. & 2 p.m.!

Tune in to see the following topics:

Friday, January 10:  Simple Ideas, Gadgets and Applications For Healthy Eating

Friday, January 17:   Simple Cleaning Ideas For The Home

Friday, January 24:   Simple Ways To Bring The Garden Indoors

Friday, January 31:   Simple Super Bowl Party Ideas

You can check this site every Friday at Noon to get all the details of each segment!

SimpleSolutionsDiva.com
The Simple Solutions Diva herself, Laura Morey!
© 2015 SIMPLESOLUTIONSDIVA.COM Designed by The Web Design Chic | ADMIN LOGIN