This recipe is the best of both worlds – pumpkin bread AND cheesecake! Feel free to use your own favorite pumpkin bread recipe, then use the directions below to create the cheesecake layer and to assemble the layers!
Ingredients:
Pumpkin Bread Layer
2 Cups canned pumpkin (one can of canned pumpkin)
4 Eggs
1 1/2 Cups flour (You can make this 1/2 white flour and 1/2 wheat flour, for a healthier and more dense bread)
3/4 Cup light brown sugar, packed
1 teaspoon baking soda
1 1/2 teaspoons ground cinnamon
1/4 teaspoons nutmeg
1/4 teaspoon ground cloves
1/4 teaspoon ginger
Cheesecake Layer
8 oz. cream cheese, softened
4 Tablespoons sugar
2 teaspoons flour
1 egg
Directions:
Preheat oven to 350 degrees. Grease and flour a bread loaf pan.
For the pumpkin layer– In a large bowl, combine the pumpkin and eggs until mixture is smooth. In a separate, medium bowl, combine the flours, sugar, baking soda, and spices, making sure they are well mixed.
Slowly add in the dry ingredients into the wet ingredients. Mix well and set aside.
For the cheesecake layer – In a small bowl, combine cream cheese, sugar, flour, and egg until smooth.
To assemble the layers – Spoon or pour the pumpkin mixture into the bread loaf pan, filling 1/2 way. Spoon or pour the entire cheesecake mixture over the pumpkin mixture, covering well. Add remaining pumpkin mixture to fill bread loaf pan 3/4 of the way.
Place in 350 degree oven for approximately 50-60 minutes. Test with a knife or toothpick in center for doneness – toothpick should come out clean. If not, place it back in oven and test again in five minutes!
This wonderful recipe was adapted from the website, BroughtToYouByMom.com. If you would like to check out the original recipe, click Here.
Here are a few “How-To’s” for some simple Halloween decor ideas that I featured on First Coast Living, WTLV-TV/NBC 12 (Jacksonville, FL). I’ve tried to include ideas that were inexpensive and fun to make with the kids! Enjoy!
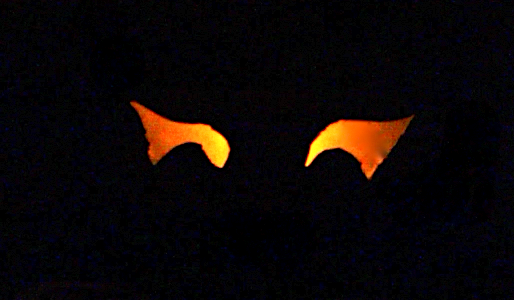
Spooky Eyes In The Bushes (or Trees, or really anywhere dark!)
Spooky Eyes In The Bushes, from SimpleSolutionsDiva.com
Items Needed For Project:
Empty Toilet Paper Rolls
Scissors or Exacto Knife (if doing project with children, an adult should be in charge of work with Exacto knife)
LED/Battery Operated Tea Lights (Or you can use a string of colored or clear twinkle lights)
Duct Tape – Dark works best, so it will blend into the bushes.
Take empty toilet paper rolls and cut out spooky (or silly) eye holes. Then make a small slit in the back of the toilet paper roll.
Insert an LED/Battery Operated Tea Light into the slit in the back of the roll, and secure it with duct tape, leaving on/off switch exposed. (If using twinkle lights, insert bulb into slit, then secure cord/bulb to back of roll using duct tape)
Duct tape over the the open ends of the toilet rolls so no light escapes either side.
Place in bushes along walkway, or in dark corners of the house. Turn on tea lights (or plug in twinkle light cord) and you have spooky eyes twinkling in the bushes on Halloween night!
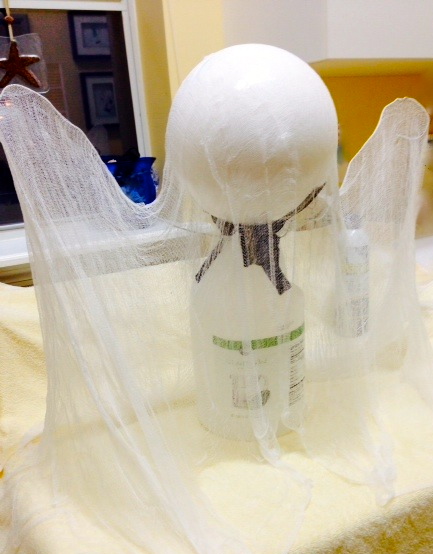
Table Top Ghost Decoration
Items Needed For Project:
Empty 2-litre soda bottle, or other tall empty bottle/jug.
One wire hanger, unraveled
One large styrofoam ball
Duct Tape
Cheese Cloth (Available in supermarkets and craft stores)
Spray Starch – Extra crisp spray, if possible.
washable towel (to protect surface)
Black felt circle (for eyes and mouth)
Create the “form” for ghost – Lay towel down to protect your work surface. Wrap wire hanger around neck of empty soda bottle, creating arms that extend out from the bottle. Secure wire hanger in place with duct tape. Press styrofoam ball onto top of soda bottle to create the shape of the ghost’s head.
Drape cheesecloth over the ghost “form” to create illusion of a ghost. Arrange the “skirt” of the ghost at the bottom of the figure.
Spray heavily with spray starch. Let dry completely. Gently remove the ghost from the mold, being careful to retain the shape of the ghost. Using black felt cut outs, glue eyes to the ghost. Set up on your table for a ghostly guardian of your Halloween table!
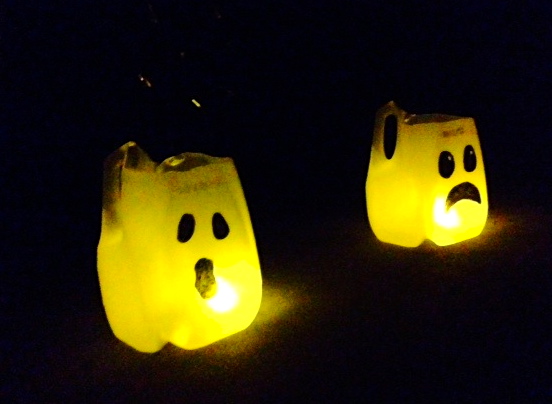
Ghost Pathway Markers
Ghost Pathway Markers, from SimpleSolutionsDiva.com.
Items Needed For Project:
Multiple clear,empty plastic milk jugs (washed and dried)
Scissors or Exacto Knife
LED/Battery Operated Tea Lights or Glow Sticks (do not use real candles)
Black Permanent Markers (or black felt cut outs for eyes, nose and mouth)
Cut off top of milk jug.
Using black permanent marker, draw ghostly eyes and mouth on front of milk jug. Place LED/Battery Operated Tea Light or activated glow stick into milk jug and place along walkway or driveway.
Pumpkin Planters
Pumpkin Planters from SimpleSolutionsDiva.com.
Items Needed For Project:
Artificial pumpkin
Pumpkin carving tool or small, serrated knife
Screwdriver, or other pointy tool
Potting Soil
Pea Stone for drainage (available from hardware stores)
One Fall Plant of equal (or slightly smaller) size to the artificial pumpkin. I love using mums because they are a hearty plant and can take a little abuse!
Optional – Garden gloves, gardening trowel.
Cut off the top of the artificial pumpkin, cutting at approximately the pumpkin starts to become wider. (usually about 1-2 inches from the top). Using a screwdriver or other pointy tool, poke drainage holes in the bottom of your pumpkin. Pour about an 1-2 inches of pea stone into bottom of pumpkin to provide drainage AND heaviness to keep the pot upright.
Arrange potting soil in bottom of pumpkin, allowing enough room to place the plant. Arrange until plant looks right to you in the pumpkin, then fill remainder with potting soil. Place outside and water thoroughly. For a more visual explanation, Click Here for video!
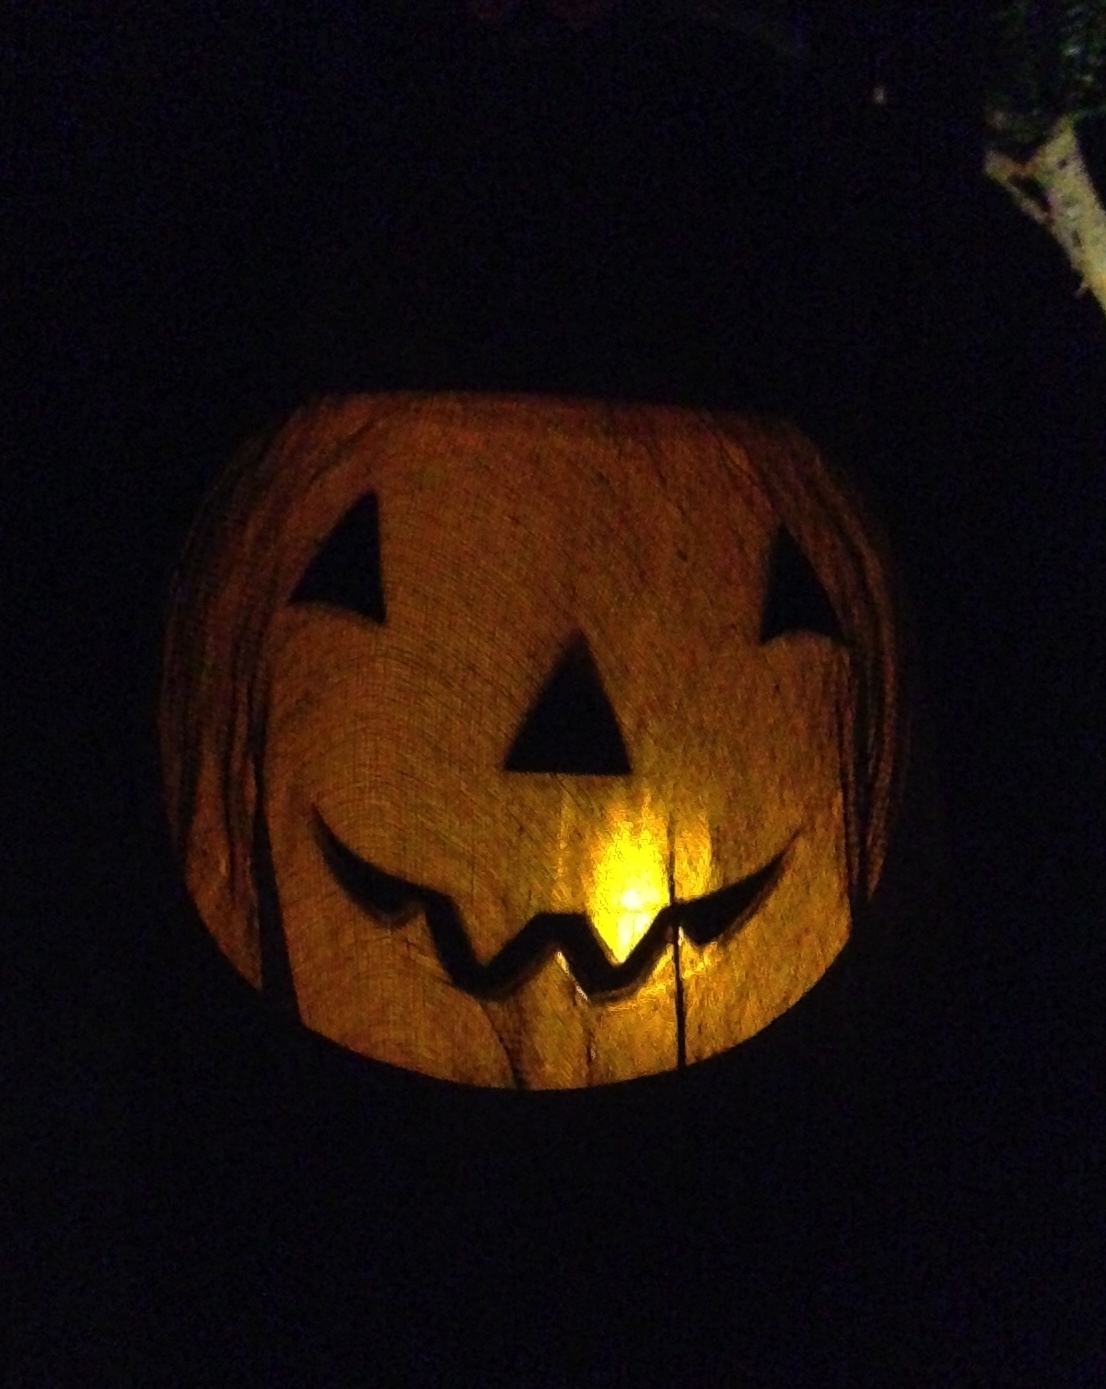
Glowing Ghosts – The Great Pumpkin
The Great Pumpkin Glowing Ghost, from SimpleSolutionsDiva.com
Items Needed For Project:
Black or White cheese cloth/gauze
Large plastic pumpkin bucket
Glow sticks
Fishing wire or string
Set up paper wedding bells. Drape cheese cloth over pumpkin bucket in ghostly fashion, being sure to create a hole to attach a string on handle.
When ready to display at night, activate glow stick and place in bottom of bucket. Use fishing wire or string to hang the “Great Pumpkin ghost from trees outside.
cinnamon sticks and small orange slices as garnish
Dark rum or spiced rum (optional)
Directions:
Pour the apple cider into a large pot (or crockpot).
Wash, dry, then slice the orange into thin slices, leaving a 1/4 of the orange ready for juicing. Place slices into the apple cider, and squeeze the juice from the 1/4 of orange into the pot.
Wash, dry, then slice the apple into thick slices. Push the whole cloves into the skin of the apple slices, and place into the pot (or just toss both apple slices and cloves separately into the pot for convenience!).
Add the cinnamon sticks, allspice, brown sugar, and nutmeg into the pot and stir well. Heat on low for 10-15 minutes (or place on warm in crockpot for hours!). Serve warm in cups garnished with a fresh cinnamon stick and a small slice of orange.
For an adult version, serve with a shot of dark rum or spiced rum – YUM!
Catch Laura Morey, your Simple Solutions Diva, on Monday, October 21 on First Coast Living, WTLV-TV, NBC Ch. 12 (@ 11 a.m. and 2 p.m.)! She will talk simple Halloween Decor you can make on your own or with your kids.
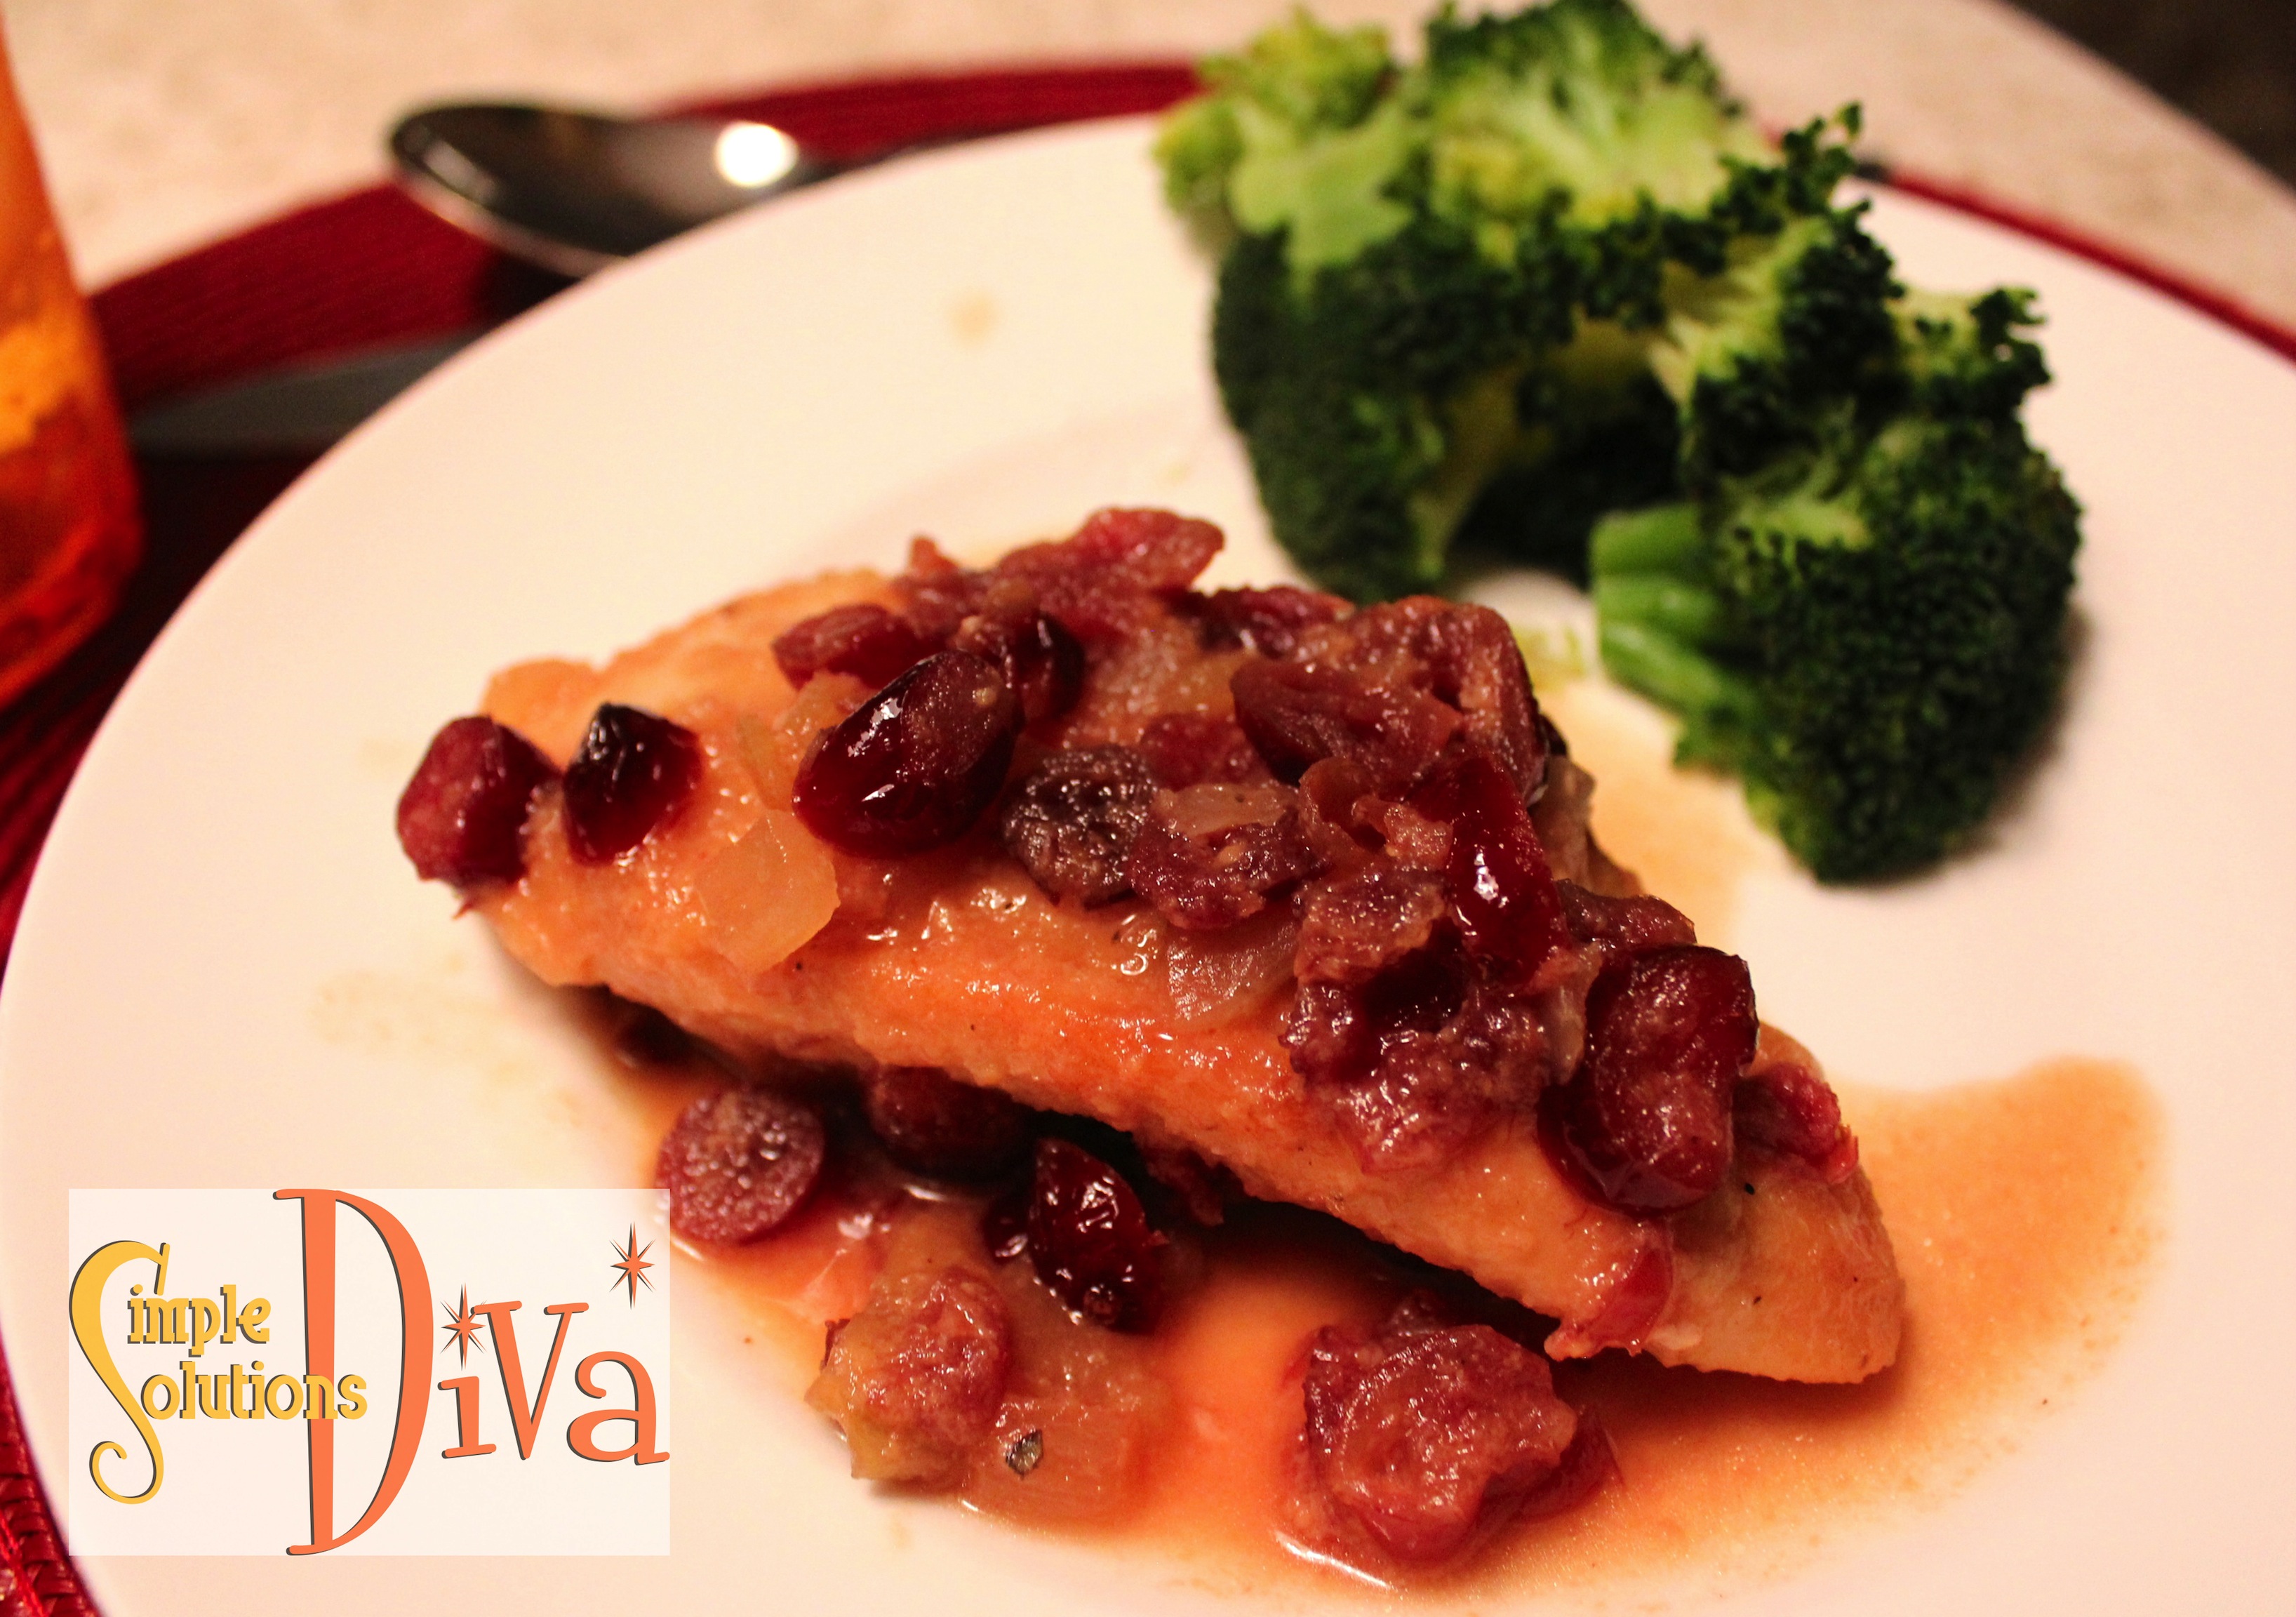
This recipe is a new favorite in our household – with dried cranberries, apples and onions, it is a sweet taste of Autumn!
Ingredients:
4 Boneless Chicken Breasts
1 cup dried, sweetened cranberries
1/2 cup apple juice
1/2 cup chicken broth
1/2 cup chopped apples (peel, core and chop one small apple)
1/2 cup chopped onions (I used frozen chopped onions)
1 Tablespoon olive oil or other cooking oil
1 Tablespoon flour
1/2 teaspoon coarse ground pepper
1/2 teaspoon kosher salt
1 Tablespoon Dijon Mustard
Directions:
Combine cranberries, apple juice and chicken stock in a small bowl. Set aside.
In a gallon-sized plastic bag with zip top, mix flour, salt and pepper. Toss chicken breasts into bag and shake well until each breast is coated evenly with flour.
Heat oil in a medium skillet over medium-high heat. Once oil is hot add chicken and cook for 5 minutes each side. Remove chicken to a plate and keep warm.
Add apples and onions to pan and cook down on medium heat until the onions are translucent.
Pour soaked cranberries with juice and stock into the hot pan, reduce heat to low and scrape up any browned bits on the bottom of the pan. Stir in mustard and add chicken back into pan.
Cook for another 8-10 minutes or until chicken is no longer pink and sauce has thickened. Serve chicken with sauce atop.
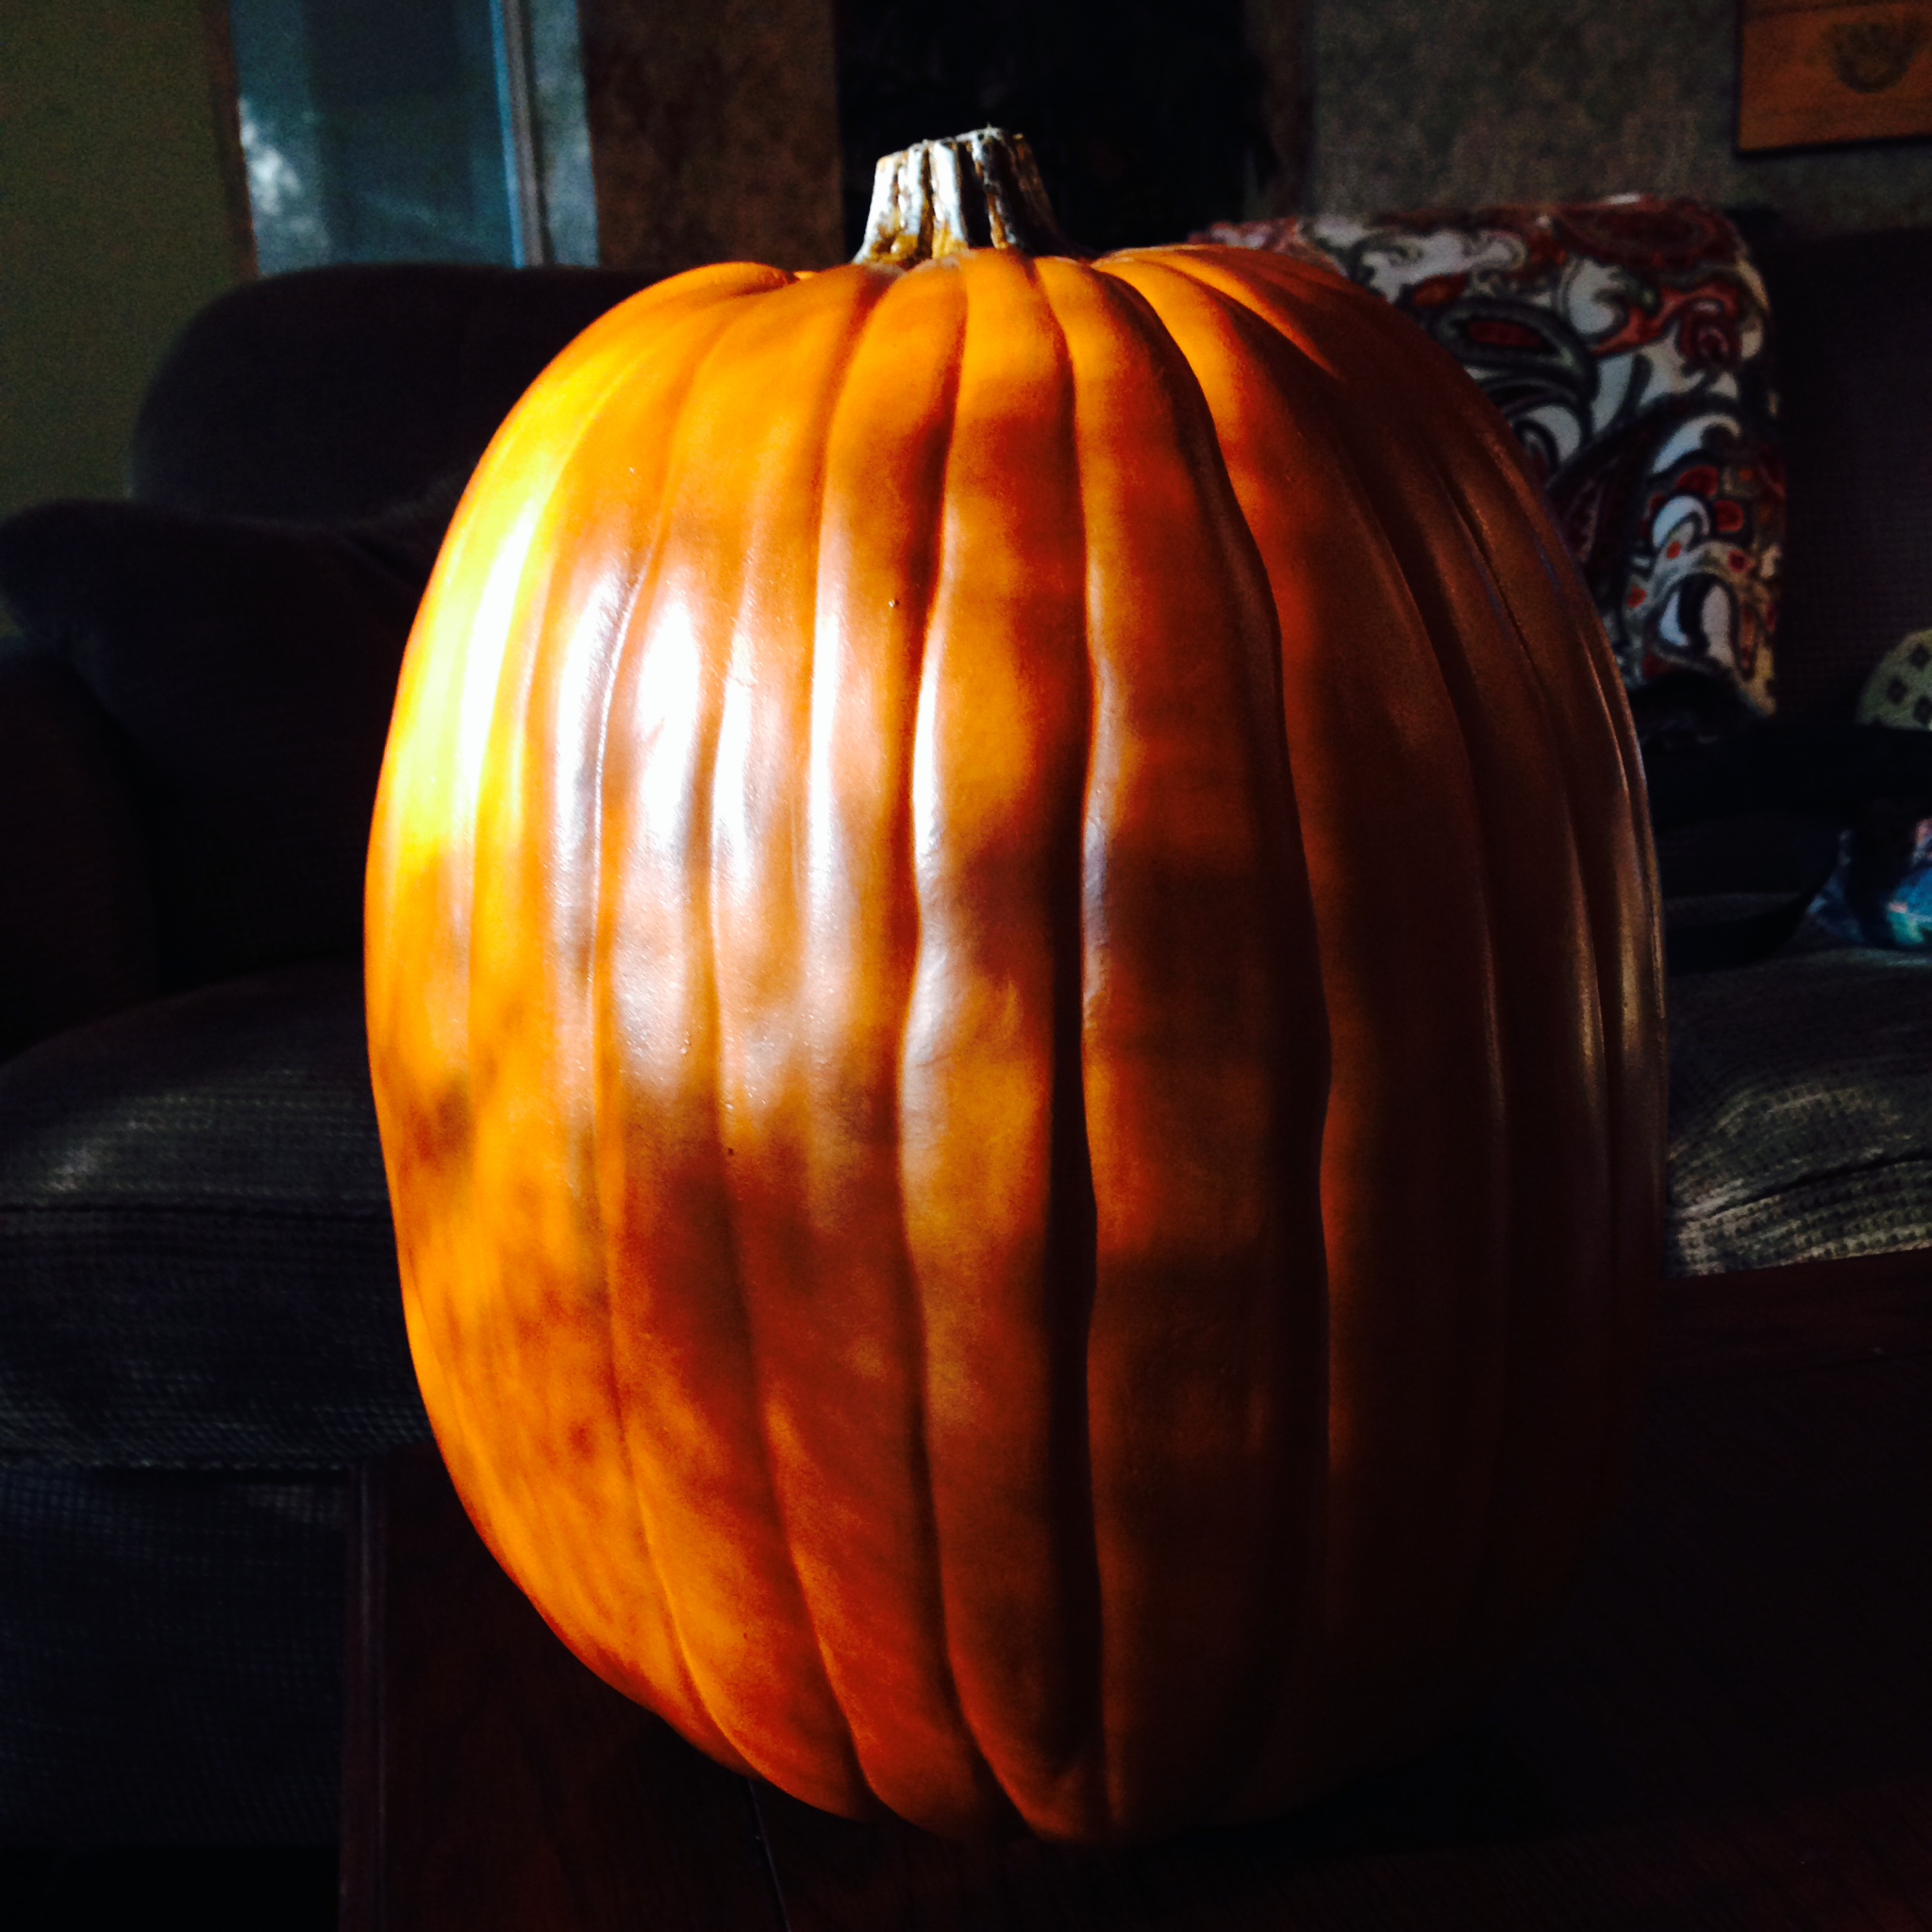
Simple Solutions Diva is busy creating some simple, fall decor videos using pumpkins, both real and artificial. Artificial pumpkins are great for Autumn in the warmer climates – they don’t rot! Look for the videos to be featured this weekend and next!
Now, take a look at the pumpkin in this photo. Can you tell if this pumpkin is real or artificial?