SimpleSolutionsDiva.com

cleaning

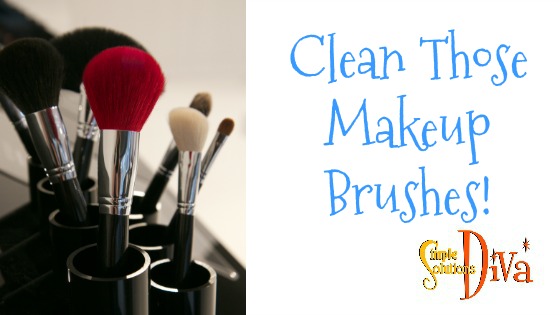
Clean Those Makeup Brushes!

Makeup Brushes – A Girl’s Best Friend! 

I use my makeup brushes every day. They are the tools of my trade! Years ago, when I started breaking out on my face, I realized that I needed to keep them clean. Turns out, the combination of old makeup and oils is just a breeding ground for germs!

So gather up a small bowl or cup, some baby shampoo and follow my easy steps for cleaning your makeup brushes!


Spring Cleaning Tip: How To Wash Walls

Let’s face it, we know dust, pollen and grime adhere to your walls, whether they are painted or wallpapered! Here is the quick process to cleaning painted walls:

Dust! Dust walls (Top down) with a lambs wool duster, a clean white cloth tied on a broom, or even a Swiffer cleaner. Be sure to dust the corners and any woodwork (& baseboards), freeing them of both cobwebs and dust.

Get Washing! First, mix up a simple Wall Washing Solution – a mixture of one gallon of water with a good squeeze of liquid dishwashing detergent. Mix well.

  • Supplies: 2 buckets – one with the wall washing solution, the other with clean water.
  • A natural sponge – not colored sponges because they may deposit the color.

Working in small sections, dip the sponge in the solution and wipe gently. And be sure to wash from the bottom up, that way drips will run onto the wet surface, making them easier to wipe up and not leaving a dirty streak down the wall. Repeat the process in the same spot with the clean water. Repeat until you have finished the entire wall.

SIMPLE TIP: Wash The Entire Wall W/out taking a break, using the same washing solution. Don’t take a break in the middle, because you will end up with “wash marks”.

For Wall Paper – It depends on whether it is coated or scrubbable wallpaper, or if it is older paper.

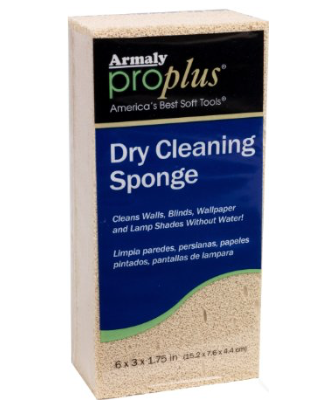
If the wallpaper is older and uncoated, you can use something called a dry sponge that allows you to clean without water. You Can Find A Dry Cleaning Sponge Here!

Example Of A Dry Cleaning Sponge.

If the wallpaper is coated/scrubbable, the process is similar to the process for a painted wall, just lighter on the water application: Dust, Mixture, Wash, then Wipe down with clean dry cloths.

I’d like to thank WTLV-TV’s First Coast Living for inviting me to come on and share this Spring Cleaning Tip! 

SSD Wash Walls

A Simple Challenge: Clear The Clutter, Part Three- Prep & Measure

With the decluttering finally finished, the next step in my journey from cluttered to clean had arrived! Prepping the storage area & measuring for the storage boxes!

Here’s where I begin to see the fruits of my labor!

Chris Stone of NeatlyDesigned.com has shepherded me through this process, gently (plus a dash of humor & firmness!) helping me clear out this mess!

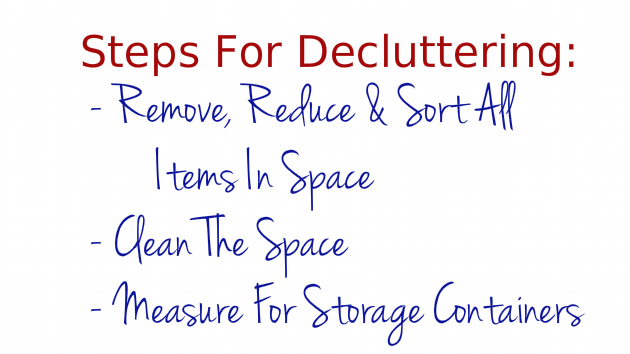
So here are the steps for this decluttering process so far:

Steps For Decluttering


A clean space to organize is a treat! You know you don’t want to put all your nicely organized items back into a dirty area! You also want to make sure you have the right sized storage bins, so you can actually close the doors! So follow along! And next week, you can see how we put it all back together!

SSD Clutter Cover Slide Part 3

Surprising Bathroom Cleaning Tips

SSD Bathroom Cleaning Tips


Who likes to clean the bathroom? Certainly not the Diva! But you can count on her to have some simple (and some surprising) tips to keeping your bathroom clean – besides calling in a cleaning service!

Clean up every day! Really, if you just do a couple of small clean up jobs every day, you will feel better about deep cleaning later. Things like wiping down the counters, faucets and sink at the end of the day, plus a spot cleaning of the mirror will keep things tidy enough so you won’t feel overwhelmed when it is time to do the deep cleaning job. Keep the essentials for these jobs under your bathroom sink – like Lysol wipes, Windex Glass & Mirror wipes, paper towels.

Clear your counters. When you are planning to do a deep cleaning of your bathroom, clear off the counters completely of your products, toothbrush, drink glass, etc. and place them under the sink or out of the room.

Vacuum and Dust! Before you start a deep clean of the bathroom, vacuum and dust from the top to the bottom. Using a microfiber cloth, dust the light fixtures – don’t forget the top ledges of the fixtures and the light bulbs! Dust off the countertops before you use cleanser on them. Dust off the baseboards. Vacuum your ventilation fan using the extension and brush attachment. Be sure, if you want to take the cover off, to turn off the circuit breaker to the fan so there is no power. Finally, shake out your bathroom rugs and place them out of the room, then vacuum the bathroom floor. This will give you a clear surface to clean.

Get Steamy! Spray all your countertops and shower stall with your cleaners, then run the shower at the hottest level, allowing the bathroom to steam up. The heat and dampness will help loosen up/soften up grime. And the cleaners will have a chance to start the disinfection process! After about 5 minutes, open the door and start scrubbing away at the counters and the shower. Rinse down everything and dry off the counters. Mop the floor and you are out the door!

Reduce clutter. When placing products, toothbrushes, etc. back on countertops, think about whether you really need them. Maybe even consolidate those half-used bottles of product! Try to reduce clutter, or find a place under the sink for some of those products.

Additional Tips:

  • Keep all cleaning supplies in your bathroom. If they are there, you will most likely use them
  • Use old dryer sheets as cleaning cloths.
  • Keep extra small trash bags in bottom of trash can so one will always be there when you need it!

You can find “recipes” to make your own Homemade Cleaning Products here: The Diva’s Homemade Cleaning Products.

Thank you to WTLV-TV’s First Coast Living for inviting me on to share these tips!

1 2 3 4

© 2015 SIMPLESOLUTIONSDIVA.COM Designed by The Web Design Chic | ADMIN LOGIN