

Love the look of Tie-Dye, but don’t want the hassle (or the messiness) of dye! Try this great idea from SunScholars.com: Sharpie Tie-Dyed T-Shirts! Rachel of SunScholars.com provides these instructions:
Supplies You Will Need:
- Variety of Colorful Sharpie Permanent Markers (Tried other brands with poor success)
- Rubbing Alcohol
- Something to “Tie” Dye, such as a white T-shirt
- Plastic Cups
- Dropper
- Rubber Bands
Instructions:
** Before you start, make sure you protect your work surface!
Prepare the Shirt!
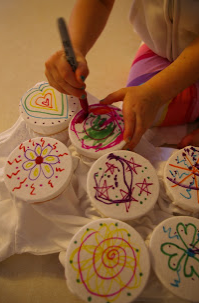
Place cups, open-side up, underneath, securing with a rubber band. We placed as many as we could at one time.
Design Your Shirt!
Use your favorite Sharpie colors to make designs on each ‘circle’. We loved the way dots of color would look in the end, so we added lots of those. You might want to test different colors, as some spread nicer then others too.
Add The Alcohol! Use a dropper to add a little alcohol at a time to the center of each ‘circle’. Don’t over-do it! The alcohol will continue to spread for a while after it is added.
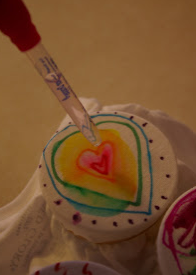
Now WAIT! You need to wait a bit to allow the alcohol to dry (so not to spread on parts of your shirt you don’t want it to).
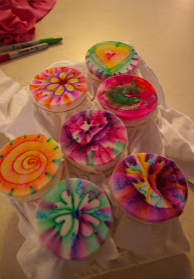
Once it is dry, you can remove the cups and rubber bands. You may want to add designs on the opposite side of the shirt.
To take a closer look at Rachel’s instructions, Click Here.