
On Tuesday, November 26, Simple Solutions Diva got to share her simple craft ideas for Thanksgiving. If you missed the show, you can check it out here!
Simple Project
Simple Thanksgiving Craft Ideas
Thanksgiving is a time for family and friends to gather and be thankful for all they have. Simple Solutions Diva has a few simple ideas to add to the Thanksgiving festivities, keeping family and friends connected, and keeping the conversations going! Thanks to WTLV-TV/Channel 12’s First Coast Living for inviting me to share these ideas on air!
May you all have a wonderful Thanksgiving!
Father, we thank Thee for this food, for health and strength and all things good. May others all these blessings share, and hearts be grateful everywhere. — Traditional American Blessing, circa 1800’s
Thankful Tree
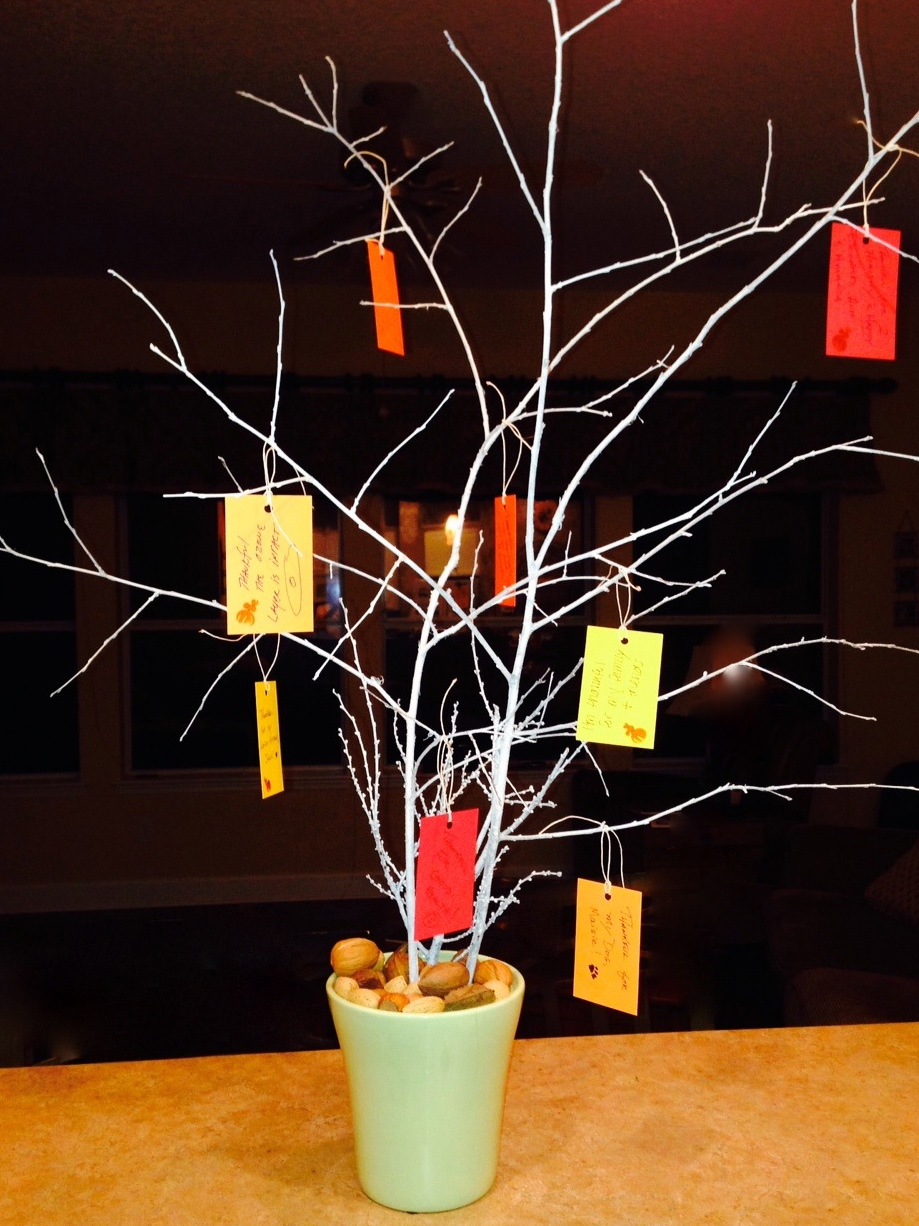
This project is very simple to make. You need the following items:
- Heavy vase or clean, outdoor pot
- Branches from trees in your own back yard, stripped of foliage and cut to the appropriate size for pot. You can paint the branches white or black, or you can leave them natural. I used white spray paint.
- Styrofoam block or floral dry foam block.
- Filler (I used nuts, but you could use fabric, autumn leaves, etc.)
- Blank tags with ties. I made my own with construction paper, and hole punch and natural cord/string.
- Pens
Place your pot on a flat surface. Place styrofoam or floral dry foam block inside pot; secure with tape if needed.
Insert branches into the foam block. Add filler material around the base of the branches to cover the foam block.
Place the Thankful Tree, tags and pens in a prominent place in your home and ask guests to write what they are thankful for and to tie it to the tree.
I found this thoughtful idea from Yesterfood.com – to see their beautiful post, click HERE.
Thanksgiving Conversation Starter Centerpiece
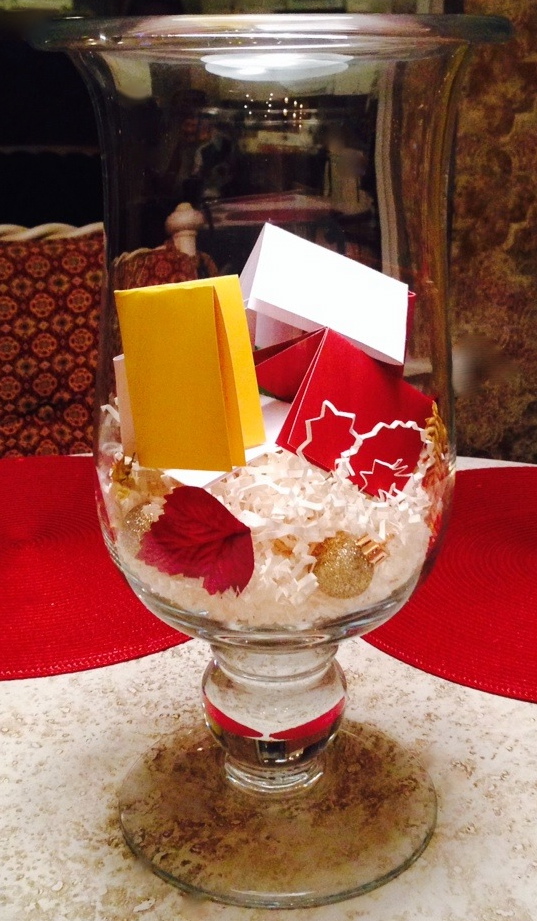
Keep the fun conversation going at the Thanksgiving table! For this project you can use many items from around your home. You will need:
- Large glass vase or decorative glass bowl
- Thanksgiving themed filler – you can use nuts, ornaments, ribbon, leaves, felt pumpkins. Basically whatever calls to you!
- Small blank cards or squares of construction paper
- Pens
- Stickers or other decorative elements – optional
Assemble your filler of choice in the vase or bowl. Write conversation prompts on the small cards and fold them (or roll & tie them). Place the cards into the bowl. Place bowl on or near the Thanksgiving table. Reach for the the bowl whenever the mood or need arises! Make sure you have at least one prompt per person.
Stumped for prompt ideas? Try some of these:
What life advice would you give a younger person?
What is your favorite holiday memory?
What is your favorite Thanksgiving food?
What is your favorite part of Thanksgiving?
How is Thanksgiving different today from when you were a child?
When you were a child, what were the popular toys everyone wanted for Christmas?
I found this great idea on CraftyChica.com. Here is the original post!
Turkey Day Table Runner
Let your guests get creative during the Thanksgiving meal! Let them discover their inner artist! And most importantly, keep them at the table by giving them something to do between courses!
You will need:
Brown or white plain wrapping paper or white butcher paper. I used postal wrapping paper because it is a little heavier than wrapping paper and there is no gloss to it. It is also significantly cheaper – $4.99 for 75 sq. ft of paper, versus $4.99 for 45 sq. ft. of wrapping paper.
Pens, crayons, markers (no bleed).
Thanksgiving themed stickers or other decorations
Run the wrapping paper down the center of your table. Add your major table elements, like your candles, centerpiece, salt & pepper – whatever you plan to place on the table for dinner.
Add a few decorative elements to your table runner, to let people know they can write on it. Add stickers or other decorations. Or even use it to write out place cards for your guests!
Place markers and or crayons in small cups along the table within easy reach of guests. Be sure to let them know they are free to doodle!
Cornucopia Place Card Holders
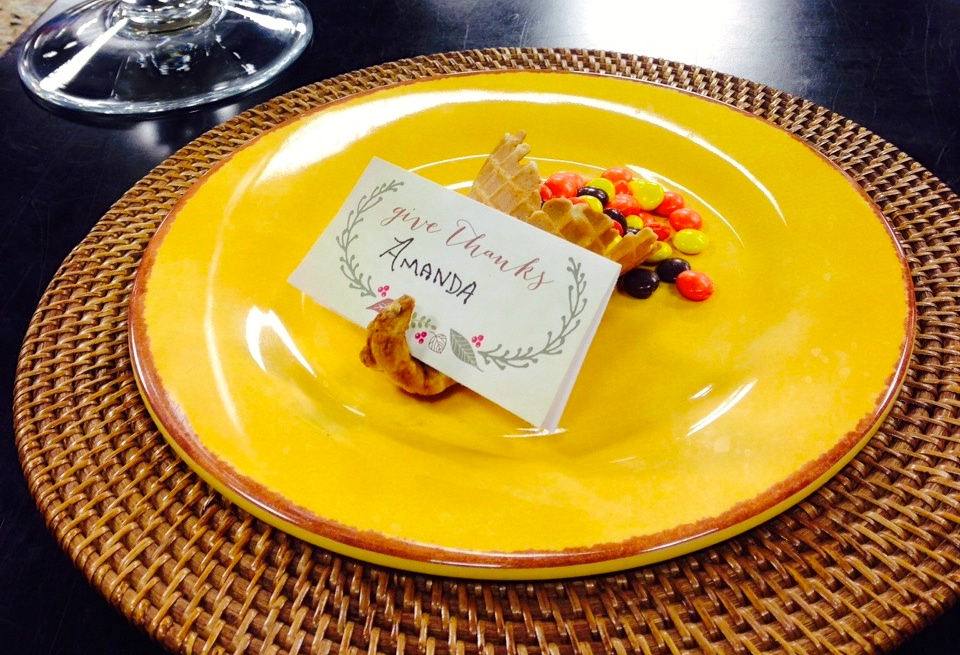
This is a perfect project to get your kids involved in, but be sure to have plenty of the candy filler around!
You will need:
- Waffle cones
- A bowl of water
- A fat pen
- Candy filler – you can use the Harvest mix candies (they are like candy corn, but veggie shapes), or you could use Reese’s Pieces (they are perfect harvest colors!), or even use a nut based trail mix.
- Place cards (you can find a free place card printable at EleganceAndEnchantment.com.)
Take your waffle cone and soak the pointy end in the bowl of water for about 30 seconds (not too soaked – you don’t want it to get too mushy). Place cone in microwave for approximately 30 seconds, until the ends is just softened and pliable.
Remove cone from microwave and using the fat pen, flatten and curl the cone’s end up around the pen to create a cornucopia effect.
Fill cornucopia with candy or nut filler and lay at the place setting. Filler can spill out for effect, or you can wrap the open end in plastic wrap and secure with ribbon.
Lay the place card on the back end of the cornucopia.
This creative idea came from Squiddo.com.
Sugar Cone Teepees

A simple little craft to entertain the kids while waiting for dinner!
You will need:
- Sugar cones
- White frosting
- Black gel icing tube
- Harvest color edible decorations – Reese’s Pieces, sprinkles, etc., placed in dishes
- A flat, clean work surface safe for kids.
Smear white icing to cover the cones. Let the kids go to town decorating their teepees!
Simple Solutions Diva Is Now A Contributor To 30SecondMom.com!
 Simple Solutions Diva is excited to share that she is now a contributor to the website, 30SecondMom.com. The website, full of great tips and ideas provided in a short and sweet 30 second format, is perfect for the busy mom!
30Second Mom’s goal is to provide mobile moms with quick and helpful tips from other moms – each in about 30 seconds or less – delivered straight to their phones. Whether moms read the tips or watch them on video, they are delivered in clear and concise – and fun! – formats that won’t take much of moms’ most precious asset: their time.
Check out Simple Solutions Diva’s 30Second Mom.com profile and tips by clicking HERE.
Simple Halloween Decor “How-To” Round-Up
Here are a few “How-To’s” for some simple Halloween decor ideas that I featured on First Coast Living, WTLV-TV/NBC 12 (Jacksonville, FL). I’ve tried to include ideas that were inexpensive and fun to make with the kids! Enjoy!
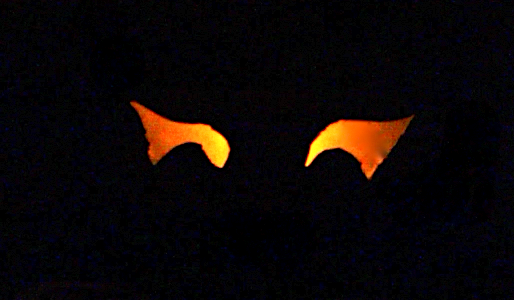
Spooky Eyes In The Bushes (or Trees, or really anywhere dark!)
Items Needed For Project:
- Empty Toilet Paper Rolls
- Scissors or Exacto Knife (if doing project with children, an adult should be in charge of work with Exacto knife)
- LED/Battery Operated Tea Lights (Or you can use a string of colored or clear twinkle lights)
- Duct Tape – Dark works best, so it will blend into the bushes.
Take empty toilet paper rolls and cut out spooky (or silly) eye holes. Then make a small slit in the back of the toilet paper roll.
Insert an LED/Battery Operated Tea Light into the slit in the back of the roll, and secure it with duct tape, leaving on/off switch exposed. (If using twinkle lights, insert bulb into slit, then secure cord/bulb to back of roll using duct tape)
Duct tape over the the open ends of the toilet rolls so no light escapes either side.
Place in bushes along walkway, or in dark corners of the house. Turn on tea lights (or plug in twinkle light cord) and you have spooky eyes twinkling in the bushes on Halloween night!
Table Top Ghost Decoration
Items Needed For Project:
- Empty 2-litre soda bottle, or other tall empty bottle/jug.
- One wire hanger, unraveled
- One large styrofoam ball
- Duct Tape
- Cheese Cloth (Available in supermarkets and craft stores)
- Spray Starch – Extra crisp spray, if possible.
- washable towel (to protect surface)
- Black felt circle (for eyes and mouth)
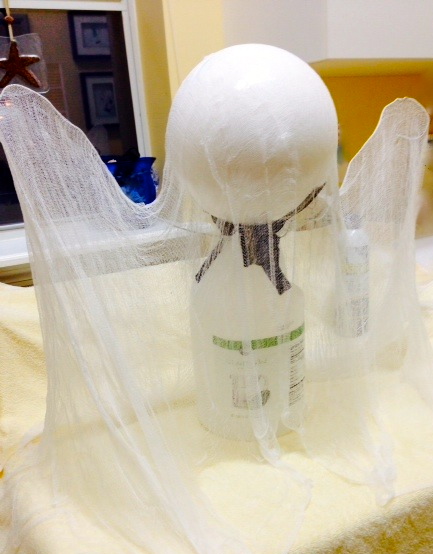
Create the “form” for ghost – Lay towel down to protect your work surface. Wrap wire hanger around neck of empty soda bottle, creating arms that extend out from the bottle. Secure wire hanger in place with duct tape. Press styrofoam ball onto top of soda bottle to create the shape of the ghost’s head.
Drape cheesecloth over the ghost “form” to create illusion of a ghost. Arrange the “skirt” of the ghost at the bottom of the figure.
Spray heavily with spray starch. Let dry completely. Gently remove the ghost from the mold, being careful to retain the shape of the ghost. Using black felt cut outs, glue eyes to the ghost. Set up on your table for a ghostly guardian of your Halloween table!
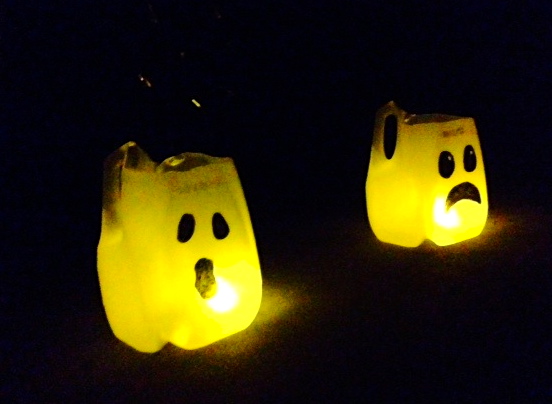
Ghost Pathway Markers
Items Needed For Project:
- Multiple clear,empty plastic milk jugs (washed and dried)
- Scissors or Exacto Knife
- LED/Battery Operated Tea Lights or Glow Sticks (do not use real candles)
- Black Permanent Markers (or black felt cut outs for eyes, nose and mouth)
Cut off top of milk jug. 
Using black permanent marker, draw ghostly eyes and mouth on front of milk jug. Place LED/Battery Operated Tea Light or activated glow stick into milk jug and place along walkway or driveway.
Pumpkin Planters

Items Needed For Project:
- Artificial pumpkin
- Pumpkin carving tool or small, serrated knife
- Screwdriver, or other pointy tool
- Potting Soil
- Pea Stone for drainage (available from hardware stores)
- One Fall Plant of equal (or slightly smaller) size to the artificial pumpkin. I love using mums because they are a hearty plant and can take a little abuse!
- Optional – Garden gloves, gardening trowel.
Cut off the top of the artificial pumpkin, cutting at approximately the pumpkin starts to become wider. (usually about 1-2 inches from the top). Using a screwdriver or other pointy tool, poke drainage holes in the bottom of your pumpkin. Pour about an 1-2 inches of pea stone into bottom of pumpkin to provide drainage AND heaviness to keep the pot upright.
Arrange potting soil in bottom of pumpkin, allowing enough room to place the plant. Arrange until plant looks right to you in the pumpkin, then fill remainder with potting soil. Place outside and water thoroughly. For a more visual explanation, Click Here for video!
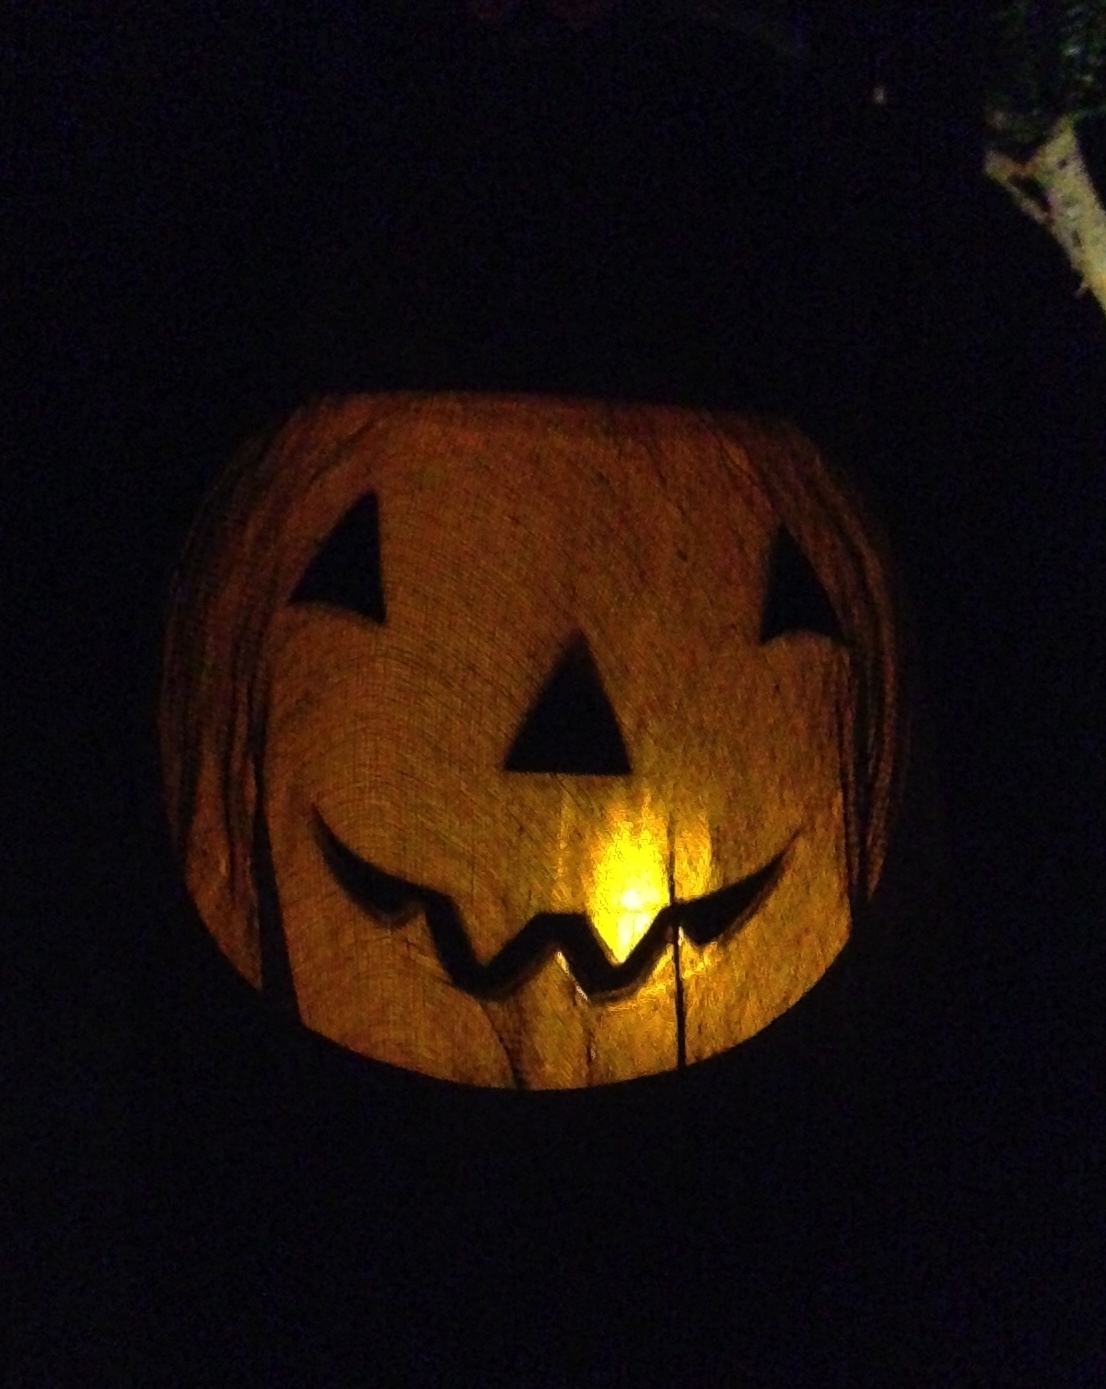
Glowing Ghosts – The Great Pumpkin
Items Needed For Project:
- Black or White cheese cloth/gauze
- Large plastic pumpkin bucket
- Glow sticks
- Fishing wire or string
Set up paper wedding bells. Drape cheese cloth over pumpkin bucket in ghostly fashion, being sure to create a hole to attach a string on handle.
When ready to display at night, activate glow stick and place in bottom of bucket. Use fishing wire or string to hang the “Great Pumpkin ghost from trees outside.
Simple Solutions Diva Talks Halloween Decor On First Coast Living
Catch Laura Morey, your Simple Solutions Diva, on Monday, October 21 on First Coast Living, WTLV-TV, NBC Ch. 12 (@ 11 a.m. and 2 p.m.)! She will talk simple Halloween Decor you can make on your own or with your kids.
Tune in and see how simple Halloween DIY can be!
Simple Fall Decor: Fall Pumpkin Display
Great Fall Decor Projects!
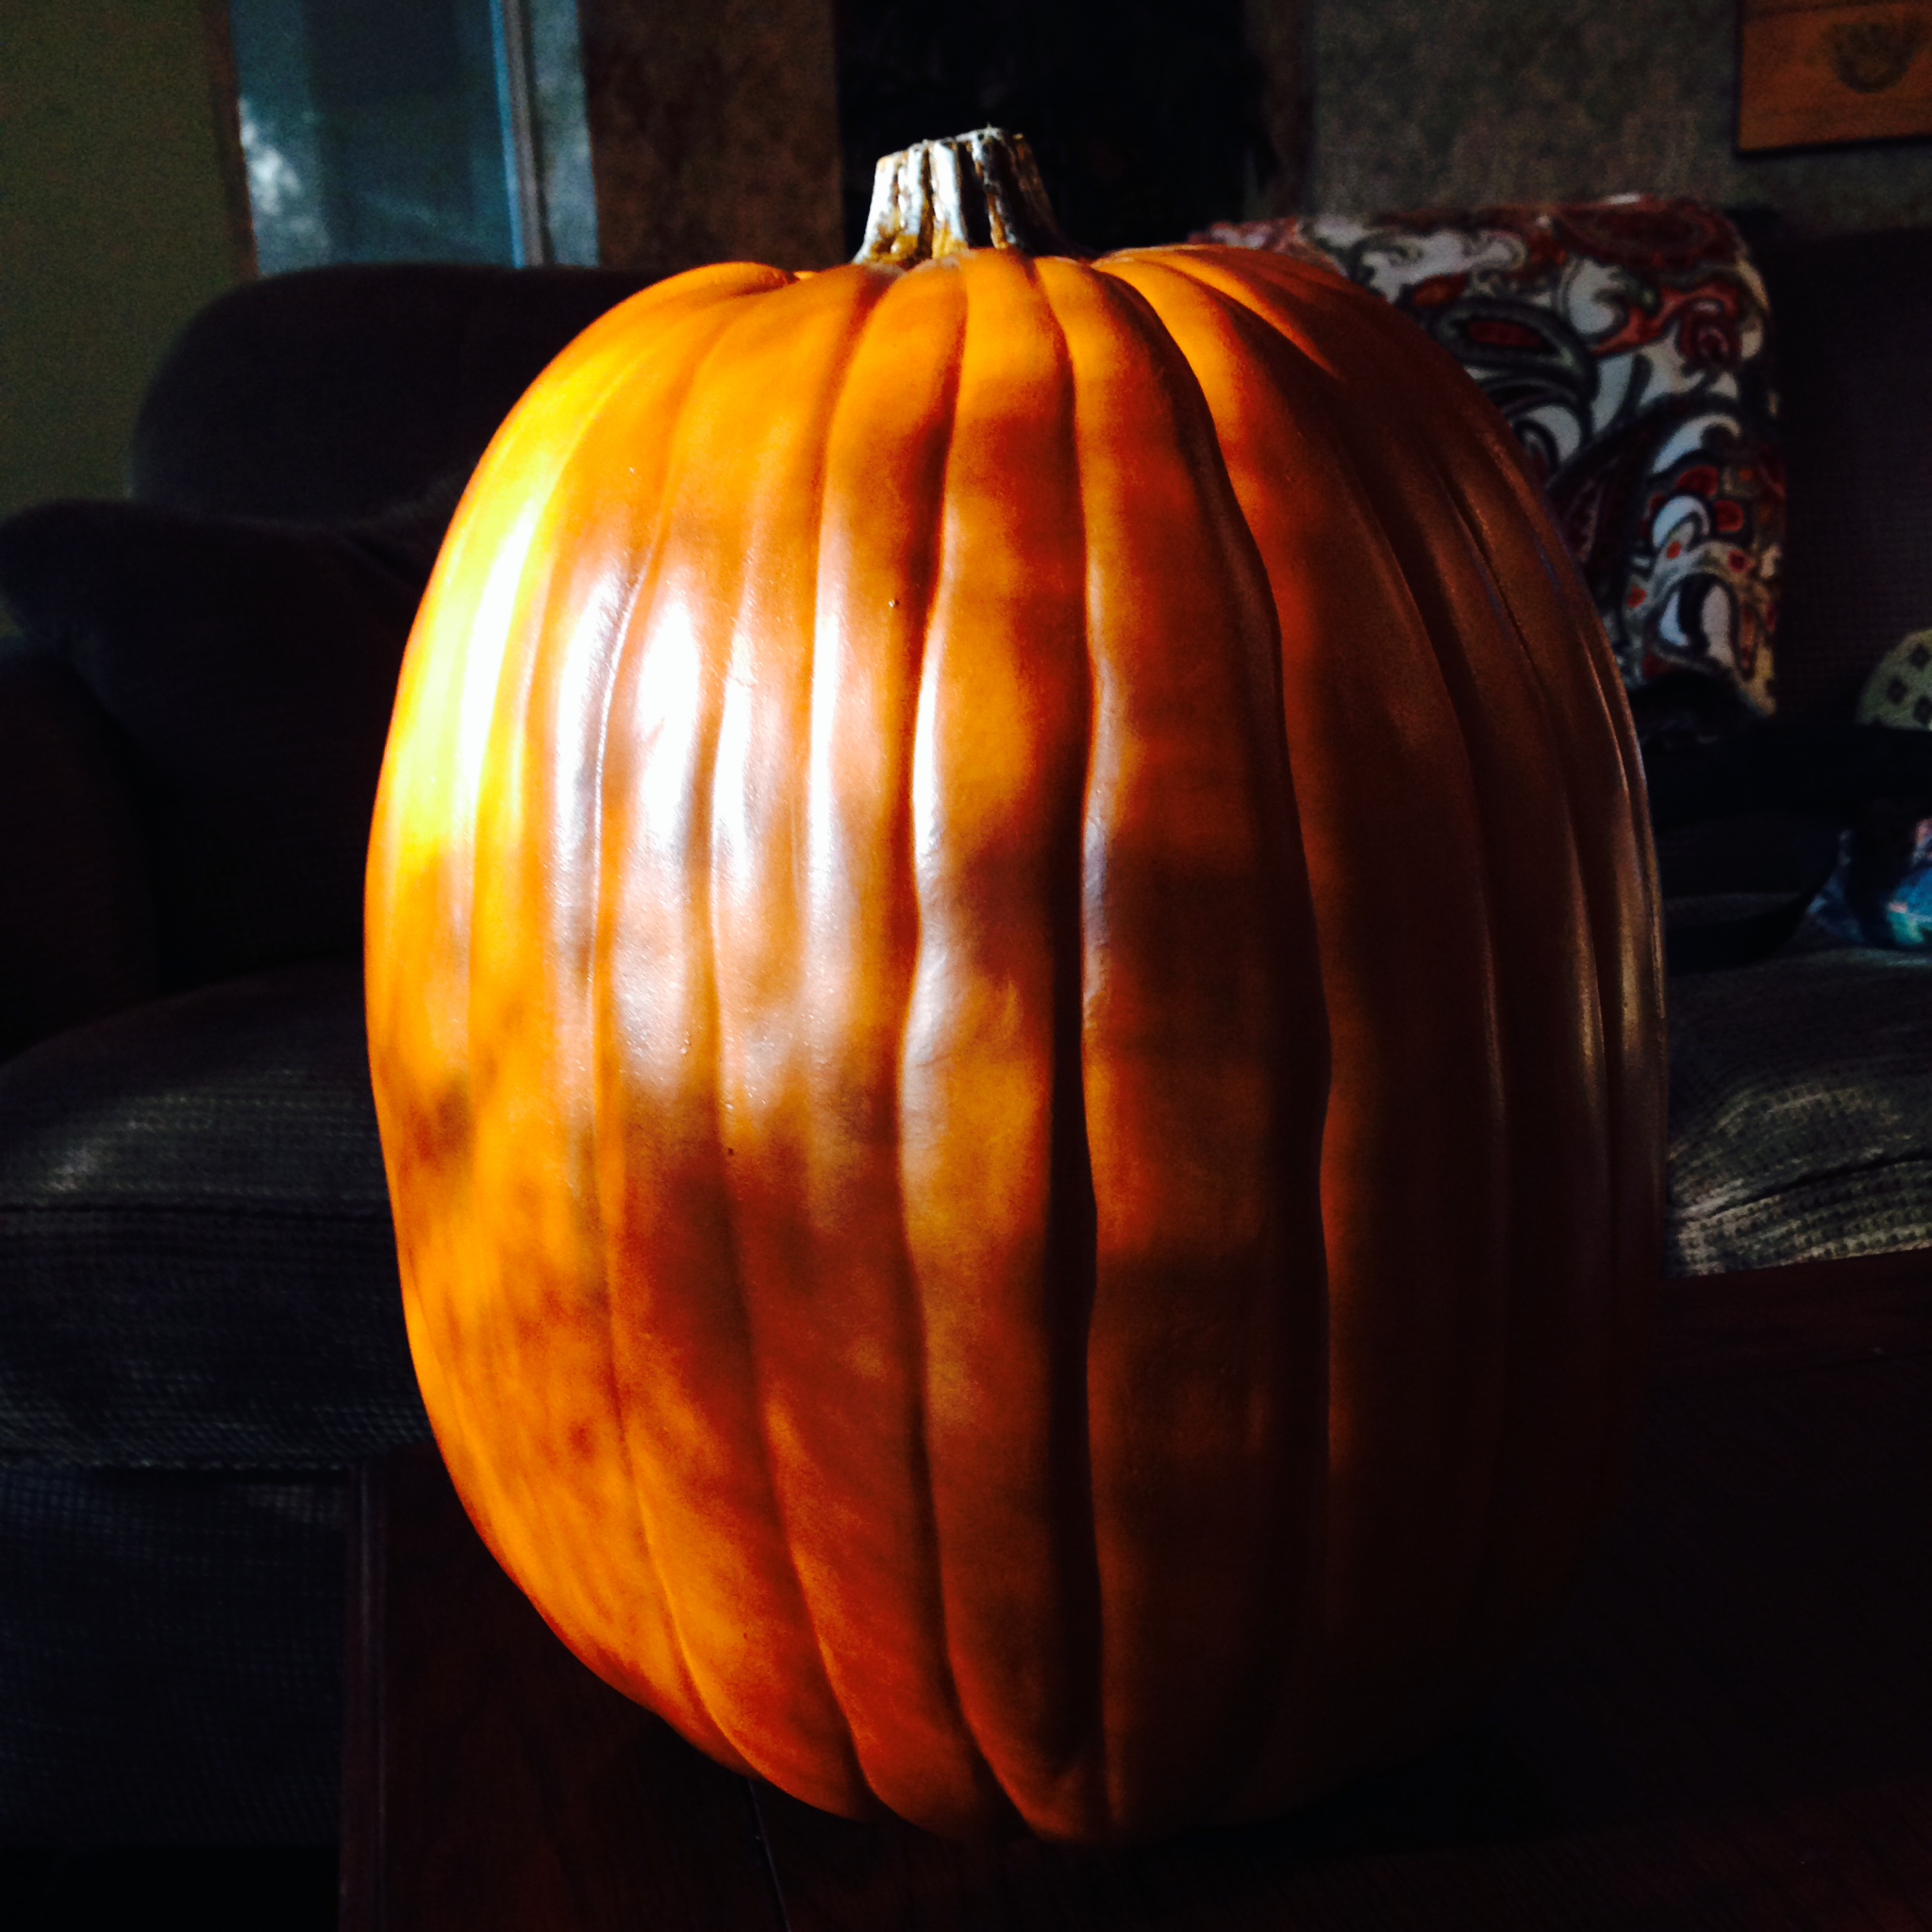
Simple Solutions Diva is busy creating some simple, fall decor videos using pumpkins, both real and artificial. Artificial pumpkins are great for Autumn in the warmer climates – they don’t rot! Look for the videos to be featured this weekend and next!
Now, take a look at the pumpkin in this photo. Can you tell if this pumpkin is real or artificial?
Simple Decor: Indoor Fall Candle Display
Simple Solutions Diva Celebrates Fall
Just a “How-To” teaser to let you know Simple Solutions Diva is celebrating Fall! For the next few Saturdays, we will feature a simple recipe or fun (and easy!) way to decorate for the Fall Season!
By The Way: there is no sound to the video!