Holiday Time means festive décor – including setting the perfect table for the holiday! But don’t spend upwards of $75-$100 per place setting! Check out your local Dollar Tree, THE holiday headquarters for affordable decorations, and get some holiday inspiration! And since everything at Dollar Tree is just $1.00, you can create some beautiful tablescapes without ruining your holiday budget!
Traditional
Traditional Centerpiece Using Dollar Tree Items.
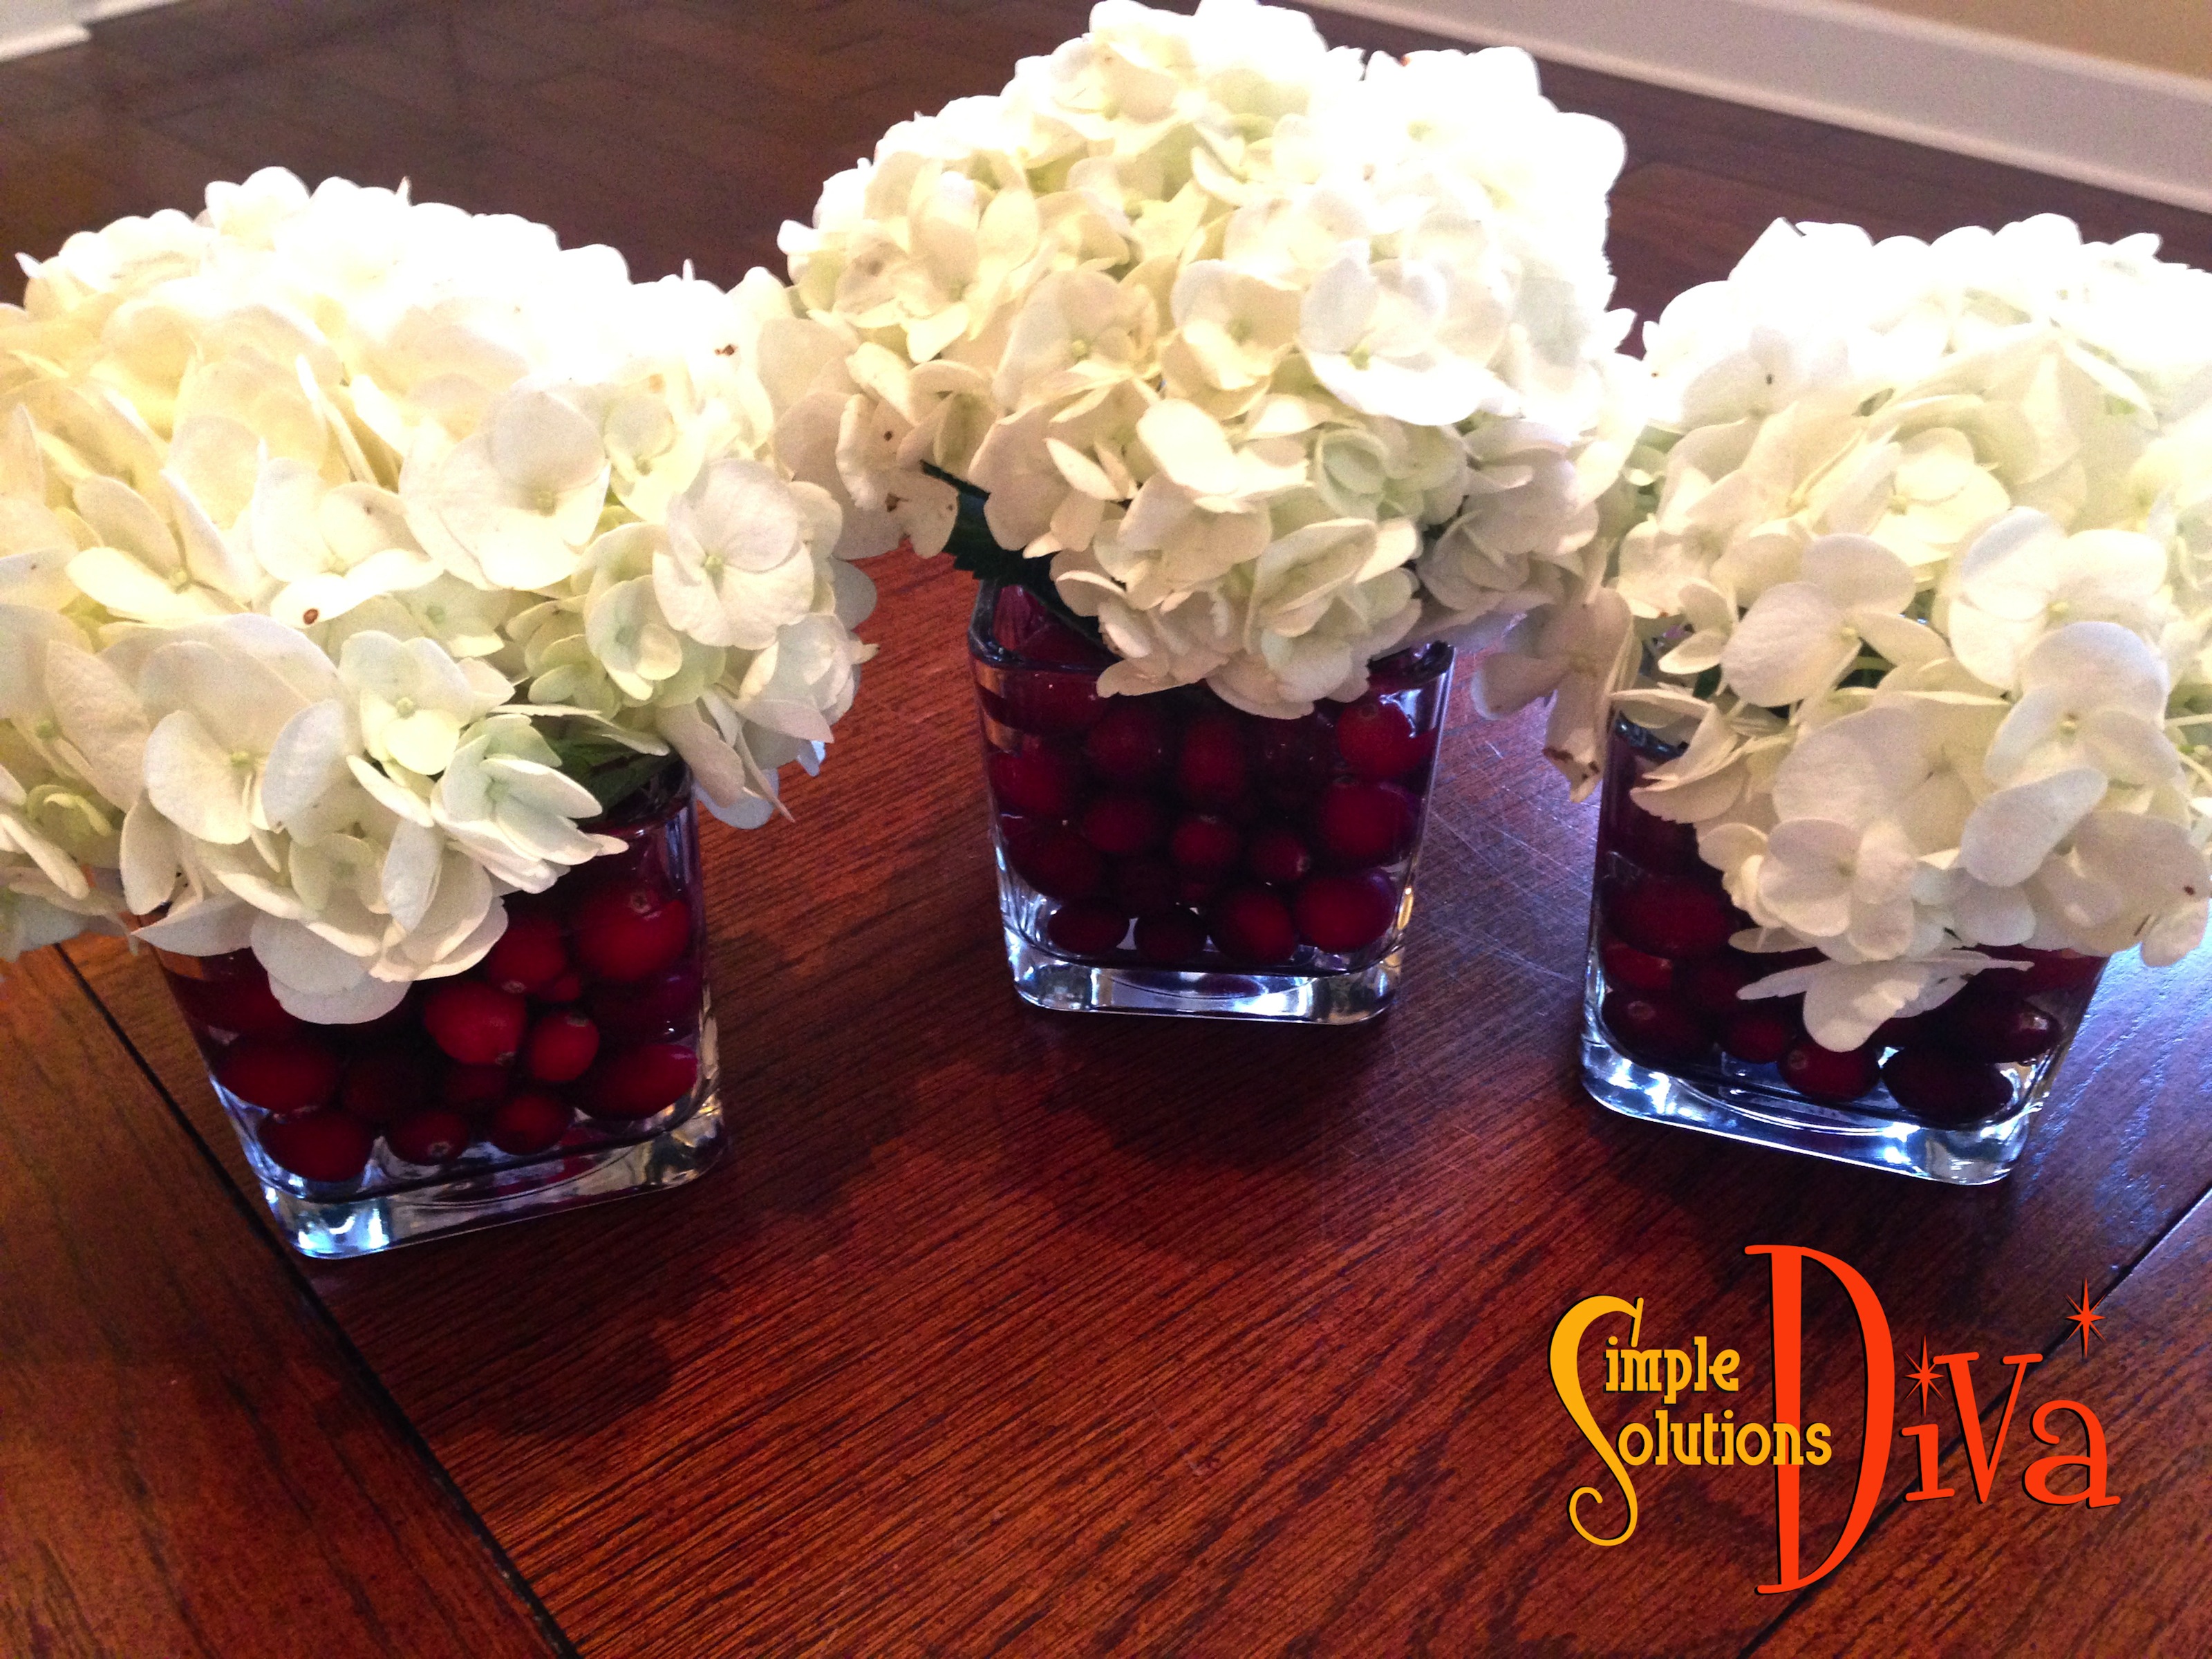
Here is a traditional look using Dollar Tree items, including a gold charger plate, gold-rimmed plate, bowl, coffee cup, and wine glass. Traditional stainless steel flatware and a red table runner finish off the look. Plus I’ve created a simple centerpiece (see below) using three glass candle holders, fresh cranberries and hydrangeas. I’ve used a pinecone ornament as a place card holder. This cost only $15.00 for everything (not including the flowers and cranberries!) from Dollar Tree!
Traditional Centerpiece Using Dollar Tree Glass Candleholders.
Whimsical
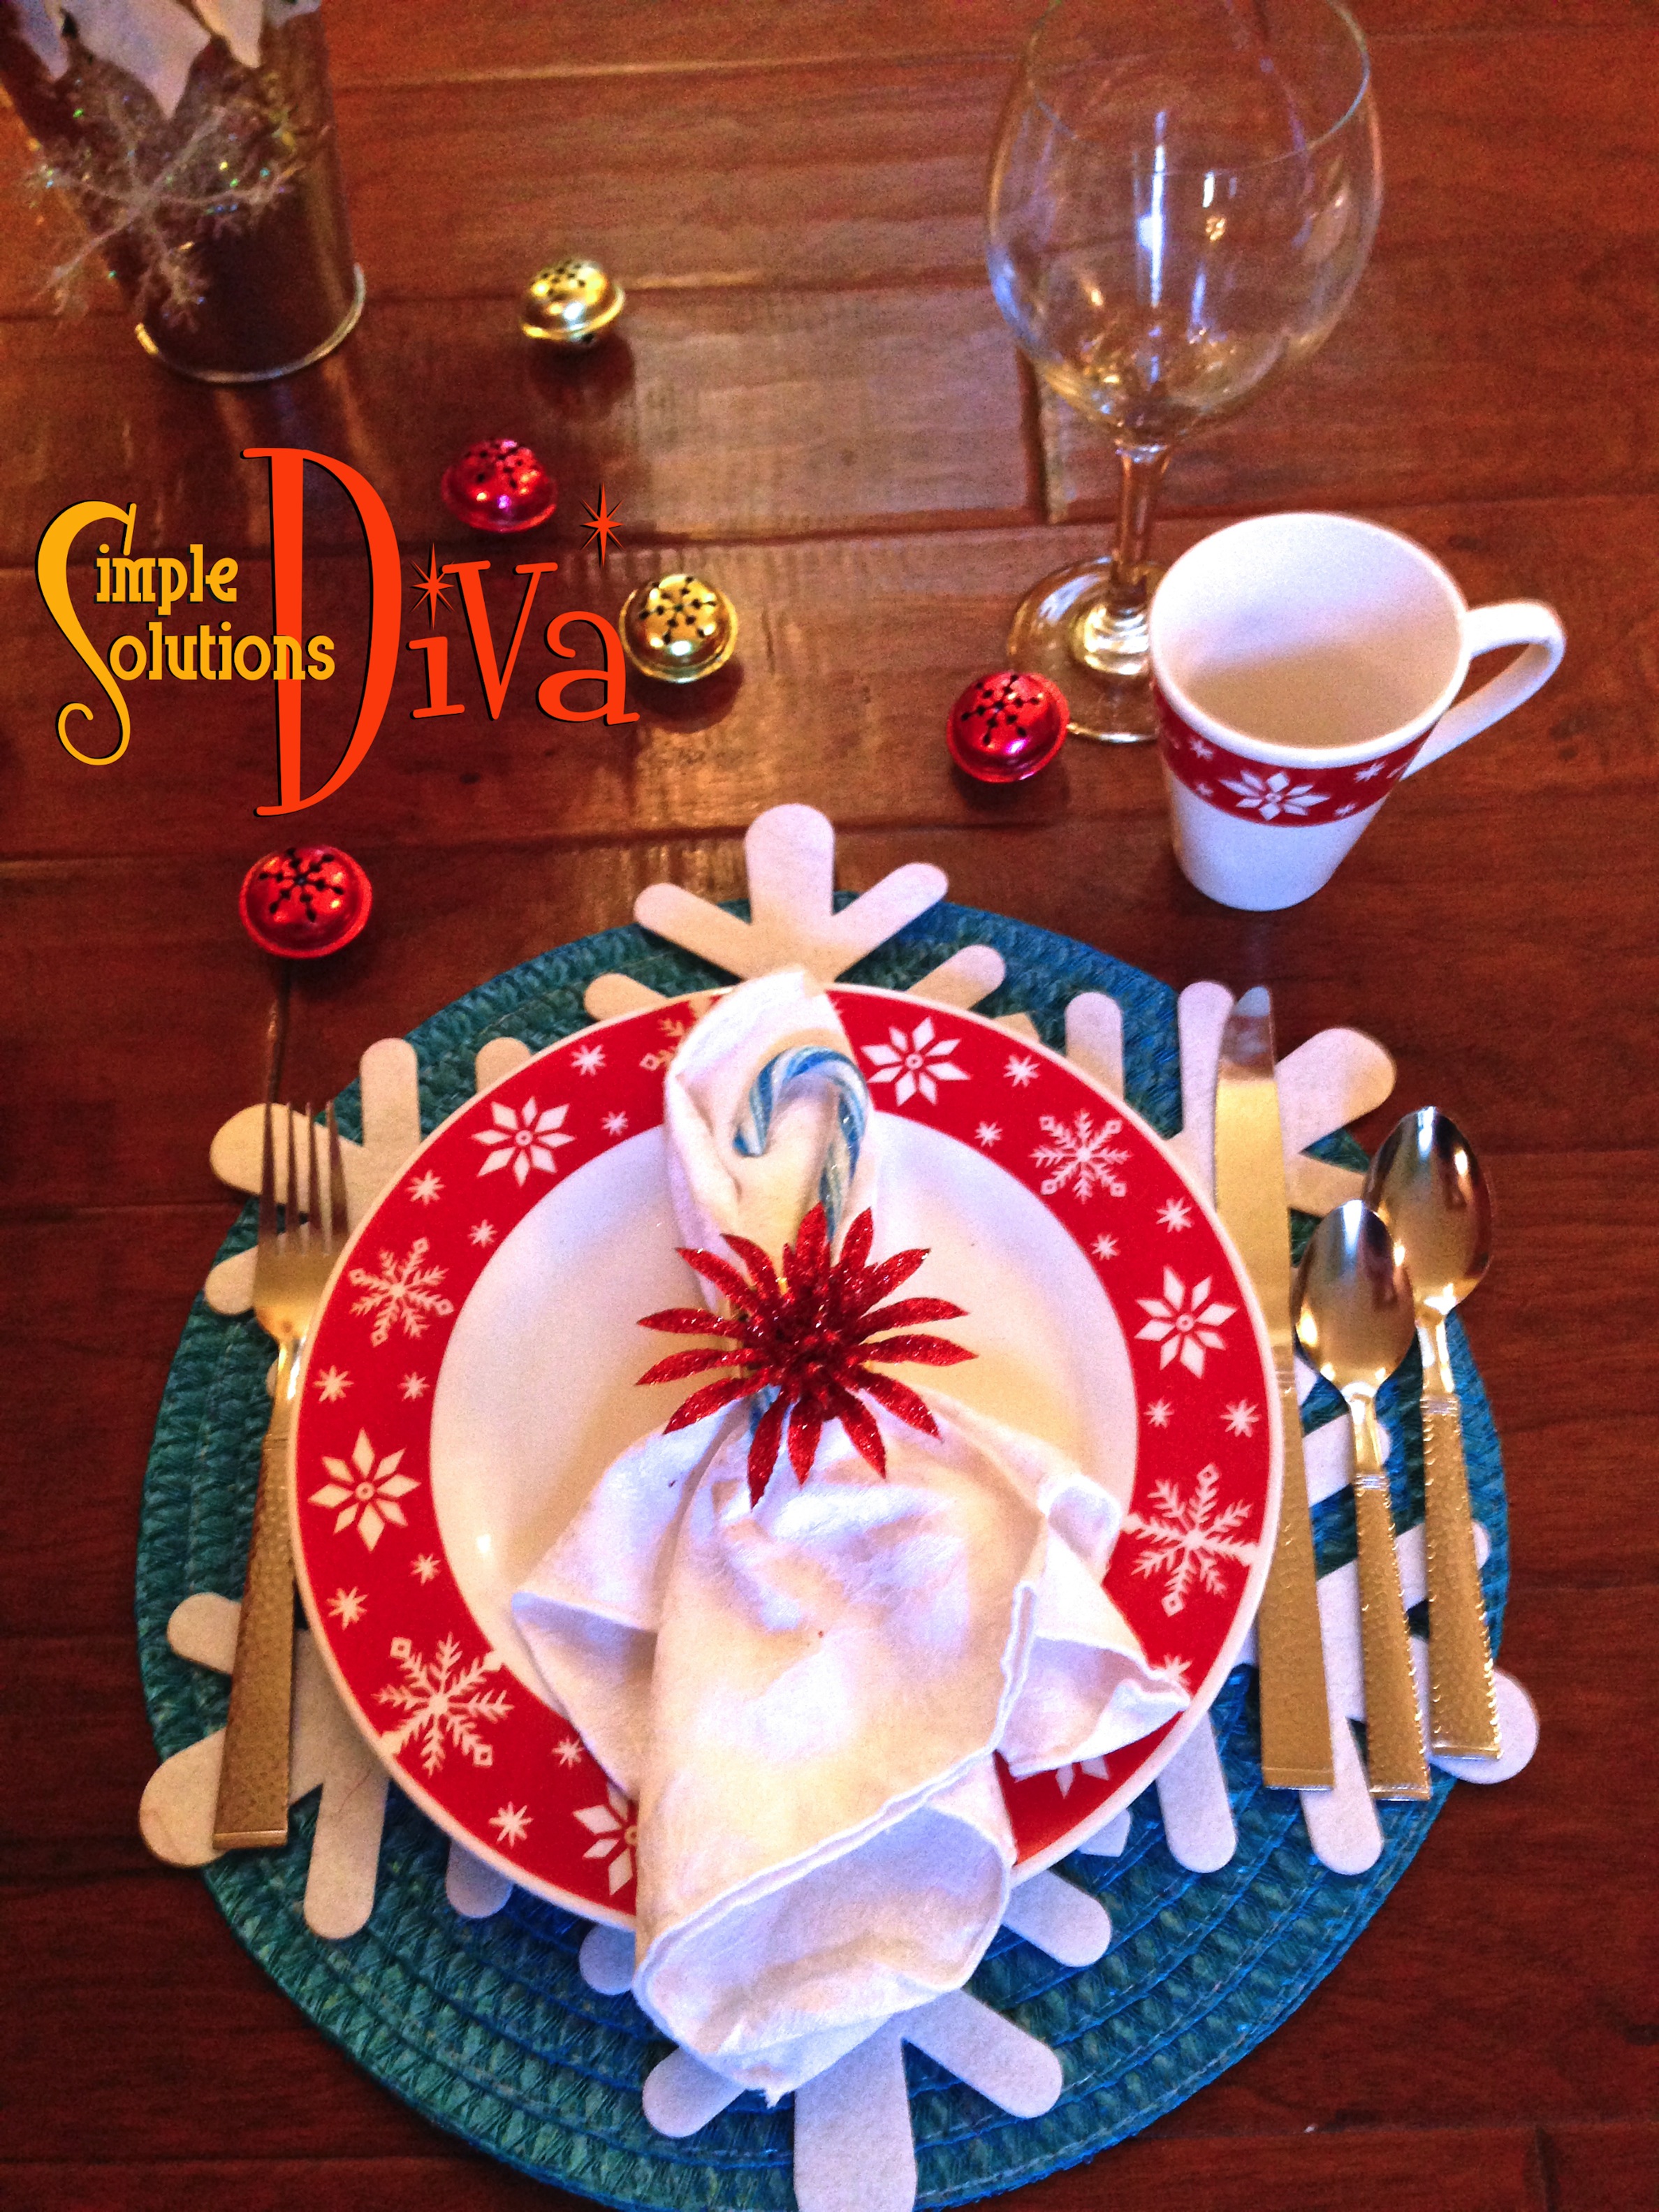
Whimsical Holiday Setting Using Dollar Tree Items.
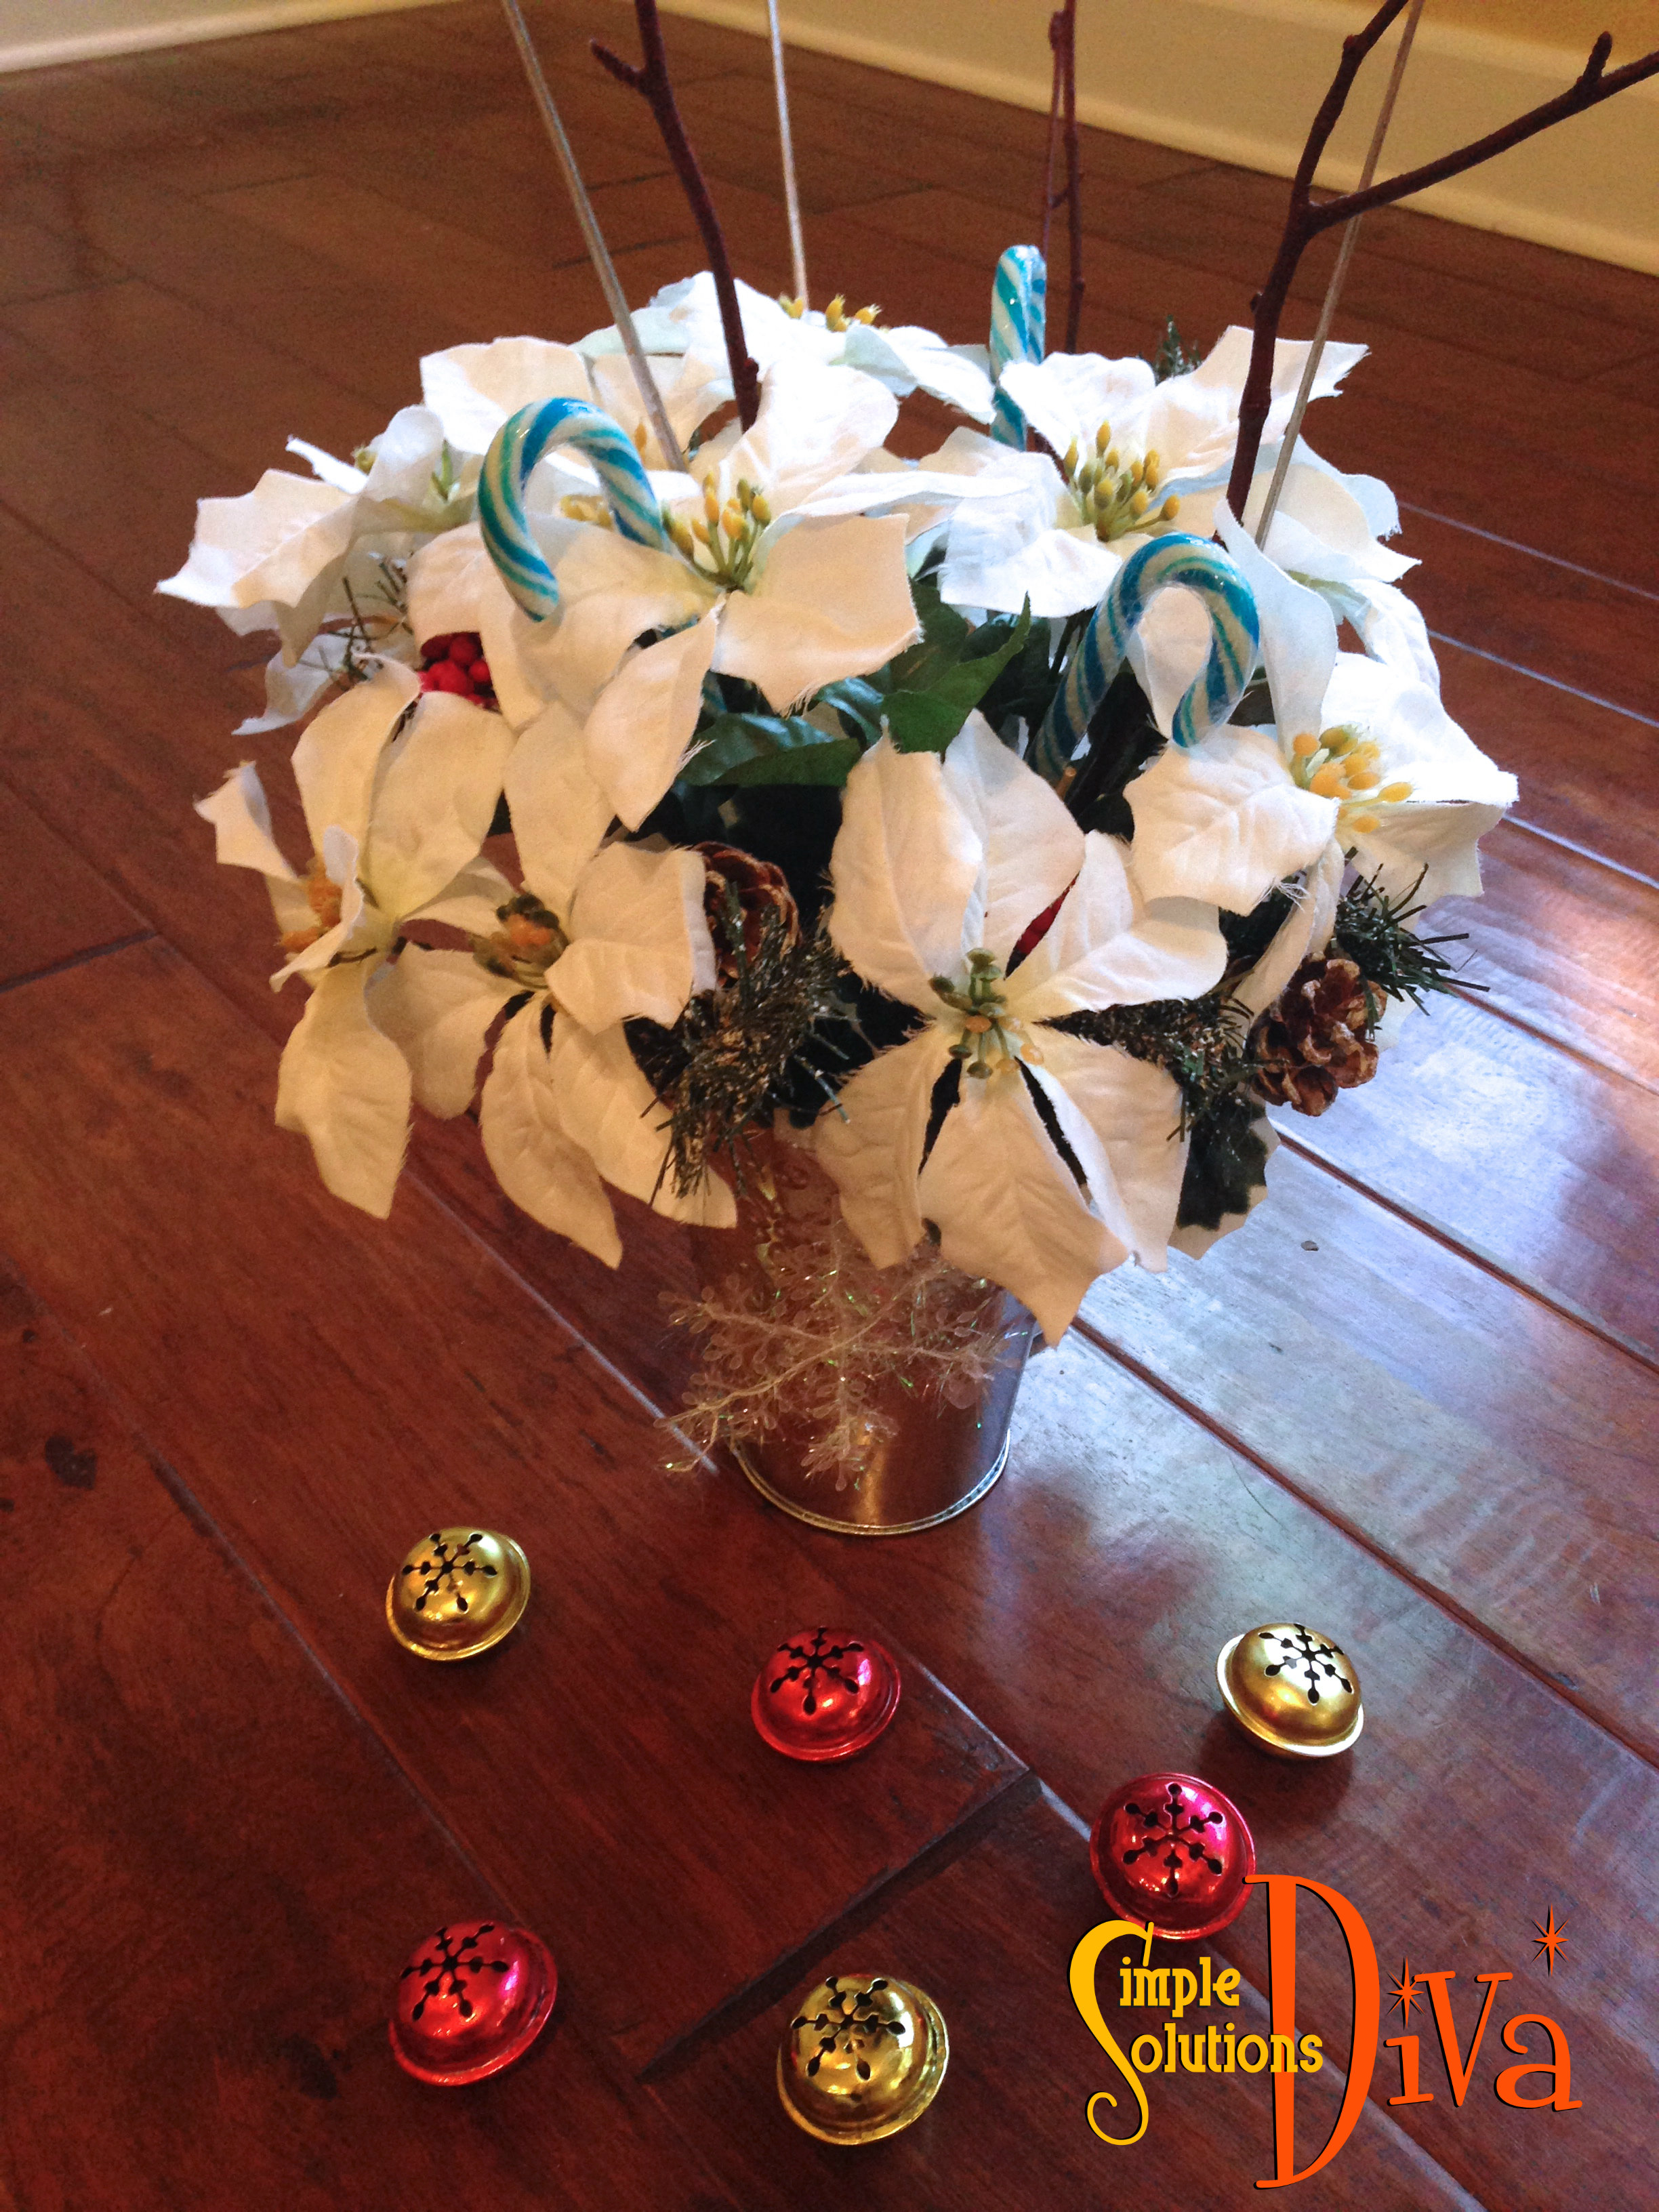
This snowflake setting is so cute! A blue placemat layered with snowflake placemat sets the theme. Add a snowflake plate and matching coffee mug, a simple red wine glass. A funky red floral Christmas clip/decoration creates a napkin ring. Stainless steel flatware with a hammered look completes the festive place setting. In addition, I created the centerpiece (see below) from floral stems, containers, candy canes and holiday ornaments. Including the centerpiece, this cost a total of $24.00.
Whimsical Centerpiece Using Materials All From Dollar Tree!
Contemporary
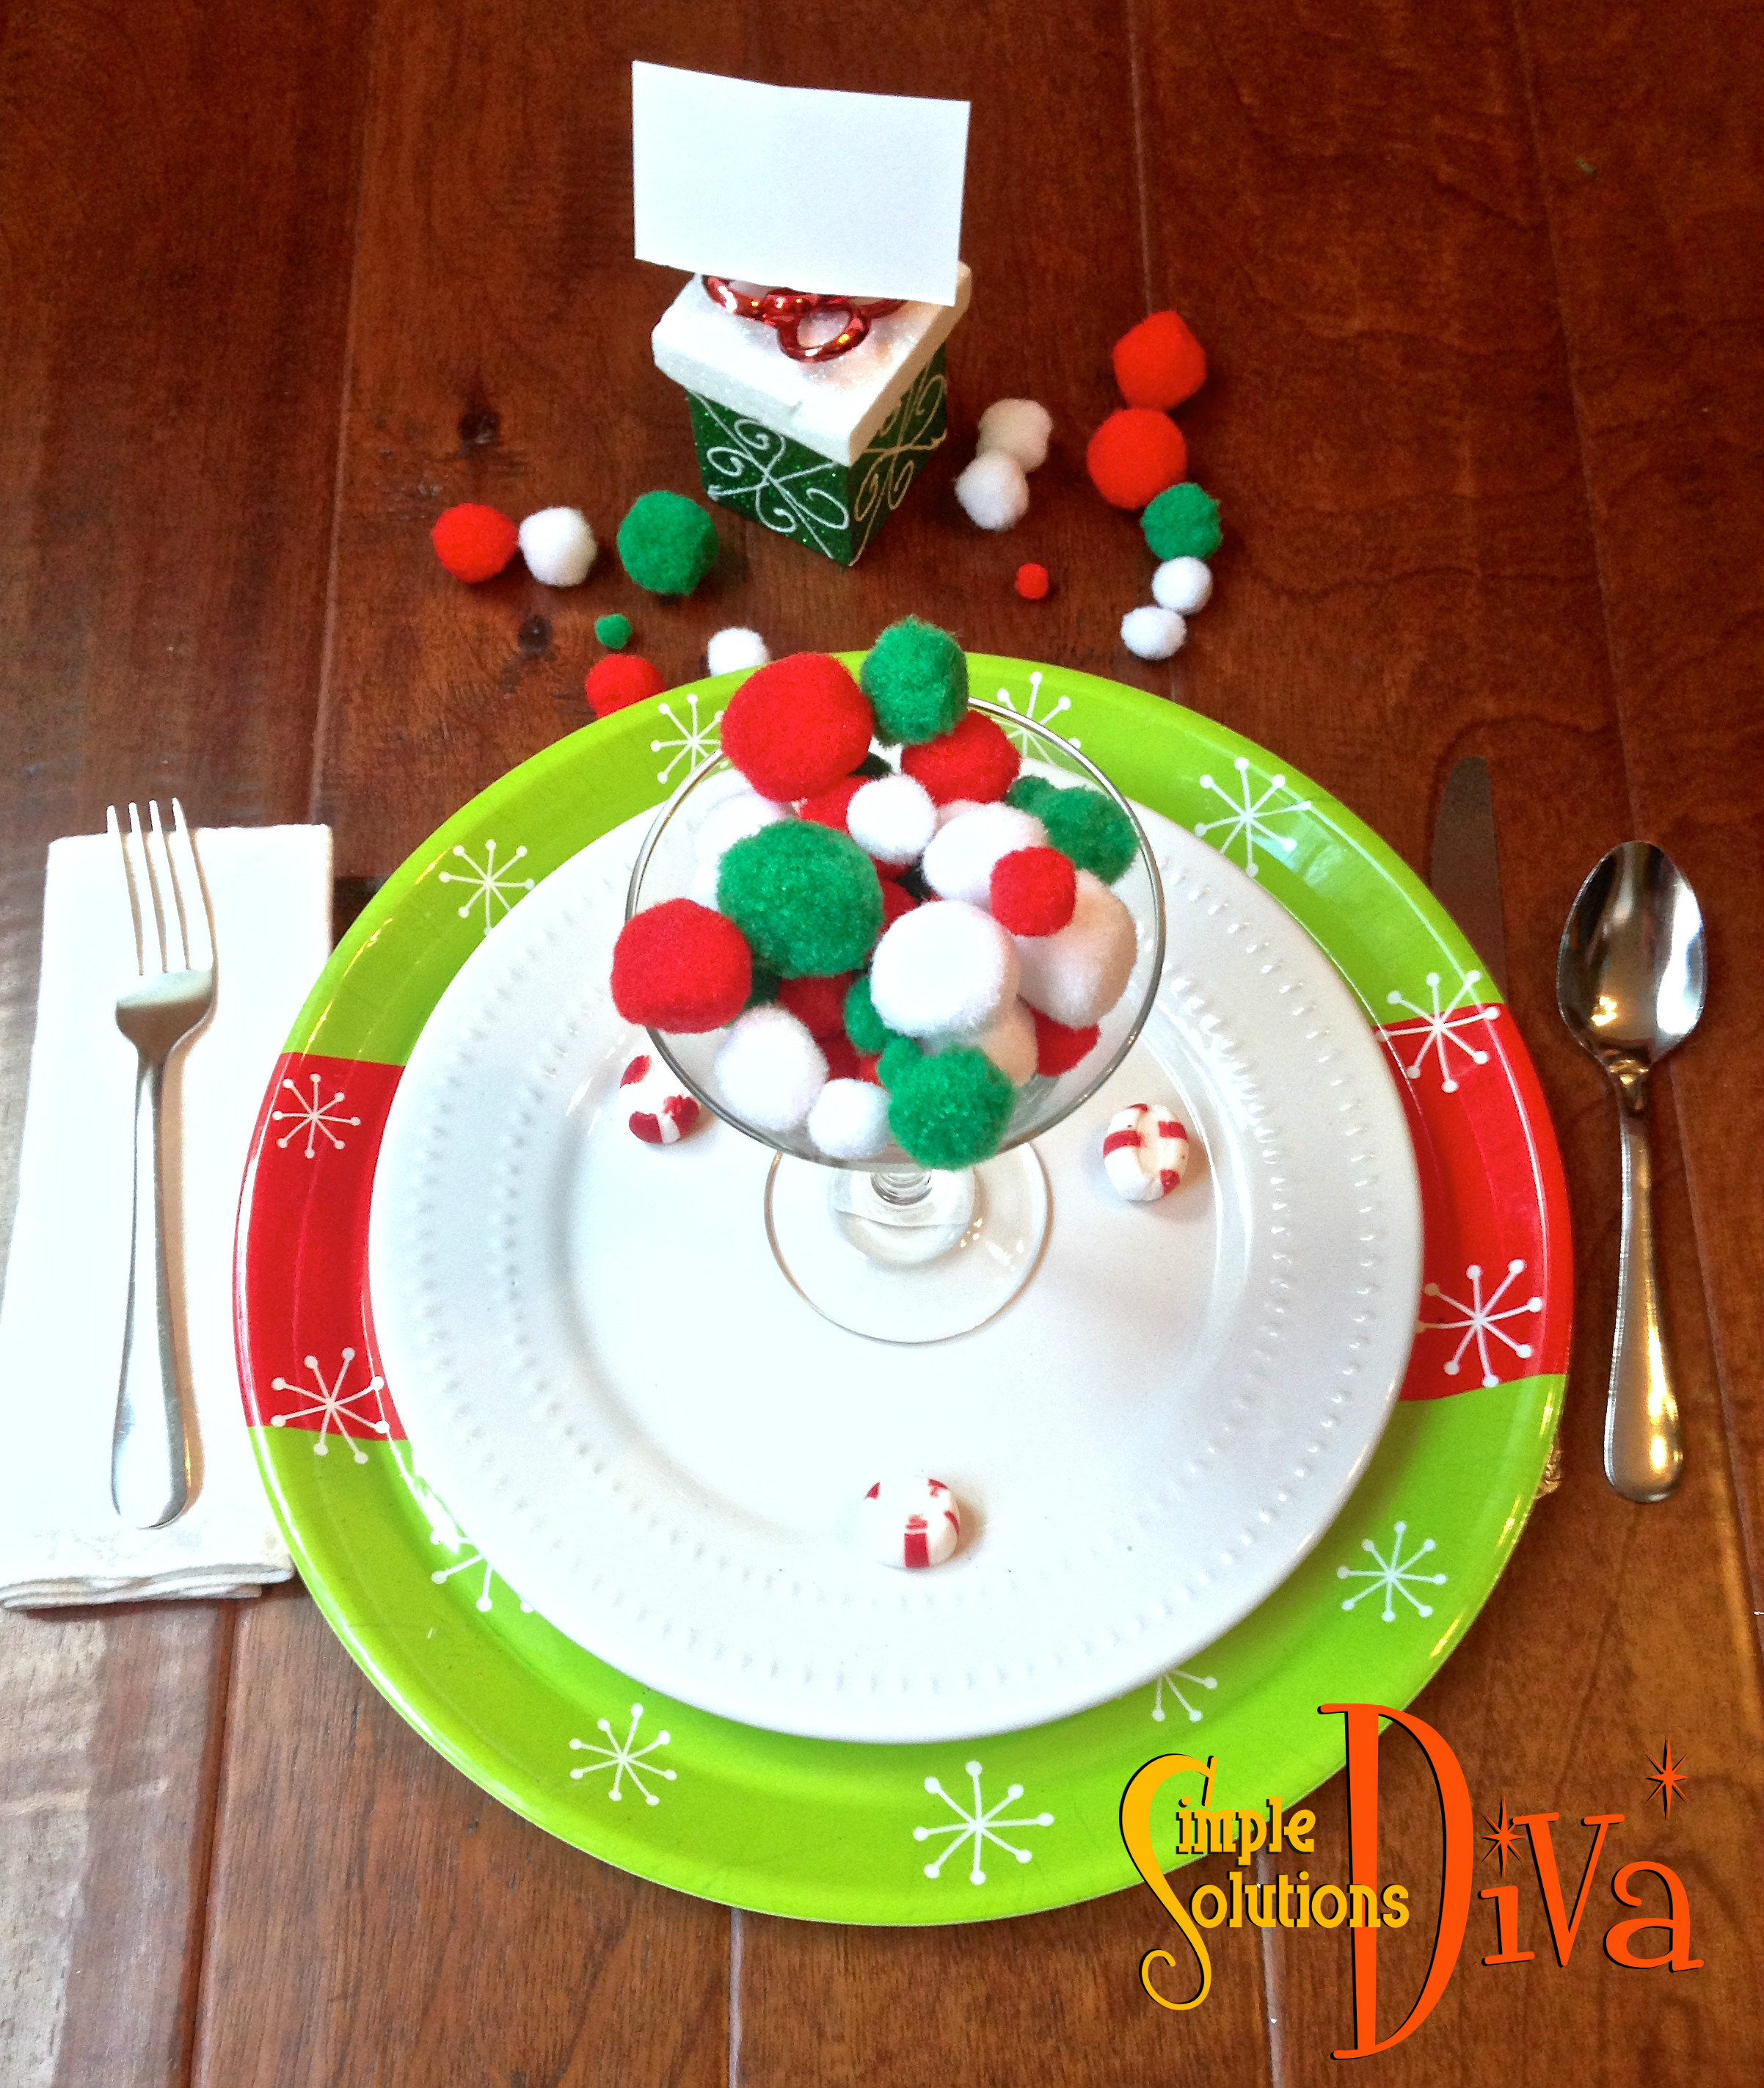
Contemporary Holiday Setting Using Dollar Tree Items.
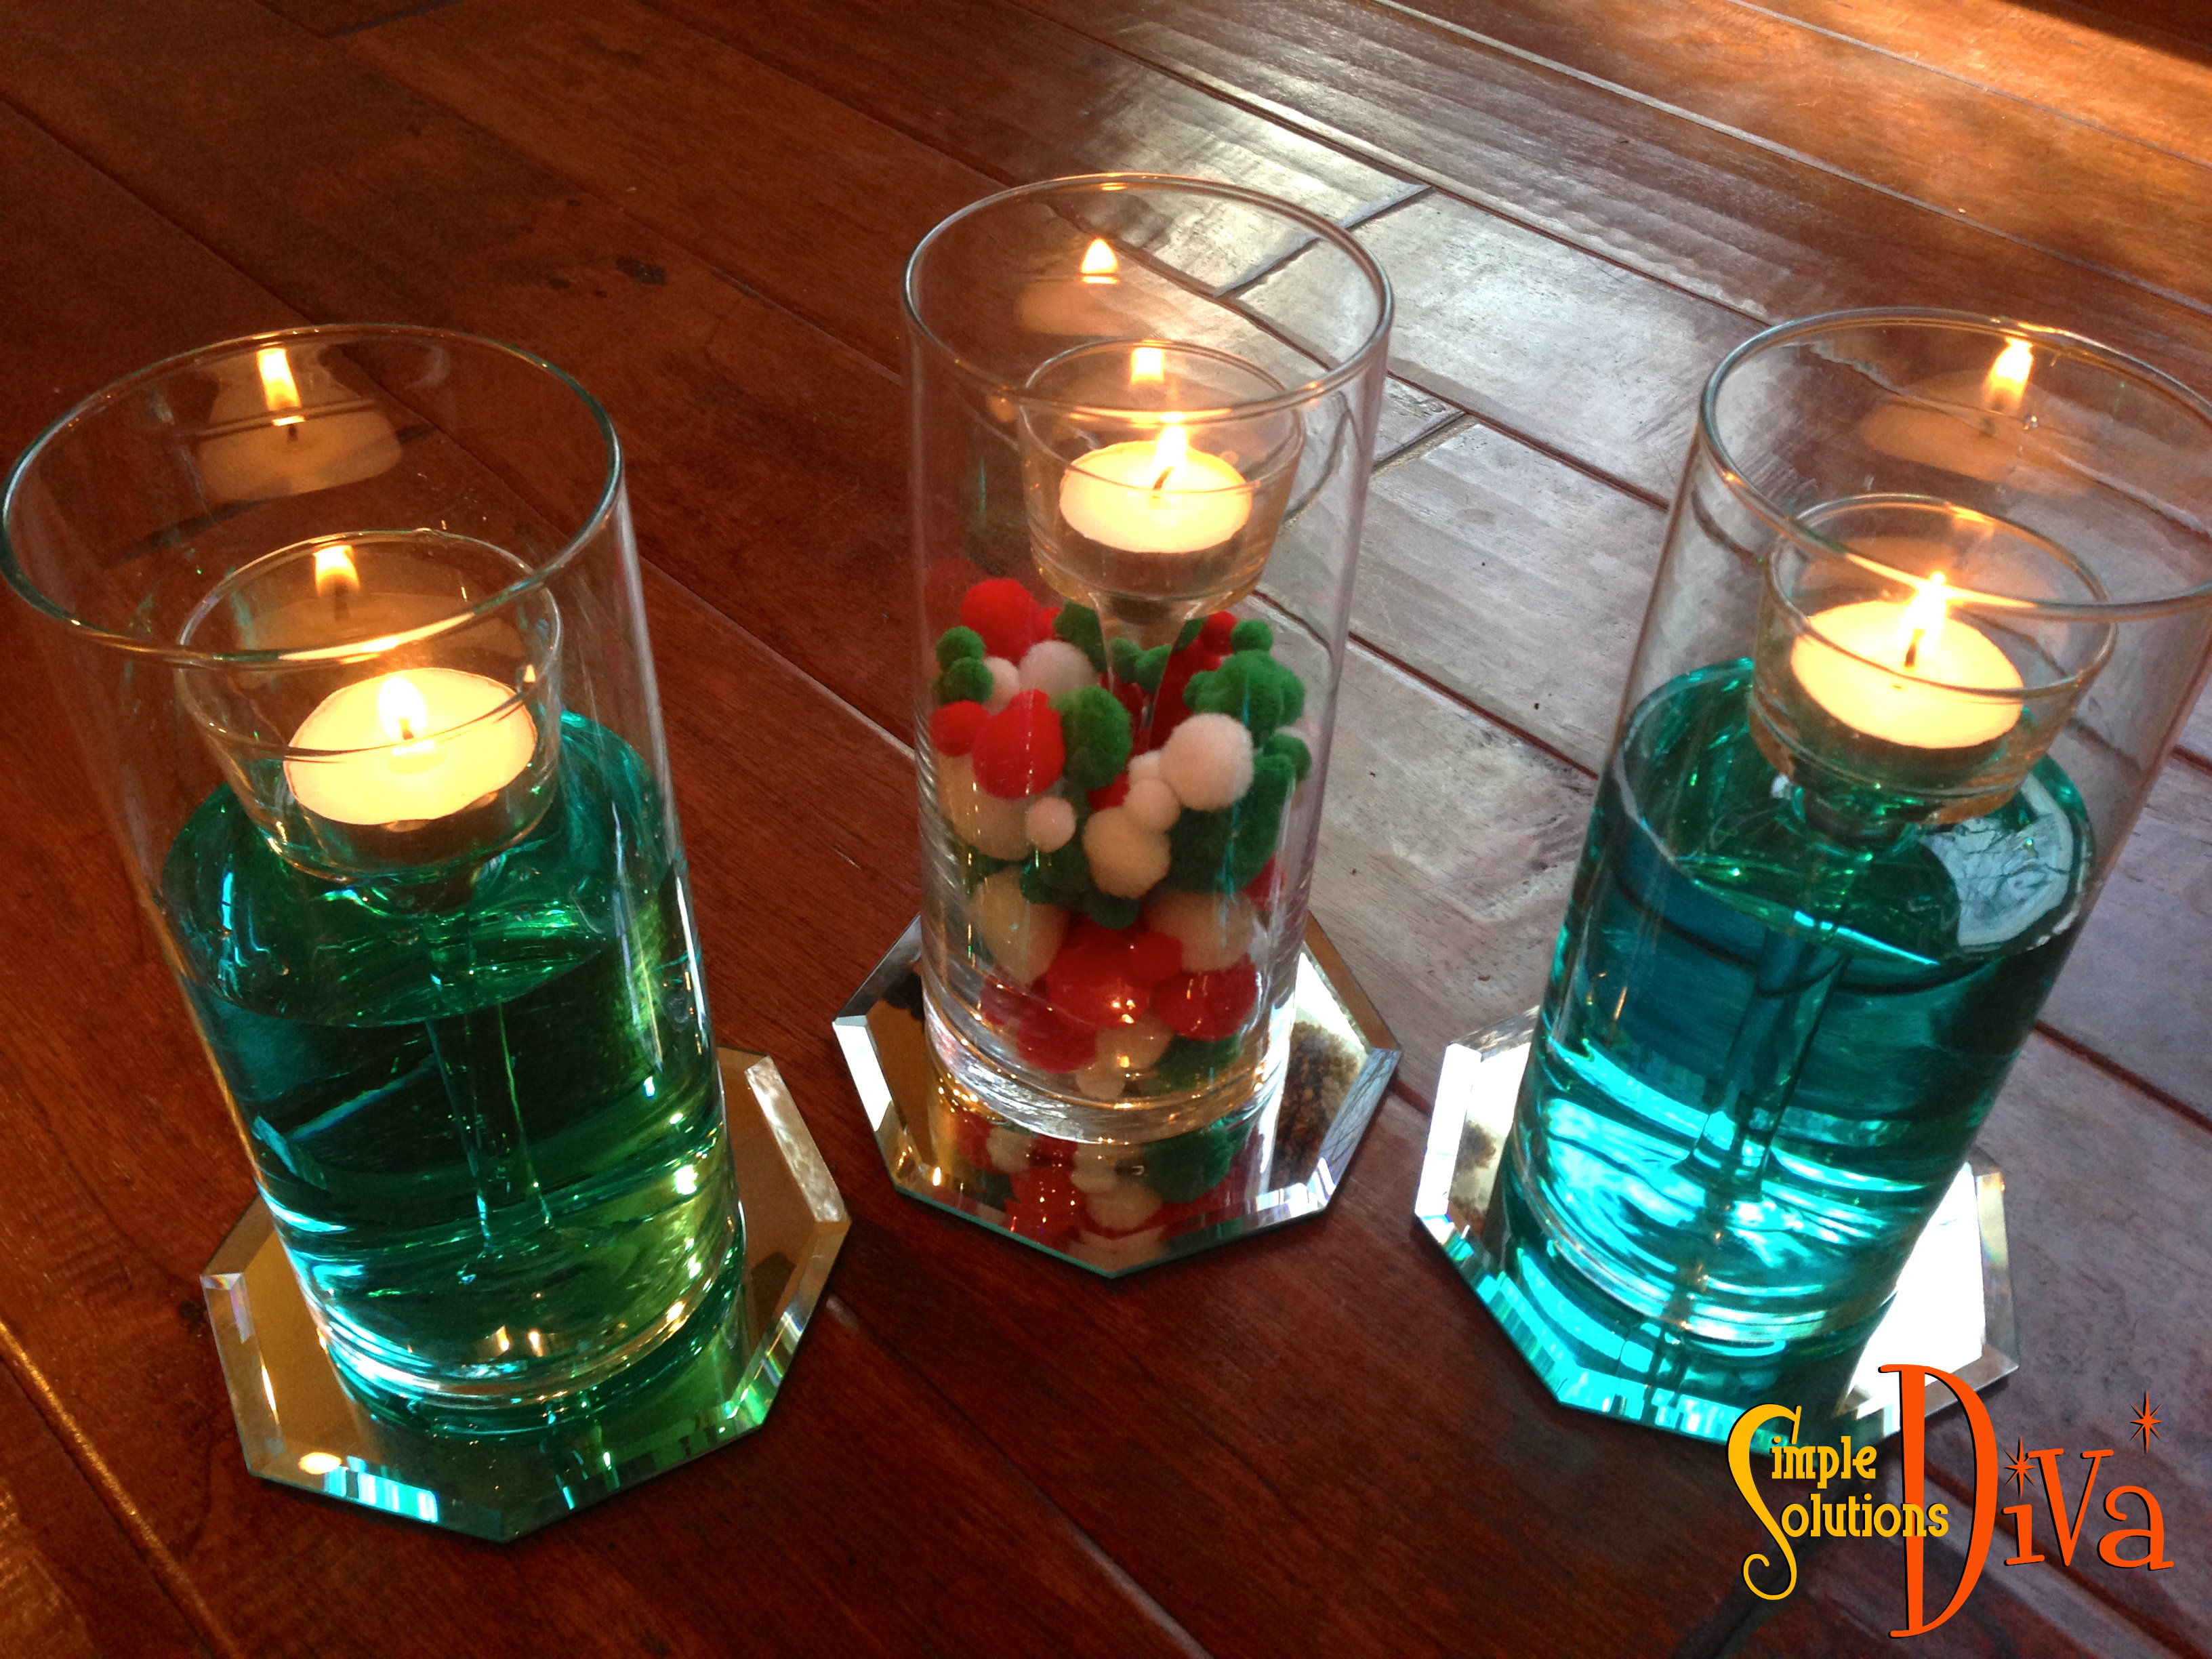
I LOVE this simple contemporary look! I’ve used a cool plastic tray as a charger to create the contemporary look, plus a crisp white plate and sleek stainless steel flatware. I’ve taken the martini glass and filled it with pompoms, plus topped it all off with the cute present place card holder (which is just a Christmas ornament). In addition, I have created a contemporary centerpiece (see below) using glass vases, votive candle holders, more pompoms, and mirrored candle holders. Total cost, including the centerpiece: $21.00.
Contemporary Centerpiece Using Glass Votives, Glass Vases, and Votives From Dollar Tree.
Stepping It Up For Christmas
While I was shopping at Dollar Tree, I overheard one woman say, “Dollar Tree really has stepped up their Christmas selection!” — and they have! They have stockings, plus everything you could want to stuff in those stockings, like candies, toys and more, gift wrap, boxes and bags. Serving pieces and holiday decorations for the home!
With everything in the store just $1.00, Dollar Tree will help keep a little jingle in your wallet this holiday season! Visit ileavehappy.com for more holiday inspiration!
Thank you to Dollar Tree for sponsoring this project, and to WTLV-TV’s First Coast Living for inviting me on to share these Holiday ideas!
Time moves quickly. Like a snowball rolling downhill, time builds momentum – growing in importance each passing second, minute, hour, year. For me, this year is the pivotal year that I need to soak in the love, gratitude and togetherness while I can. Why?
BECAUSE MY 1ST BORN BABY IS GOING OFF TO COLLEGE!
Don’t get me wrong; I am not upset with it, just more amazed that we (the whole family) are at that point in our lives so quickly. It is the march of time AND life, and I am thankful to be able to enjoy every minute of it.
Granted, it feels like I just brought her home from the hospital two weeks ago, and now, we are looking at colleges together, sending her off for her first college semester this summer.
This is CRAZY! How can I be that old? How can SHE be that old?!
I am keenly aware that this is one of the last holiday seasons where we will be assured that our girls will be spending the holidays with us. In a few more years, we will probably have conflicting college schedules, possible plans to go home with roommates (or boyfriends!) for Thanksgiving. Eventually, the reasons for not getting together will be because of new jobs, distance, and – someone get me the tissues – spending holidays with the new in-laws!!
Mid-life crisis aside, I know that this is such a good thing! I’ve done all that I can to give both my girls confidence, courage and a sense of security within themselves, to prepare them for the adventures their lives will bring them. (I will say, secretly I hope they will want to include me in some of their adventures!)
This year at Thanksgiving, I will soak it in. I am thankful that my family is whole, together, and enjoying life. Yes, I am very thankful this year. Though I can’t stop the snowball of time from rolling, I WILL jump on top of it, dig in my hands and feet to hold on, and enjoy the ride all the way.
May you have a wonderful Thanksgiving with those most important to you! And if you can’t be with them, enjoy those you are with!
Simple Solutions Diva & Family Just ignore the tight grip she & her husband have on the girls!
Welcome to the FIRST Simple Holiday Survival Tip for 2014! For the next six weeks, I will feature a tip that will save you time during the holiday season!
Thanksgiving is right around the corner, and for many of us, that means pulling out the good china and silverware to set the table. I can pretty much count on my silverware being tarnished – and I really don’t enjoy cleaning silverware. I thought there had to be a better way,
WELL, I could not believe how easy this tip was until I tried it myself! And check out the before and after:
It’s that time of year again! The third year of the series, Simple Holiday Survival! Every Saturday for the next six weeks, I will feature a video tip that is sure to make your holidays a little easier!
You can also search our database for all of our past Simple Holiday Survival Tips by searching that word in our search bar, or just by clicking the link below!
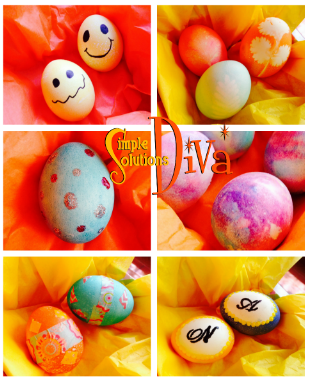
I was so excited when First Coast Living gave me a challenge – find some unique ways to decorate Easter Eggs! Well, after searching high and low, I found some favorites and tested them just for you!
Volcano Eggs
Volcano Eggs
This is a cool technique and great fun to do with the kids! And it yields a beautiful egg coloring. The best part about this technique? It looks like a volcano bubbling a rainbow! I found this technique on the website ToddlerApproved.com. Check out the website for great ideas!
What You Need:
Hard boiled eggs
Food coloring
Baking soda
Vinegar
Wide-lipped plate or bowl
Paint Brushes
Color-safe cups for mixing “paint”
Technique:
Make the “Paint” – Combine in a color- safe cup, one tablespoon baking soda, a teaspoon or two of water and food coloring of choice. Mix until it is a consistency of mustard – kind of grainy but with some heft to it.
Repeat that process with the other colors you choose to use.
Take a paintbrush and start to paint your eggs with the different “paint” colors – there is no perfect way to do this, just have fun and be creative. Make sure to leave a “blob” or two of the paint on the egg.
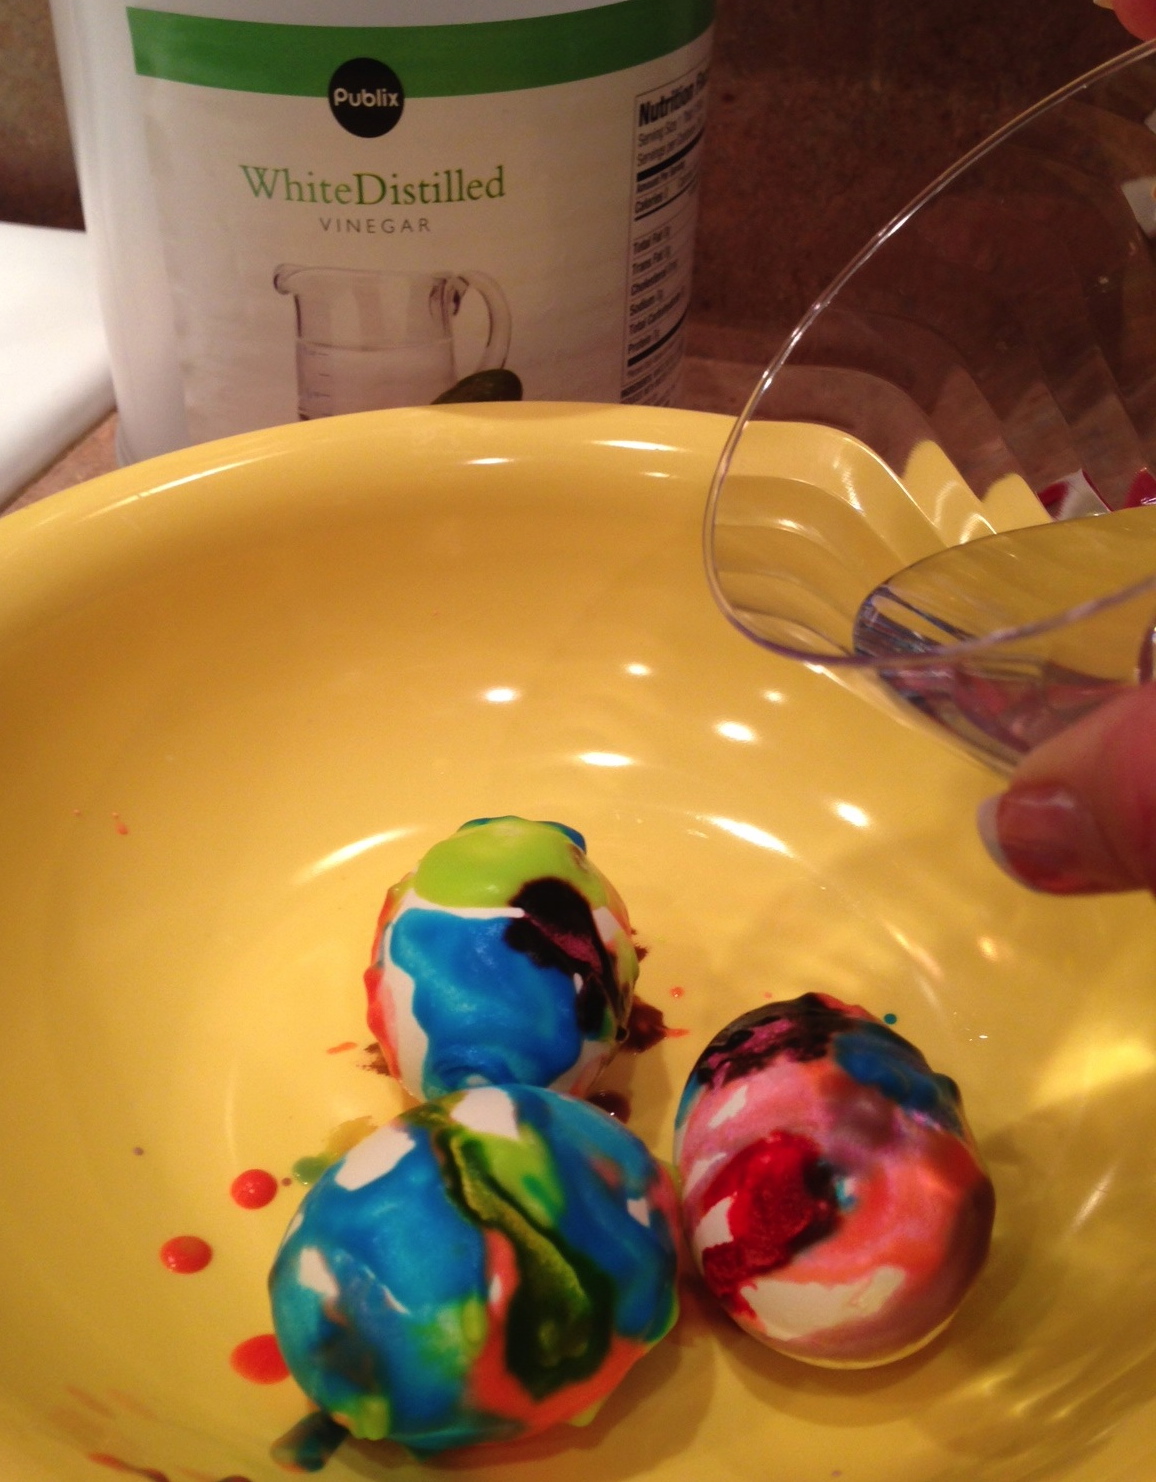
Pouring Vinegar on Volcano Eggs.
Place the painted eggs into the wide-lipped plate or bowl. Take your food coloring and drip a drop or two on your eggs.
Now comes the volcano part: Drizzle vinegar over your eggs and watch the colors start to bubble! Let the mixture sit on the eggs for awhile, then wipe off with paper towel!
Leaf Print Eggs
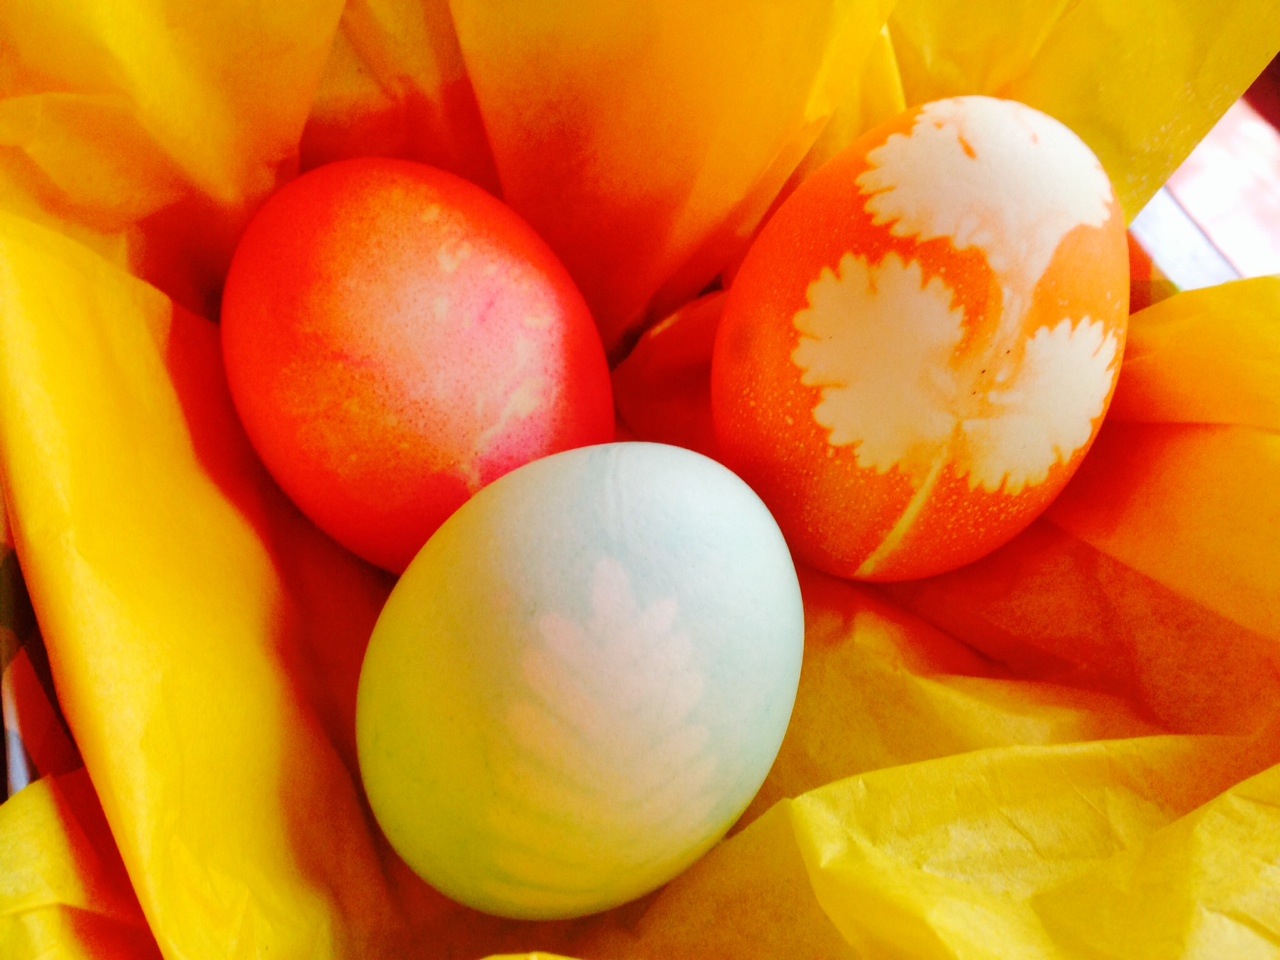
Leaf Print Easter Eggs
I love incorporating natural elements into projects if I can. I found this beautiful idea, Leaf Print Eggs, on Spoonful.com and thought I’d give it a try! Since I AM the Simple Solutions Diva, I wanted to simplify the process, so I just used the PAAS Egg Decorating Kit to dye the eggs, rather than mix up my own dyes as listed on Spoonful (click on the link above to see their full instructions!).
What You Need:
Hard Boiled Eggs
PAAS Egg Decorating Kit
Various leaves with interesting shapes – I used Cilantro, a fern and a small squash leaf. (Don’t recommend “woody” types like rosemary)
Cups to mix up the dyes
Rubber bands
Sheer knee high hosiery (nylons), cut into 3 inch strips
Color-safe place to dry the eggs
Instructions:
Mix up your dyes according to the PAAS package, using the instructions for more vivid colors (using vinegar).
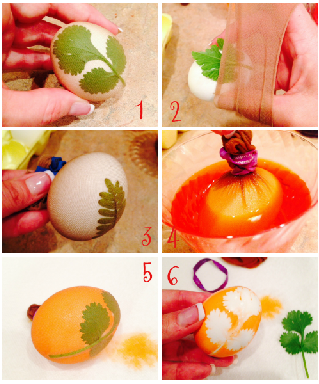
1.) Take the egg and position your leaf on your egg. 2.) Using the piece of knee high, wrap your egg so the leaf is secure and tight against the egg. 3.) Pull the excess nylon tight on the opposite side of the egg, securing with a rubber band.
4.) Place the egg in the dye and allow to sit until the egg has reached the color intensity you want.
5.) Remove the egg from the dye and place on color safe surface. 6.) Remove rubber band and nylon and gently remove the leaf from the egg. Allow to dry.
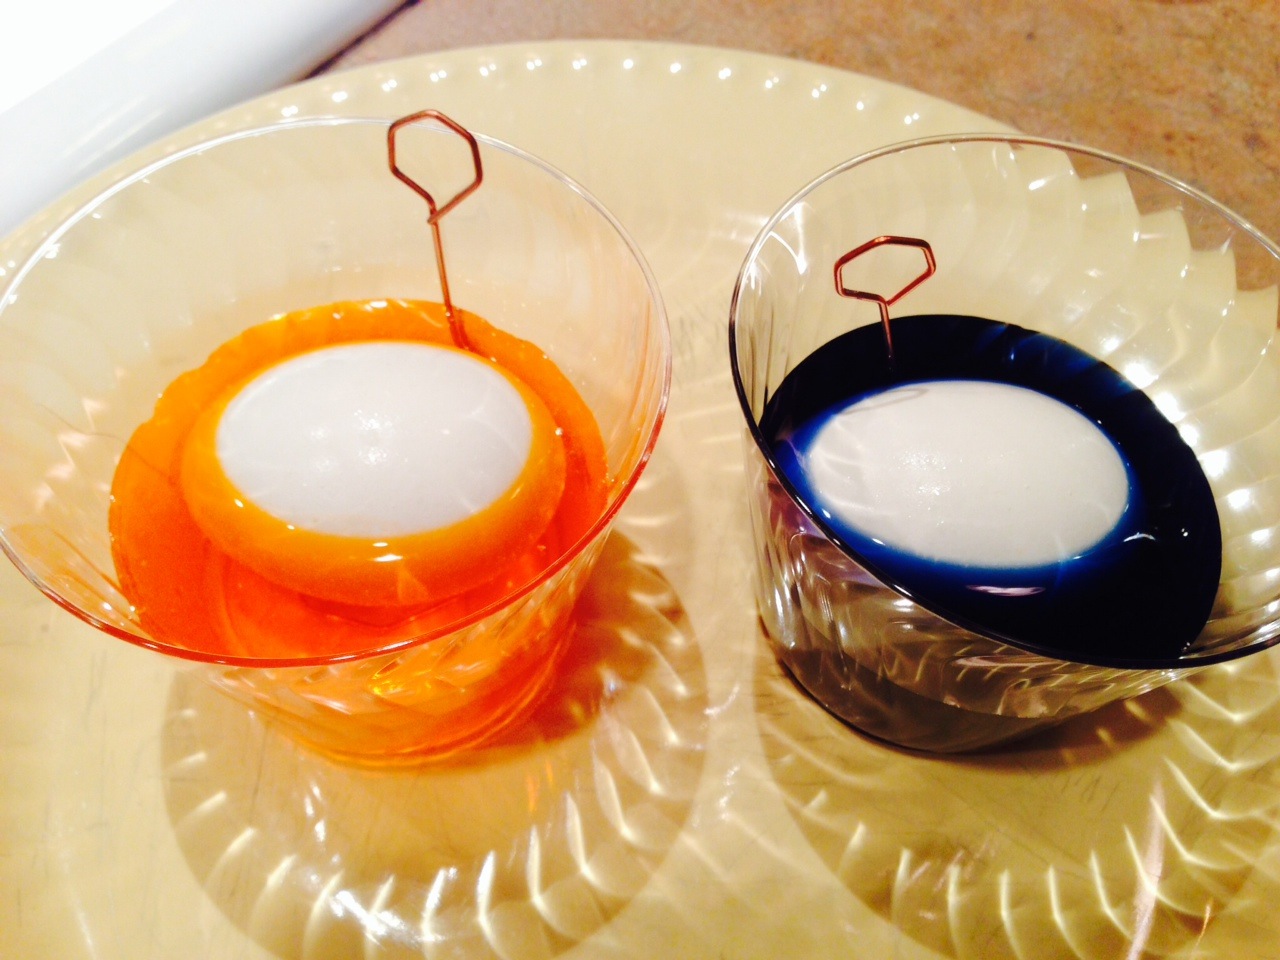
Initial Eggs
Initial Easter Eggs
These make for cute placeholders for the Easter table, or for limiting how many each child gets during the Easter Egg Hunt (They look for their name or initial!). This cute idea is from Reader’s Digest!
What You Need:
Hard Boiled Eggs
PAAS Egg Decorating Kit with dyes
Cups for mixing dyes
Acrylic Paint
Small Paintbrush
Black Sharpie
Instructions:
Mix up your egg dyes according to package, using the vivid instructions (includes using vinegar).
Place an egg sideways in a cup and gently pour the dye of choice until you have an oval of white showing (don’t cover the entire egg with dye-See photo below). Let egg sit, without disturbing, in dye until it reaches the desired color. Remove egg from dye and allow to dry.
Once dry, take acrylic paint and, using paintbrush, draw dots around the edge of the oval. Allow to dry.
Once dry, draw an initial or a name in center of oval, using the black sharpie. Allow to completely dry.
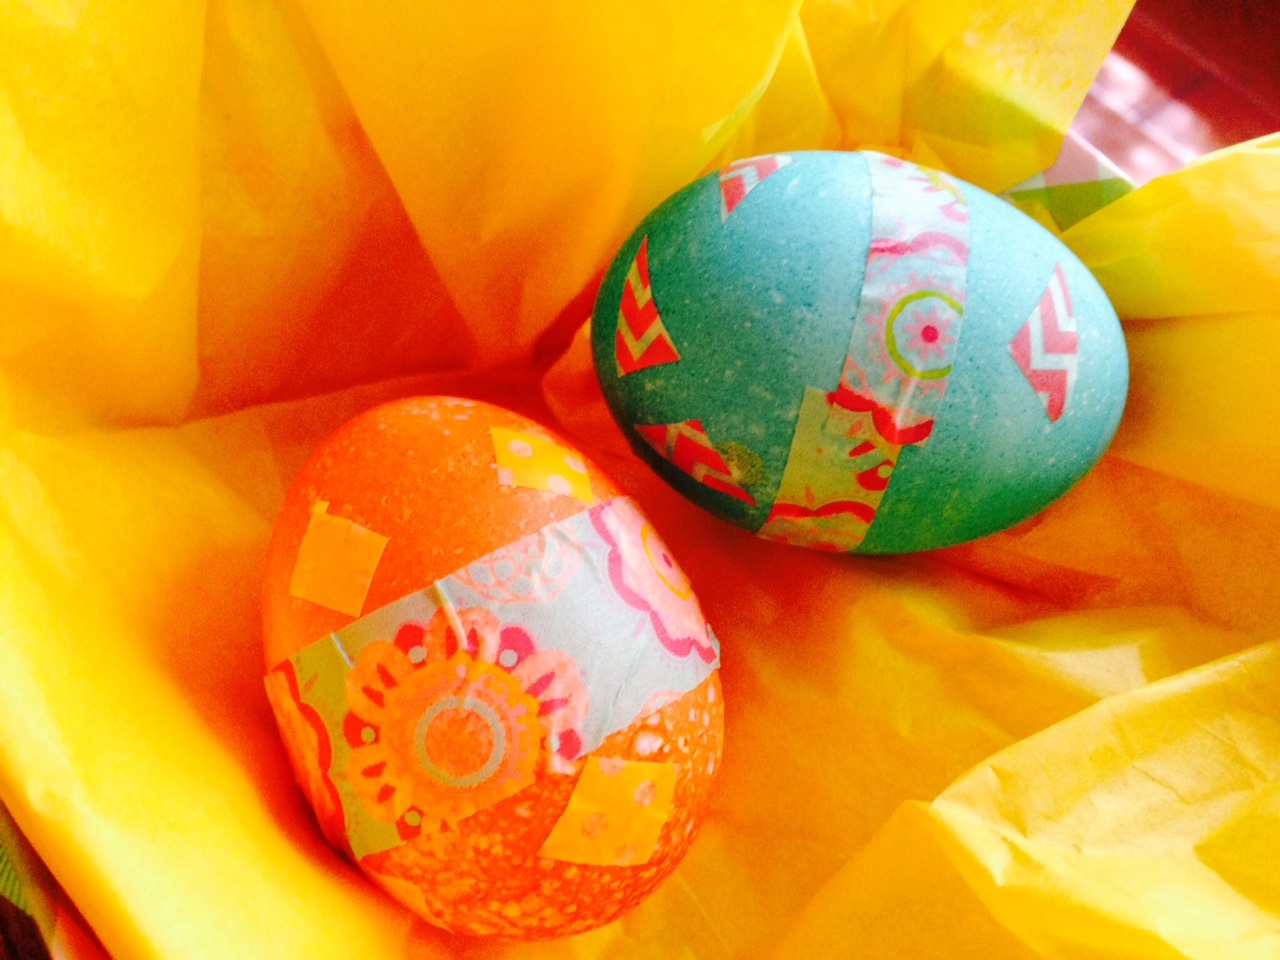
Washi Tape Eggs
Washi Tape Eggs
Washi tape is like a very pretty, decorative masking tape. And projects using it are all over Pinterest! It comes in a variety of colors and sizes. It works perfectly on dyed, hard boiled eggs or just plain, white hard boiled eggs! This is a simple way to get little kids involved with the egg decorating.
What You Need:
Hard Boiled Eggs (they can be dyed or not)
Washi Tape (available at any craft stores), choose a variety of patterns and sizes.
Instructions:
Just “go to town” and start decorating!
For small children – Cut small pieces of washi tape and put them out for little hands to decorate with!
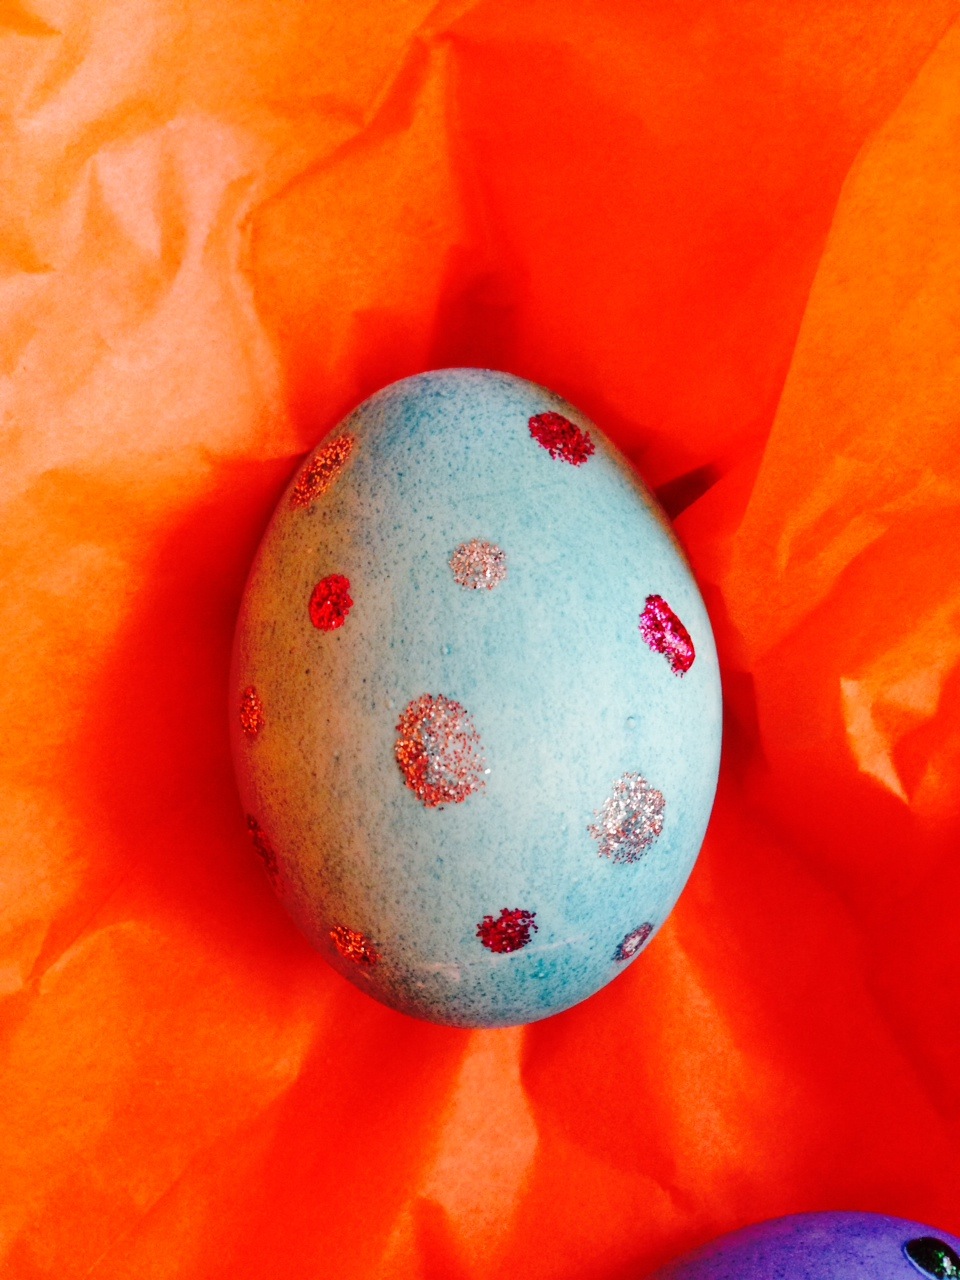
“Bling” Eggs
Bling Eggs
Another simple way to decorate the eggs with little kids!
What You Need:
Hard Boiled Eggs (colored or plain white)
Crayola Washable Glitter Pens, variety of colors
Instructions:
Using the glitter pens, make dots of glitter all over the eggs. I did one side first, allowed to dry, then did the other side!
Happy Face Eggs
Happy Face Eggs
This is my personal favorite because my mom and I love smiley faces, PLUS it is super simple to do!
What You Need:
Hard Boiled Eggs dyed yellow
Black Sharpie
Instructions:
Use the black sharpie to create whatever type of face YOU want! Tip –When drawing the eyes, make sure the eyes are on the narrow end of the egg, mouth near the lower half of egg.
Thanks WTLV-TV’s First Coast Living for this fun challenge!
Ringing in the New Year is a fun tradition, and Simple Solutions Diva has a few simple ideas on how to bring in the New Year with a little style and not a lot of money! A BIG thank you to WTLV-TV’s First Coast Living (Weekdays at 11 a.m. and 2 p.m) for inviting Simple Solutions Diva on to share these ideas!
Choose To Make Nicer New Year’s Resolutions
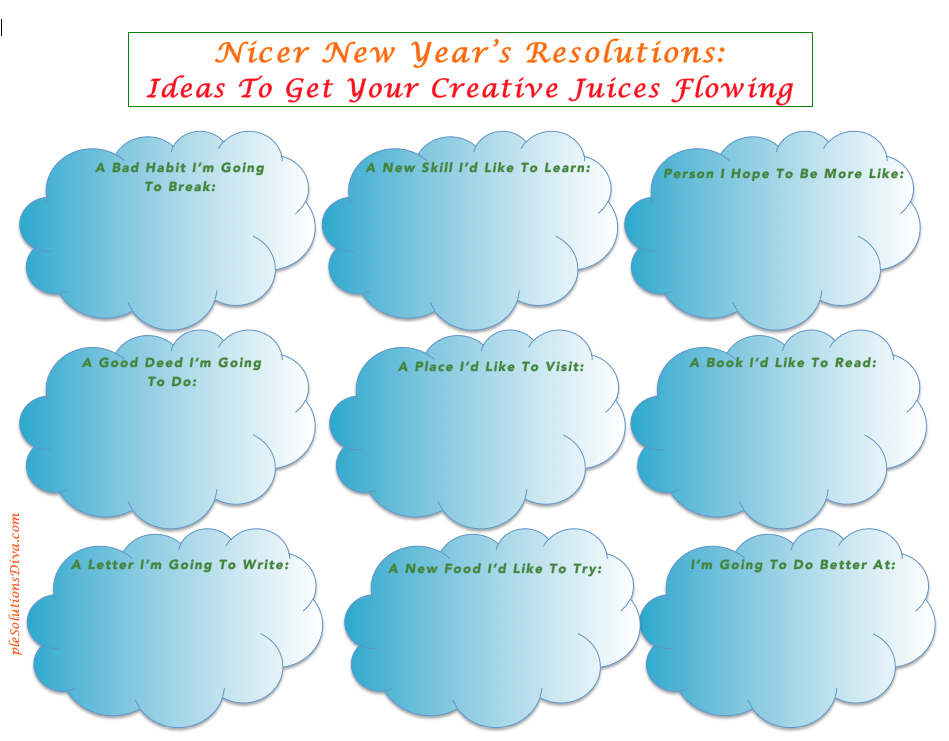
New Year’s resolutions don’t have to be about loosing weight or radically changing behaviors. Those types of resolutions are much harder to keep because they require drastic changes. Try making nicer resolutions that are more like goals you work towards all year. Need some ideas? Print out this Nicer New Year’s Resolution Worksheet below; it includes prompts to help you get your creative juices flowing! (Be sure to print it out in landscape format!)
Make a resolution to be nicer to yourself when it comes to your resolutions! Use this Printable worksheet to get your creative juices flowing! (Be sure to prit in landscape format!)
Plan a Giving 2014 New Year
This is a great idea for a family celebration! Each family member submits several family volunteering ideas for 2014; Use New Year’s Day to decide, as a group, what volunteer opportunities the family will commit to for 2014 and schedule them into your calendar. Giving back and helping others really makes life enjoyable!
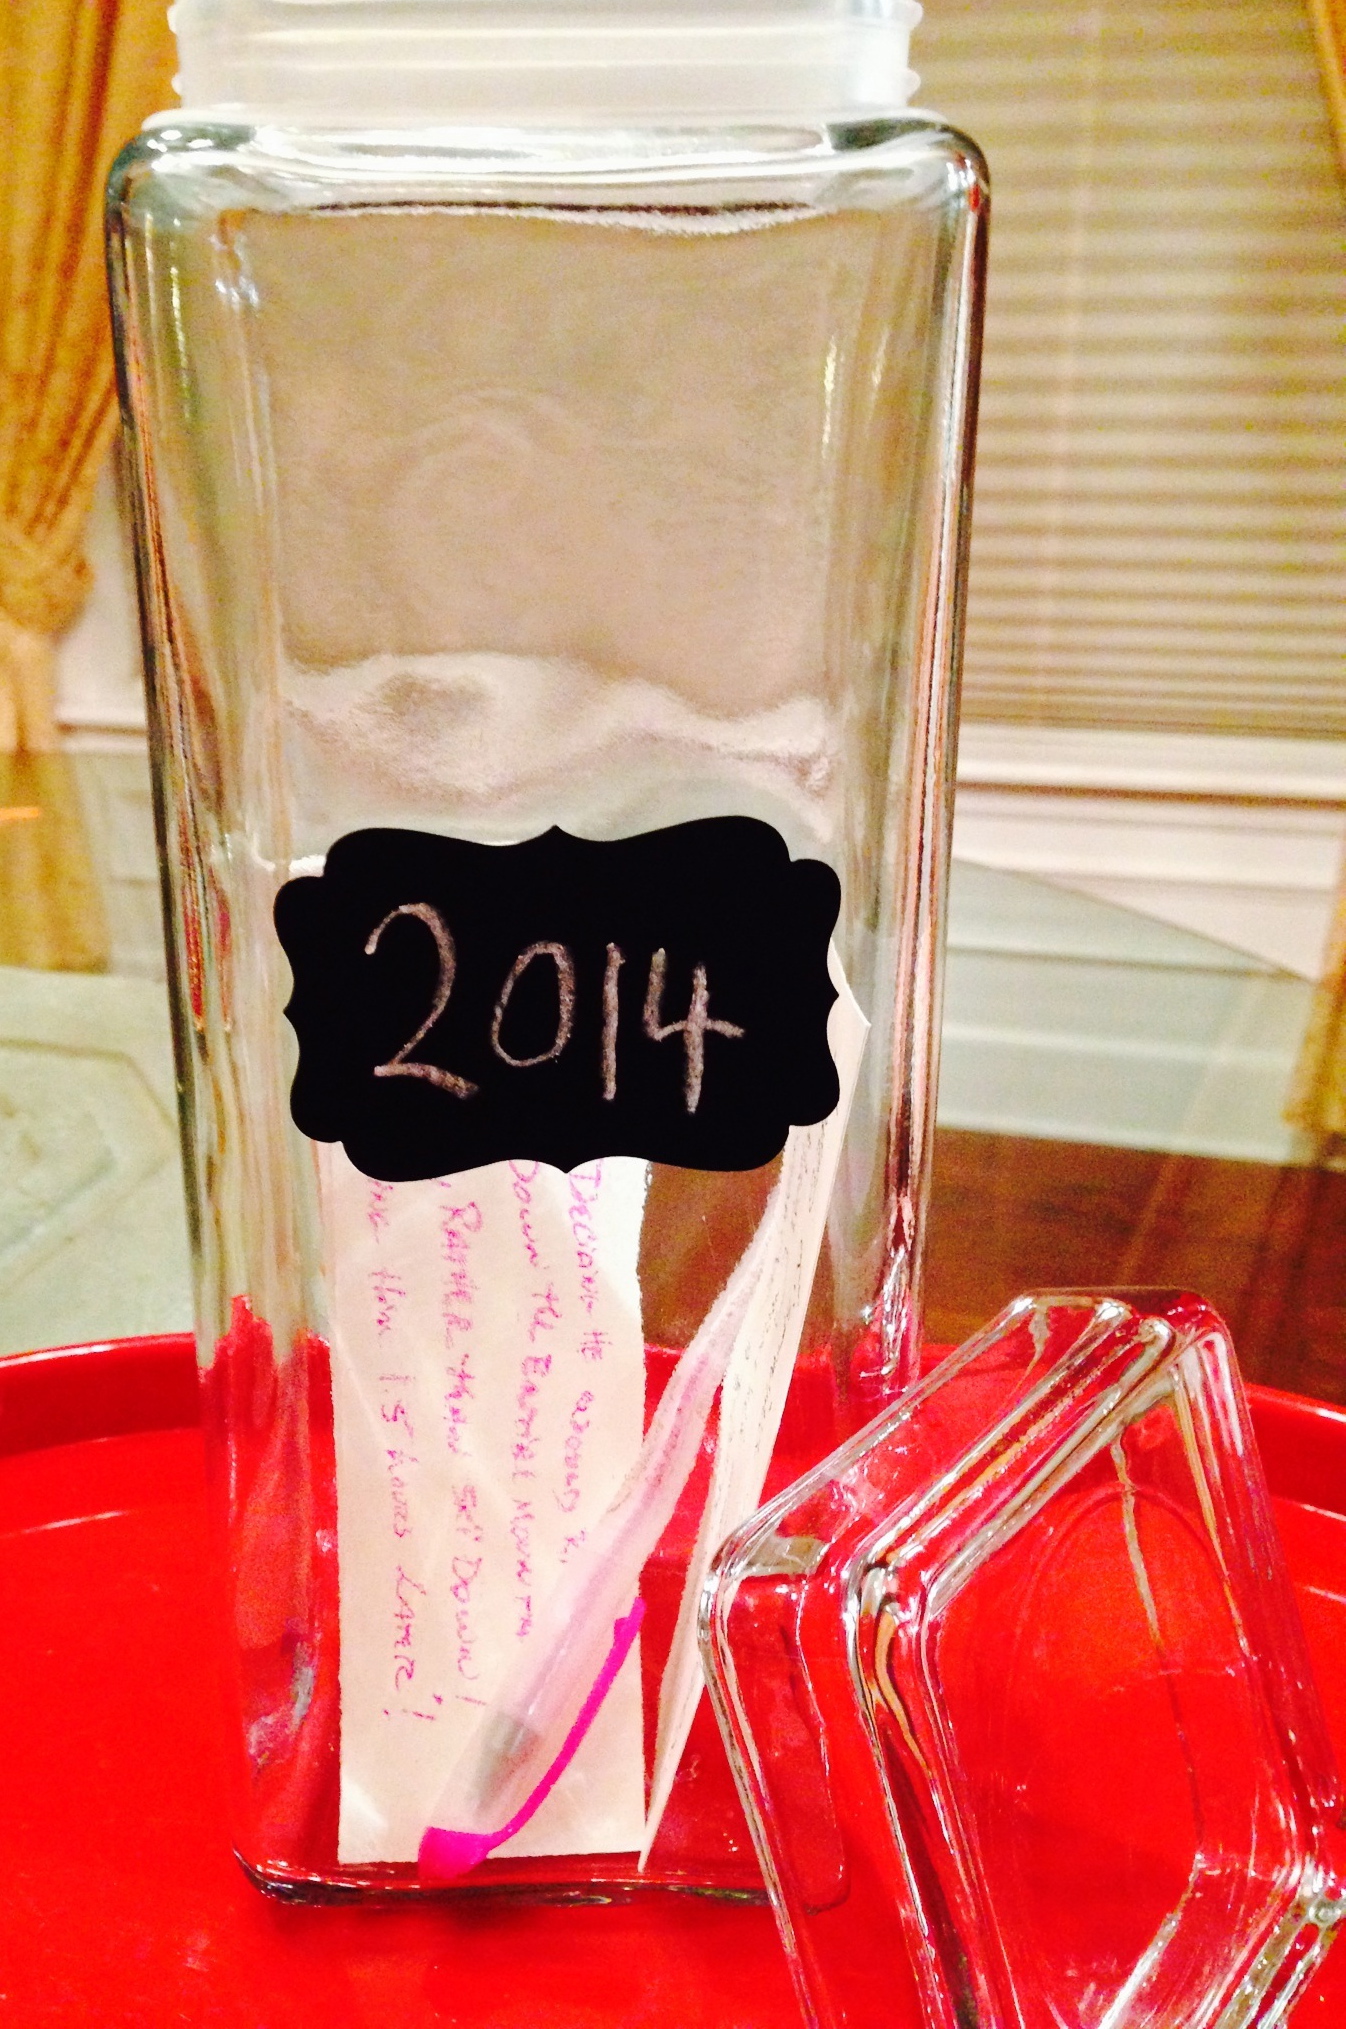
Start A Memory Jar For 2014
Remember the fun times all year with a 2014 Memory Jar, from SimpleSolutionsDiva.com.
Create a Decorative Jar filled with memories collected over 2014; near New Year’s 2014, open the jar and relive the fun memories from 2014!
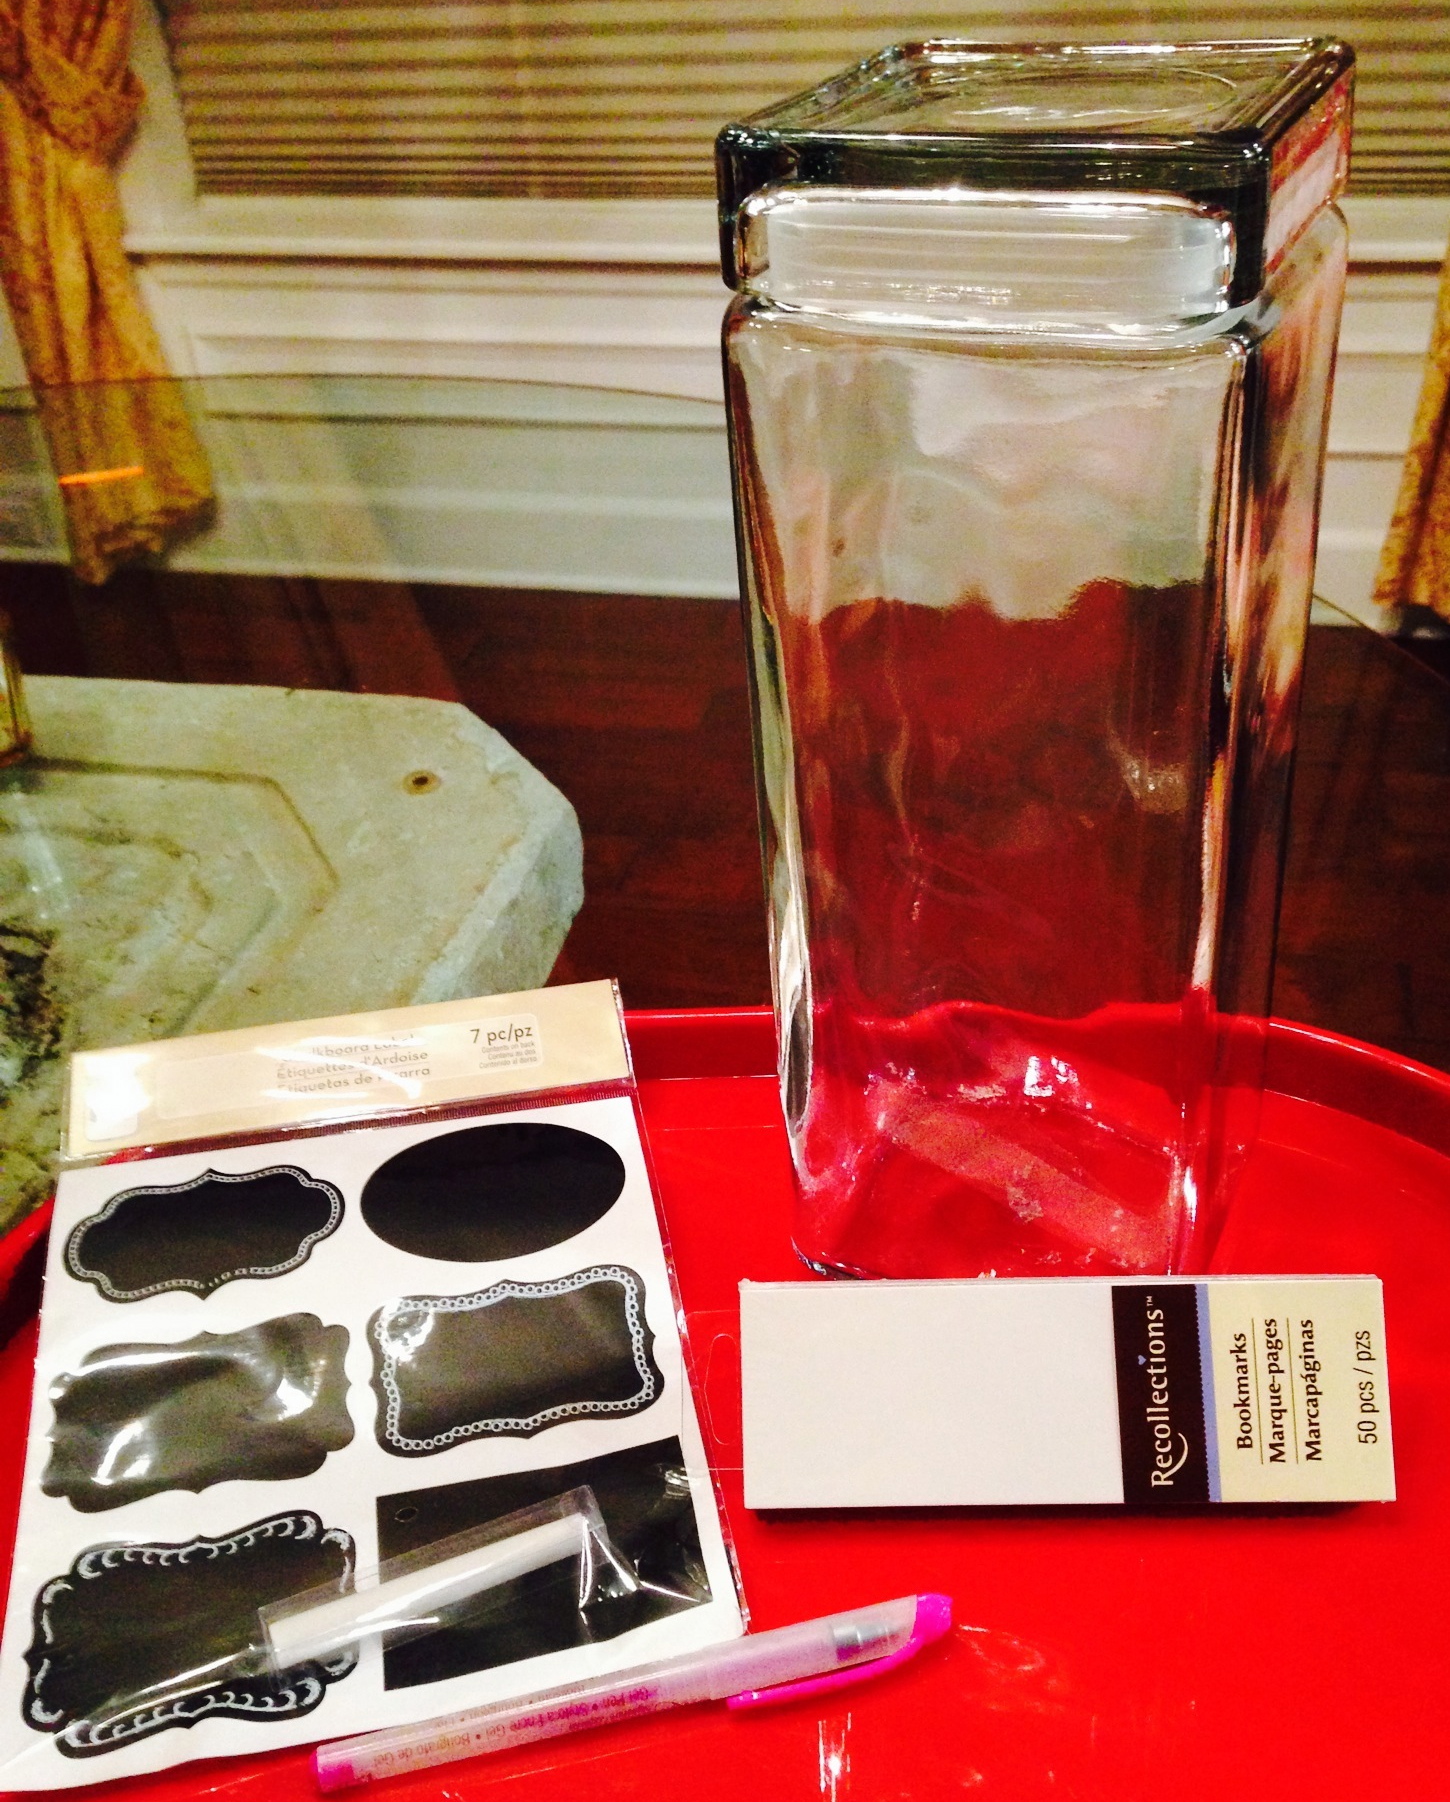
Supplies Needed:
A Clean Glass Jar
Small, blank tags, cards, or bookmarks (I used bookmarks)
Chalkboard Self-Stick Labels (I got this little packet, including chalk, for $1.00 at Michaels!)
Decorative Pen
Instructions:
Clean the jar and remove all sticky price labels. Let dry. Apply the chalkboard label to the glass jar. Write 2014 on the chalkboard label. Add blank bookmarks or cards and a pen. Place Jar in active place in the house (ours is in the kitchen). As fun events or memories happen, write them down on the blank cards and place them in the jar. At the end of year, sit down with family and revisit all the fun times over 2014 by reading the cards aloud. Wipe 2014 off with a slight damp cloth, and write the new year and start all over again!
Kids New Year’s Eve Party
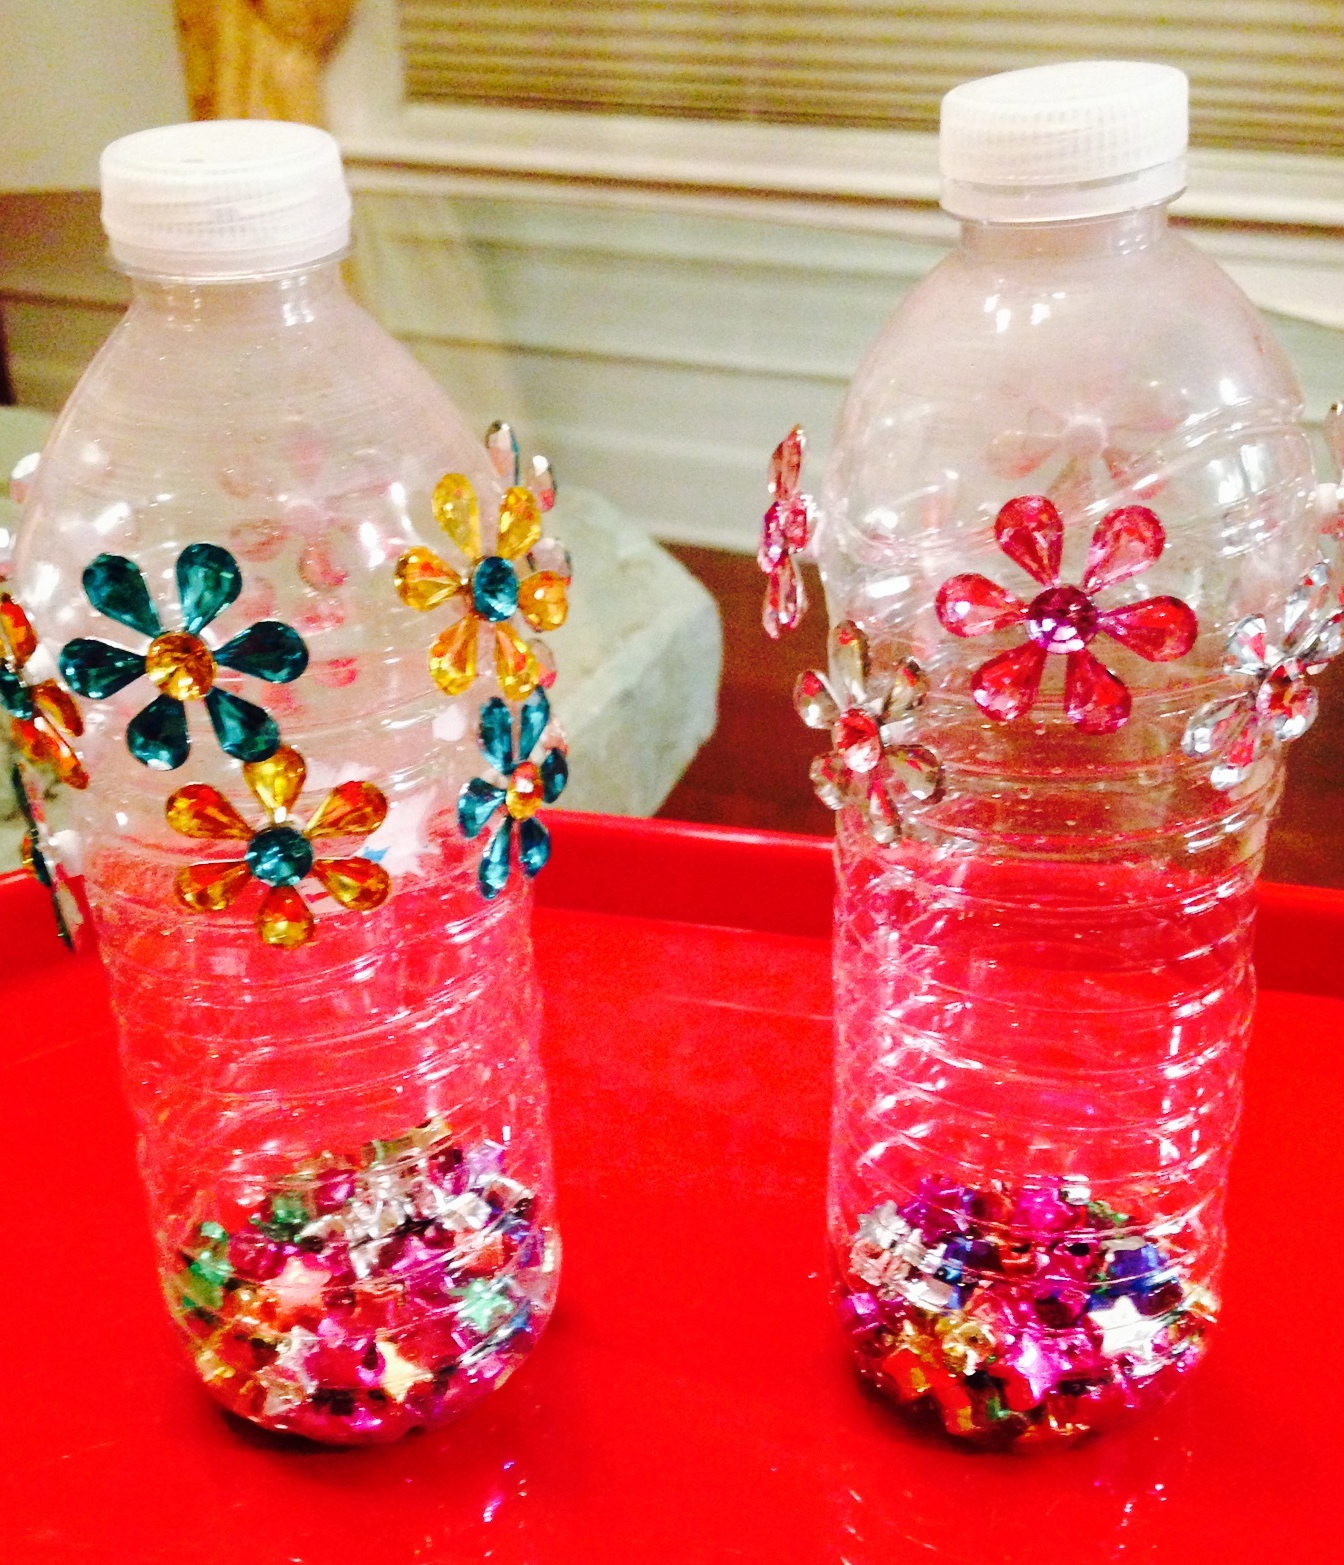
Pick a time in the early evening to invite the kids over and toast the New Year early with DIY Noise Makers and a Cookies & Milk “Midnight” Toast!
DIY Kids’Noise Makers, from SimpleSolutionsDiva.com.
DIY Noise Maker Supplies:
Empty and clean water bottles, with labels removed.
Craft Beads
Variety of stickers
Instructions:
Add a handful of craft beads to the empty water bottles and secure the top. Lay out the stickers and let the kids decorate their own shaker.
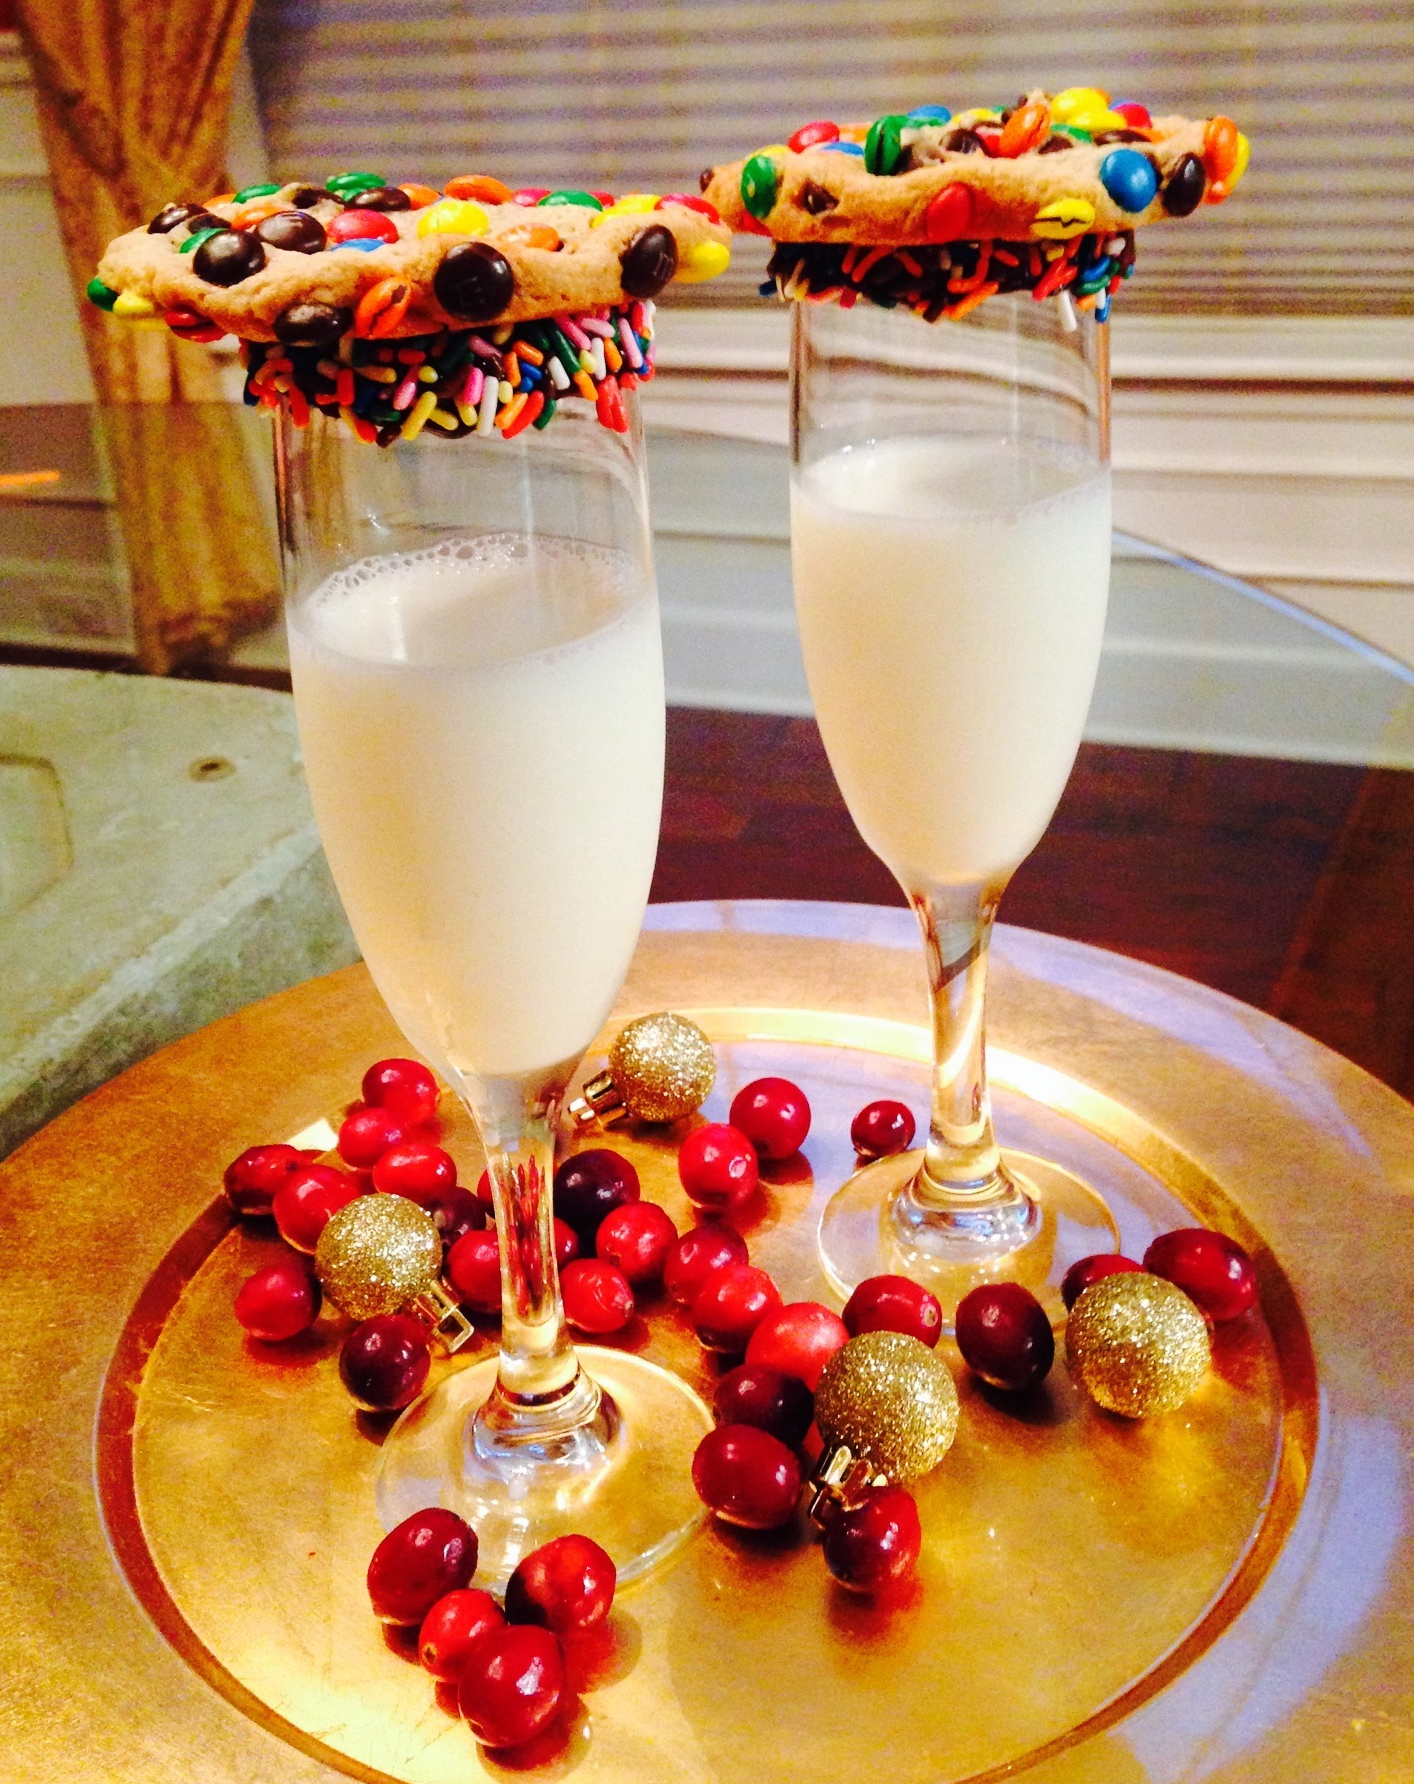
New Year’s Eve Kids “Midnight” Cookies &Milk Toast, by SimpleSolutionsDiva.com.
Cookies & Milk “Midnight Toast Supplies:
“Fancy” glasses (these can be champagne glasses, wine glasses or whatever works for you)
Hot Fudge Sauce (I used Smucker’s brand)
Colored Sprinkles
Milk
Chocolate Chip or M&M cookies (I bought mine pre-made from the grocery store)
Instructions:
Using a knife or back of a spoon, rim the top of the glasses with room-temperature hot fudge sauce. Pour sprinkles into a bowl or small plate. Roll the fudge covered rims of the glasses in the sprinkles, so sprinkles adhere to the glass & fudge. Fill with milk. Place a cookie on top of glass and serve.
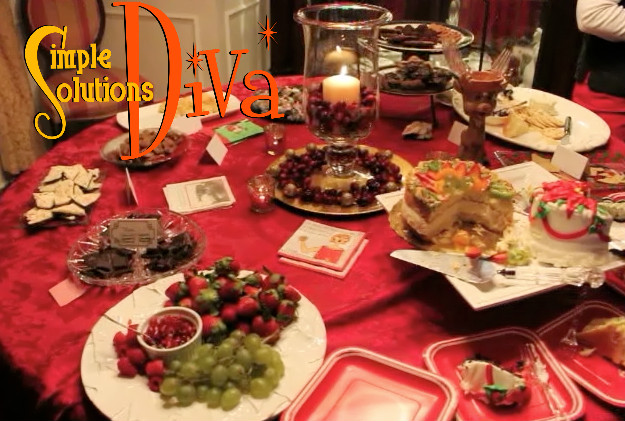
Simple Party For The Adults
Try a Dessert & Champagne Party! Simple Solutions Diva featured a whole “how-to” video and outline to create a simple party. Click Here to see the video and all of the suggestions to make a party easy for you!
Need some simple ideas to ring in the New Year? Catch Simple Solutions Diva Monday, December 30, at 11 a.m. and 2 p.m., on First Coast Living, WTLV-TV/Ch. 12! Five great ideas to ring in the New Year with a little style, without having to spend a lot of money!
For easy invitations, try using the website Evite.com, where you can customize one of their great designs and import email addresses to send out invites electronically! Good for you AND the environment!
A Champagne Bar is easy to do! Offer a variety of add-ins for your champagne, like cranberry, peach, pomegranate juices, strawberries and pomegranate seeds. For Champagne, I served Jaume Serra Cristalino Brut, recommended by the wine expert at World Market. With a price point under $7.00, I was a bit wary. I was extremely surprised by how wonderful the champagne tasted! It was rated by Wine & Spirits Magazine as the Value Brand Of The Year for 2013 (3rd year in a row!).
Desserts are so simple! Use a combination of store-bought and homemade desserts. Items on my dessert table included:
A tasting plate of flavored dark chocolates – Chipotle Chili, Pomegranate and Strawberries & Champagne.
Ginger Crisp cookies and Chocolate Lace cookies from World Market.
Two beautifully decorated mini cakes from Publix Supermarket.
Store-bought Chocolate Truffles
Homemade Coconut Macaroons – Wonderfully easy recipe from JoansFoodWanderings Blog.
Homemade Peppermint Bark – Here is my recipe for peppermint bark.
Store-bought Chocolate Truffles
Homemade Candied Pecans – This recipe was so simple! I made them in the crockpot! You can find the recipe Here!
A Cheese Plate featuring Manchego, Triple Cream Brie, and Boursin Cheese.

 Holiday Time means festive décor – including setting the perfect table for the holiday! But don’t spend upwards of $75-$100 per place setting! Check out your local Dollar Tree, THE holiday headquarters for affordable decorations, and get some holiday inspiration! And since everything at Dollar Tree is just $1.00, you can create some beautiful tablescapes without ruining your holiday budget!
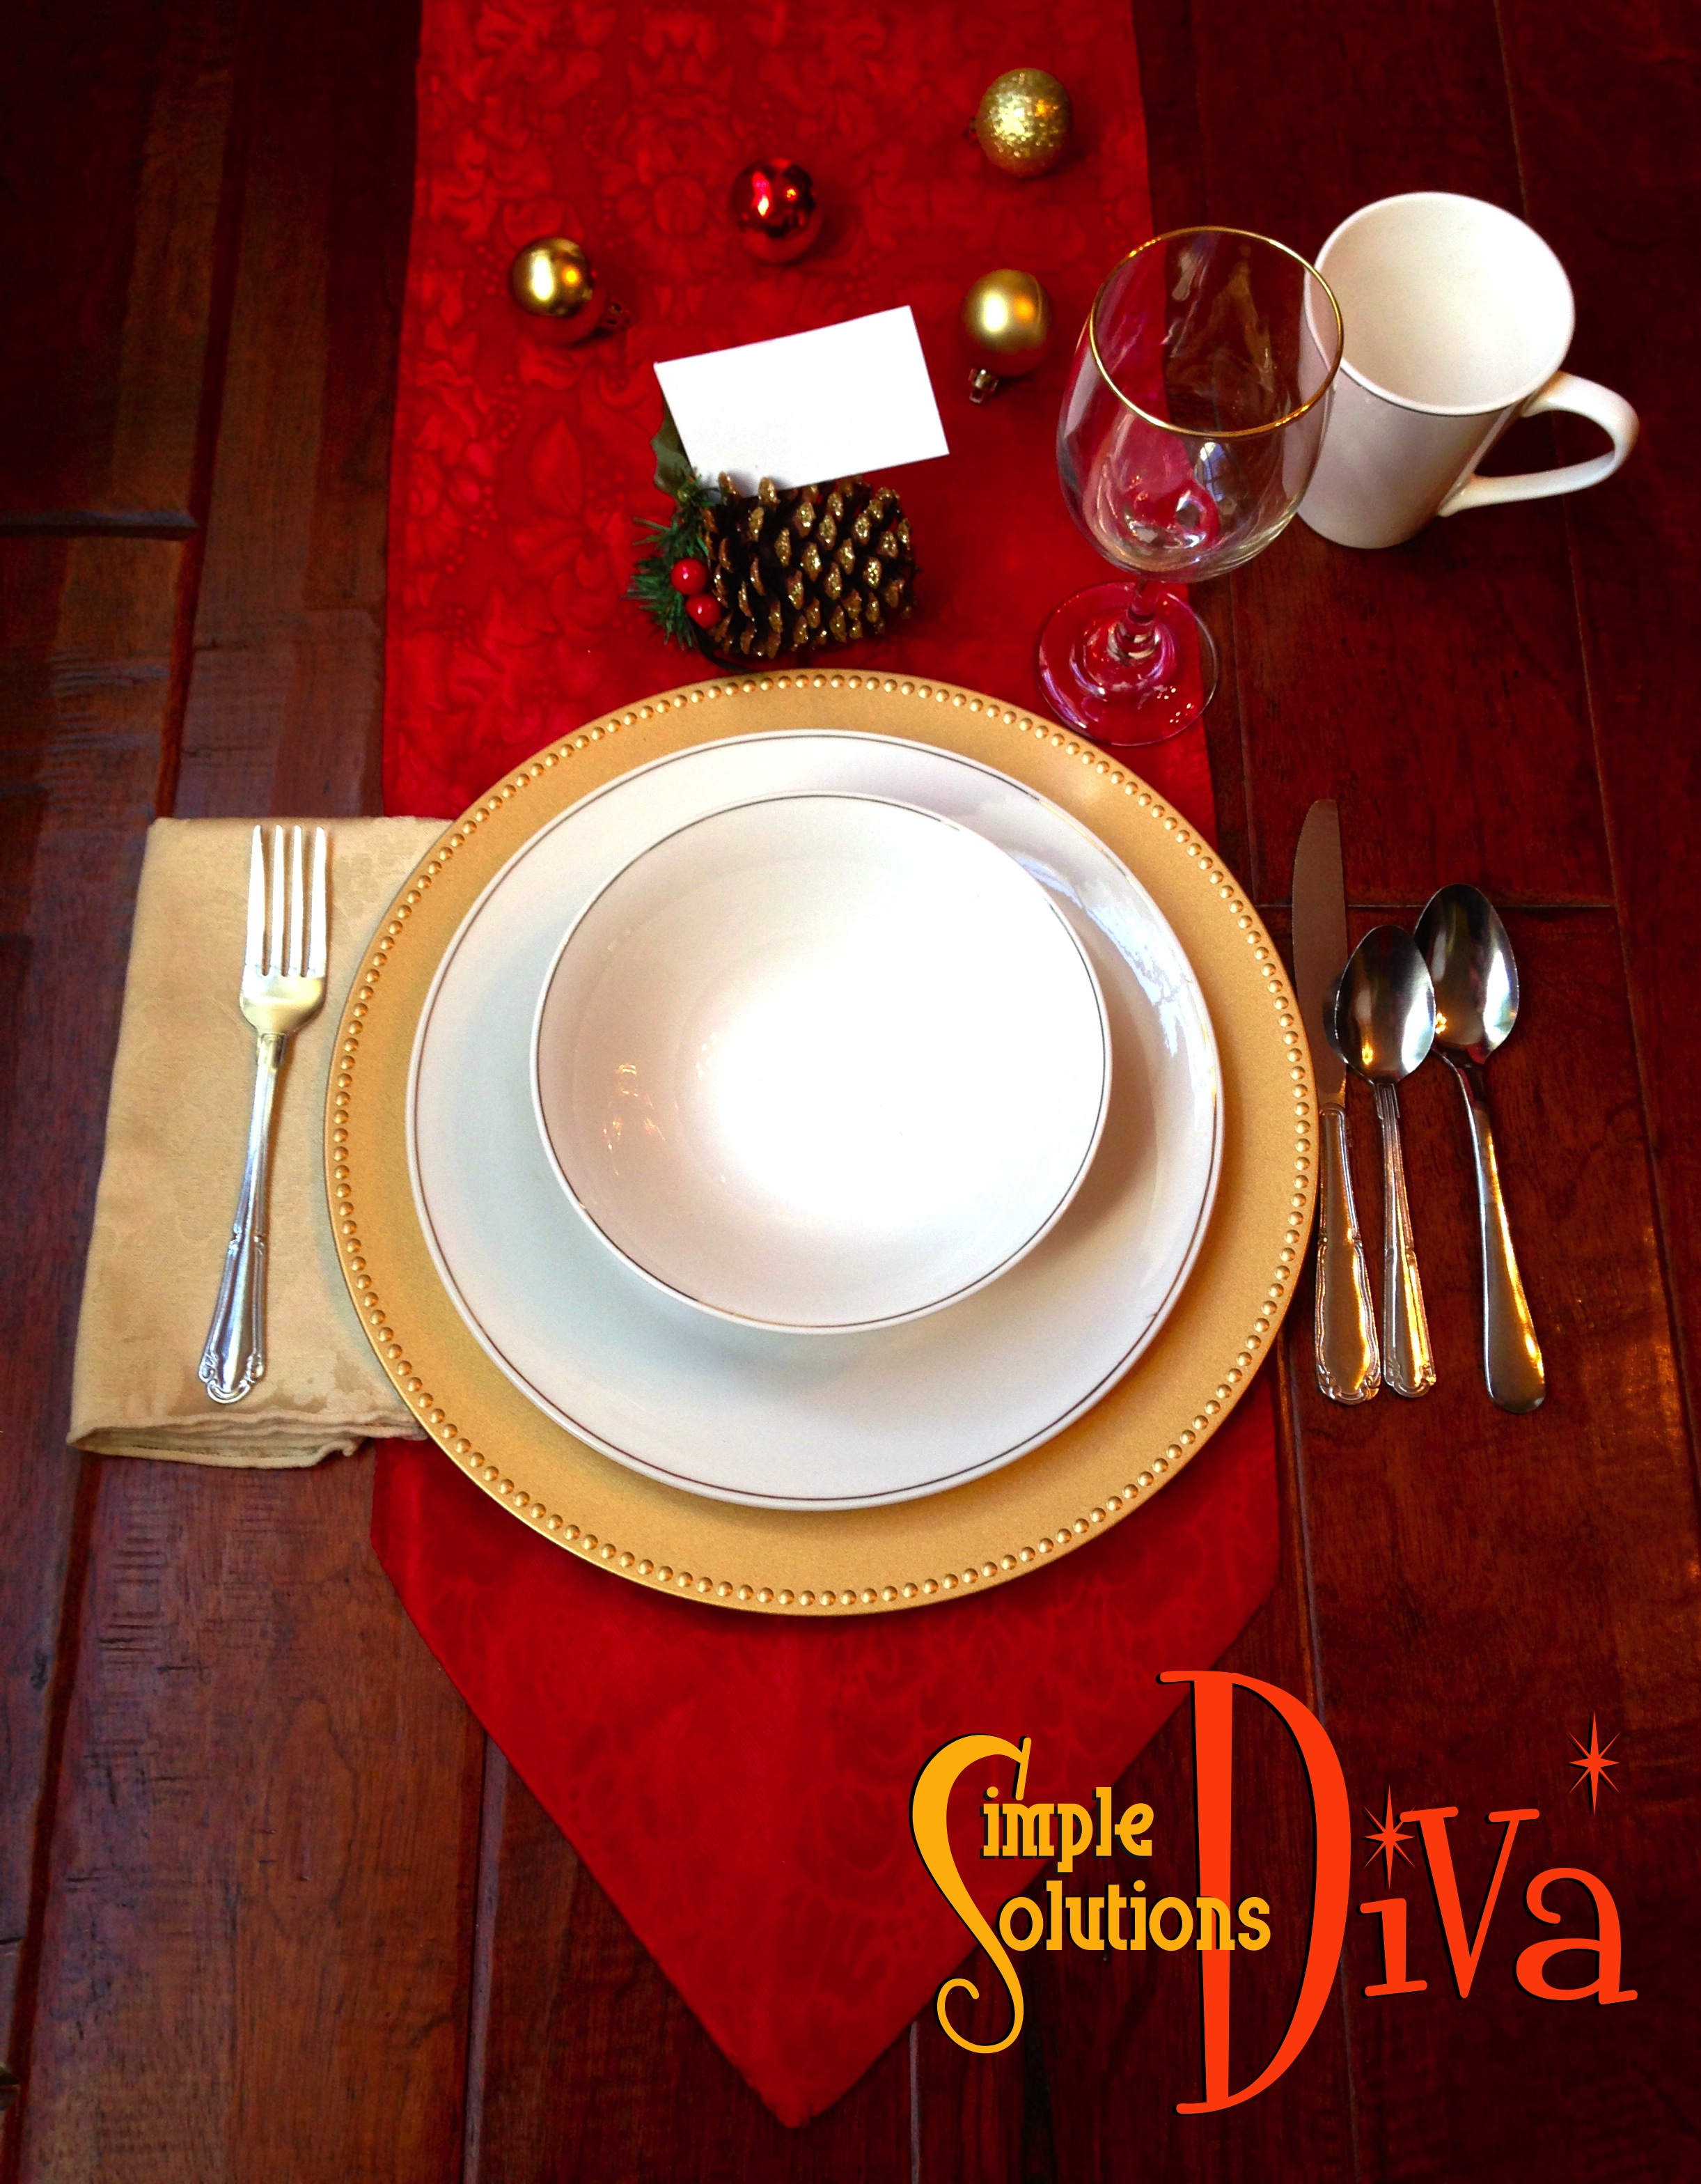


