SimpleSolutionsDiva.com

Simple Decor

Beautiful Holiday Tablescapes Without Spending A Fortune!


Screenshot 2014-10-18 10.32.58Holiday Time means festive décor – including setting the perfect table for the holiday! But don’t spend upwards of $75-$100 per place setting! Check out your local Dollar Tree, THE holiday headquarters for affordable decorations, and get some holiday inspiration! And since everything at Dollar Tree is just $1.00, you can create some beautiful tablescapes without ruining your holiday budget!

Traditional

DT XMAS Traditional
Traditional Centerpiece Using Dollar Tree Items.

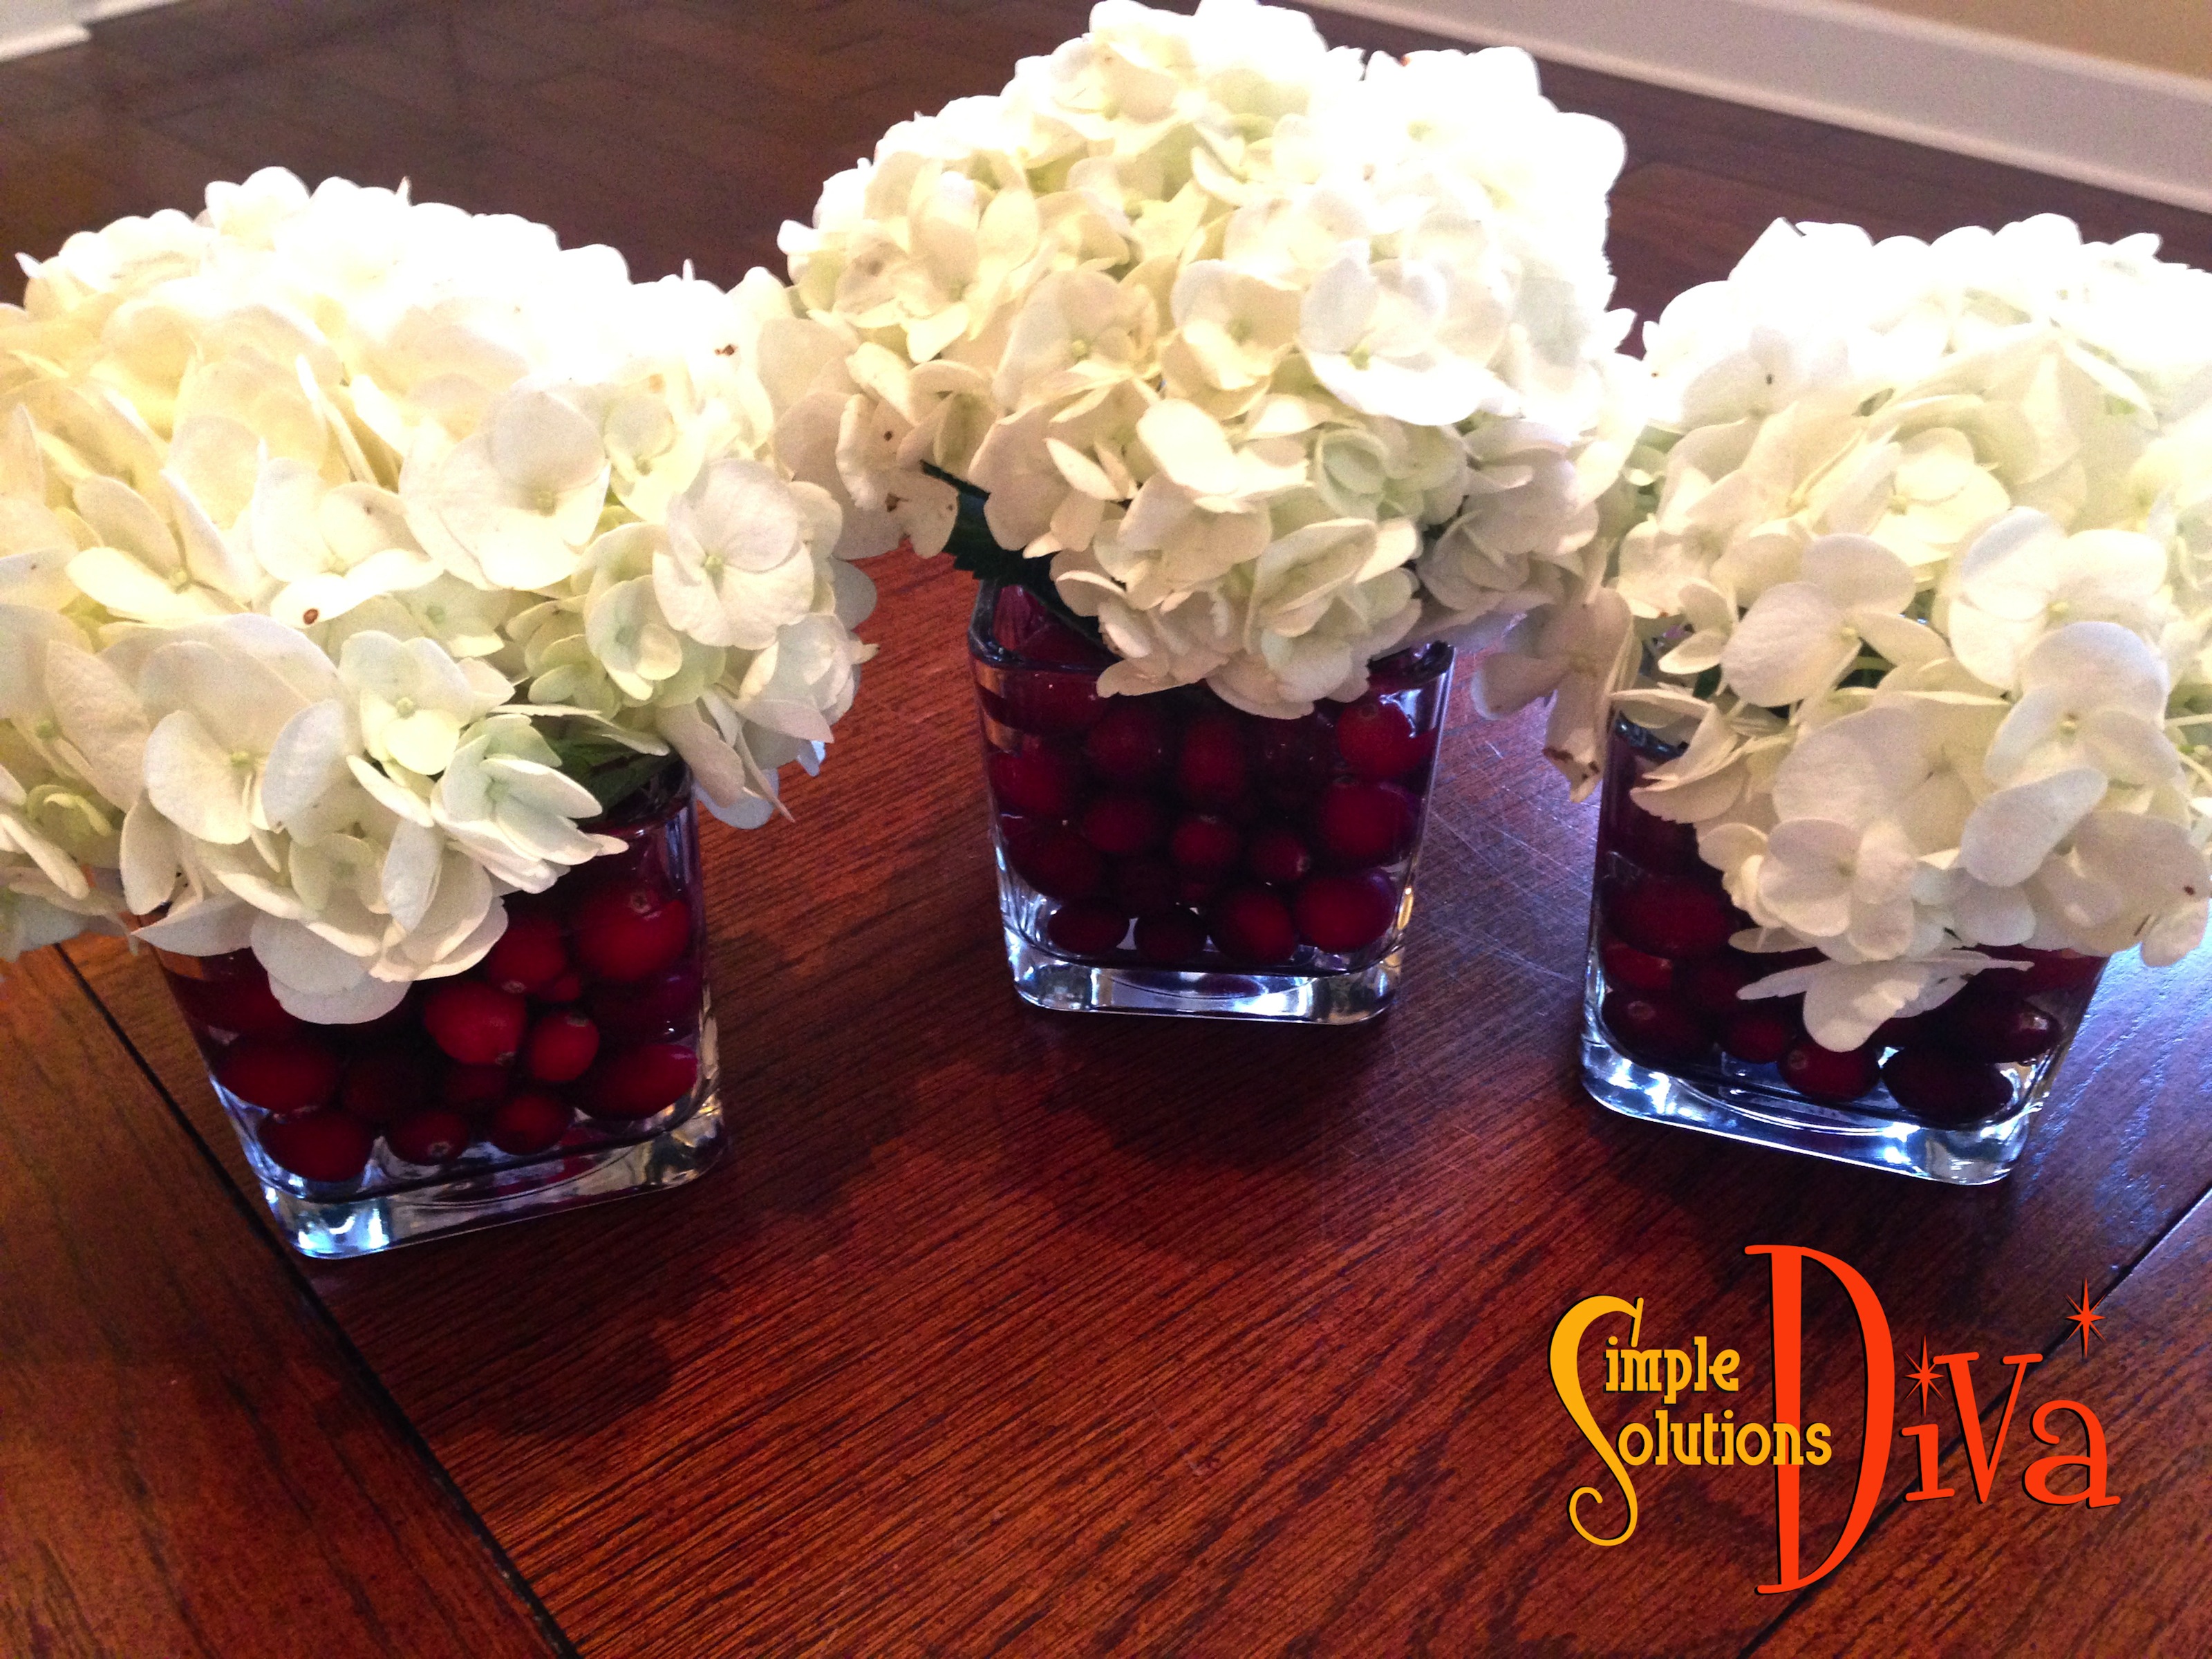
Here is a traditional look using Dollar Tree items, including a gold charger plate, gold-rimmed plate, bowl, coffee cup, and wine glass. Traditional stainless steel flatware and a red table runner finish off the look. Plus I’ve created a simple centerpiece (see below) using three glass candle holders, fresh cranberries and hydrangeas. I’ve used a pinecone ornament as a place card holder. This cost only $15.00 for everything (not including the flowers and cranberries!) from Dollar Tree!

Traditional Centerpiece Using Dollar Tree Glass Candleholders.

Whimsical

DT XMAS whimsy1
Whimsical Holiday Setting Using Dollar Tree Items.

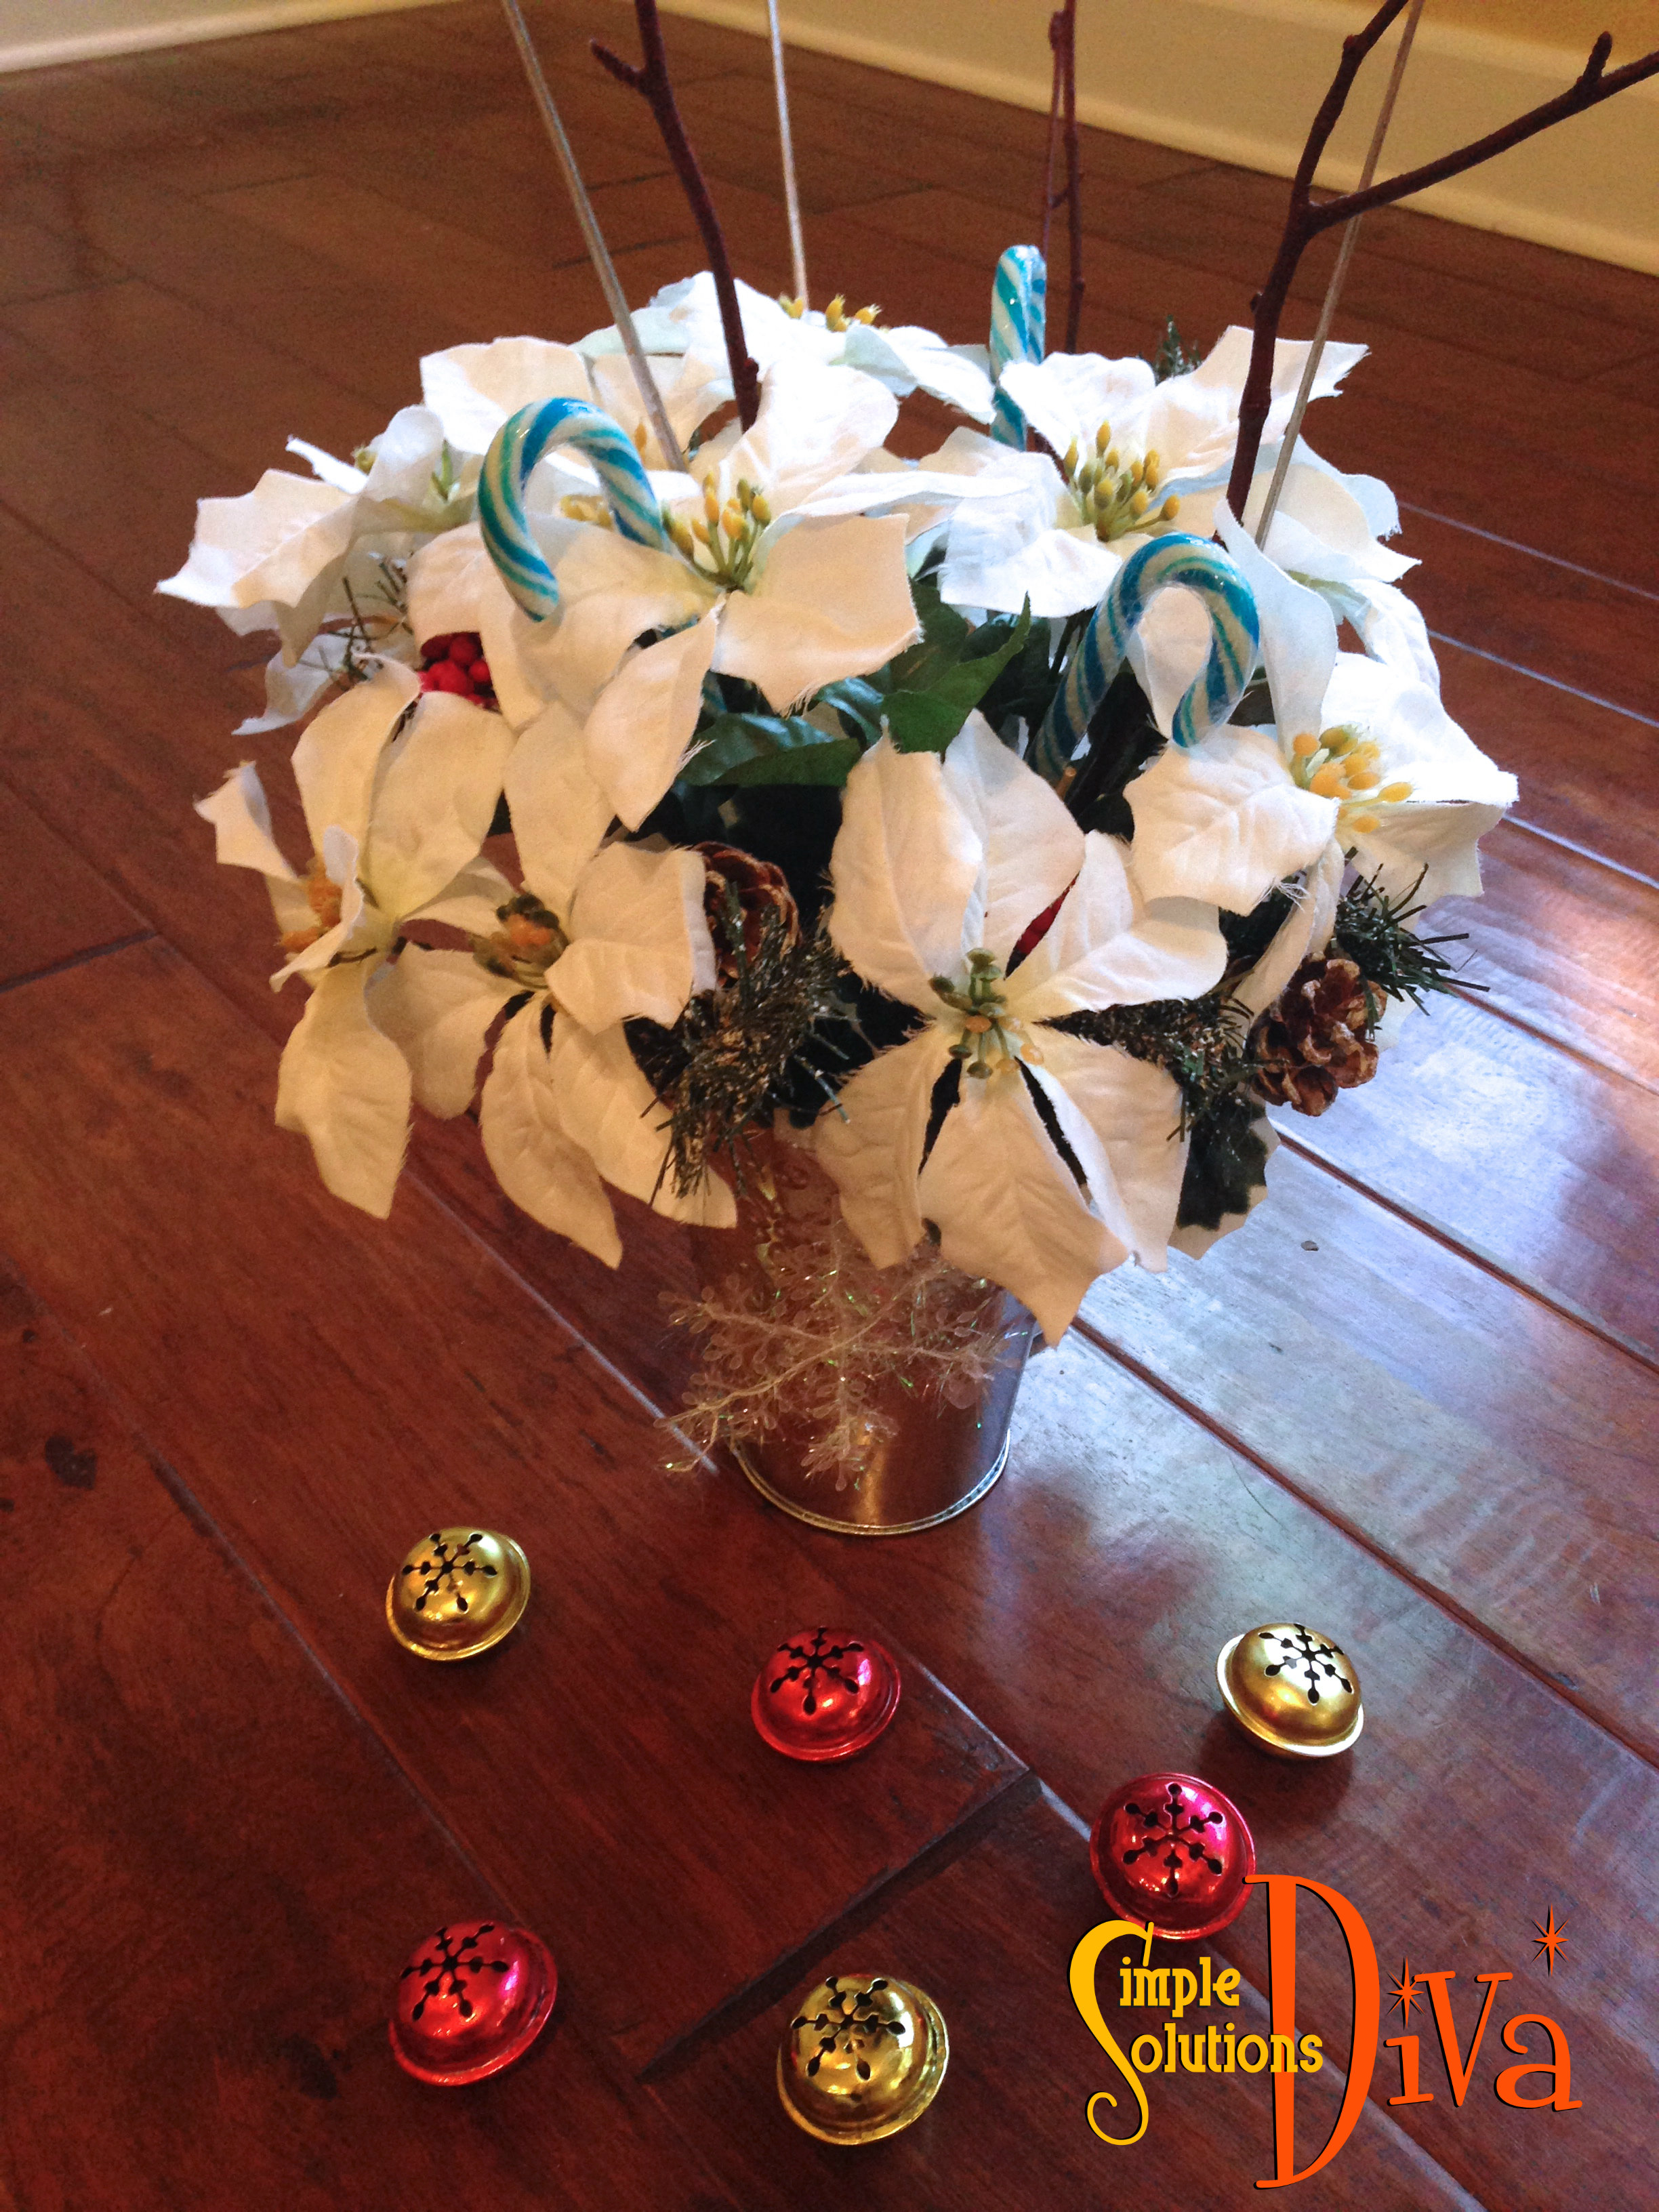
This snowflake setting is so cute! A blue placemat layered with snowflake placemat sets the theme. Add a snowflake plate and matching coffee mug, a simple red wine glass. A funky red floral Christmas clip/decoration creates a napkin ring. Stainless steel flatware with a hammered look completes the festive place setting. In addition, I created the centerpiece (see below) from floral stems, containers, candy canes and holiday ornaments. Including the centerpiece, this cost a total of $24.00.

Whimsical Centerpiece Using Materials All From Dollar Tree!

Contemporary

DT Contemporary
Contemporary Holiday Setting Using Dollar Tree Items.

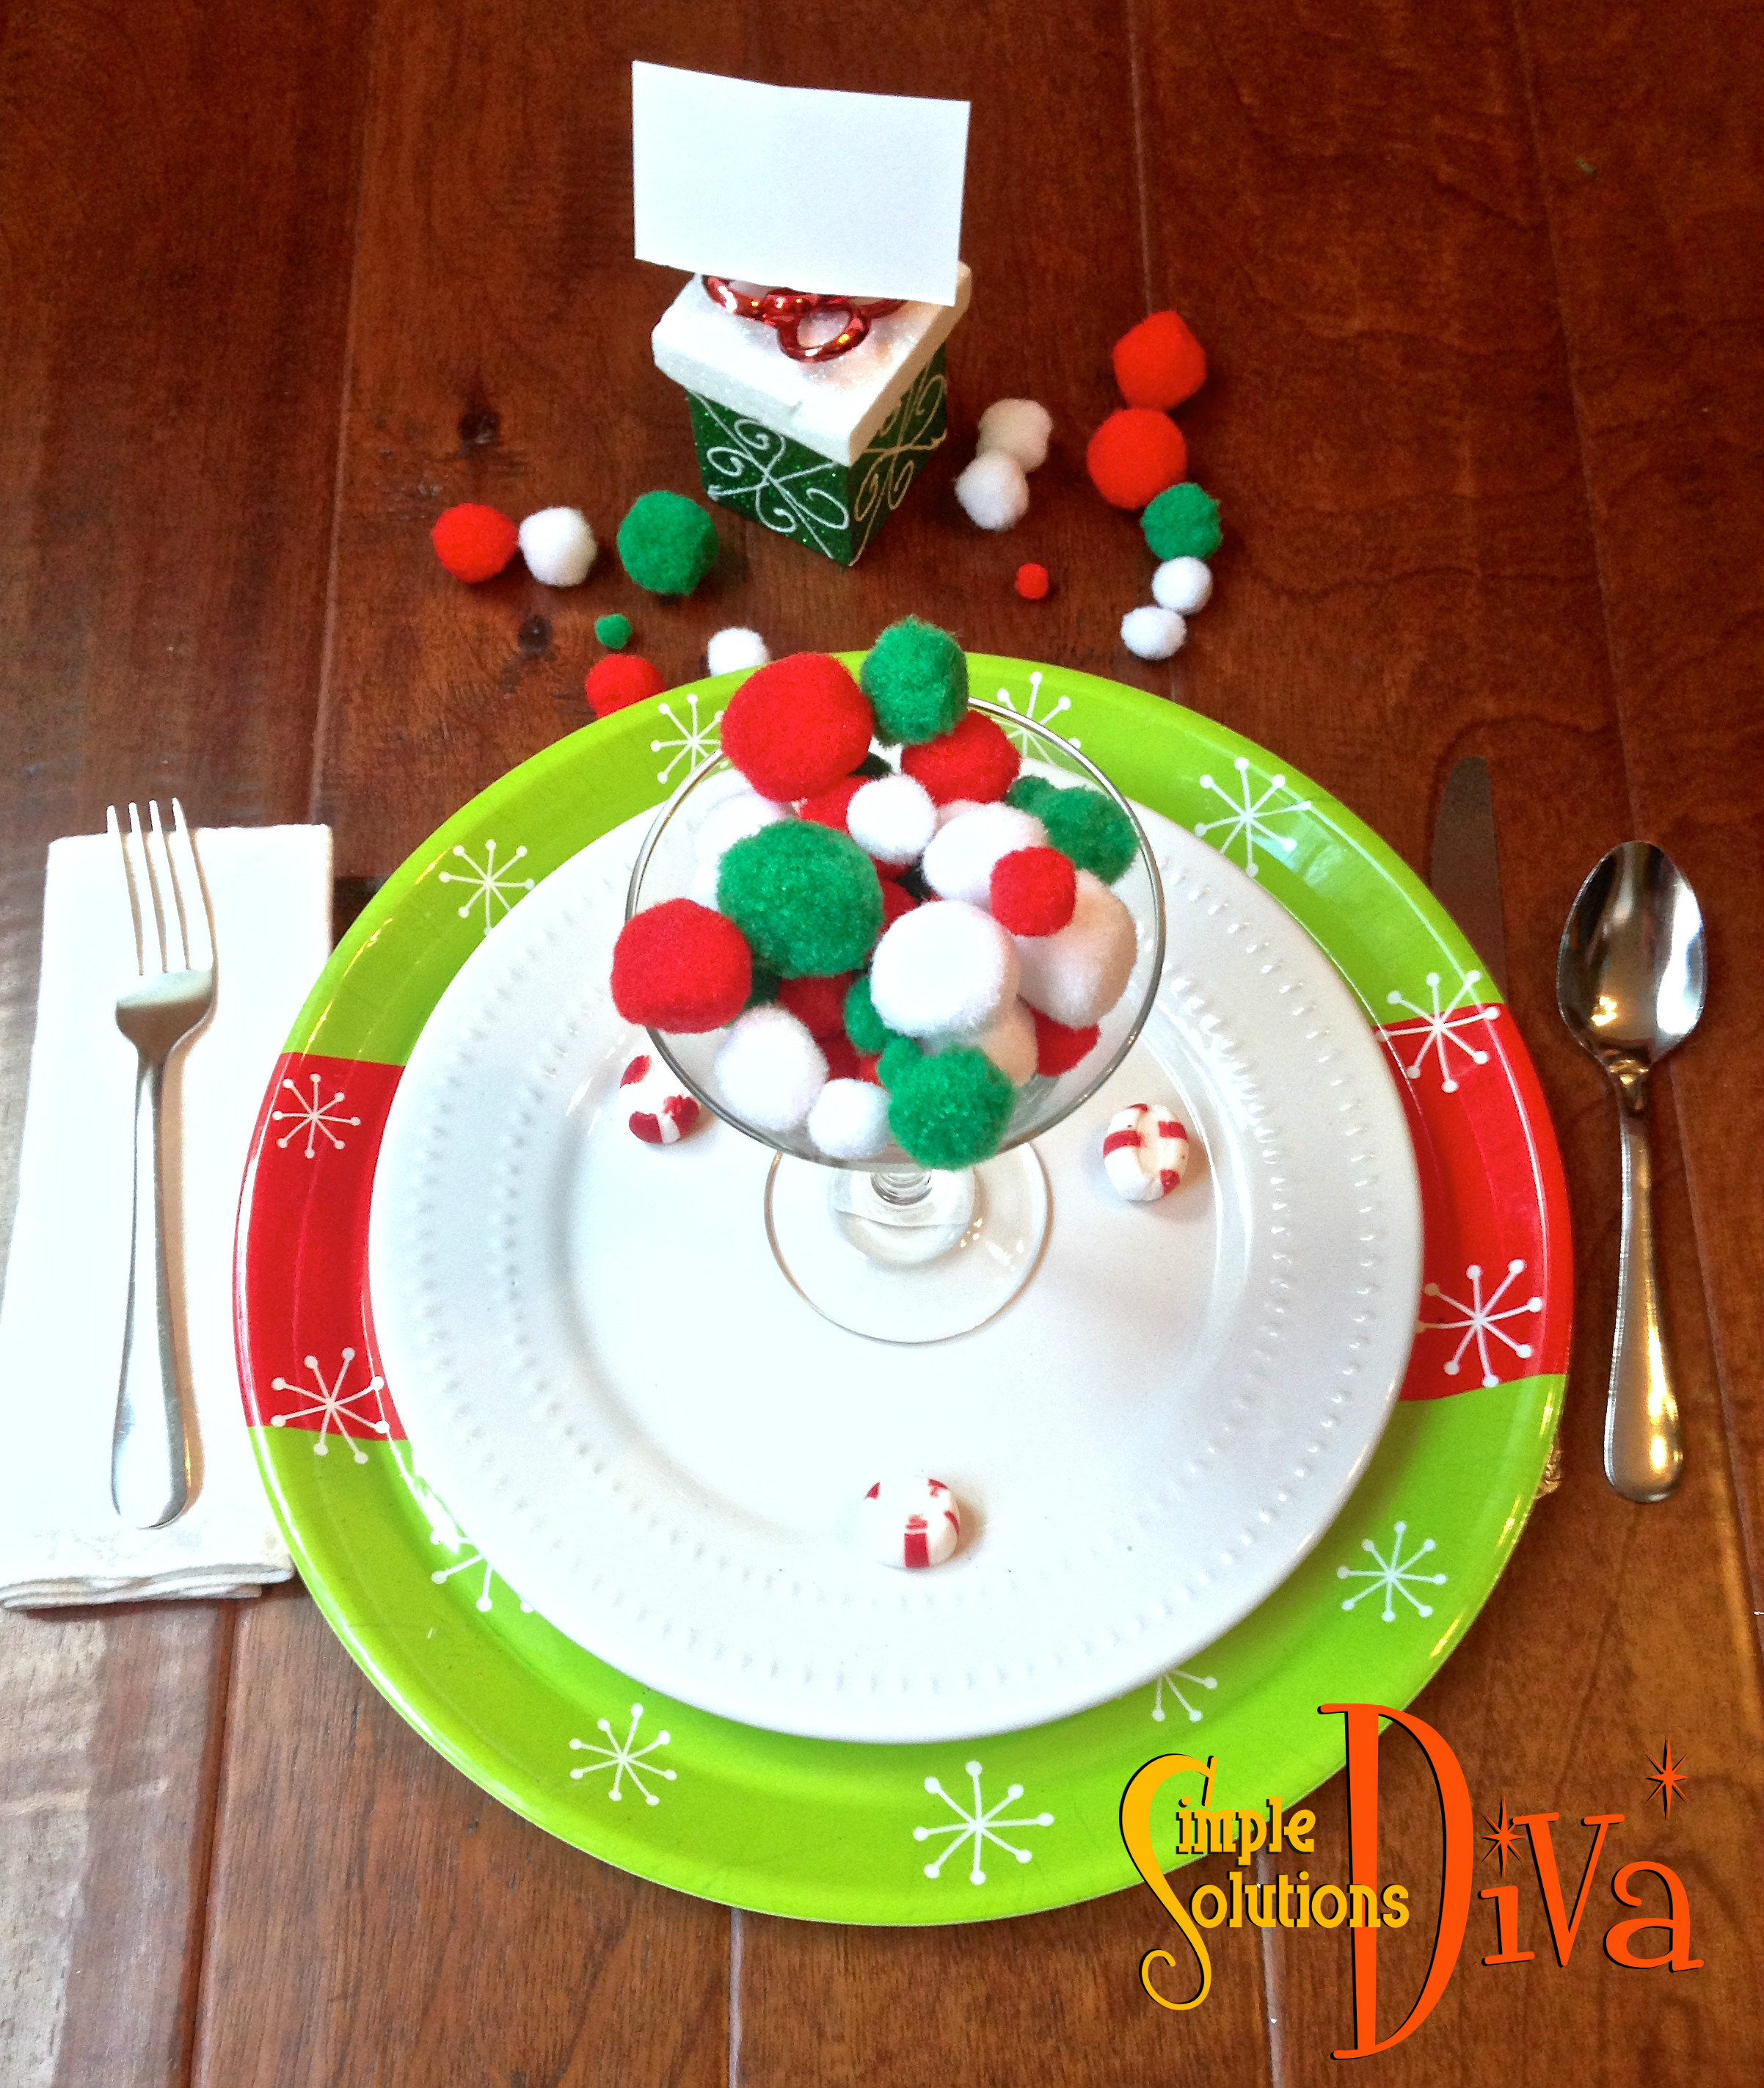
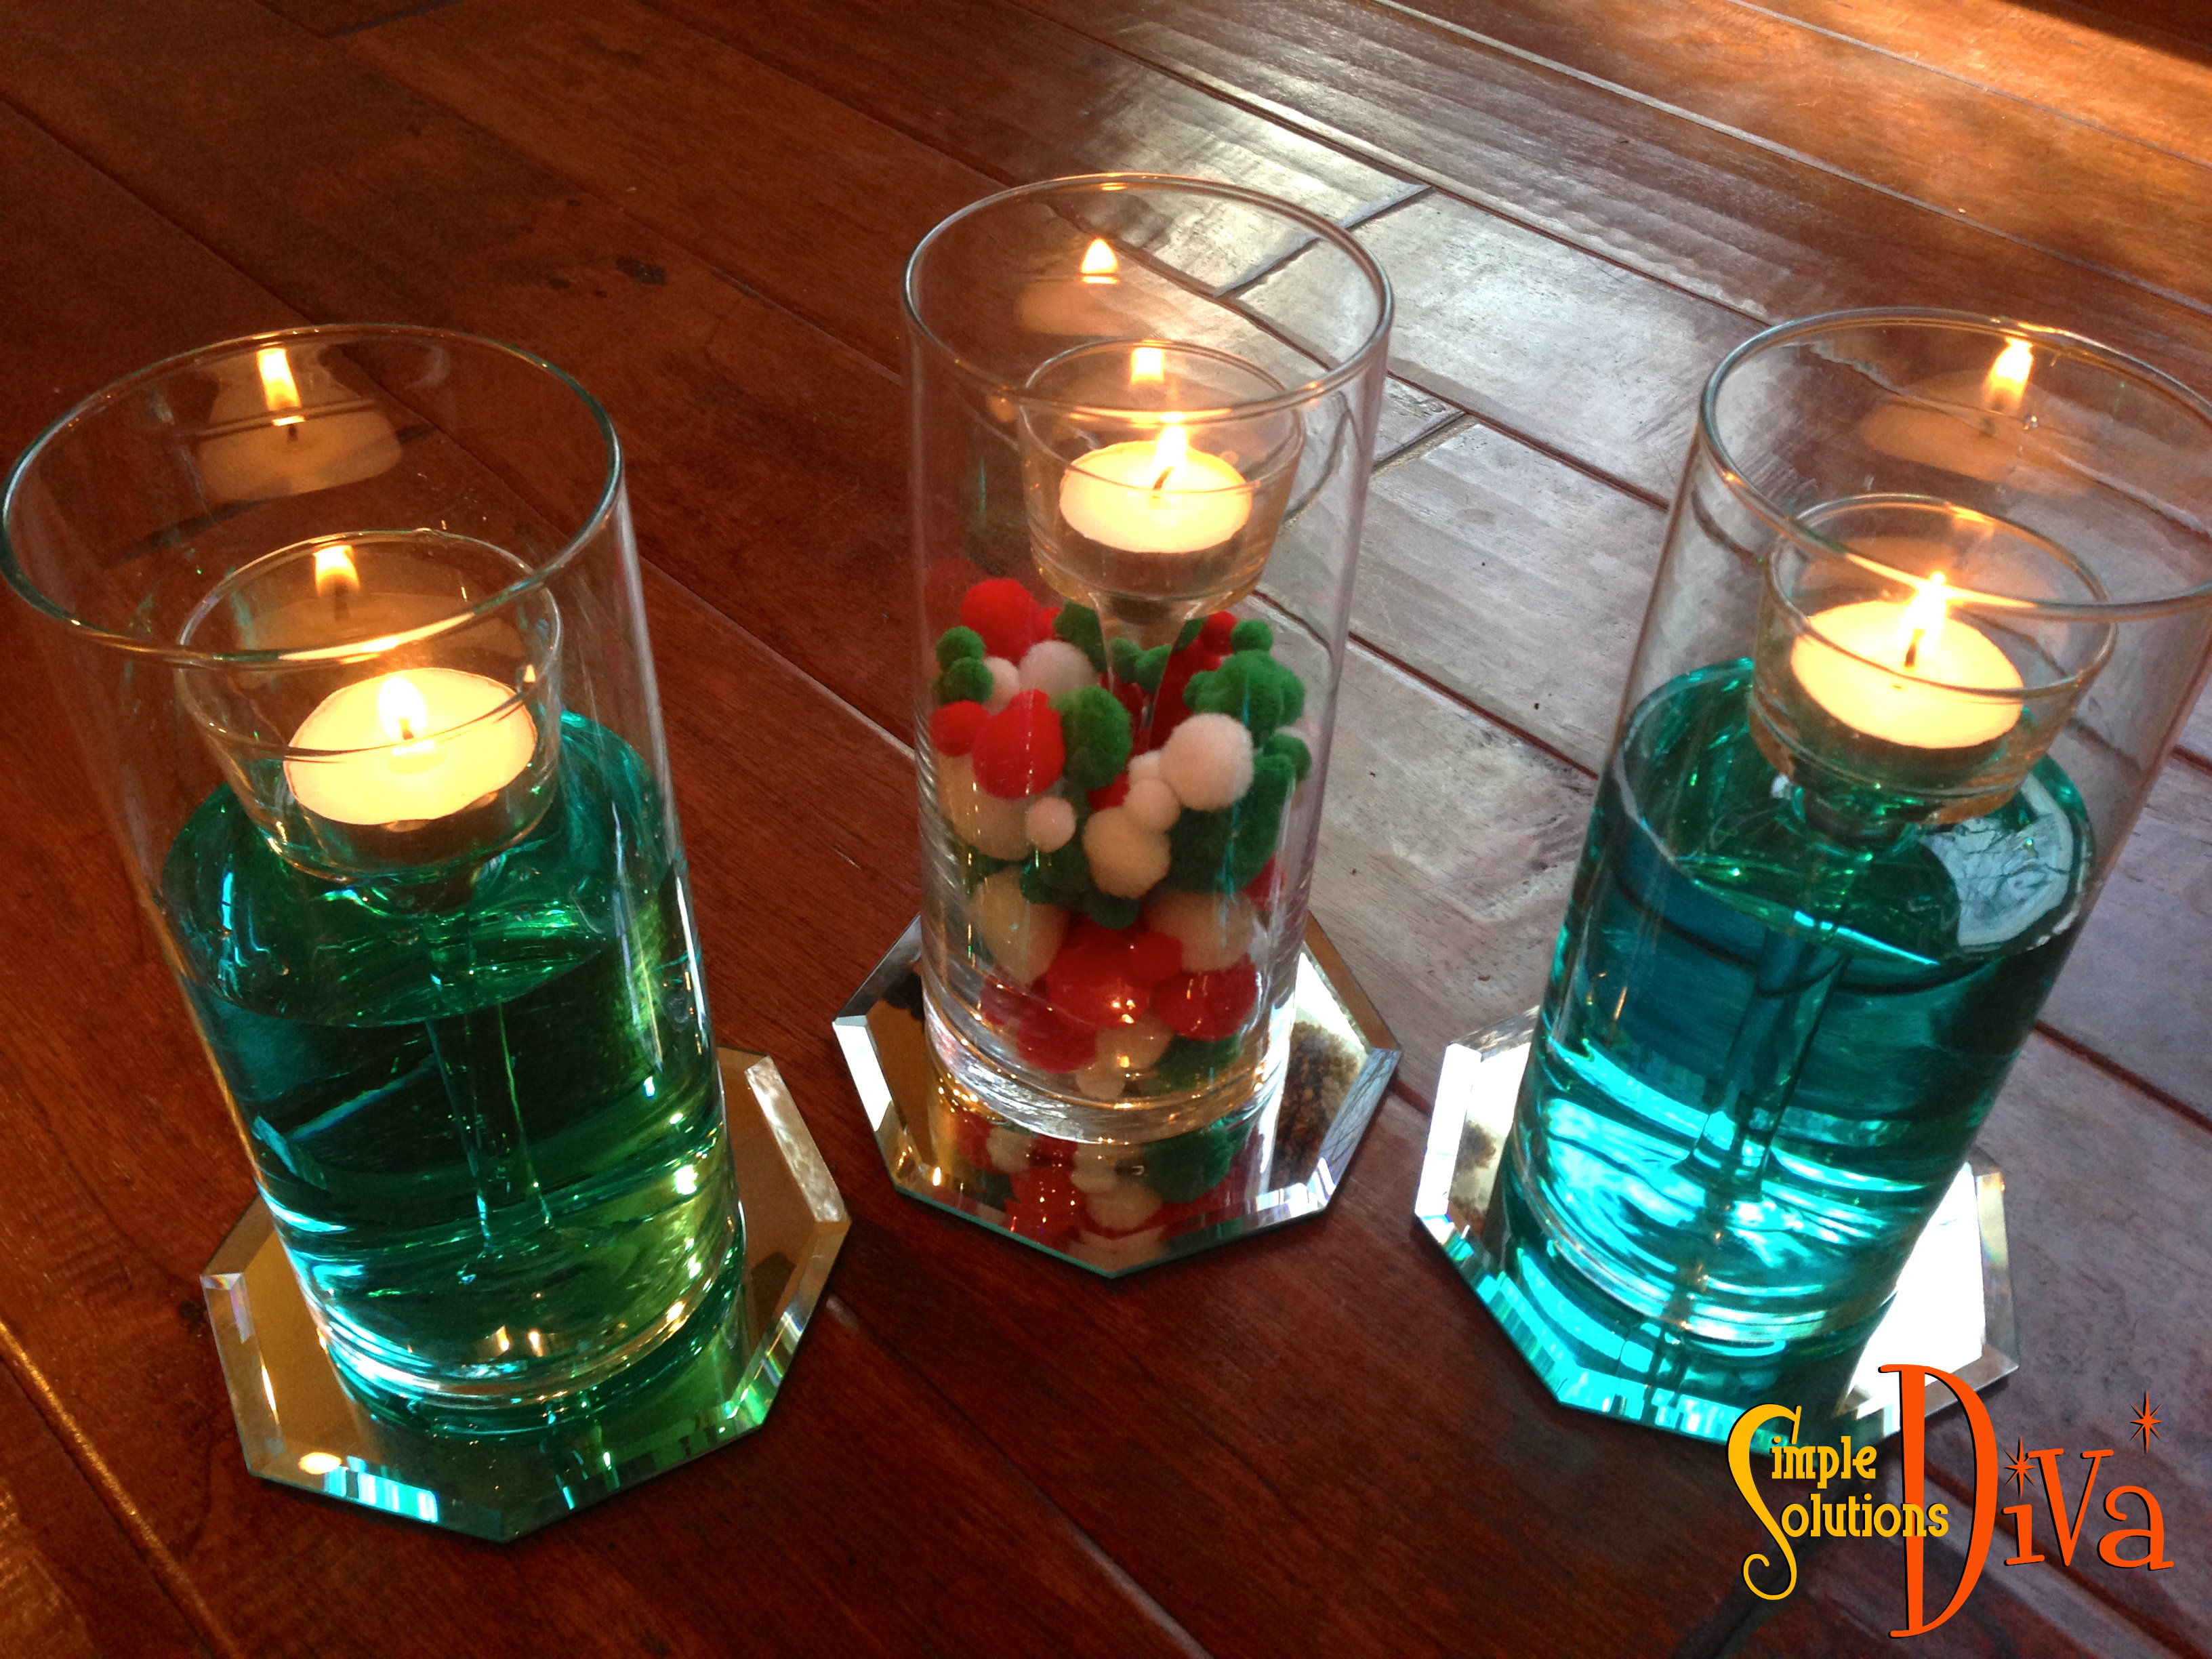
I LOVE this simple contemporary look! I’ve used a cool plastic tray as a charger to create the contemporary look, plus a crisp white plate and sleek stainless steel flatware. I’ve taken the martini glass and filled it with pompoms, plus topped it all off with the cute present place card holder (which is just a Christmas ornament). In addition, I have created a contemporary centerpiece (see below) using glass vases, votive candle holders, more pompoms, and mirrored candle holders. Total cost, including the centerpiece: $21.00.

Contemporary Centerpiece Using Glass Votives, Glass Vases, and Votives From Dollar Tree.

Stepping It Up For Christmas

While I was shopping at Dollar Tree, I overheard one woman say, “Dollar Tree really has stepped up their Christmas selection!” — and they have! They have stockings, plus everything you could want to stuff in those stockings, like candies, toys and more, gift wrap, boxes and bags. Serving pieces and holiday decorations for the home!

With everything in the store just $1.00, Dollar Tree will help keep a little jingle in your wallet this holiday season! Visit ileavehappy.com for more holiday inspiration!

Thank you to Dollar Tree for sponsoring this project, and to WTLV-TV’s First Coast Living for inviting me on to share these Holiday ideas!

DT XMAS 3

Easy Halloween Party Decorations

I love finding ways to add a spooky fun Halloween motif without spending too much money! These little tips are cost effective and fun to make! Thank you to WTLV-TV’s First Coast Living for inviting me on to share these ideas!

SSD Halloween Candles 2Ghoulish Bleeding Candles

These are simple and you can use items you already have at home! Click here for the video and instructions.

Boo pumpkin


Crafty Halloween Pumpkin

For something a little less ghoulish and a little more sparkly, try this simple craft idea! I used an artificial pumpkin, Halloween ribbon, and sparkly purple sequins to create a Blinged-Out Pumpkin! I used a marker to write out my word of choice (you can choose any frightening word you want.), used a hot glue gun to attach the sequins, then topped it with the bow! (you can use craft glue, instead)


Flying Bats photo and idea from DanaMadeIt.com.

Flying Bats!

Something about the sight of a colony of bats just gives me chills! This idea from DanaMadeIt.com does the trick! It is as simple as cutting out of black card stock a lot of different sized bats and sticking them to the wall with double-sided tape! Easy Peasy! You can also set them up outside, just use duct tape – it will hold better outside!

Happy Halloween!

Simple Project: Make Your Own Chalkboard Sign

This is such a simple little project! You can make this using the following supplies:

  • Chalkboard Paint (purchase at any craft supply stores or many hardware stores)
  • Small paint brush (I recommend using one with bristles, not a sponge applicator, just to have a smooth finish)
  • A dish or plate (I used one from the dollar store!)

Depending on how large the plate is, you can use it to serve and identify appetizers (like a cheese plate), use it to list the dinner menu, use it as an ever-changing welcome sign, a humorous sign for family, and so much more!

SSD DIY Chalkboard

Simple Solutions Diva Is Now A Contributor To 30SecondMom.com!

Screen Shot 2013-11-20 at 9.44.19 AMSimple Solutions Diva is excited to share that she is now a contributor to the website, 30SecondMom.com. The website, full of great tips and ideas provided in a short and sweet 30 second format, is perfect for the busy mom!

30Second Mom’s goal is to provide mobile moms with quick and helpful tips from other moms – each in about 30 seconds or less – delivered straight to their phones. Whether moms read the tips or watch them on video, they are delivered in clear and concise – and fun! – formats that won’t take much of moms’ most precious asset: their time.

Check out Simple Solutions Diva’s 30Second Mom.com profile and tips by clicking HERE.

Simple Halloween Decor “How-To” Round-Up

Here are a few  “How-To’s” for some simple Halloween decor ideas that I featured on First Coast Living, WTLV-TV/NBC 12 (Jacksonville, FL).  I’ve tried to include ideas that were inexpensive and fun to make with the kids! Enjoy!


Spooky Eyes In The Bushes (or Trees, or really anywhere dark!)

Spooky Eyes In The Bushes, from SimpleSolutionsDiva.com

Items Needed For Project:

  • Empty Toilet Paper Rolls
  • Scissors or Exacto Knife (if doing project with children, an adult should be in charge of work with Exacto knife)
  • LED/Battery Operated Tea Lights (Or you can use a string of colored or clear twinkle lights)
  • Duct Tape – Dark works best, so it will blend into the bushes.

Take empty toilet paper rolls and cut out spooky (or silly) eye holes. Then make a small slit in the back of the toilet paper roll.

Insert an LED/Battery Operated Tea Light into the slit in the back of the roll, and secure it with duct tape, leaving on/off switch exposed. (If using twinkle lights, insert bulb into slit, then secure cord/bulb to back of roll using duct tape)

Duct tape over the the open ends of the toilet rolls so no light escapes either side.

Place in bushes along walkway, or in dark corners of the house. Turn on tea lights (or plug in twinkle light cord) and you have spooky eyes twinkling in the bushes on Halloween night!


Table Top Ghost Decoration

Items Needed For Project:

  • Empty 2-litre soda bottle, or other tall empty bottle/jug.
  • One wire hanger, unraveled
  • One large styrofoam ball
  • Duct Tape
  • Cheese Cloth (Available in supermarkets and craft stores)
  • Spray Starch – Extra crisp spray, if possible.
  • washable towel (to protect surface)
  • Black felt circle (for eyes and mouth)

Image


Create the “form” for ghost – Lay towel down to protect your work surface. Wrap wire hanger around neck of empty soda bottle, creating arms that extend out from the bottle.  Secure wire hanger in place with duct tape. Press styrofoam ball onto top of soda bottle to create the shape of the ghost’s head.

Drape cheesecloth over the ghost “form” to create illusion of a ghost. Arrange the “skirt” of the ghost at the bottom of the figure.

Spray heavily with spray starch. Let dry completely. Gently remove the ghost from the mold, being careful to retain the shape of the ghost.  Using black felt cut outs, glue eyes to the ghost. Set up on your table for a ghostly guardian of your Halloween table!


 Ghost Pathway Markers

Image 3
Ghost Pathway Markers, from SimpleSolutionsDiva.com.

Items Needed For Project:

  • Multiple clear,empty plastic milk jugs (washed and dried)
  • Scissors or Exacto Knife
  • LED/Battery Operated Tea Lights or Glow Sticks (do not use real candles)
  • Black Permanent Markers (or black felt cut outs for eyes, nose and mouth)

Cut off top of milk jug. jugs

Using black permanent marker, draw ghostly eyes and mouth on front of milk jug.  Place LED/Battery Operated Tea Light or activated glow stick into milk jug and place along walkway or driveway.


Pumpkin Planters

Pumpkin Planters from SimpleSolutionsDiva.com.

Items Needed For Project:

  • Artificial pumpkin
  • Pumpkin carving tool or small, serrated knife
  • Screwdriver, or other pointy tool
  • Potting Soil
  • Pea Stone for drainage (available from hardware stores)
  • One Fall Plant of equal (or slightly smaller) size  to the artificial pumpkin. I love using mums because they are a hearty plant and can take a little abuse!
  • Optional – Garden gloves, gardening trowel.

Cut off the top of the artificial pumpkin, cutting at approximately the pumpkin starts to become wider. (usually about 1-2 inches from the top).  Using a screwdriver or other pointy tool, poke drainage holes in the bottom of your pumpkin. Pour about an 1-2 inches of pea stone into bottom of pumpkin to provide drainage AND heaviness to keep the pot upright.

Arrange potting soil in bottom of pumpkin, allowing enough room to place the plant.  Arrange until plant looks right to you in the pumpkin, then fill remainder with potting soil. Place outside and water thoroughly. For a more visual explanation, Click Here for video!

Glowing Ghosts – The Great Pumpkin

Image 5
The Great Pumpkin Glowing Ghost, from SimpleSolutionsDiva.com

Items Needed For Project:

  • Black or White cheese cloth/gauze
  • Large plastic pumpkin bucket
  • Glow sticks
  • Fishing wire or string

Set up paper wedding bells. Drape cheese cloth over pumpkin bucket in ghostly fashion, being sure to create a hole to attach a string on handle.

When ready to display at night, activate glow stick and place in bottom of bucket. Use fishing wire or string to hang the “Great Pumpkin ghost from trees outside.


Great Fall Decor Projects!

Simple Solutions Diva is busy creating some simple, fall decor videos using pumpkins, both real and artificial. Artificial pumpkins are great for Autumn in the warmer climates – they don’t rot!   Look for the videos to be featured this weekend and next!

Now, take a look at the pumpkin in this photo. Can you tell if this pumpkin is real or artificial?

pumpkin
Is it real or artificial?

1 2 3

© 2015 SIMPLESOLUTIONSDIVA.COM Designed by The Web Design Chic | ADMIN LOGIN