SimpleSolutionsDiva.com

Cooking With The Kids

Getting Creative With Veggies – Carrot “Pumpkins”

I know from experience it can be difficult to get kids to eat their veggies! For some reason, two and three year olds just don’t care when you explain that veggies are good for them! But like all good parents, we try to sneak vegetables into their diet – some with success, some without!

So I knew when I saw these adorable carrot “pumpkins” they would be a perfect fall treat for kids – and something a parent can feel good about giving them!

pumpkin-carrot2


I hope you like the cutting demonstration in the video!  Disclaimer: When using a big knife, I don’t recommend letting the kids cut the carrots! If you want to get them involved, give them the job of peeling and washing the carrots!

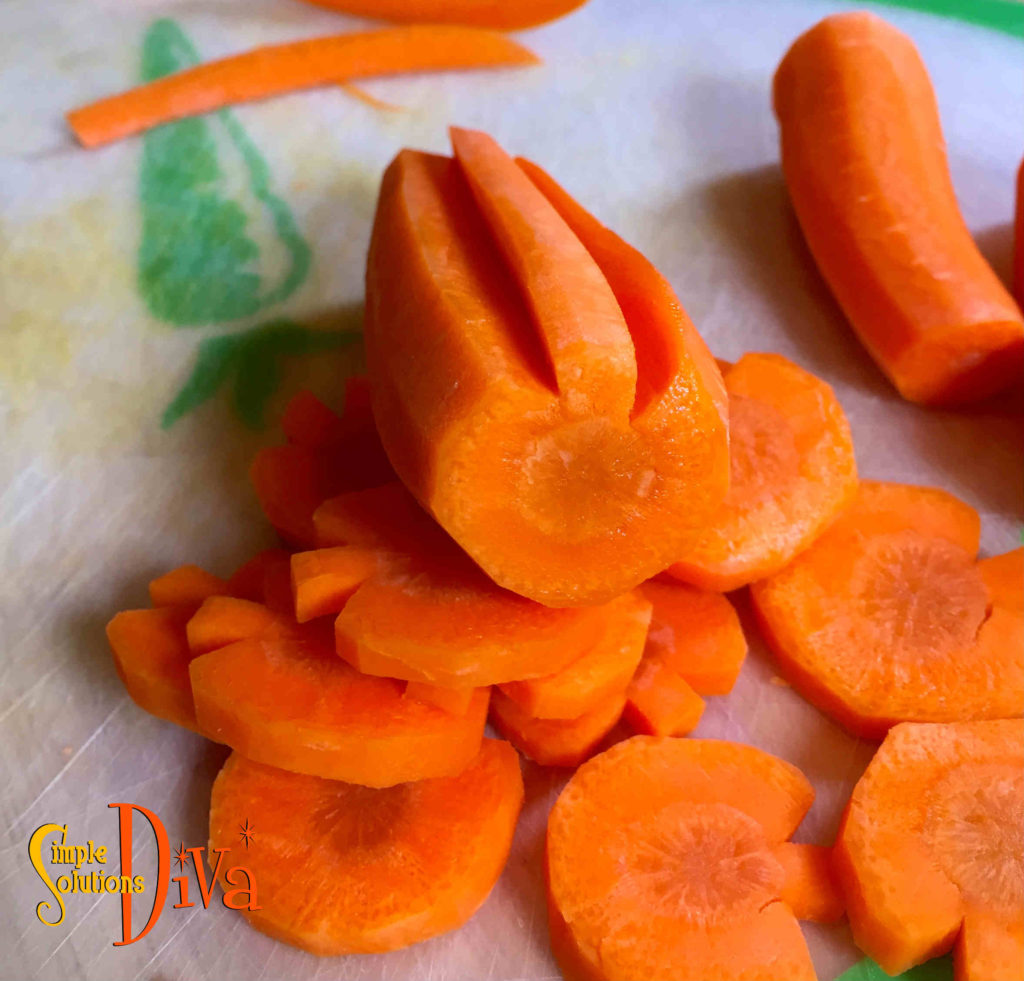
A close-up of the cuts you need to make on your carrot - So cute!
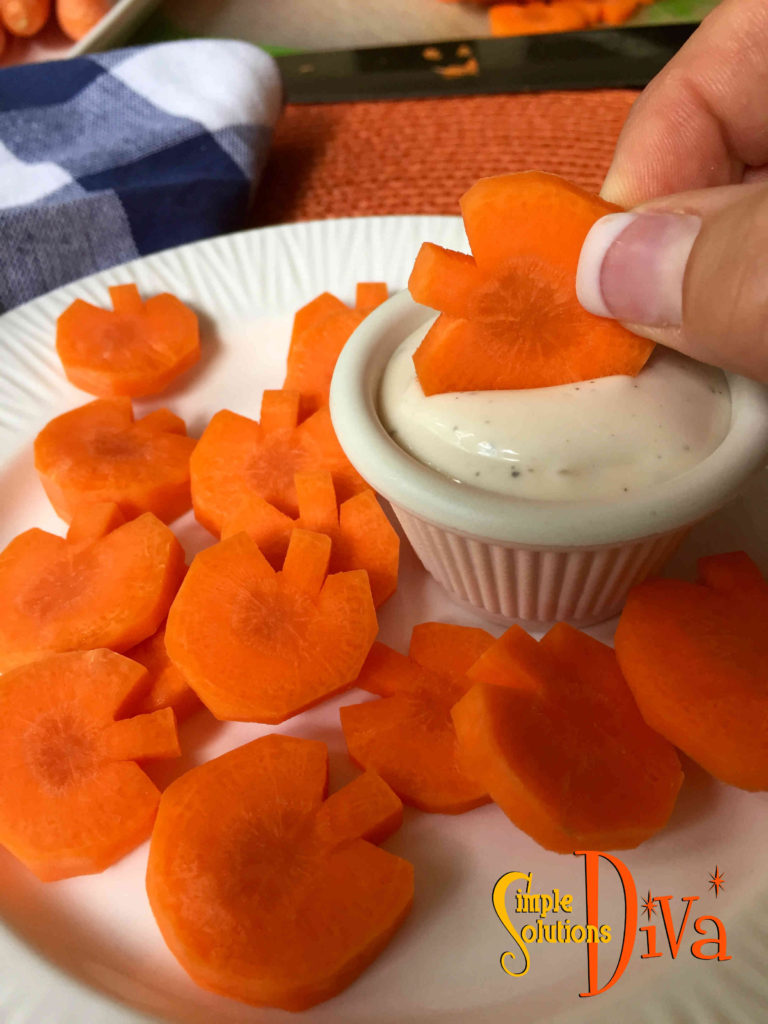
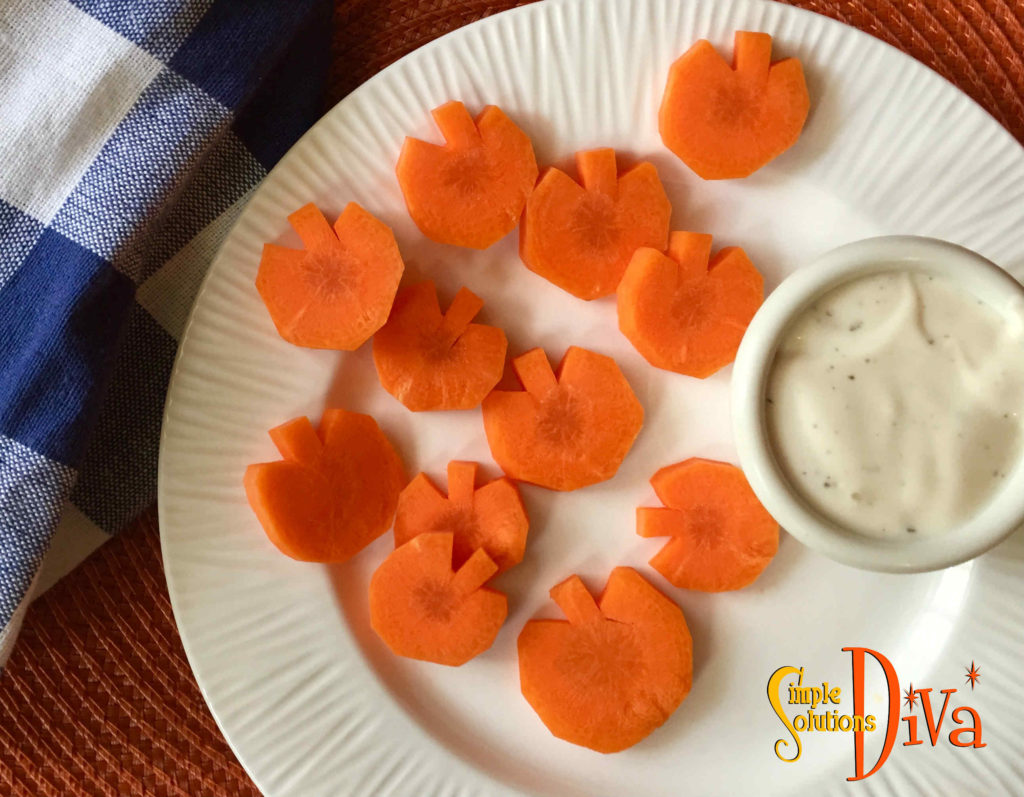
A close-up of the cut carrot – So cute!


What kid could refuse these sweet & crunchy “pumpkins” – especially if they are served with dip! Or add them to chicken noodle soup for a Fall or Halloween theme!

pumpkin-carrots-1


However you serve them, you and your child are sure to love them! (FYI – Even my teenagers happily munched away on these – before I was done filming!)

pumpkin-carrots4

Recipes For Kids To Make This Summer


kids recipes


With kids out of school during summer break, the two most dreaded phrases parents will hear are, “I’m Bored!” and “I’m Hungry”! Why not kill two birds with one stone and use the lazy days of summer to teach your kids to cook? Here are some recipes, of varying levels of difficulty, you can teach your kids to make. Who knows? Maybe they will make dinner for YOU sometime!

Note: As a parent, you need to determine how much supervision your child needs when using the oven, stovetop, knives, etc. Every child is different!

Ants on a Log – The childhood classic — celery sticks filled with peanut butter and topped with raisins is always a favorite, requires no oven and no sharp knives. Pre wash & cut the celery and keep it in the fridge for quick access for the kids! For a fun variation, use Craisins instead of raisins or use a flavored cream cheese spread in place of the peanut butter.

Corn Dog Muffins – I’ve taken the County Fair Favorite (a corn dog on a stick) and made it super easy! Your child can make a batch of these for snacks! Serve with ketchup or mustard to as a dip! (Requires the oven.)

Ingredients:

  • 2 packages cornbread mix
  • 2 Tablespoons brown sugar
  • 2 Eggs
  • 1.5 Cups milk
  • 1 Cup Cheddar Cheese (optional)
  • 9 All Beef Hot Dogs, sliced in half

Directions:

Preheat Oven To 400 degrees. Lightly grease muffin tin (makes 18 muffins).

In a large bowl, stir together the cornbread mix and brown sugar. In a separate bowl, beat the eggs and milk. Gently fold the egg mixture (and the optional cheese) into the cornbread mixture – mix until moistened.

Spoon the mixture into muffin tins until they are about 2/3 full. Add a ½ hot dog to each muffin cup.

Bake for 14-18 minutes, until golden brown.

Tuna Cheese Melts – English muffins, homemade tuna salad and cheese make for a yummy, simple lunch! (Requires toaster oven or regular oven for melting cheese.)

Ingredients:

  • 2 cans white albacore tuna fish in water, drained
  • 3 Tablespoons mayonnaise, more or less to taste
  • 1 teaspoon celery salt
  • 1 teaspoon onion powder
  • 1 teaspoon garlic powder
  • ¼ Cup each chopped celery & onion, chopped
  • 2-3 Tablespoons yellow or red bell pepper, chopped
  • 3 English muffins, split
  • 6 slices American cheese (or other favorite cheese)
  • 6 slices fresh tomato (optional)

Directions:

Toast the English muffin halves and set aside on a baking sheet. (Optional: You can butter the English muffins when you toast them.)

Preheat toaster oven (or oven) to 200 degrees.

In a medium bowl, flake the tuna and then combine the remaining ingredients, mixing thoroughly.

Spoon mixture onto each muffin half and top with a slice of cheese.

Pop in oven and bake until the cheese melts (approximately 8 minutes). Remove from oven, top with a tomato slice and serve.

Coconut Chicken Nuggets – A Tropical Twist on a kid’s favorite! Serve with pineapple mango salsa, or orange marmalade for dipping!

  • 1 Cup Flaked coconut
  • ½ Cup Flour
  • ½ teaspoon salt
  • ¼ teaspoon black pepper
  • ¼ teaspoon garlic powder
  • 1-1/2 pounds boneless, skinless chicken breasts, cut into 1 inch cubes (or strips if you prefer chicken strips!)
  • 1 egg, beaten
  • 1/3 Cup Butter, melted

Directions:

Preheat oven to 400 degrees.

On a plate, mix coconut, flour, salt, pepper, and garlic. In small bowl, beat the egg.

Dip the chicken in the egg mixture, then roll the pieces in the coconut mixture to coat.

Place on a non-stick baking sheet and drizzle with the butter. Bake 25 minutes, or until chicken is browned and cooked through, turning pieces halfway through.

Serve with dipping sauce and enjoy!

Note: You can mix a cup of orange marmalade with 2 tablespoons dijon mustard to make a zesty dip! (I added a couple of splashes of sweet chili sauce to it for my dip!)

For more recipes to make with the kids, check out the Diva’s video series Cooking With The Kids!

Thank you to WTLV-TV’s First Coast Living for inviting me on to share these recipes!
Super Easy Halloween Party Foods

It is the day before Halloween, and you get invited at the last minute for a Halloween Party. You need to bring something to share, but you want to do something easy! Try one of these simply ghoulish treats – they are tasty, easy to make, and are kind of creepy! They are so easy, the kids can even make them!

SSD Halloween Party Foods


Spider Eggs

These are the EASIEST food to bring by far! It is as simple as getting powdered donut holes, stacking them on a plate or bowl, and placing plastic spiders around and on the donut holes. (If there are little kids at the party, they need to be supervised so they don’t eat the spiders!)

SSD Spider eggs


Witch’s Broom

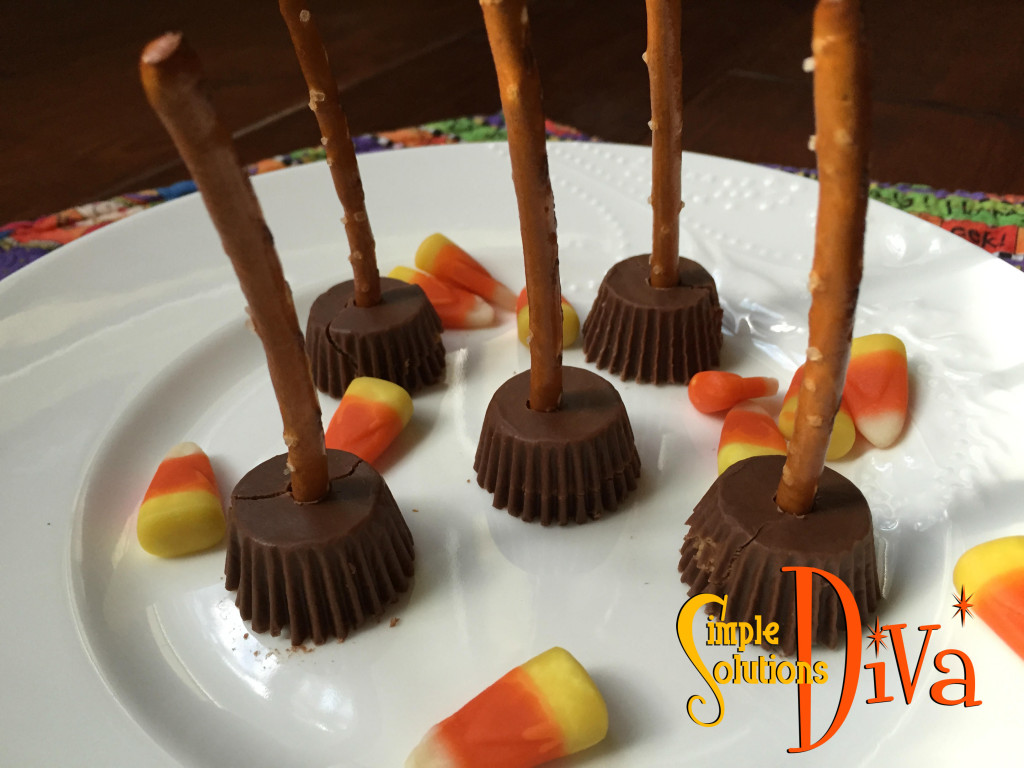
Another super simple, little party treat! Reese’s minis, unwrapped and placed upside down on a serving plate. Insert into what is now the top of the Reese’s (actually the bottom), insert a small pretzel stick. Easy Peasy! (Note: You may want to use a toothpick to make a small hole first – the size of the pretzel stick may crack the Reese’s – as seen below!)

SSD Witch Broom


“Blood-Splattered” Cupcakes

You can make your own, or use store-bought, white frosted cupcakes for this treat! Using red GEL food coloring (it adds a little thickness to the “blood”), squeeze into a small bowl and add a little water. Take a BRAND NEW toothbrush (use an old one? YUCK!), dip it into the red mixture, then splatter the cupcakes with it. Looks gruesome! (Be sure to not wear a white or other light colored shirt – protect your shirt while doing this!)

SSD Blood cupcake


Pumpkin Pizza

No, not pumpkin flavored pizza, just pizza decorated to look like a Jack-0-Lantern! Take any frozen, round cheese pizza and add toppings (choose your favorites) to decorate! Here is a great example from the Papa Murphy’s Restaurant website:

Pumpkin Pizza: Photo Courtesy of Papa Murphy's Restaurant.
Pumpkin Pizza: Photo Courtesy of Papa Murphy’s Restaurant.


Spider Dogs

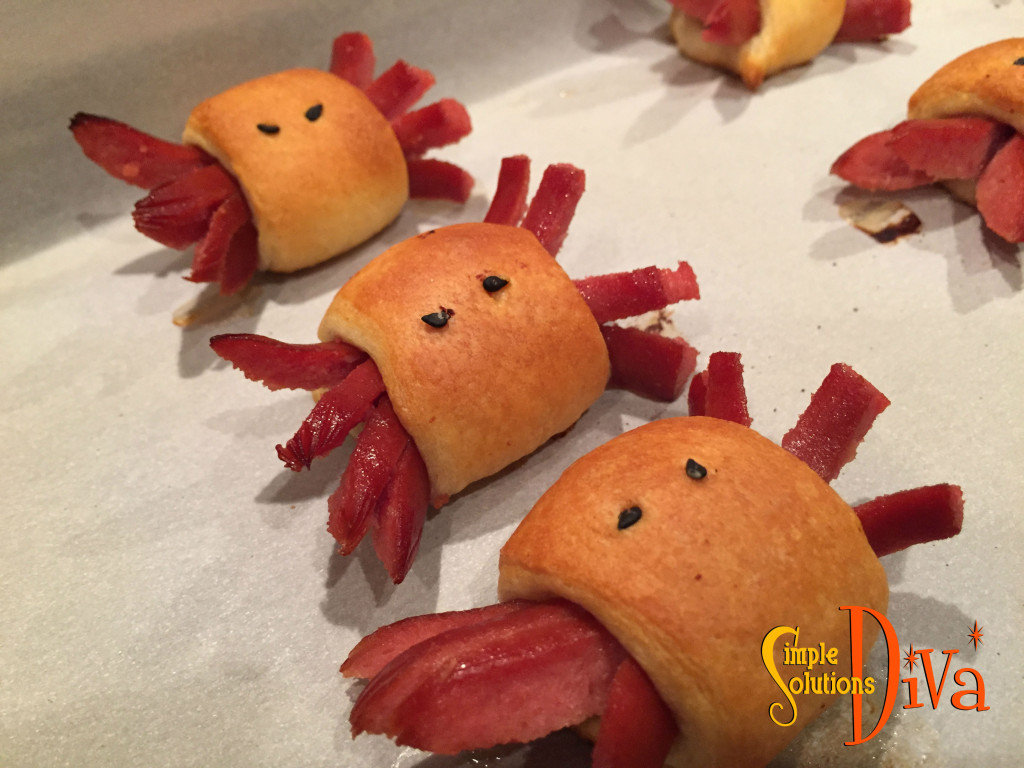
These cute little guys are probably the most time consuming of the bunch here(it took me 10 minutes to whip up and assemble them), but they are just so cute! Preheat your oven to 400 degrees. Cover a cookie sheet with parchment paper. Start with one hot dog (one hotdog will make 4 spider dogs), slice it length-wise. Cut each length in half. See illustration below:

hot dog

Lay each quarter dog flat. Slice 3 slits on each end of the quarters (leaving about 1/2 inch or so solid in the middle. These will make the eight legs for the spiders!

Using crescent roll dough, take slices of the dough and wrap around the middle of each spider and place on the parchment paper covered cook sheet. Black sesame seeds make the eyes. Place in the oven for 8-12 minutes, until the spiders are light brown (ovens will vary so be sure to watch them!).

SSD spider dogs


Thank you to WTLV-TV’s First Coast Living for inviting me on to share these simple Halloween recipes!

Pumpkin Peanut Butter Oatmeal Dog Biscuits

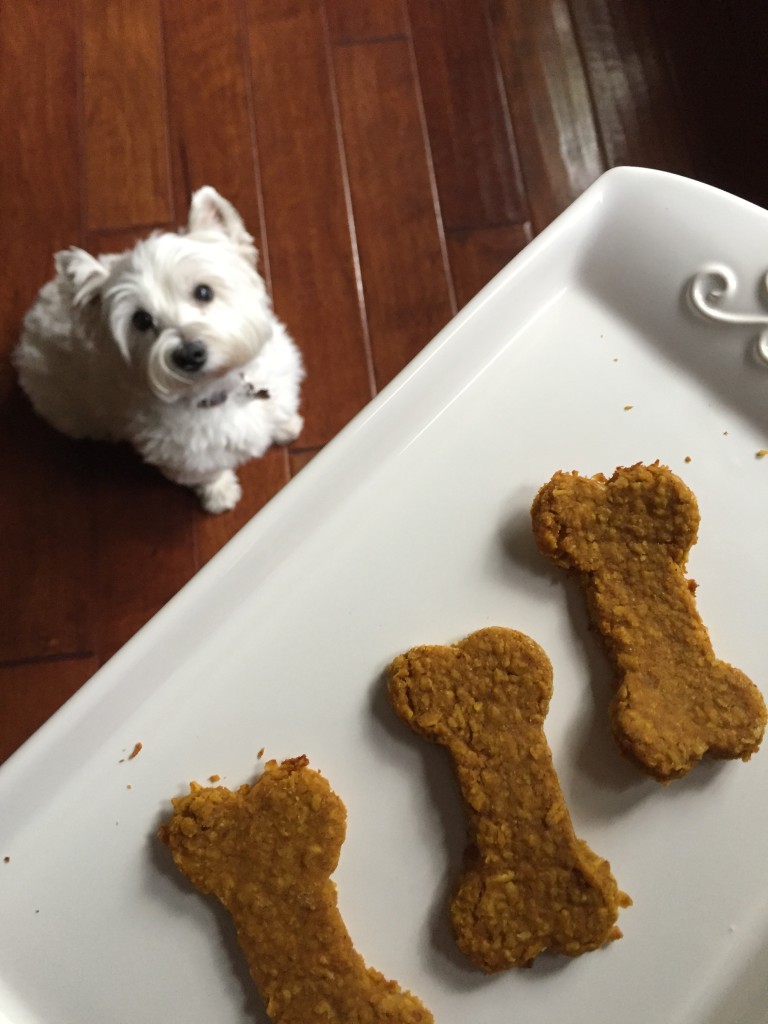
The month of October offers a HUGE variety of pumpkin treats for us humans, but don’t forget your dog likes pumpkin, too! These are the easiest dog biscuits to make and they are simple ingredients your dog will love! Plus, you can feel good feeding these to your pup! (My taste-tester, Maisie, LOVED them!)


Maisietreats


Pumpkin Peanut Butter Oatmeal Dog Biscuits
 
Prep time
Cook time
Total time
 
Dogs love pumpkin, so you can feel good about giving them this tasty treat!
Author:
Recipe type: dog biscuits
Cuisine: Dog food
Serves: 24 biscuits
Ingredients
  • 3 cups oats
  • ½ cup peanut butter
  • 1 cup pumpkin puree
  • 1 teaspoon cinnamon
  • 1 teaspoon baking powder
  • 2 eggs
Instructions
  1. Preheat oven to 375 degrees.
  2. Place the oatmeal into a food processor or blender and pulse it so it is not coarse (it does not need to be as fine as flour.)
  3. In a large bowl, add oatmeal, pumpkin, peanut butter, cinnamon, baking powder, and eggs. Using a hand mixer, blend on medium until it is thoroughly mixed.
  4. On a clean work surface, sprinkle a little flour and roll out the dough to ¼ - ½ inch thick. NOTE: Dough will be sticky, so have a little flour on hand to sprinkle on. Cut with cookie cutters.
  5. Place on a cookie sheet and bake for 15-20 minutes (ours took 18 minutes).
  6. Cool on rack until completely cooled.
  7. Place in airtight container to keep them fresh, or in the freezer.


FullSizeRender 2


This recipe is from CreatedBy-Diane.com – Definitely make it a point to visit her site – she has SO MANY recipes (Including ones for humans!) and they all look terrific!!


Maisie2


Five Minute Cake In A Mug!


When you are in a hurry for a decadent dessert, who doesn’t like chocolate? Here’s a recipe that is perfect to make and eat with the kids! Warning – this serving was so big, one mug (an oversized mug!) would have been plenty for two people!

Ingredients:

  • 4 Tablespoons flour
  • 4 Tablespoons sugar
  • 2 Tablespoons cocoa
  • 1 egg
  • 3 Tablespoons milk
  • 3 Tablespoons vegetable oil
  • 3 Tablespoons chocolate chips, optional (really, if you are making cake, GO FOR IT!) 😉
  • 1/2 teaspoon vanilla extract

Directions:

Add the dry ingredients to a large, microwave-safe coffee mug, and mix well. Add the egg and mix thoroughly, being sure to scrape the sides and the bottom well to incorporate the mixture. Add the chocolate chips and vanilla and mix.

Place mug in microwave and cook for 3 minutes. The cake will rise and will peek out over the top of the mug, so don’t worry and think that it will explode!

Cake right out of the microwave - looks a little spongy and it is oh, so good!
Cake right out of the microwave – looks a little spongy and it is oh, so good!

Allow to cool, add some vanilla ice cream (why not!?!) and enjoy! So good you don’t need frosting!

Thank you so much to my assistants in today’s video, Dylan and Kingston! They were a big help AND they did a great job!

SSD Cake in mug

Baked Mozzarella Mini Bites


This recipe is fun to make with the kids and is a healthy alternative to fried mozzarella sticks. These little mini-bites of gooey deliciousness are baked, not fried, so you can feel good about enjoying them – and MAYBE even share with the kids! This recipe is a snack size; double or triple the recipe for more than 2 people.

Baked Mozzarella Mini Bites

Ingredients:

  • 3 Mozzarella Cheese Sticks, sliced into thirds (about one inch in length)
  • 1/3 cup panko crumbs
  • 1/3 cup egg substitute
  • 1/2 cup marinara sauce
  • cooking spray

Directions:

Preheat the oven to 425 degrees.

Toast the panko crumbs over medium heat in a pan (no oil or grease). Stir continuously until the crumbs are a light golden brown. Place the crumbs on a plate.

Pour the egg substitute into a small bowl.

Dredge the cheese stick pieces in the egg, then in the panko crumbs, and place on a cookie sheet sprayed with cooking spray. (Make sure to cover all sides of the cheese with the panko crumbs, or else the cheese will melt and lose shape – as you can see in the video!)

Place in oven and cook until the cheese has started to melt (but not spread all over the place!) — approximately 3 minutes. Remove from oven, place on serving plate and serve immediately with warm marinara sauce.

SSD Mozzarella Mini Bites

Walking Tacos – A Favorite For Kids and Adults!


This recipe couldn’t be easier! I discovered the Walking Taco when I helped at my daughter’s high school sports concession stand. As i was happily pushing my Crockpot Ropa Vieja (find recipe HERE), more and more people were ordering this Walking Taco!  It is a favorite at sports concession stands, and kids and adults love them!  It is also a great way to serve up tacos for a bunch of kids at a party. I’ve also heard that it is a great way to do tacos while camping!

Walking Tacos (AKA Tacos In A Bag)

Ingredients:

  • 1 pound of your favorite taco meat recipe, cooked
  • Individual sized bags of your favorite flavored Doritos® or Fritos®
  • Favorite Taco Toppings (suggestions: cheddar cheese, sour cream, salsa, corn, beans, lettuce, tomatoes, etc.)
  • Plastic spoons

Directions:

Crush the chips in their bag. Gently open the top of bag, being careful not to rip it from top to bottom.

Add meat and popping of your choice into the bag. Close bag and gently “mush” the ingredients around. Open the bag and walk around, eating the awesome “Walking Tacos”!

Enjoy!


SSD Walking Tacos

Tasty & Simple Chili Mac & Cheese

Now, there are just some recipes that as you cook, you become more hungry. It’s the smell as the recipe cooks. I know my nephew, Dylan, and I were hungry, but as we cooked this Chili Mac & Cheese, our mouths were watering! We had people coming over after we taped the video, and all I can say is – we didn’t have any left to take a photo of! We ate every last bit of this oh so yummy recipe!! So, sorry about no photos to share of this delectable treat!

I believe that is a sign of a good recipe!

So here it is!

Chili Mac & Cheese

Ingredients:

  • 1 teaspoon canola oil
  • 3/4 pound lean ground beef
  • 1 teaspoon garlic powder
  • 1 teaspoon ground coriander
  • 1 teaspoon ground cumin
  • 1 teaspoon onion powder
  • 2 teaspoons chili powder
  • 2 cups fat-free, lower-sodium beef broth
  • 1 cup water
  • 1 (10-ounce) can mild diced tomatoes and green chiles, undrained
  • 1 cup (8 ounces) uncooked elbow macaroni
  • 1/2 cup fat-free milk
  • 4 ounces 1/3-less-fat cream cheese
  • 4 1/2 ounces finely shredded reduced-fat sharp cheddar cheese

Directions:

Heat a Dutch oven over medium-high heat. Add oil. Add beef and next five ingredients; cook until the meat is thoroughly cooked through. Add the broth, water, and diced tomatoes and bring to a boil. Stir in the macaroni; cover and cook 10 minutes or until macaroni is done.

While the macaroni is cooking, heat milk and cream cheese in a saucepan over medium heat. Cook until cheese melts, stirring frequently (using a whisk really helped!) Remove from heat. Stir in cheddar and continue stirring until smooth. Add cheese sauce to macaroni mixture; toss well to coat. Serve hot!

Adapted from a favorite recipe on MyRecipes.com.


SSD Chili Mac & Cheese

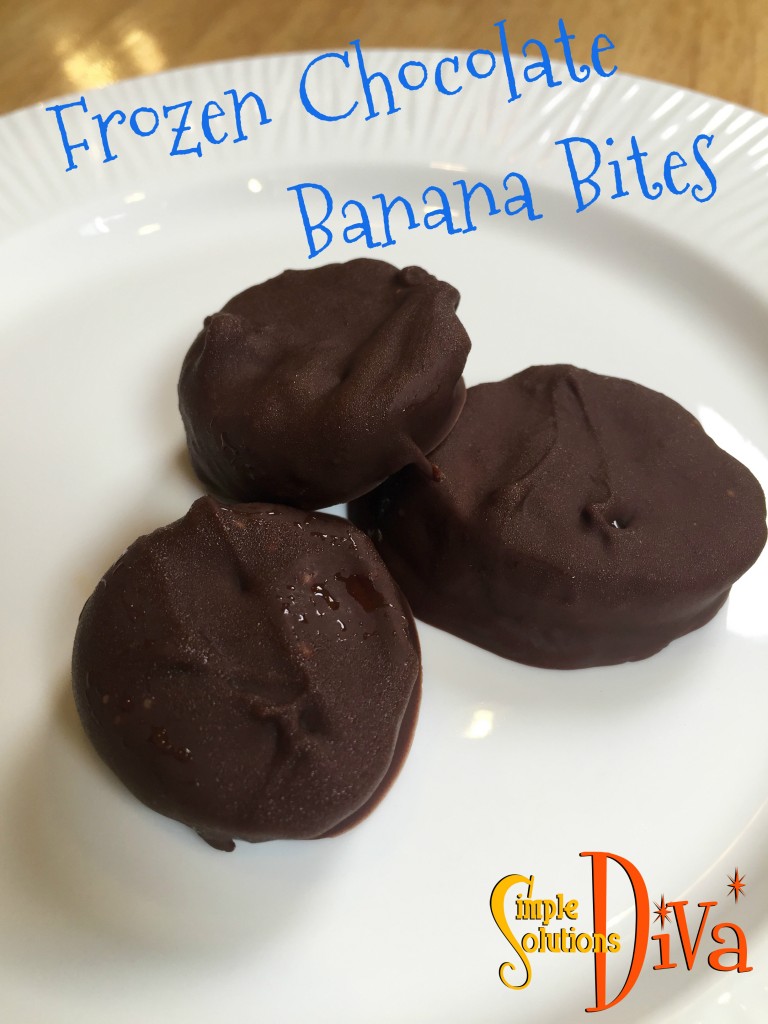
Simple Treat: Frozen Chocolate Banana Bites

Summertime has the kids home, ready to raid the pantry for snacks. You want to give them something that will be good for them, but when they are craving something sweet, what do you do? Try these simple, frozen treats you can feel good about – the kids can even make these treats themselves! Plus, it is a nice snack for those adults who have a sweet tooth – only about 25 calories per bite!

SSD Banana Bites 2

Frozen Chocolate Banana Bites

Ingredients:

  • Three ripe (but not too ripe!) bananas
  • 12 oz. semi sweet chocolate chips
  • 1.5 Tablespoons vegetable oil

Preparation:

Place a sheet of wax paper on a baking sheet.

Slice the bananas into ½ inch slices.

In a microwave-safe bowl, combine the chocolate chips and oil. Place in microwave and heat on full (HIGH) power for 30 seconds. Stir. Place back in microwave for 10-second increments, stirring in between, until the chocolate is just smooth. (FYI – Don’t over cook, or the chocolate will harden and look grainy.)

Dip the banana slices in the chocolate, making sure to cover entire slice in chocolate.

Place slices on wax paper. Place the baking sheet in the freezer for six hours or overnight until slices are thoroughly frozen.

Enjoy!!


SSD Banana Bites

Make Your Morning Smoothie, The Simple Way


My family loves a good smoothie for breakfast, but sometimes the morning rush leaves us without enough time to assemble the smoothie! Check out the simple video tip above for a simple solution to that time problem!


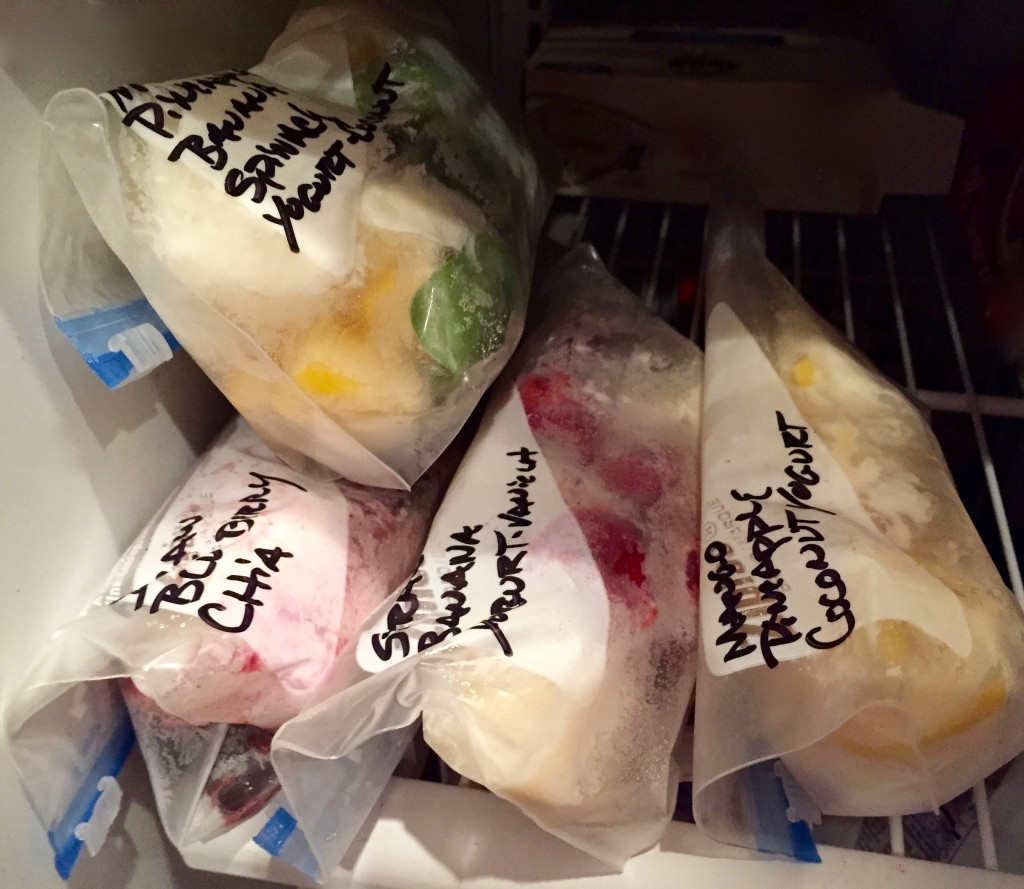
My smoothie packets all assembled and ready to use in the morning!

Frozen Smoothie Packet Recipes:

Smoothie Flavor Combos – You are only limited by your imagination!

Our current favorite recipe includes banana, mango, pineapple, spinach, and coconut greek yogurt (mixed with apple juice)! My oldest says, “It is better than ice cream, and healthier, too!”

Other favorites include:

The Superfood Smoothie – strawberry, blueberry, chia seeds and apple juice or almond milk.

The Tropical – Mango, Pineapple, Coconut Yogurt mixed with organic acai juice.

Strawberry & Banana – mixed with vanilla yogurt and almond milk.

Another great tip when preparing your frozen smoothie packets: If you want to include yogurt in your smoothie, use an ice cube tray and make yogurt ice cubes. They make it easier to assemble your smoothie packets!

SSD Smoothie PAckets

1 2

© 2015 SIMPLESOLUTIONSDIVA.COM Designed by The Web Design Chic | ADMIN LOGIN