SimpleSolutionsDiva.com

LauraMorey

Simple & Delicious: Chicken Souvlaki

Summer is the perfect time to make that simple and delicious Greek dish, Chicken Souvlaki! Marinating chicken with the flavors of lemon and garlic – a perfect combination in my book! You can grill the chicken or bake it in the oven – whatever is convenient for you. I had plans to grill this, but with downpours all day, I decided to bake them instead – and they were delicious!

By the way – this goes perfectly served with my cool, Greek Tzatziki Sauce! Serve the sauce on the side for dipping, OR chop up the chicken, place in a Pita or a Stonefire Naan (individual size), add a hefty dollop of Tzatziki, and lettuce, Makes a VERY yummy sandwich!

FullSizeRender-3
Chicken Souvlaki served up on a Stonefire Naan with my homemade Tzatziki Sauce!

Chicken Souvlaki
 
Prep time
Cook time
Total time
 
Lemon, garlic and oregano blend together to marinate fresh chicken breast in this Greek tradition recipe!
Author:
Recipe type: Main Dish
Cuisine: Greek
Serves: 4
Ingredients
  • Juice of one lemon
  • ½ teaspoon dried oregano (or 2 Tablespoons chopped fresh oregano)
  • 2 Tablespoons olive oil
  • ½ teaspoon salt (I used sea salt)
  • 2-4 cloves of fresh garlic, minced (I used three!)
  • 4 chicken breasts
Instructions
  1. In a large baggie, combine all the ingredients.
  2. Seal the baggie and shake to combine.
  3. Allow to rest for 30 minutes in the fridge, or until ready to grill or cook.
  4. Grill on medium high heat, turning once or twice, until instant read meat thermometer inserted into the chicken breast reads 165 degrees. (approximately 15-20 minutes)
  5. Alternative Cooking Method: Place on a greased baking sheet and cook for approximately 20-30 minutes in a 400 degree oven. They are done when instant read meat thermometer reads 165 degrees.

Enjoy this wonderful greek recipe! OPA!

Summer Cool Off – Greek Tzatziki Sauce

“Can’t we just do something that a Greek person in TODAY’S world would do?”

And with that challenge, my 19 year old got me thinking out of the box for a family trip! A little backstory:

We decided to take the kids on a trip to Greece: Touring ALL the historical sites throughout Athens, seeing the beautiful, white buildings and blue waters of Greek Island – with two teenage girls, in the summer, taking them away from their friends for 10 days. A recipe for Family Awesomeness, right?! (Those of you with teenagers are probably laughing right now at my blessed ignorance!)

SIMPLE VACATION TIP: The trip WAS actually awesome because we included activities the girls wanted to do!

So back to the challenge my 19 year old gave me. My daughter wanted to experience something culturally relevant to the modern, Greek citizen. It was a brilliant idea! I suggested a cooking class, which was greeted with much enthusiasm. Working with our travel agent, we settled on a private cooking class with Teta, owner of Mykonian Spiti, on the island of Mykonos.

IMG_1061
The whole family in Teta’s beautiful, light-filled kitchen

Held in Teta’s kitchen in her traditional, Mykonian home, we had a FANTASTIC experience! We spent the whole day making Tzatziki Sauce, Spinach Pie, Stuffed Peppers & Tomatoes, and Beef With Orzo. The entire family was involved in the class.

Teta and my oldest making spinach pie.

Here is Teta’s Recipe for Tzatziki Sauce – a sauce perfect for grilled meats, or as a dip for pita and fresh veggies. I am including a link to her recipes page of her website. (FYI –  I’ve translated the measurements into U.S. measurements. PLUS, she forgot to add dill to her written tzatziki sauce recipe – trust me, it is supposed to be in there!)

FullSizeRender-1

Greek Tzatziki Sauce
 
Prep time
Total time
 
This versatile Greek sauce goes great as an accompaniment to grilled meats, or as a dip for veggies and pita bread!
Author:
Recipe type: Sauce/Dip/Appetizer
Cuisine: Greek
Serves: 1.5 cups
Ingredients
  • 1 Cup Greek Yogurt - I used Fage Greek Yogurt, recommended by my friend in Greece!
  • 1 large cucumber, grated, with water squeezed out as much as possible!
  • 1 Tablespoon fresh dill, finely chopped
  • 1 clove fresh garlic, finely minced
  • 1 Tablespoon olive oil
  • 1 Tablespoon white vinegar
  • Salt to taste
Instructions
  1. Mix all ingredients together and let sit for at least 30 minutes. Serve with grilled meats or as an appetizer served with pita and fresh veggies! Store, covered, in the fridge for up to one week.

Note About Mykonian Spiti: Teta is a one woman dynamo and I couldn’t be more impressed with her. Between her family’s two businesses, Teta and her husband employ about 35-45 Mykonians and house approximately 25 during the summer months. (Amazing, when you consider the economic upheaval Greece is currently experiencing!) Check out her website, Mykonian Spiti – there you can read all about her business, her efforts to give visitors a true cultural experience. PLUS, she has some of her recipes posted – you will love the way she writes in English!!

The tzatziki sauce "resting" for 30 minutes.
The tzatziki sauce “resting” for 30 minutes.
My husband "relaxing" his eyes for 30 minutes.
My husband “resting” his eyes for 30 minutes!


SSD Tzatziki Sauce


Teta's rooftop garden!
Teta’s rooftop garden!
IMG_1053
Even the vegetables are presented beautifully at Mykonian Spiti!

Simple Desserts To Celebrate July 4th!

patriotic 2

Independence Day is Monday, and that means we have a long weekend to celebrate with family and friends! i’m featuring a few simple desserts you can bring to that July 4th Party or Picnic that are sure to be a hit! Best of all you can get kids of all ages involved in making these!

FullSizeRender

Patriotic Oreos – Red, white & blue make this simple dessert a winner.

Ingredients:

  • One package of Oreo cookies.
  • One container of Dolce Frusta White Shell, melted (or you can make your own white chocolate dip by following the melting directions on back of package of Nestle’s White Chocolate Chips)
  • Red and Blue Cookie Icing – To make it easy on myself, I used Betty Crocker Cookie Icing.
  • Optional: Edible, Patriotic decorations

Directions:

Dip the Oreos in melted white shell/white chocolate (cover 1/2 – 3/4 of cookie). Place on wax paper to cool and set.

Using the cookie frosting, drizzle the Oreos with red and blue, then sprinkle with patriotic decorations (If using!) Allow icing to set before serving.

Screen Shot 2016-06-30 at 7.35.01 PM

Fruit Flag Dessert – A healthy way to celebrate the holiday! And you don’t need to worry about it going bad in warm weather!

Ingredients:

Your favorite red & blue fruits! I used strawberries, raspberries, cherries, and blueberries.

Yogurt covered pretzels or yogurt covered raisins.

Assemble the fruits into the shape of a flag – pretty easy peasy!!

IMG_1647

Icebox Cake – Old Fashioned, not filled with sugar and so tasty! This one requires refrigeration until serving!

Ingredients:

  • Nabisco Chocolate Wafers
  • 2 cups whipping cream
  • 1/2 teaspoon vanilla
  • 2-3 Tablespoons Chambourd Liqueur
  • 1/4 cup fresh raspberries, mashed
  • Patriotic Sprinkles

Directions:

TIP: Before starting, store your beaters and bowl in the refrigerator to chill. This will help with whipping the cream.

In a large bowl, mix the whipping cream at high speed until peaks form. Gently add in vanilla. Move 1/3 of the whipped cream into another chilled bowl and fold in the raspberries and Chambourd.

On a plate or small platter, arrange one layer of the chocolate wafers. Layer with the raspberry whipped cream. Add another layer of chocolate wafers. Layer with raspberry cream again. Add one last layer of chocolate wafers.

Taking the plain whipped cream and cover the entire cake. Sprinkle with patriotic sprinkles and refrigerate overnight. Serve and eat immediately.

Optional: Brush each layer of wafers with additional Chambourd – as much or as little as you like.

The cake at the end of the TV segment - devoured! But at least you can see what the cake looks like in the center!
The cake at the end of the TV segment – devoured! But at least you can see what the cake looks like in the center!

Thank you to WTLV-TV’s First Coast Living for inviting me on to share these recipes!

Recipes For Kids To Make This Summer


kids recipes


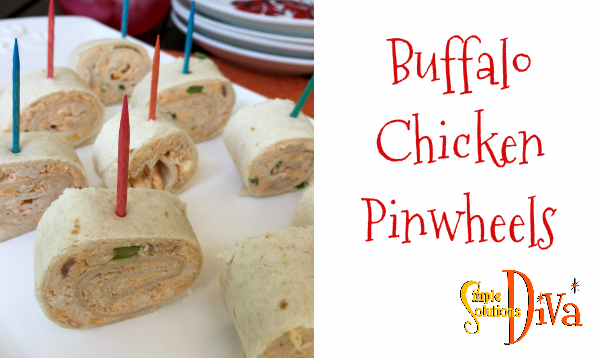
With kids out of school during summer break, the two most dreaded phrases parents will hear are, “I’m Bored!” and “I’m Hungry”! Why not kill two birds with one stone and use the lazy days of summer to teach your kids to cook? Here are some recipes, of varying levels of difficulty, you can teach your kids to make. Who knows? Maybe they will make dinner for YOU sometime!

Note: As a parent, you need to determine how much supervision your child needs when using the oven, stovetop, knives, etc. Every child is different!

Ants on a Log – The childhood classic — celery sticks filled with peanut butter and topped with raisins is always a favorite, requires no oven and no sharp knives. Pre wash & cut the celery and keep it in the fridge for quick access for the kids! For a fun variation, use Craisins instead of raisins or use a flavored cream cheese spread in place of the peanut butter.

Corn Dog Muffins – I’ve taken the County Fair Favorite (a corn dog on a stick) and made it super easy! Your child can make a batch of these for snacks! Serve with ketchup or mustard to as a dip! (Requires the oven.)

Ingredients:

  • 2 packages cornbread mix
  • 2 Tablespoons brown sugar
  • 2 Eggs
  • 1.5 Cups milk
  • 1 Cup Cheddar Cheese (optional)
  • 9 All Beef Hot Dogs, sliced in half

Directions:

Preheat Oven To 400 degrees. Lightly grease muffin tin (makes 18 muffins).

In a large bowl, stir together the cornbread mix and brown sugar. In a separate bowl, beat the eggs and milk. Gently fold the egg mixture (and the optional cheese) into the cornbread mixture – mix until moistened.

Spoon the mixture into muffin tins until they are about 2/3 full. Add a ½ hot dog to each muffin cup.

Bake for 14-18 minutes, until golden brown.

Tuna Cheese Melts – English muffins, homemade tuna salad and cheese make for a yummy, simple lunch! (Requires toaster oven or regular oven for melting cheese.)

Ingredients:

  • 2 cans white albacore tuna fish in water, drained
  • 3 Tablespoons mayonnaise, more or less to taste
  • 1 teaspoon celery salt
  • 1 teaspoon onion powder
  • 1 teaspoon garlic powder
  • ¼ Cup each chopped celery & onion, chopped
  • 2-3 Tablespoons yellow or red bell pepper, chopped
  • 3 English muffins, split
  • 6 slices American cheese (or other favorite cheese)
  • 6 slices fresh tomato (optional)

Directions:

Toast the English muffin halves and set aside on a baking sheet. (Optional: You can butter the English muffins when you toast them.)

Preheat toaster oven (or oven) to 200 degrees.

In a medium bowl, flake the tuna and then combine the remaining ingredients, mixing thoroughly.

Spoon mixture onto each muffin half and top with a slice of cheese.

Pop in oven and bake until the cheese melts (approximately 8 minutes). Remove from oven, top with a tomato slice and serve.

Coconut Chicken Nuggets – A Tropical Twist on a kid’s favorite! Serve with pineapple mango salsa, or orange marmalade for dipping!

  • 1 Cup Flaked coconut
  • ½ Cup Flour
  • ½ teaspoon salt
  • ¼ teaspoon black pepper
  • ¼ teaspoon garlic powder
  • 1-1/2 pounds boneless, skinless chicken breasts, cut into 1 inch cubes (or strips if you prefer chicken strips!)
  • 1 egg, beaten
  • 1/3 Cup Butter, melted

Directions:

Preheat oven to 400 degrees.

On a plate, mix coconut, flour, salt, pepper, and garlic. In small bowl, beat the egg.

Dip the chicken in the egg mixture, then roll the pieces in the coconut mixture to coat.

Place on a non-stick baking sheet and drizzle with the butter. Bake 25 minutes, or until chicken is browned and cooked through, turning pieces halfway through.

Serve with dipping sauce and enjoy!

Note: You can mix a cup of orange marmalade with 2 tablespoons dijon mustard to make a zesty dip! (I added a couple of splashes of sweet chili sauce to it for my dip!)

For more recipes to make with the kids, check out the Diva’s video series Cooking With The Kids!

Thank you to WTLV-TV’s First Coast Living for inviting me on to share these recipes!

Kill Pesky Mosquitoes Before They Can Bite!


With concerns of the Zika virus spreading during the summer months, I wanted to address one way to prevent mosquitoes in our gardens and back yards. Specifically for those who love to have bird baths and fountains running in our gardens. My recommendations are not meant to replace, in any way, the constantly updating recommendations of the Centers For Disease Control (CDC). For complete and updated information, check out the CDC website (Click Here).

FYI – A running fountain is a deterrent to mosquitoes (they don’t want to land and lay eggs) –but if that motor stops and water becomes stagnant, even for a few days, it can become a breeding ground!


ssd Mosquitoes

Stop That Sweaty, Summertime Chafing!


This is your summertime PSA, and you are welcome!

Ok, I admit this is kind of an unusual post for me. (And it is NOT a sponsored post!) But I view it as a summertime public service announcement (PSA) for all of us who don’t have a thigh gap. What is a Thigh Gap? Barbie is here to illustrate:

thigh gap
Thigh Gap: When Thighs Don’t Touch When Standing with knees together – usually someone who is 95 pounds and 2% body fat! AKA: Something I haven’t experienced, I don’t know, since maybe I was 8 years old!


I was inspired to do this post while on a college tour with my youngest. It was extremely hot and humid, and my skort (skirt with built-in shorts) was not keeping my thighs from rubbing together! Talk about uncomfortable! So when I got home, I decided to find out how to prevent that chafing. My friends who are runners & bikers probably know this already, but it was all new to me!

So if you, like me, are not aware of how to stop the bane of summer, enjoy and learn! You are welcome!


SSD Chafing

Tips To Create A Photo Wall!


I LOVE photos of my family (If you doubt it, check out this #ClearTheClutter video I did with professional organizer Chris Stone of NeatlyDesigned.com on how to reduce the number of photos you have!)!  So it was a natural progression for me to create a photo wall in my home!

The Diva’s Simple Tips To Create A Photo Wall:

  1. Create A Photo Wall That Appeals To You!
  2. Choose A Unifying Theme (For My Wall, I Chose Black Frames)
  3. Give Yourself Time!
  4. Display More Than Photos – This Provides Visual Interest!
  5. Use Different Types Of Photo Formats
  6. Arrange Photos On Wall First – Keeps You From Making A Million Holes In Your Wall!
  7. Have Fun!!
Here is the photo wall in my home! What is yours going to look like?


Close-Up: Here is a close-up of my favorite frame, which has the photos “floating” between two difference panes of glass – giving depth to the photo collage!

photo wall 5


photo wall

Home Decor Trend: Succulents

Succulents add a touch of greenery and texture to any room, whether indoors or outside! While In California on a recent trip, I was inspired by these cute, textured pots that held little succulents, so I took a photo:

succulent 4


I used this photo to find inspiration to recreate the look, but more tailored to my home style.

I was lucky enough to stumble upon some adorable, textured mercury glass candleholders at West Elm. (If you aren’t familiar with the store, you can check them out here: West Elm Mercury Glass Candleholders) So, I used them as pots!

succulent 3

So these little guys are perfect indoors:

succulent 2


Or outdoors!

succulent 1

Home Decor Succulents


Worth Noting: West Elm deserves a little recognition for support of local, small businesses and entrepreneurs! They sponsor something called West Elm Local, where they invite selected, local creators of handmade items into their stores to sell their products! (For More Info – West Elm LOCAL).

IMG_0425

When I went into their Jacksonville, FL store, they had 6 different merchants there, selling handmade items like soaps, baked goods, essential oils and more. They also happened to have someone selling handmade cement planters that were formed by using recycled materials! Of course, I bought one! Check Out Green Crete’s most recent work on Instagram.

IMG_0424


Buffalo Chicken Pinwheels


This simple recipe is perfect finger food for a party – you can make it ahead and serve it later! And who doesn’t like Buffalo Chicken? Best of all, there is no grease involved!

Buffalo Chicken 2

Buffalo Chicken Pinwheels
 
Prep time
Total time
 
All the spiciness and flavor of Buffalo Chicken Wings, without the greasiness! An EASY party appetizer!
Author:
Recipe type: Appetizer
Cuisine: American
Serves: 20-25 pieces
Ingredients
  • 4 Cups shredded, cooked chicken - I used one whole roasted chicken from the grocery store to make this easy!
  • 8 oz. cream cheese, softened
  • 1 Cup colby jack cheese
  • ¼ Cup crumbled blue cheese
  • ¼ Cup sliced green onions
  • ½ Cup hot sauce - I used my favorite, Texas Pete, but feel free to use your favorite!
  • 5 large flour tortillas
Instructions
  1. In a large bowl, combine the softened cream cheese, the colby jack, blue cheese, hot sauce, and green onions using a mixer on low.
  2. Add in the shredded chicken, mixing by hand until all ingredients are combined.
  3. Spread approximately ¾ cup of the mixture onto each tortilla, spreading to the edges of the tortilla.
  4. Wrap the rolls in plastic wrap and place in fridge for 2-4 hours. You CAN slice and eat them now, but they slice better if they have been chilled.
  5. Enjoy!


Buffalo Chicken Pin

1 2 3 4 5 6 42

© 2015 SIMPLESOLUTIONSDIVA.COM Designed by The Web Design Chic | ADMIN LOGIN