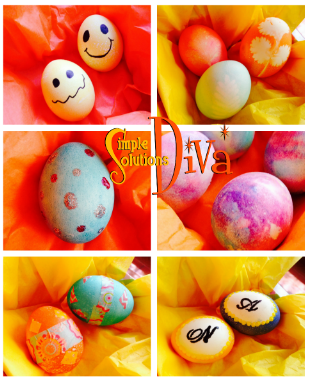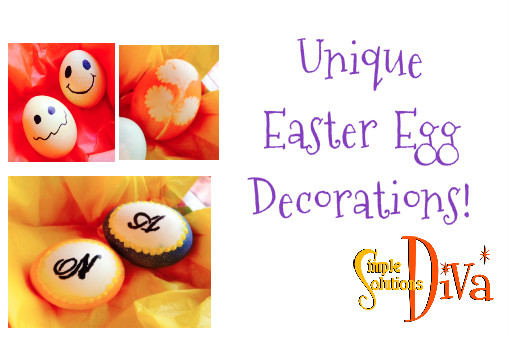
I was so excited when First Coast Living gave me a challenge – find some unique ways to decorate Easter Eggs! Well, after searching high and low, I found some favorites and tested them just for you!
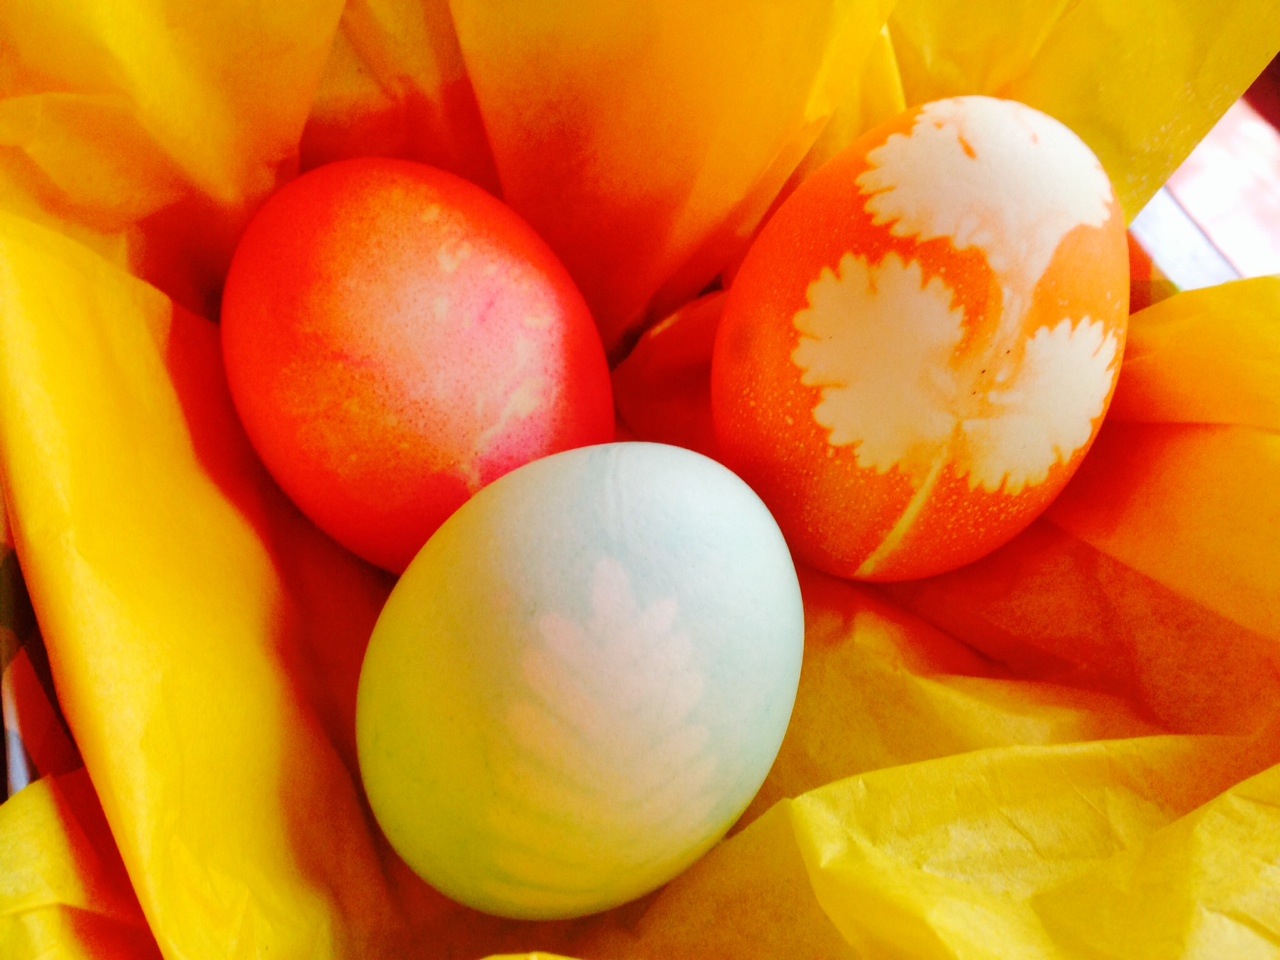
Volcano Eggs

This is a cool technique and great fun to do with the kids! And it yields a beautiful egg coloring. The best part about this technique? It looks like a volcano bubbling a rainbow! I found this technique on the website ToddlerApproved.com. Check out the website for great ideas!
What You Need:
- Hard boiled eggs
- Food coloring
- Baking soda
- Vinegar
- Wide-lipped plate or bowl
- Paint Brushes
- Color-safe cups for mixing “paint”
Technique:
Make the “Paint” – Combine in a color- safe cup, one tablespoon baking soda, a teaspoon or two of water and food coloring of choice. Mix until it is a consistency of mustard – kind of grainy but with some heft to it.
Repeat that process with the other colors you choose to use.
Take a paintbrush and start to paint your eggs with the different “paint” colors – there is no perfect way to do this, just have fun and be creative. Make sure to leave a “blob” or two of the paint on the egg.
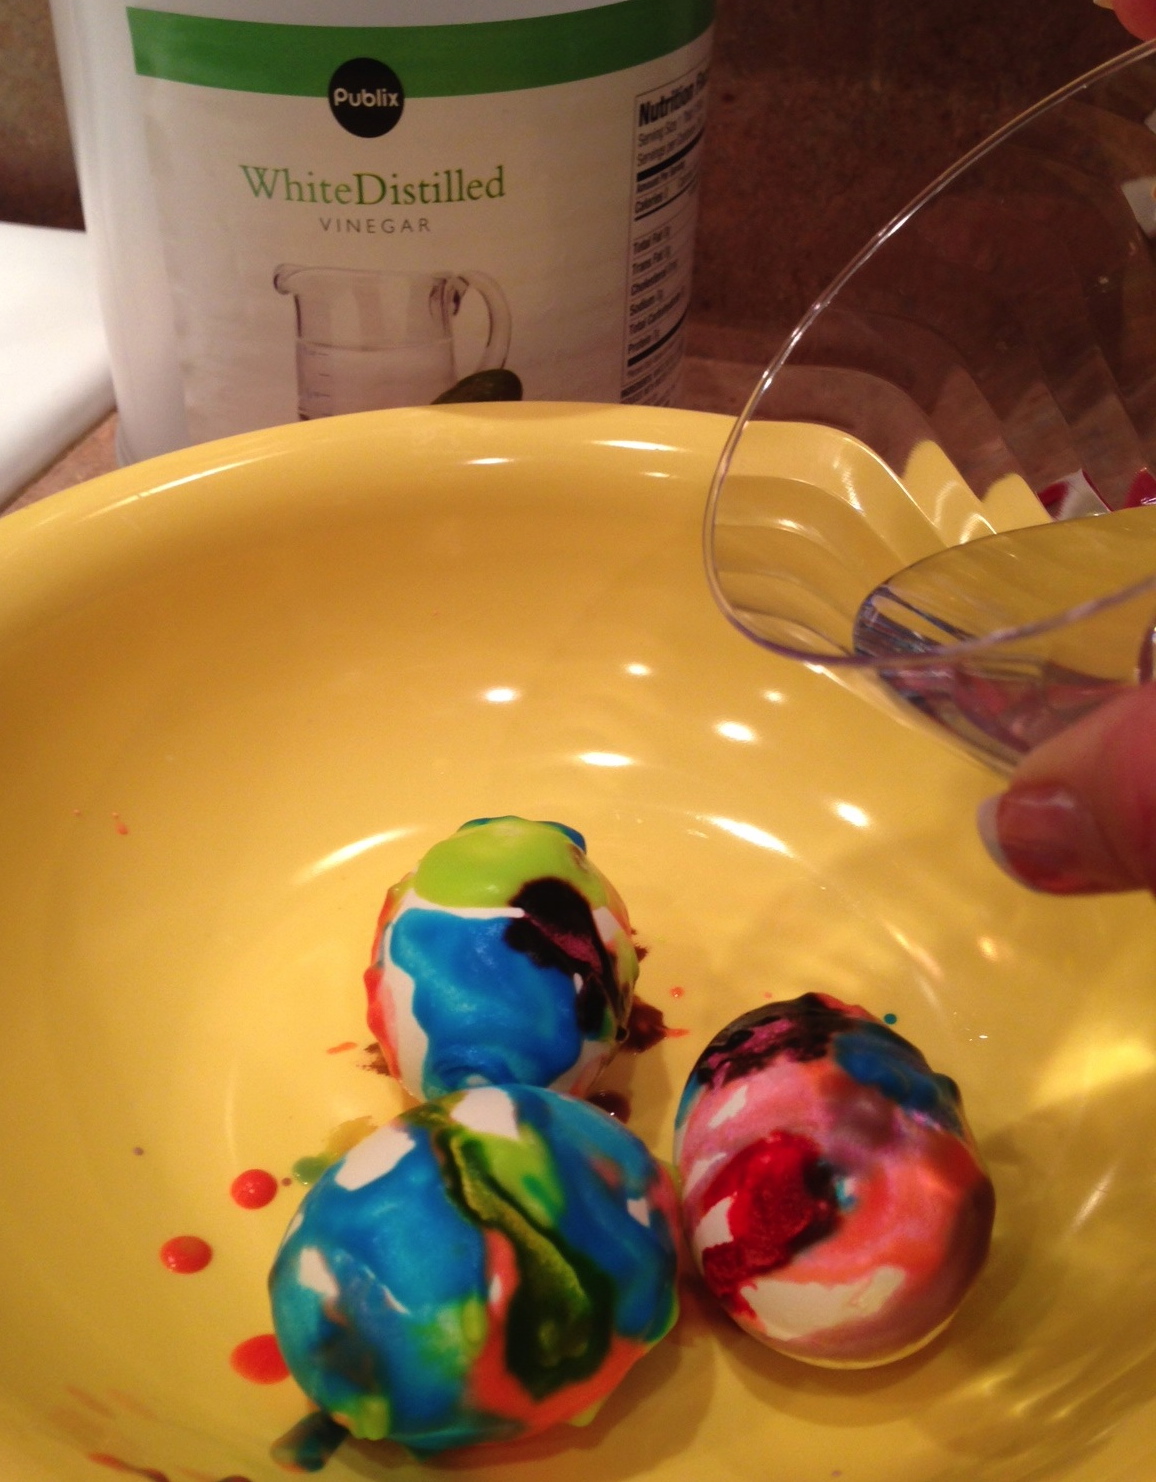
Place the painted eggs into the wide-lipped plate or bowl. Take your food coloring and drip a drop or two on your eggs.
Now comes the volcano part: Drizzle vinegar over your eggs and watch the colors start to bubble! Let the mixture sit on the eggs for awhile, then wipe off with paper towel!
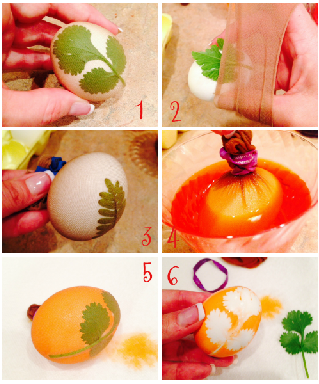
Leaf Print Eggs
I love incorporating natural elements into projects if I can. I found this beautiful idea, Leaf Print Eggs, on Spoonful.com and thought I’d give it a try! Since I AM the Simple Solutions Diva, I wanted to simplify the process, so I just used the PAAS Egg Decorating Kit to dye the eggs, rather than mix up my own dyes as listed on Spoonful (click on the link above to see their full instructions!).
What You Need:
- Hard Boiled Eggs
- PAAS Egg Decorating Kit
- Various leaves with interesting shapes – I used Cilantro, a fern and a small squash leaf. (Don’t recommend “woody” types like rosemary)
- Cups to mix up the dyes
- Rubber bands
- Sheer knee high hosiery (nylons), cut into 3 inch strips
- Color-safe place to dry the eggs
Instructions:
Mix up your dyes according to the PAAS package, using the instructions for more vivid colors (using vinegar).
1.) Take the egg and position your leaf on your egg. 2.) Using the piece of knee high, wrap your egg so the leaf is secure and tight against the egg. 3.) Pull the excess nylon tight on the opposite side of the egg, securing with a rubber band.
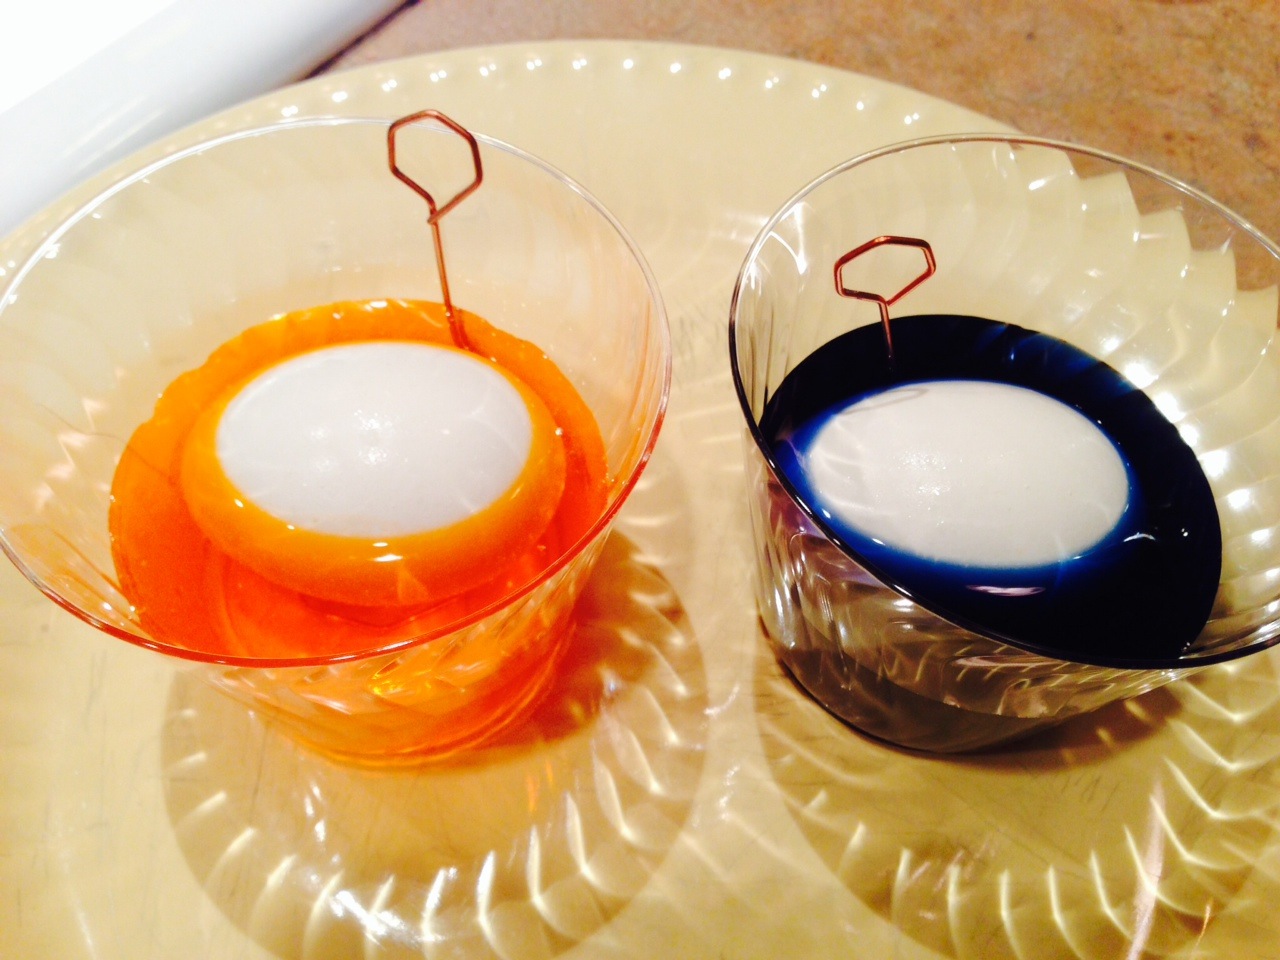
4.) Place the egg in the dye and allow to sit until the egg has reached the color intensity you want.
5.) Remove the egg from the dye and place on color safe surface. 6.) Remove rubber band and nylon and gently remove the leaf from the egg. Allow to dry.
Initial Eggs

These make for cute placeholders for the Easter table, or for limiting how many each child gets during the Easter Egg Hunt (They look for their name or initial!). This cute idea is from Reader’s Digest!
What You Need:
- Hard Boiled Eggs
- PAAS Egg Decorating Kit with dyes
- Cups for mixing dyes
- Acrylic Paint
- Small Paintbrush
- Black Sharpie
Instructions:
Mix up your egg dyes according to package, using the vivid instructions (includes using vinegar).
Place an egg sideways in a cup and gently pour the dye of choice until you have an oval of white showing (don’t cover the entire egg with dye-See photo below). Let egg sit, without disturbing, in dye until it reaches the desired color. Remove egg from dye and allow to dry.
Once dry, take acrylic paint and, using paintbrush, draw dots around the edge of the oval. Allow to dry.
Once dry, draw an initial or a name in center of oval, using the black sharpie. Allow to completely dry.
Washi Tape Eggs
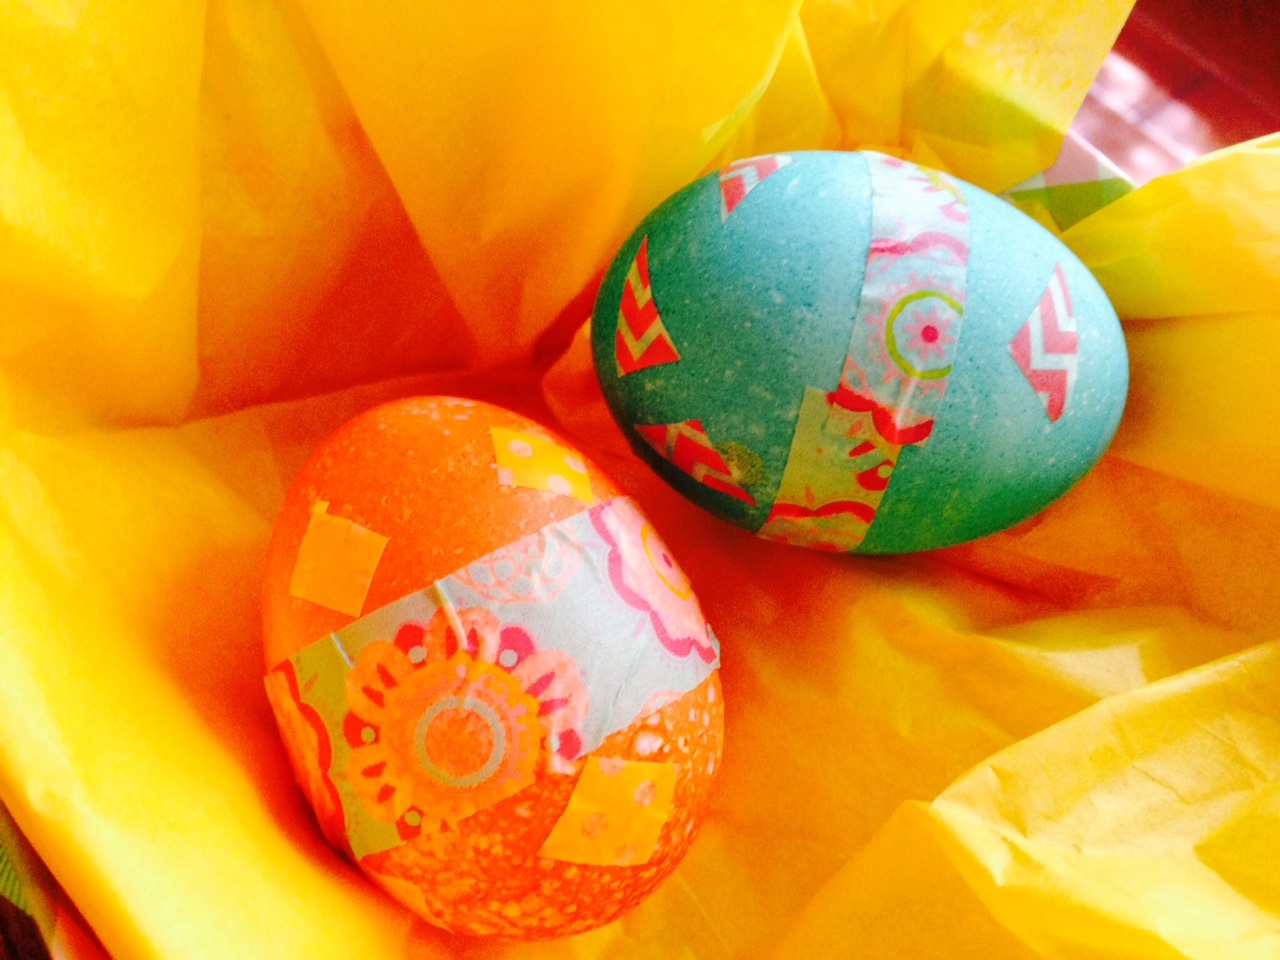
Washi tape is like a very pretty, decorative masking tape. And projects using it are all over Pinterest! It comes in a variety of colors and sizes. It works perfectly on dyed, hard boiled eggs or just plain, white hard boiled eggs! This is a simple way to get little kids involved with the egg decorating.
What You Need:
- Hard Boiled Eggs (they can be dyed or not)
- Washi Tape (available at any craft stores), choose a variety of patterns and sizes.
Instructions:
Just “go to town” and start decorating!
For small children – Cut small pieces of washi tape and put them out for little hands to decorate with!
“Bling” Eggs
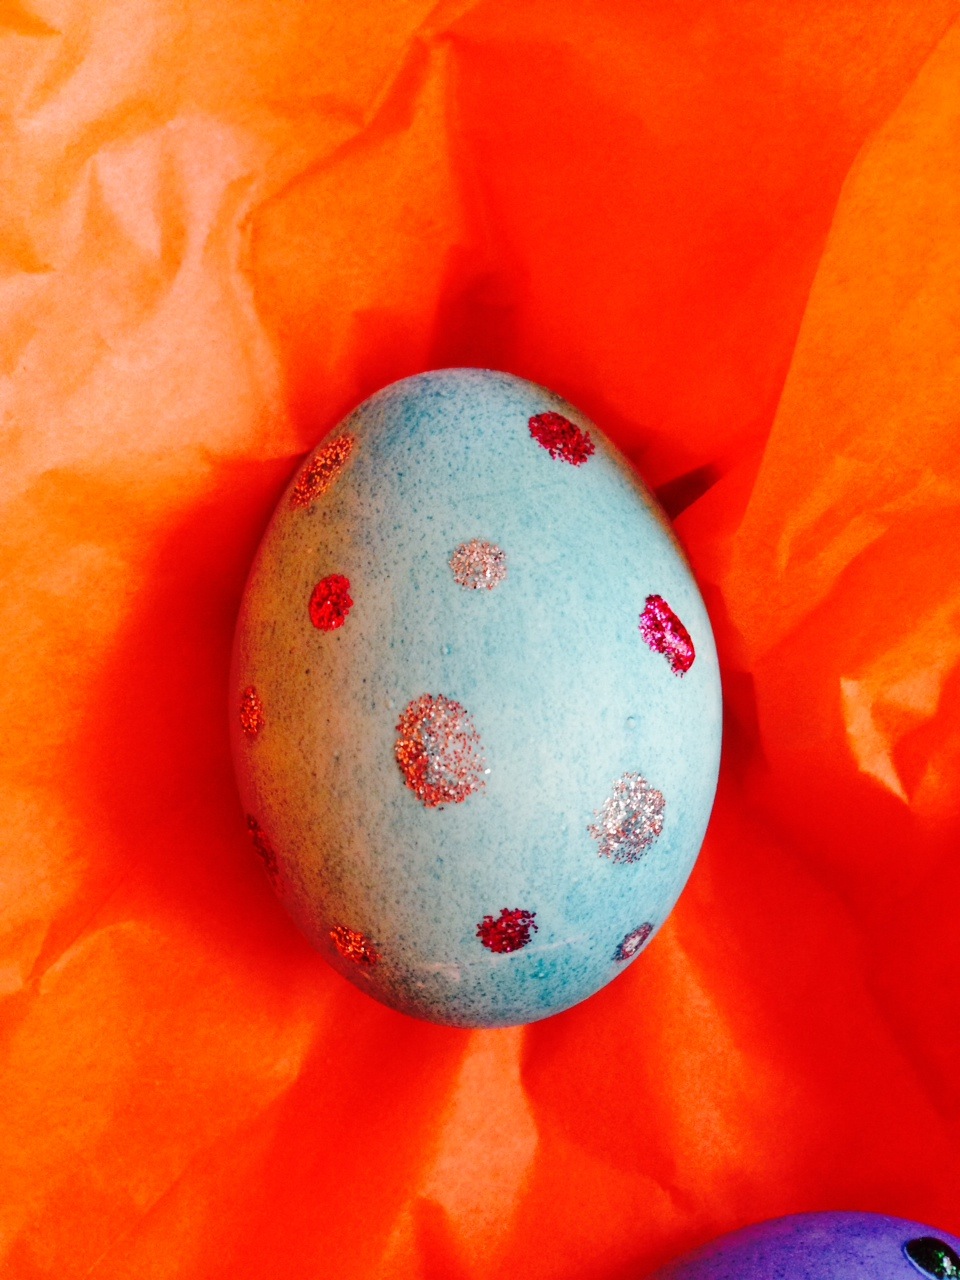
Another simple way to decorate the eggs with little kids!
What You Need:
- Hard Boiled Eggs (colored or plain white)
- Crayola Washable Glitter Pens, variety of colors
Instructions:
Using the glitter pens, make dots of glitter all over the eggs. I did one side first, allowed to dry, then did the other side!
Happy Face Eggs

This is my personal favorite because my mom and I love smiley faces, PLUS it is super simple to do!
What You Need:
- Hard Boiled Eggs dyed yellow
- Black Sharpie
Instructions:
Use the black sharpie to create whatever type of face YOU want! Tip –When drawing the eyes, make sure the eyes are on the narrow end of the egg, mouth near the lower half of egg.
Thanks WTLV-TV’s First Coast Living for this fun challenge!